Asp.net vNext 学习之路(二)
View component(视图组件)应该是MVC6 新加的一个东西,类似于分部视图。本文将演示在mvc 6中 怎么添加视图组件以及怎么在视图中注入一个服务。
本文包括以下内容:
1,创建一个新的asp.net vNext 项目。
2,安装 KVM(K version manager)。
3,如何运行EF 数据库迁移。
4,什么是 view component。
5,如何在 mvc 6 中添加一个view component 。
6,如何在view 中注入一个服务。
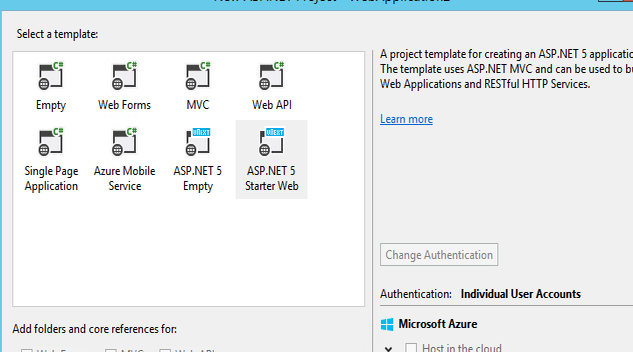
一 创建一个新的asp.net vNext 项目
打开vs 2015 。 File>New >Project>Templates>C#>Web>Asp.Net Application 点击OK。然后选择 New ASP.NET Project :
由于是演示我就在Home的文件下新建一个视图Test.cshtml 相应的HomeController 添加如下代码:
1    public IActionResult Test()
2    {
3        return View();
5     }
在Models 文件夹里新建一个TestModel类:

1    public class TestModel
2     {
3         public int ID { get; set; }
4
5         public string Title { get; set; }
6     }
然后在 ModelsIdentityModels.cs 文件的 ApplicationDbContext类中添加一句代码:
1 public DbSet<TestModel> TestItems { get; set; }
表示我们加了一张表在数据库中。但是现在运行肯定会报错,我们需要安装KVM。
二 安装 KVM(K version manager)
首先在管理员权限下运行cmd。然后把下面这句代码拷进去。
1 @powershell -NoProfile -ExecutionPolicy unrestricted -Command "iex ((new-object net.webclient).DownloadString('https://raw.githubusercontent.com/aspnet/Home/master/kvminstall.ps1'))"
如果成功的话说明KVM安装成功了。

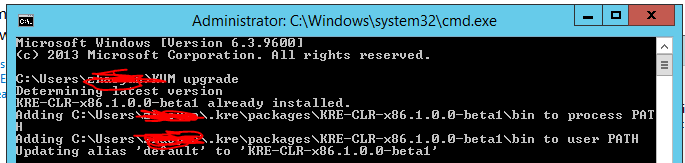
然后重新打开一个cmd 。输入 KVM upgrade 成功之后我们就可以做EF的迁移了。
三 如何运行EF 数据库迁移
首先打开cmd 然后我们需要进入项目的当前目录:接下来运行 k ef migration add initial k ef migration applay
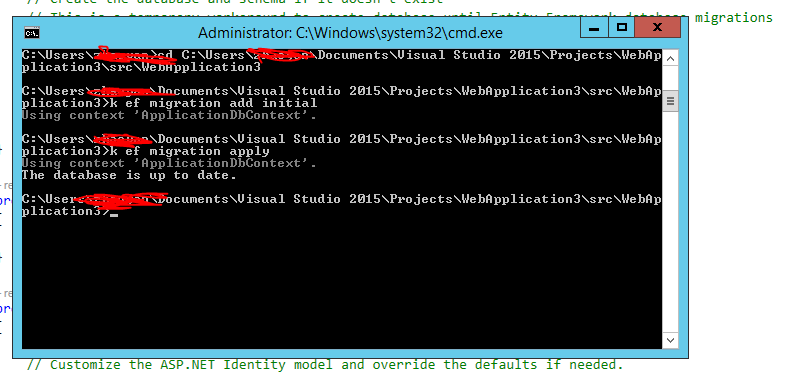
ok 这样 ef 就迁移好了,我们会发现项目中多了一些东西

然后我们需要在Startup.cs 中的 Configure 方法中 添加如下代码:
1     app.UseServices(service =>
2             {
3                 service.AddEntityFramework()
4                           .AddSqlServer()
5                           .AddDbContext<ApplicationDbContext>(options => options.UseSqlServer(
6                               Configuration.Get("Data:DefaultConnection:ConnectionString")));
7             });
在HomeController 中部分代码:
 1    ApplicationDbContext context = new ApplicationDbContext();
 2
 3         public IActionResult Index()
 4         {
 5             return View();
 6         }
 7
 8         public IActionResult Test()
 9         {
10             context.Add(new TestModel() { Title = "test1" });
11
12
13             context.SaveChanges();
14
15             List<TestModel> list = context.Set<TestModel>().ToList();
16
17             return View(list);
18         }
19
20         protected override void Dispose(bool disposing)
21         {
22             base.Dispose(disposing);
23
24             context.Dispose();
25         }
Test.cshtml 文件代码:
 1 @model List<WebApplication3.Models.TestModel>
 2
 3 @{
 4     ViewBag.Title = "Test";
 5
 6 }
 7 <table class="table  table-hover table-bordered  table-condensed">
 8     <thead>
 9         <tr>
10             <th>ID</th>
11             <th>Title</th>
12         </tr>
13     </thead>
14     <tbody>
15         @foreach (var item in Model)
16         {
17         <tr>
18             <td>@item.ID</td>
19             <td>@item.Title</td>
20         </tr>
21         }
22
23     </tbody>
24 </table>
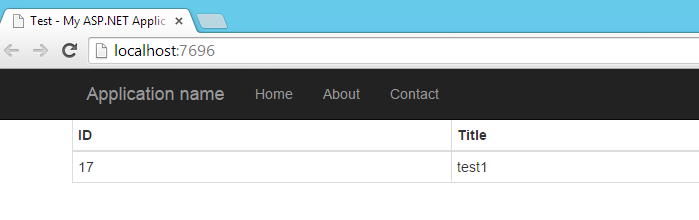
Ok 运行一下项目效果如下:
四 什么是 view component
作为Mvc6 新添加的东西和之前的partial view 还是比较类似的。但是要比partial view 更加的灵活和强大。和controller 和 view的关系一样是关注点分离的, component 相当于是一个mini的controller
它是去响应局部的模块而非是完整的。我们可以用view component 来解决更加复杂的页面上的问题。它有两部分组成 一个后台类和前台的Razor view (可以回掉后台类的方法)。
五 如何在 mvc 6 中添加一个view component
首先我在项目中新建一个ViewComponents的文件夹(这个文件夹名字可以随意命名),然后文件夹里新建一个 TestViewComponent 类 :
 1  public class TestViewComponent : ViewComponent
 2     {
 3         ApplicationDbContext context;
 4
 5
 6         public TestViewComponent(ApplicationDbContext context)
 7         {
 8             this.context = context;
 9         }
10
11         public IViewComponentResult Invoke(int max)
12         {
13             var item = context.Set<TestModel>().Where(p => p.ID > max).ToList();
14
15             return View(item);
16         }
17
18     }
然后我们需要添加一个 component view 。在 Home文件夹新建Components(必须这样命名)文件夹然后 里面新建一个文件夹 Test(这个名字是和之前的那个TestComponent 相匹配的)
Test 文件夹里新建 一个视图,随意命名 default.cshtml
 1 @model List<WebApplication3.Models.TestModel>
 2 @{
 3     // ViewBag.Title = "Home Page";
 4 }
 5
 6 <h3>Priority Items</h3>
 7 <ul>
 8     @foreach (var item in Model)
 9     {
10         <li>@item.ID ----- @item.Title</li>
11     }
12 </ul>
那么我们就可以去调这个view component了 在Test.cshtml
 1 @model List<WebApplication3.Models.TestModel>
 2
 3 @{
 4     ViewBag.Title = "Test";
 5
 6 }
 7 <table class="table  table-hover table-bordered  table-condensed">
 8     <thead>
 9         <tr>
10             <th>ID</th>
11             <th>Title</th>
12         </tr>
13     </thead>
14     <tbody>
15         @foreach (var item in Model)
16         {
17         <tr>
18             <td>@item.ID</td>
19             <td>@item.Title</td>
20         </tr>
21         }
22
23     </tbody>
24 </table>
25
26 <div class="row">
27     @Component.Invoke("Test", 2);
28 </div>
Ok 看一下效果 :
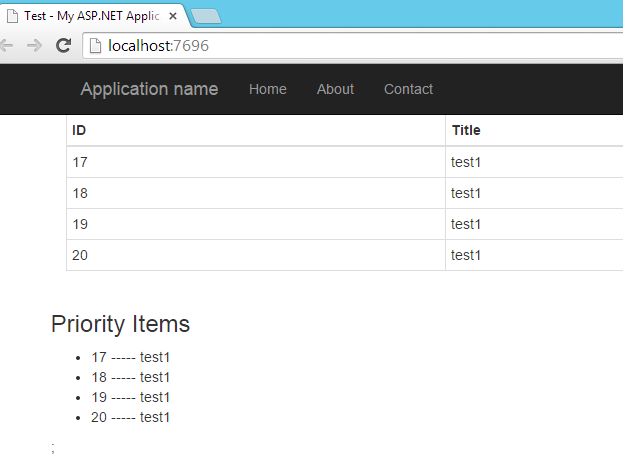
那个view components 的意思是所有ID>2的列表。
六 如何在view 中注入一个服务
首先新建一个StaticService 类
 1  public class StatisticsService
 2     {
 3         private ApplicationDbContext db;
 4
 5         public StatisticsService(ApplicationDbContext db)
 6         {
 7             this.db = db;
 8         }
 9
10
11         public int GetCount()
12         {
13             return db.TestItems.Count();
14         }
15
16     }
然后Test.cshtml 代码:
1 @model List<WebApplication3.Models.TestModel>
2 @inject WebApplication3.Models.StatisticsService service
3 <table class="table table-hover table-bordered table-condensed">
4 <thead>
5 <tr>
6 <th>ID</th>
7 <th>Title</th>
8 </tr>
9 </thead>
10 <tbody>
11 @foreach (var item in Model)
12 {
13 <tr>
14 <td>@item.ID</td>
15 <td>@item.Title</td>
16 </tr>
17 }
18
19 </tbody>
20 </table>
21
22 <div class="row">
23 @Component.Invoke("Test", 2);
24 </div>
25
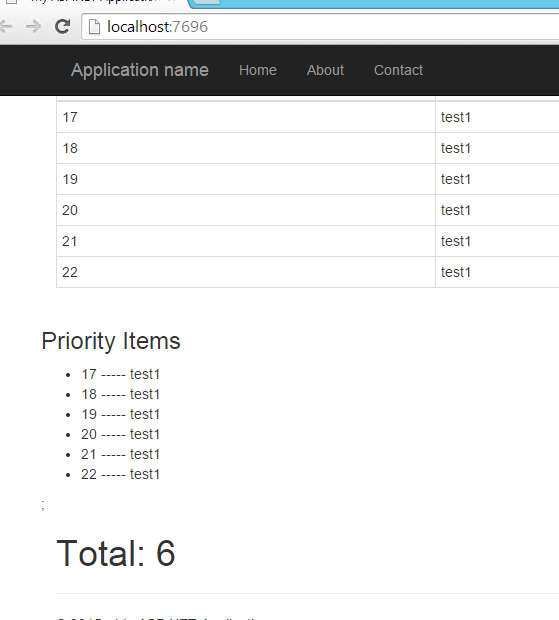
26 <h1>
27 Total: @service.GetCount()
28 </h1>
在 startup.cs 中注册该类:
 1     public void ConfigureServices(IServiceCollection services)
 2         {
 3             // Add EF services to the services container.
 4             services.AddEntityFramework(Configuration)
 5                 .AddSqlServer()
 6                 .AddDbContext<ApplicationDbContext>();
 7
 8             // Add Identity services to the services container.
 9             services.AddDefaultIdentity<ApplicationDbContext, ApplicationUser, IdentityRole>(Configuration);
10
11             // Add MVC services to the services container.
12             services.AddMvc();
13
14             services.AddTransient<StatisticsService>();
15             // Uncomment the following line to add Web API servcies which makes it easier to port Web API 2 controllers.
16             // You need to add Microsoft.AspNet.Mvc.WebApiCompatShim package to project.json
17             // services.AddWebApiConventions();
18
19         }
运行 看效果:
七 总结
Mvc 6 还是加了不少的东西的,不过只会让以后的开发会原来越简单。