1,创建一个空工程 new - project - emptyproject
2,new一个Modules ---------------- maven (启动器) :
springboottest-spring-boot-starter
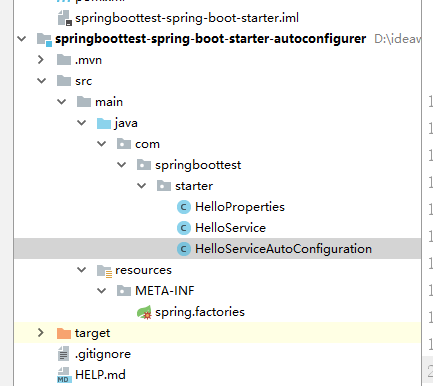
3,new一个Modules ---------------- spring(做自动配置的):
springboottest-spring-boot-starter-autoconfigurer spring版本:1.5.10
4,启动器pom文件中引入自动配置模块:
    <!--启动器-->
     <dependencies>
         <!--引入自动配置模块-->
          <dependency>
              <groupId>com.springboottest.starter</groupId>
              <artifactId>springboottest-spring-boot-starter-autoconfigurer</artifactId>
              <version>0.0.1-SNAPSHOT</version>
          </dependency>
     </dependencies>
5,自动配置器中,删除主主程序等不需要的内容,以及项目的启动类。并编写启动器:
- pom文件中引入启动器(所有starter的基本配置):
<dependencies> <!--引入spring-boot-starter--> <dependency> <groupId>org.springframework.boot</groupId> <artifactId>spring-boot-starter</artifactId> </dependency> </dependencies> - 编写会被调用的service
-
package com.springboottest.starter;

import org.springframework.boot.context.properties.ConfigurationProperties;

//绑定文件中所有以springboottest.hello 开始的配置
@ConfigurationProperties(prefix = "springboottest.hello")
public class HelloProperties {
    private String prefix;
    private String suffix;

    public String getPrefix() {
        return prefix;
    }

    public void setPrefix(String prefix) {
        this.prefix = prefix;
    }

    public String getSuffix() {
        return suffix;
    }

    public void setSuffix(String suffix) {
        this.suffix = suffix;
    }
}
package com.springboottest.starter;

public class HelloService {
   HelloProperties helloProperties;


    public HelloProperties getHelloProperties() {
        return helloProperties;
    }

    public void setHelloProperties(HelloProperties helloProperties) {
        this.helloProperties = helloProperties;
    }

    public  String sayHello(String name){
      return  helloProperties.getPrefix()+"-"+ name + helloProperties.getSuffix();
    };
}
package com.springboottest.starter;

import org.springframework.beans.factory.annotation.Autowired;
import org.springframework.boot.autoconfigure.condition.ConditionalOnWebApplication;
import org.springframework.boot.context.properties.EnableConfigurationProperties;
import org.springframework.context.annotation.Bean;
import org.springframework.context.annotation.Configuration;

@Configuration
@ConditionalOnWebApplication//web应用才生效
@EnableConfigurationProperties(HelloProperties.class)//让属性生效 HelloProperties helloProperties;
public class HelloServiceAutoConfiguration {

    //让属性生效 HelloProperties helloProperties;
    @Autowired
    HelloProperties helloProperties;
    @Bean
    public  HelloService helloService(){
        HelloService service = new HelloService();
        service.setHelloProperties(helloProperties);
        return  service;
    }

}
- 配置spring.factories让自动配置类生效
org.springframework.boot.autoconfigure.EnableAutoConfiguration= com.springboottest.starter.HelloServiceAutoConfiguration - springboottest-spring-boot-starter 启动器编写完成
- 两个项目分别install

- 加载完成,现在可以在别的项目里面调用
6,新建项目,调用自定义启动器的方法
- pom文件引入自定义启动器
<!--引入自定义starter-->
        <dependency>
            <groupId>com.springboottest.starter</groupId>
            <artifactId>springboottest-spring-boot-starter</artifactId>
            <version>1.0-SNAPSHOT</version>
        </dependency>
- 按照规则编写properties,增加前后缀
springboottest.hello.prefix=SPRINGBOOT springboottest.hello.suffix=HELLO WORLD - 调用方法
