索引:
一.创建一个空项目
请查看 新建 .NET Core 项目 -- Hello World! 一节,新建一个项目:

二.添加引用并修改配置为 MVC
修改 .vscodelaunch.json 文件
![]()
代码如下:

 1 {
 2     "version": "0.2.0",
 3     "configurations": [
 4         {
 5             "name": ".NET Core Launch (web)",
 6             "type": "coreclr",
 7             "request": "launch",
 8             "preLaunchTask": "build",
 9             "program": "${workspaceRoot}\bin\Debug\netcoreapp1.0\WebAppCore.dll",
10             "args": [],
11             "cwd": "${workspaceRoot}",
12             "stopAtEntry": false,
13             "internalConsoleOptions": "openOnSessionStart",
14             "env": {
15                 "ASPNETCORE_ENVIRONMENT": "Development"
16             },
17             "sourceFileMap": {
18                 "/Views": "${workspaceRoot}/Views"   // 用来编译 cshtml
19             }
20         }
21     ]
22 }
修改 .vscode asks.json 文件
![]()
代码如下:

 1 {
 2     "version": "0.1.0",
 3     "command": "dotnet",
 4     "isShellCommand": true,
 5     "args": [],
 6     "tasks": [
 7         {
 8             "taskName": "build",
 9             "args": [
10                 "${workspaceRoot}\project.json"
11             ],
12             "isBuildCommand": true,
13             "problemMatcher": "$msCompile"
14         }
15     ]
16 }
修改 project.json 项目文件
![]()
代码如下,注意必要依赖的添加项,微软新的MVC库文件:

 1 {
 2   "dependencies": {
 3     "Microsoft.NETCore.App": {   // 多平台编译,必须在这里指明 .net core
 4       "version": "1.0.1",
 5       "type": "platform"
 6     },
 7     "Microsoft.ApplicationInsights.AspNetCore": "1.0.0",
 8     "Microsoft.AspNetCore.Mvc": "1.0.1",
 9     "Microsoft.AspNetCore.Razor.Tools": {
10       "version": "1.0.0-preview2-final",
11       "type": "build"
12     },
13     "Microsoft.AspNetCore.Routing": "1.0.1",
14     "Microsoft.AspNetCore.Server.Kestrel": "1.0.1"
15   },
16
17   "tools": {
18     "Microsoft.AspNetCore.Razor.Tools": "1.0.0-preview2-final"
19   },
20   "frameworks": {
21     "netcoreapp1.0": {
22       "imports": [
23         "dotnet5.6"
24       ]
25     }
26   },
27   "buildOptions": {
28     "emitEntryPoint": true,
29     "preserveCompilationContext": true
30   },
31   "runtimeOptions": {
32     "configProperties": {
33       "System.GC.Server": true
34     }
35   }
36 }
添加 Startup.cs 文件
![]()
代码如下,注意代码中的 ConfigureServices 与 Configure 方法:

 1 using Microsoft.AspNetCore.Builder;
 2 using Microsoft.Extensions.Configuration;
 3 using Microsoft.Extensions.DependencyInjection;
 4
 5
 6 namespace WebAppCore
 7 {
 8     public class Startup
 9     {
10         public IConfigurationRoot Configuration { get; }
11
12         public Startup()
13         {
14             Configuration = new ConfigurationBuilder().Build();
15         }
16
17         // 被 runtime 使用的方法.
18         // 用这个方法向 容器 中添加服务.
19         public void ConfigureServices(IServiceCollection services)
20         {
21             services.AddApplicationInsightsTelemetry(Configuration);
22             services.AddMvc();
23
24         }
25
26         // 被 runtime 使用的方法.
27         // 用这个方法配置 Http 请求管道.
28         public void Configure(IApplicationBuilder app)
29         {
30             app.UseMvc(routes =>
31             {
32                 routes.MapRoute(
33                     name: "default",
34                     template: "{controller=HelloWorld}/{action=Index}/{id?}");
35             });
36         }
37     }
38 }
修改 Program.cs 文件
![]()
代码如下,代码中建立了 Host :

 1 using System.IO;
 2 using Microsoft.AspNetCore.Hosting;
 3
 4 namespace WebAppCore
 5 {
 6     public class Program
 7     {
 8         public static void Main(string[] args)
 9         {
10             var host = new WebHostBuilder()
11                 .UseKestrel()
12                 .UseContentRoot(Directory.GetCurrentDirectory())
13                 .UseStartup<Startup>()
14                 .Build();
15
16             host.Run();
17         }
18     }
19 }
三.添加 Controller/View
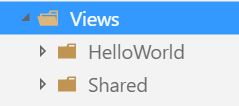
在项目中分别添加以下文件夹
Controllers
![]()
Views
ViewsHelloWorld
ViewsShared

在 Views 目录中创建 模板页及相关文件
ViewsShared\_Layout.cshtml
Views\_ViewImports.cshtml
Views\_ViewStart.cshtml
代码如下,注意布局页的使用:

 1 <!DOCTYPE html>
 2
 3 <html>
 4 <head>
 5     <meta charset="utf-8" />
 6     <meta name="viewport" content="width=device-width, initial-scale=1.0" />
 7     <title>@ViewData["Title"]</title>
 8 </head>
 9 <body>
10     <div class="container body-content">
11         @RenderBody()
12     </div>
13 </body>
14 </html>

1 @addTagHelper *, Microsoft.AspNetCore.Mvc.TagHelpers

1 @{
2     Layout = "_Layout";
3 }
添加控制器 ControllersHelloWorldController.cs
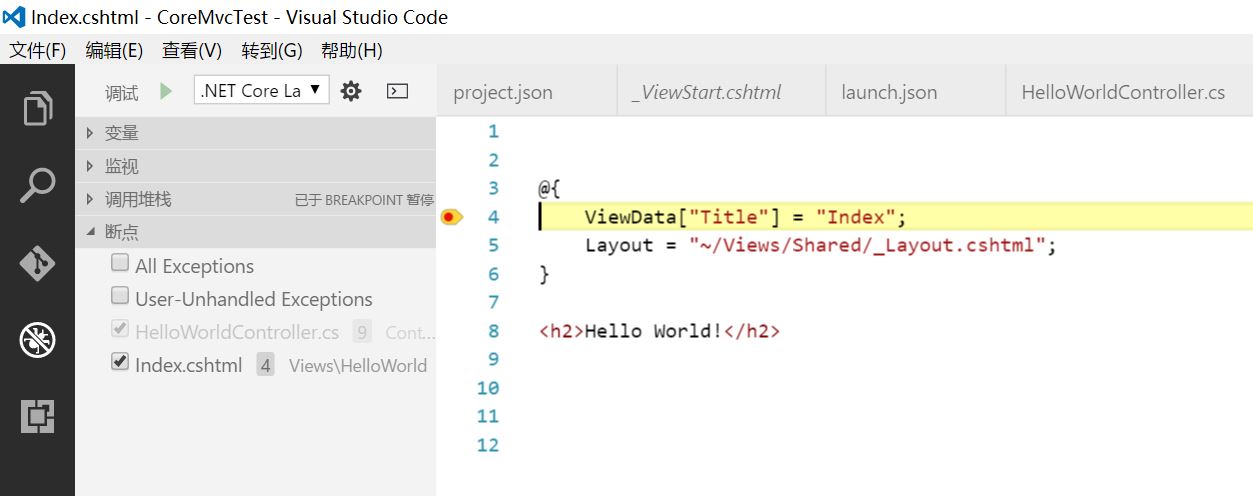
添加与控制器对应的视图 ViewsHelloWorldIndex.cshtml
相应代码如下:

 1 using Microsoft.AspNetCore.Mvc;
 2
 3 namespace WebAppCore.Controllers
 4 {
 5     public class HelloWorldController : Controller
 6     {
 7         public IActionResult Index()
 8         {
 9             //
10             return View();
11         }
12     }
13 }

1 @{
2     ViewData["Title"] = "Index";
3     Layout = "~/Views/Shared/_Layout.cshtml";
4 }
5
6 <h2>Hello World!</h2>
四.使用Visual Studio Code 运行
点击 ![]() 运行
运行
输出窗口可看到,编译结果:

调试窗口可看到,站点已启动:

在浏览器中,请求地址 http://localhost:5000/helloworld/index 如下:
调试窗口,可看到:

调试执行,浏览器中可看到:

蒙
2016-09-21 14:12 周三
