Spring Cloud
Spring Cloud是一个分布式的整体解决方案。Spring Cloud 为开发者提供了在分布式系统
(配置管理,服务发现,熔断,路由,微代理,控制总线,一次性token,全局琐,leader选举,
分布式session,集群状态)中快速构建的工具,使用Spring Cloud的开发者可以快速的启
动服务或构建应用、同时能够快速和云平台资源进行对接。
SpringCloud分布式开发五大常用组件
服务发现——Netflix Eureka
客服端负载均衡——Netflix Ribbon
断路器——Netflix Hystrix
服务网关——Netflix Zuul
分布式配置——Spring Cloud Config
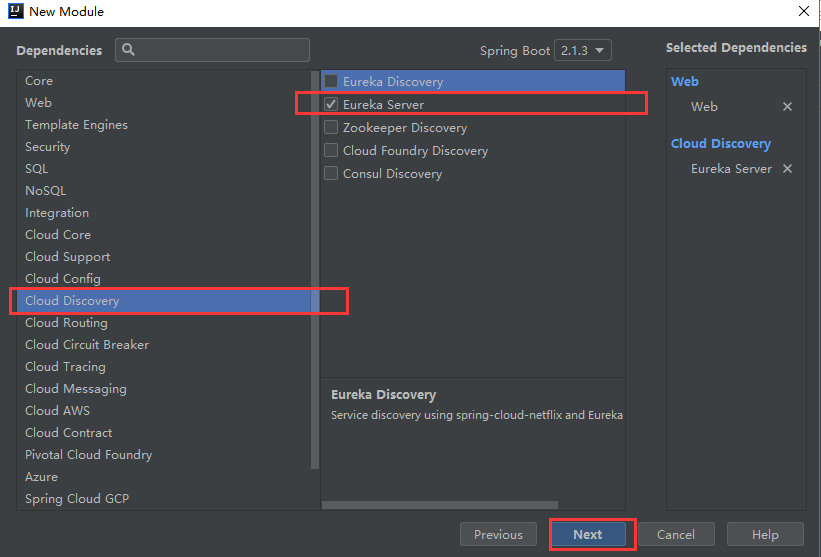
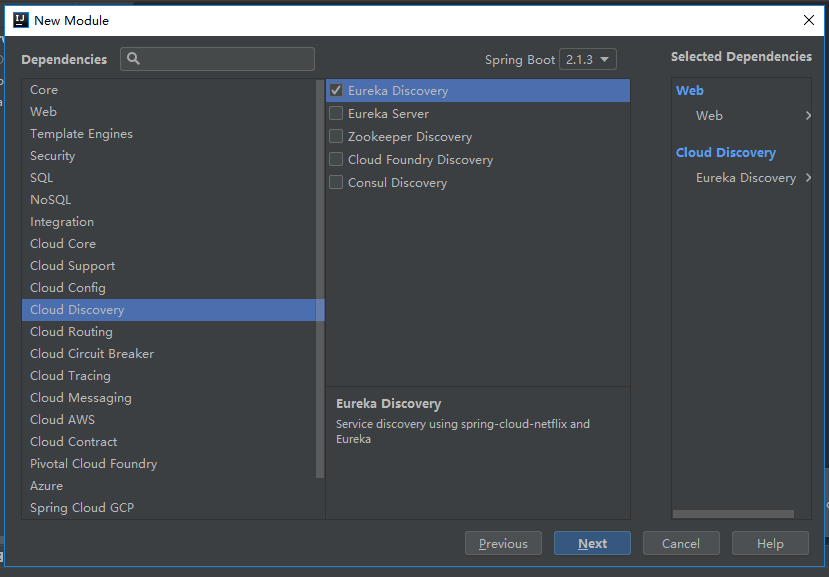
新建工程:
服务发现(注册中心):Eureka

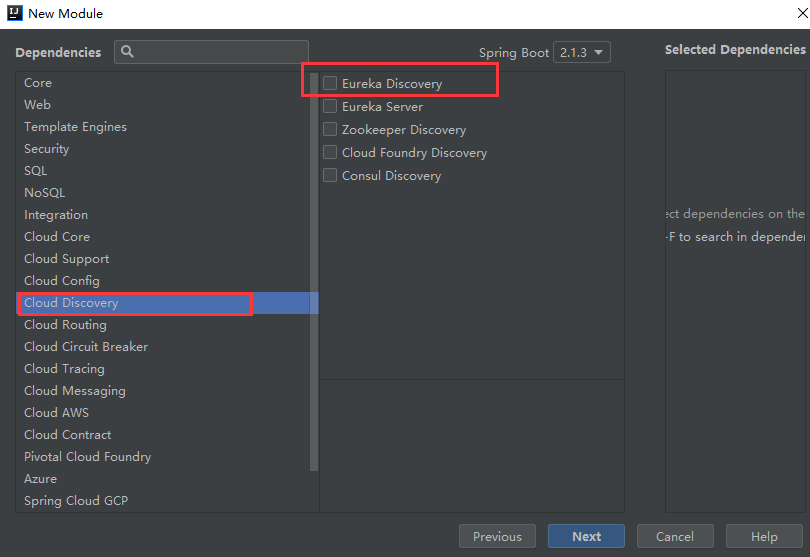
此时需要引入:
配置文件
server.port=8761
#主机名
eureka.instance.hostname=server
#不做高可用不进行设置
#不把本身注册在注册中心
eureka.client.register-with-eureka=false
#不从eureka上获取服务的注册信息
eureka.client.fetch-registry=false
#服务中心地址
eureka.client.service-url.DEFAULT_ZONE=http://localhost:8761/eureka/
开启服务:
@EnableEurekaServer
@SpringBootApplication
public class EurekaServerApplication {

    public static void main(String[] args) {
        SpringApplication.run(EurekaServerApplication.class, args);
    }

}
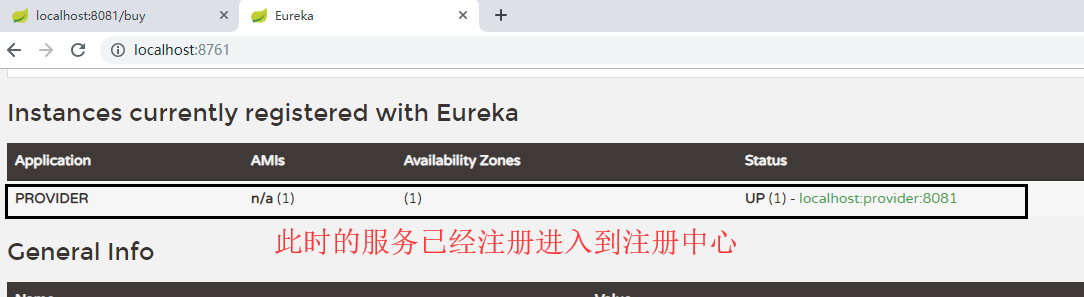
访问网页:
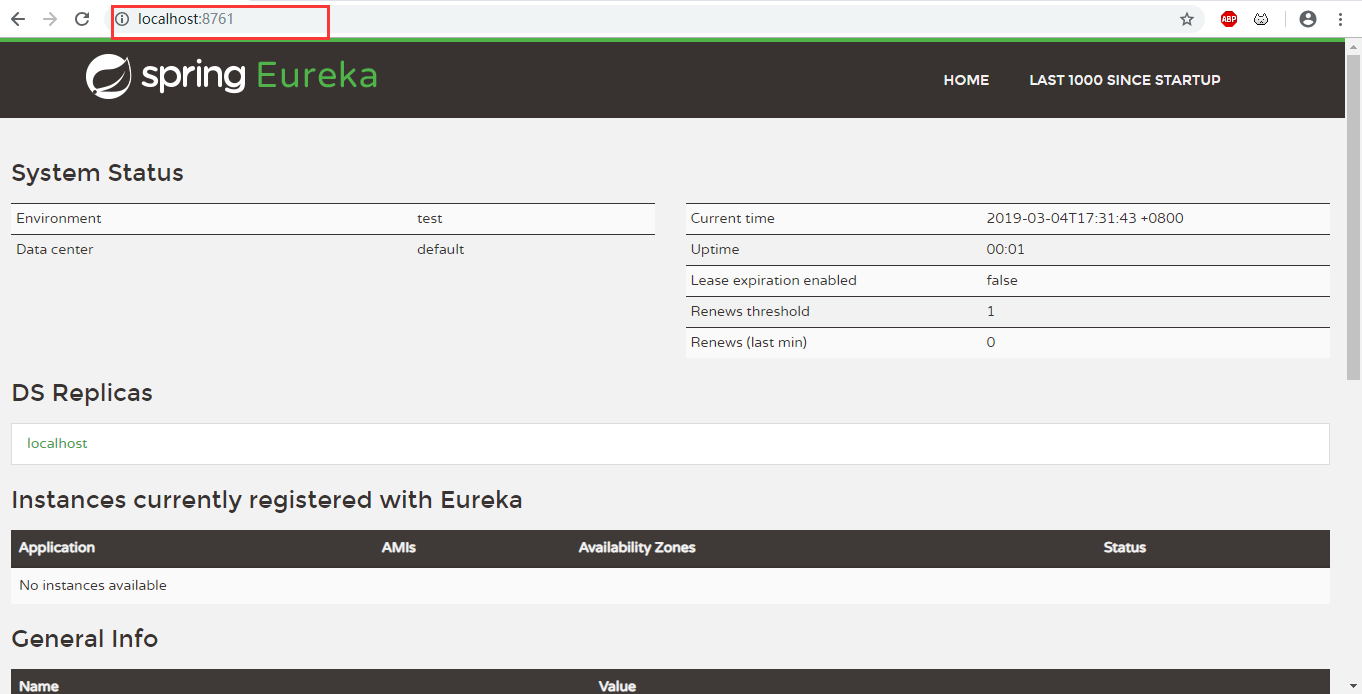
此时的服务是开启的!!!
服务提供者:

TicketService.java
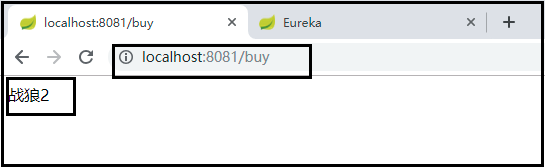
package com.cr.provider.service;
import org.springframework.stereotype.Service;
@Service
public class TicketService {
    public String buyTicket(){
        return "战狼2";
    }
}
TicketController.java
import org.springframework.web.bind.annotation.RestController;
@RestController
public class TicketController {
    @Autowired
    TicketService ticketService;

    //通过http协议进行发送的
    @GetMapping("/buy")
    public String getTicket(){
        return ticketService.buyTicket();
    }
}
配置文件:
server.port=8081
#应用起名字spring.application.name=provider
#注册服务时使用服务的ip地址
eureka.instance.prefer-ip-address=true
#服务中心地址
eureka.client.service-url.DEFAULT_ZONE=http://localhost:8761/eureka/
启动服务访问:
@SpringBootApplication
public class ProviderApplication {

    public static void main(String[] args) {
        SpringApplication.run(ProviderApplication.class, args);
    }

}
此时查看注册证中心:
此时打包两个jar文件分别未8081、8082端口,分别进行多个服务的注册

此时:同一个应用的两个实例

服务消费者:

UserController.java
package com.cr.consumer.controller;

import org.springframework.beans.factory.annotation.Autowired;
import org.springframework.web.bind.annotation.GetMapping;
import org.springframework.web.bind.annotation.RestController;
import org.springframework.web.client.RestTemplate;

@RestController
public class UserController {

    //用于获取http请求的信息
    @Autowired
    RestTemplate restTemplate;


    @GetMapping("/buyTicket")
    public  String buyTicket(String name){

        String ticket = restTemplate.getForObject("http://PROVIDER/buy", String.class);
        return name + "购买了" + ticket ;
    }

}
配置文件:
server.port=8088spring.application.name=consumer
#注册服务时使用服务的ip地址
eureka.instance.prefer-ip-address=true
#服务中心地址
eureka.client.service-url.DEFAULT_ZONE=http://localhost:8761/eureka/
主类:
package com.cr.consumer;

import org.springframework.boot.SpringApplication;
import org.springframework.boot.autoconfigure.SpringBootApplication;
import org.springframework.cloud.client.discovery.EnableDiscoveryClient;
import org.springframework.cloud.client.loadbalancer.LoadBalanced;
import org.springframework.context.annotation.Bean;
import org.springframework.web.client.RestTemplate;

//开启发现服务功能
@EnableDiscoveryClient
@SpringBootApplication
public class ConsumerApplication {

    public static void main(String[] args) {
        SpringApplication.run(ConsumerApplication.class, args);
    }


    //http请求
    @LoadBalanced//使用负载均衡机制
    @Bean
    public RestTemplate restTemplate(){
        return new RestTemplate();
    }
}
启动服务:


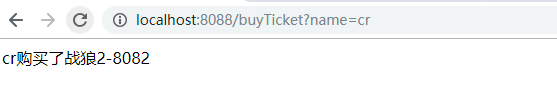
负载均衡机制,没执行一次就更换一次