1、Quartz 2D 简介
-
Quartz 2D 属于 Core Graphics(所以大多数相关方法的都是以 CG 开头),是 iOS/Mac OSX 提供的在内核之上的强大的 2D 绘图引擎,并且这个绘图引擎是设备无关的。也就是说,不用关心设备的大小,设备的分辨率,只要利用 Quartz 2D,这些设备相关的会自动处理。
-
1、Quartz 2D 在 iOS 开发中的价值
- 绘制一些系统 UIKit 框架中不好展示的内容,例如饼图
- 自定义一些控件
- 不添加 UI 控件的情况下,使 UI 内容更丰富
- 绘制图形:线条三角形矩形圆弧等
- 绘制文字
- 绘制生成图片(图像)
- 读取生成 PDF
- 截图裁剪图片
- 自定义 UI 控件
- iOS 中,大部分控件都是 Quartz 2D 绘制出来的
-
2、Quartz 2D 提供的强大功能
- 透明层(transparency layers)
- 阴影
- 基于 path 的绘图(path-based drawing)
- 离屏渲染(offscreen rendering)
- 复杂的颜色处理(advanced color management)
- 抗锯齿渲染(anti-aliased rendering)
- PDF 创建,展示,解析
- 配合 Core Animation, OpenGL ES, UIKit 完成复杂的功能
-
3、画板/图形上下文
-
既然提到绘图,那自然有一个容器来包含绘制的结果,然后把这个结果渲染到屏幕上去,而 Quartz 2D 的容器就是 CGContextRef 数据模型,这种数据模型是 C 的结构体,存储了渲染到屏幕上需要的一切信息。
-
图形上下文就相当于画布,不同类型的画布就是决定着画得内容将展示在哪里。Quartz 2D 提供了以下几种类型的 Graphics Context
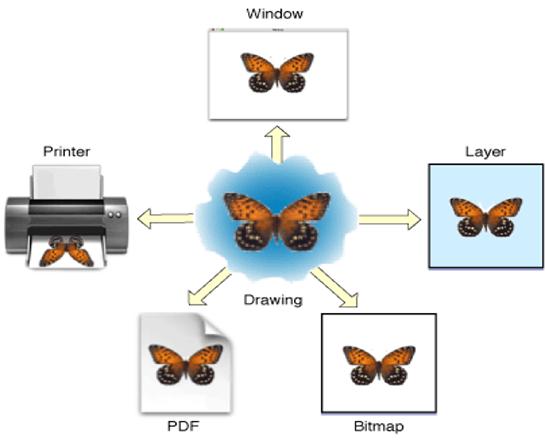
- Bitmap Graphics Context:位图上下文,在这个上下文上绘制或者渲染的内容,可以获取成图片(需要主动创建一个位图上下文来使用,使用完毕,一定要销毁)。
- PDF Graphics Context
- Window Graphics Context
- Layer Graphics Context:图层上下文,针对 UI 控件的上下文。
- Printer Graphics Context
-
-
4、绘制模型
-
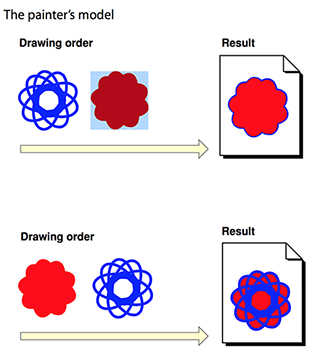
Quartz 2D 采用 painter’s model,意味着每一次绘制都是一层,然后按照顺序一层层的叠加到画板上。
-
-
5、数据类型
-
Quartz 2D 中的数据类型都是透明的,也就是说用户只需要使用即可,不需要实际访问其中的变量。Quartz 2D 的 API 是纯 C 语言的,来自于 Core Graphics 框架,数据类型和函数基本都以 CG 作为前缀。
- CGPathRef :路径类型,用来绘制路径(注意带有 ref 后缀的一般都是绘制的画板)
- CGImageRef:绘制 bitmap
- CGLayerRef:绘制 layer,layer 可复用,可离屏渲染
- CGPatternRef :重复绘制
- CGFunctionRef:定义回调函数,CGShadingRef 和 CGGradientRef 的辅助类型
- CGShadingRef 和 CGGradientRef:绘制渐变(例如颜色渐变)
- CGColorRef 和 CGColorSpaceRef:定义如何处理颜色
- CGFontRef:绘制文字
- 其他类型
-
-
6、绘制状态
-
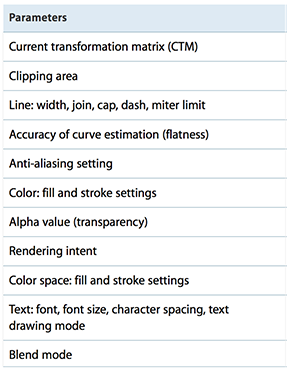
在使用 Quartz 2D 进行绘图的时候,经常需要设置颜色、字体,设置 context 的坐标原点变换,context 旋转。这些影响的都是当前绘制状态。Context 中利用堆栈的方式来保存绘制状态。调用 CGContextSaveGState 来保存当前绘制状态的 copy 到堆栈中,利用 CGContextRestoreGState 弹出堆栈最顶层的绘制状态,设置为当前的绘制状态。注意,不是所有的参数都会保存,以下表格中的参数会保存。
-
-
7、Quartz 2D 的内存管理
-
使用含有 “Create” 或 “Copy” 的函数创建的对象,使用完后必须释放,否则将导致内存泄露。使用不含有 “Create” 或 “Copy” 的函数获取的对象,则不需要释放。
-
如果 retain 了一个对象,不再使用时,需要将其 release 掉,可以使用 Quartz 2D 的函数来指定 retain 和 release 一个对象。例如,如果创建了一个 CGColorSpace 对象,则使用函数CGColorSpaceRetain 和 CGColorSpaceRelease 来 retain 和 release 对象。
-
也可以使用 Core Foundation 的 CFRetain 和 CFRelease。注意不能传递 NULL 值给这些函数。
-
-
8、drawRect 方法
-
因为在 drawRect: 方法中才能取得跟 view 相关联的图形上下文,才让我们可以在 drawRect: 方法中绘制。注意:在其他地方拿不到 view 相关的上下文,所以不能实现绘制。
-
在 drawRect: 方法中取得上下文后,就可以绘制东西到 view 上。View 内部有个 layer(图层)属性,drawRect: 方法中取得的是一个 Layer Graphics Context,因此,绘制的东西其实是绘制到 view 的 layer 上去了。View 之所以能显示东西,完全是因为它内部的 layer。
-
drawRect: 方法的调用
- 当 view 第一次显示到屏幕上(被加到 UIWindow 上显示出来)时,系统会创建好一个跟当前 view 相关的 Layer 上下文。
- 系统会通过此上下文,在 drawRect: 方法中绘制好当前 view 的内容。
- 主动让 view 重绘内容的时候,调用 setNeedsDisplay 或者 setNeedsDisplayInRect: 方法。我们主动调用 drawRect: 方法是无效的。
- 调用 view 的 setNeedsDisplay 或者 setNeedsDisplayInRect: 方法后,屏幕并不是立即刷新,而是会在下一次刷新屏幕的时候把绘制的内容显示出来。
-
-
9、绘图的核心步骤
-
获得上下文。
-
绘制/拼接绘图路径。
-
将路径添加到上下文。
-
渲染上下文。
-
所有的绘图,都是这个步骤,即使使用贝塞尔路径,也只是对这个步骤进行了封装。对于绘图而言,拿到上下文很关键。
-
-
10、自定义 view
-
如何利用 Quartz 2D 绘制东西到 view 上
- 首先,得有图形上下文,因为它能保存绘图信息,并且决定着绘制到什么地方去。
- 其次,那个图形上下文必须跟view相关联,才能将内容绘制到 view 上面。
-
自定义 view 的步骤
- 新建一个类,继承自 UIView。
- 实现
- (void)drawRect:(CGRect)rect方法,然后在这个方法中。 - 取得跟当前 view 相关联的图形上下文。
- 绘制相应的图形内容。
- 利用图形上下文将绘制的所有内容渲染显示到 view 上面。
-
2、Quartz 2D 基本设置
2.1 Quartz 2D 坐标系
-
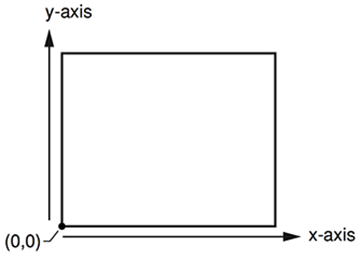
和 UIKit 的坐标系不一样,Quartz 2D 的坐标系是在左下角的。Quartz 2D 利用坐标系的旋转位移等操作来绘制复杂的动画。
-
但是有两个地方的坐标系是正常的 UIKit 坐标系
- UIView 的 context
- 通过这个方法 UIGraphicsBeginImageContextWithOptions 返回的 context。
-
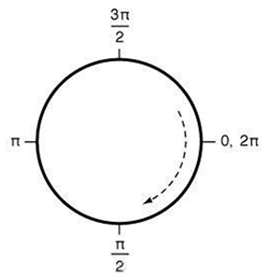
Quartz 2D 中的圆形坐标
2.2 Stroke 描边
-
影响描边的因素
- 线的宽度 - CGContextSetLineWidth
- 交叉线的处理方式 - CGContextSetLineJoin
- 线顶端的处理方式 - CGContextSetLineCap
- 进一步限制交叉线的处理方式 - CGContextSetMiterLimit
- 是否要虚线 - Line dash pattern
- 颜色控件 - CGContextSetStrokeColorSpace
- 画笔颜色 - CGContextSetStrokeColor/CGContextSetStrokeColorWithColor
- 描边模式 - CGContextSetStrokePattern
-
CGContextSetMiterLimit
-
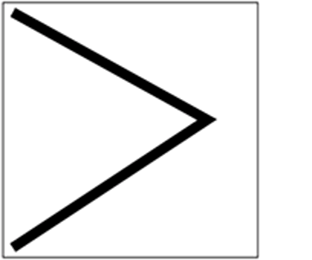
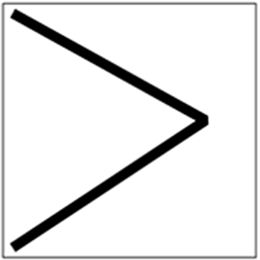
如果当前交叉线绘图模式是 kCGLineJoinMiter(CGContextSetLineJoin),Quartz 2D 根据设置的 miter 值来判断线的 join 是 bevel 或者 miter。具体的模式是:将 miter 的长度除以线的宽度,如果小于设置的 mitetLimit 值,则 join style 为 bevel。
- (void)drawRect:(CGRect)rect { CGContextRef ctx = UIGraphicsGetCurrentContext(); CGContextMoveToPoint(ctx, 10, 10); CGContextAddLineToPoint(ctx, 50, 50); CGContextAddLineToPoint(ctx, 10, 90); CGContextSetLineWidth(ctx, 10.0); CGContextSetLineJoin(ctx, kCGLineJoinMiter); CGContextSetMiterLimit(ctx, 10.0); CGContextStrokePath(ctx); } -
效果,将 Miter 设置为 1,则效果如下
-
2.3 Fill 填充
-
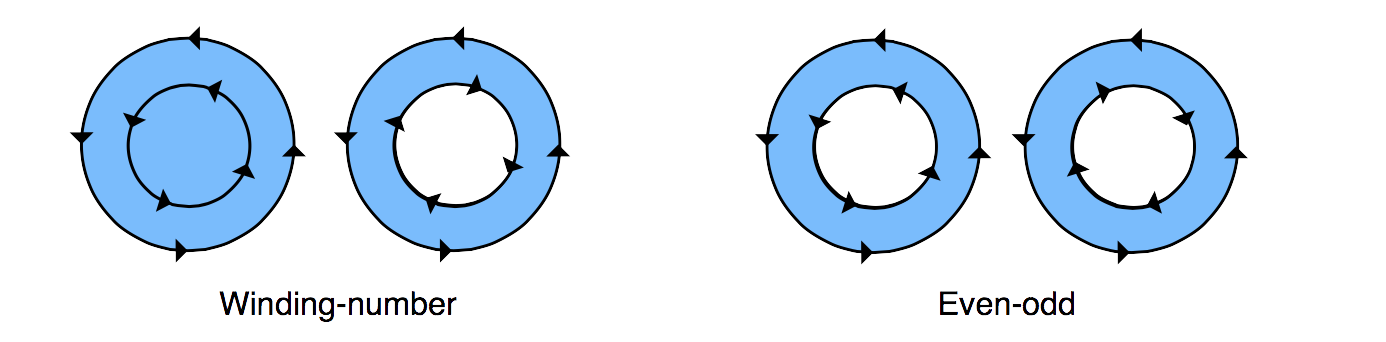
Quartz 2D 填充的时候会认为 subpath 是封闭的,然后根据规则来填充。有两种规则
- nonzero winding number rule:沿着当前点,画一条直线到区域外,检查交叉点,如果交叉点从左到右,则加一,从右到左,则减去一。如果结果不为 0,则绘制。可参见这个 link。
- even-odd rule:沿着当前点,花一条线到区域外,然后检查相交的路径,偶数则绘制,奇数则不绘制。
-
相关函数
- CGContextEOFillPath:用 even-odd rule 来填充
- CGContextFillPath :用 nonzero winding number rule 方式填充
- CGContextFillRect/CGContextFillRects:填充指定矩形区域内 path
- CGContextFillEllipseInRect:填充椭圆
- CGContextDrawPath :绘制当前 path(根据参数 stroke/fill)
2.4 Clip 切割/遮盖
-
顾名思义,根据 path 只绘制指定的区域,在区域外的都不会绘制。
-
相关函数
- CGContextClip :按照 nonzero winding number rule 规则切割
- CGContextEOClip:按照 even-odd 规则切割
- CGContextClipToRect :切割到指定矩形
- CGContextClipToRects:切割到指定矩形组
- CGContextClipToMask :切割到 mask
-
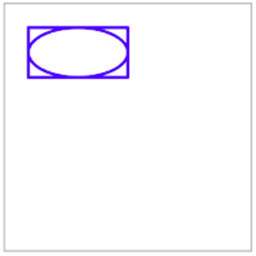
举个例子,截取圆形区域。
- (void)drawRect:(CGRect)rect { CGContextRef ctx = UIGraphicsGetCurrentContext(); CGContextAddArc(ctx, 125, 125, 100, 0, M_PI * 2, true); CGContextSetFillColorWithColor(ctx, [UIColor lightGrayColor].CGColor); // 按指定的路径切割,要放在区域填充之前(下一句之前) CGContextClip(ctx); CGContextFillRect(ctx, rect); // 上面两句相当于这一句 // CGContextFillPath(ctx); } -
效果,切割前后
2.5 Subpath 子路径
-
很简单,在 stroke/fill 或者 CGContextBeginPath/CGContextClosePath 以后就新开启一个子路径。注意 CGContextClosePath,会连接第一个点和最后一个点。
	- (void)drawRect:(CGRect)rect {

		CGContextRef ctx = UIGraphicsGetCurrentContext();

		CGContextBeginPath(ctx);
		CGContextAddArc(ctx, 125, 125, 100, 0, M_PI * 2, true);
		CGContextSetFillColorWithColor(ctx, [UIColor lightGrayColor].CGColor);
		CGContextClosePath(ctx);

		CGContextFillPath(ctx);
	}
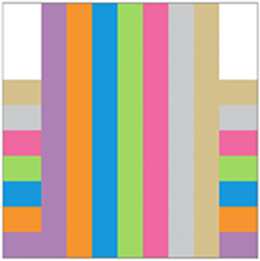
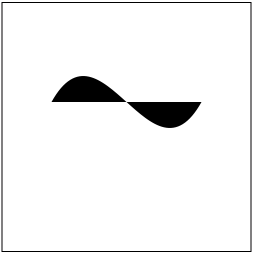
2.6 Blend 混合模式
-
Quartz 2D 中,默认的颜色混合模式采用如下公式
result = (alpha * foreground) + (1 - alpha) * background -
可以使用 CGContextSetBlendMode 来设置不同的颜色混合模式,注意设置 blend 是与 context 绘制状态相关的,一切与状态相关的设置都要想到状态堆栈。
-
官方文档里的例子,blend 模式较多,具体参见官方文档。
-
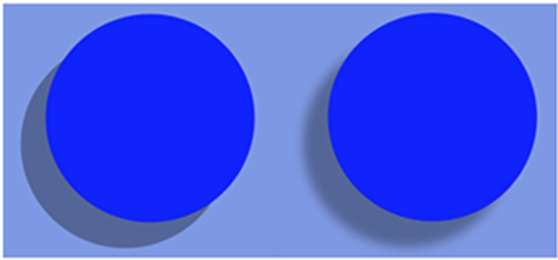
background 和 foreGround
-
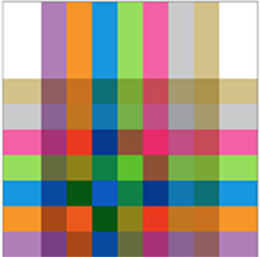
Normal Blend Mode 效果
-
Multiply Blend Mode 效果,交叉部分会显得比较暗,用上一层和底层相乘,至少和一层一样暗。
-
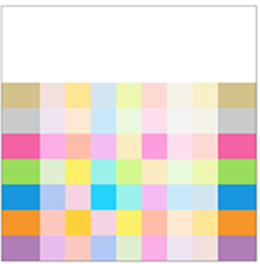
Screen Blend Mode 效果,交叉部分比较亮,上层的 reverse 和下层的 reverse 相乘,至少和一个一样亮。
-
2.7 CTM 状态矩阵
-
Quartz 2D 默认采用设备无关的 user space 来进行绘图,当 context(画板)建立之后,默认的坐标系原点以及方向也就确认了,可以通过 CTM(current transformation matrix)来修改坐标系的原点。从数组图像处理的角度来说,就是对当前 context state 乘以一个状态矩阵。其中的矩阵运算开发者可以不了解。
-
最初的状态
	- (void)drawRect:(CGRect)rect {

		CGContextRef context = UIGraphicsGetCurrentContext();
		CGContextAddRect(context, CGRectMake(50, 50, 100, 50));
		CGContextSetFillColorWithColor(context,[UIColor blueColor].CGColor);
		CGContextFillPath(context);
	}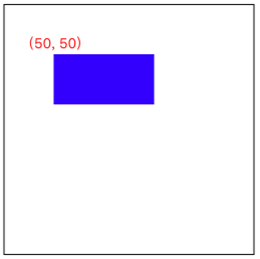
-
-
Translate 平移
-
在绘制之前,进行坐标系移动,代码中,我们是还是在(50,50)点绘制,但是要注意,当前坐标系的原点已经移了。
	- (void)drawRect:(CGRect)rect {

		CGContextRef context = UIGraphicsGetCurrentContext();

	    // Translate
	    CGContextTranslateCTM(context, 50, 50);

		CGContextAddRect(context, CGRectMake(50, 50, 100, 50));
		CGContextSetFillColorWithColor(context, [UIColor blueColor].CGColor);
		CGContextFillPath(context);
	}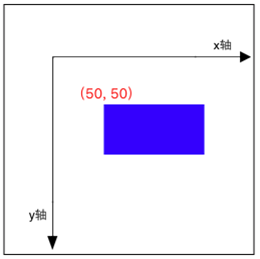
-
-
Rotate 旋转
-
在 Transform 的基础上我们再 Rotate 45 度,注意 CGContextRotateCTM 传入的参数是弧度。
	- (void)drawRect:(CGRect)rect {

		CGContextRef context = UIGraphicsGetCurrentContext();

	    // Translate
	    CGContextTranslateCTM(context, 50, 50);

		// Rotate
		CGContextRotateCTM(context, M_PI_4);

		CGContextAddRect(context, CGRectMake(50, 50, 100, 50));
		CGContextSetFillColorWithColor(context, [UIColor blueColor].CGColor);
		CGContextFillPath(context);
	}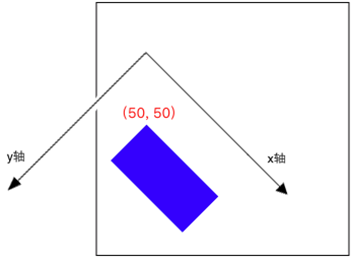
-
-
Scale 缩放
-
对于 Scale 相对来说,好理解一点,无非就是成比例放大缩小。
	- (void)drawRect:(CGRect)rect {

		CGContextRef context = UIGraphicsGetCurrentContext();

	    // Translate
	    CGContextTranslateCTM(context, 50, 50);

		// Rotate
		CGContextRotateCTM(context, M_PI_4);

		// Scale
		CGContextScaleCTM(context, 0.5, 0.5);

		CGContextAddRect(context, CGRectMake(50, 50, 100, 50));
		CGContextSetFillColorWithColor(context, [UIColor blueColor].CGColor);
		CGContextFillPath(context);
	}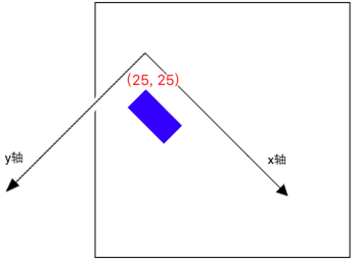
-
-
Affine Transforms
-
可以通过以下方法先创建放射矩阵,然后然后再把放射矩阵映射到 CTM。
- CGAffineTransform
- CGAffineTransformTranslate
- CGAffineTransformMakeRotation
- CGAffineTransformRotate
- CGAffineTransformMakeScale
- CGAffineTransformScale
-
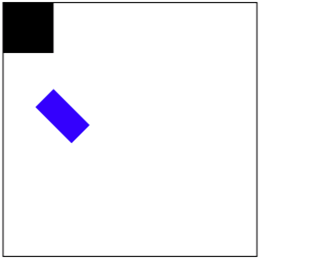
2.8 GState 状态保存恢复
-
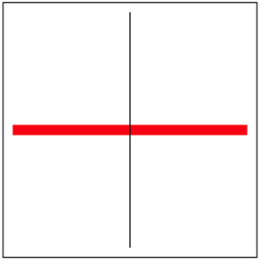
在复杂的绘图中,我们可能只是想对一个 subpath 设置,如进行旋转、移动和缩放等,这时候状态堆栈就起到作用了。
	- (void)drawRect:(CGRect)rect {

		CGContextRef context = UIGraphicsGetCurrentContext();

		// 保存状态,入栈
		CGContextSaveGState(context);

		CGContextTranslateCTM(context, 50, 50);
		CGContextRotateCTM(context, M_PI_4);
		CGContextScaleCTM(context, 0.5, 0.5);

		CGContextAddRect(context, CGRectMake(50, 50, 100, 50));
		CGContextSetFillColorWithColor(context, [UIColor blueColor].CGColor);
		CGContextFillPath(context);

		// 恢复,推出栈顶部状态
		CGContextRestoreGState(context);

		// 这里坐标系已经回到了最开始的状态
		CGContextAddRect(context, CGRectMake(0, 0, 50, 50));
		CGContextFillPath(context);
	}
- (void)drawRect:(CGRect)rect { // 描述第一条路径 UIBezierPath *path = [UIBezierPath bezierPath]; [path moveToPoint:CGPointMake(10, 125)]; [path addLineToPoint:CGPointMake(240, 125)]; // 获取上下文,保存上下文状态 CGContextRef ctx = UIGraphicsGetCurrentContext(); CGContextSaveGState(ctx); // 设置属性绘制路径 path.lineWidth = 10; [[UIColor redColor] set]; [path stroke]; // 描述第二条路径 path = [UIBezierPath bezierPath]; [path moveToPoint:CGPointMake(125, 10)]; [path addLineToPoint:CGPointMake(125, 240)]; // 还原上下文状态 CGContextRestoreGState(ctx); // 绘制路径 [path stroke]; }-
效果
-
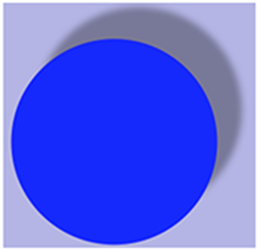
2.9 Shadow 阴影
-
shadow(阴影)的目的是为了使 UI 更具有立体感。注意 Shadow 也是绘制状态相关的,意味着如果仅仅要绘制一个 subpath 的 shadow,要注意 save 和 restore 状态。
-
shadow 主要有三个影响因素,其中不同的 blur 效果如图。
- x off-set 决定阴影沿着 x 的偏移量
- y off-set 决定阴影沿着 y 的偏移量
- blur value 决定了阴影的边缘区域是不是模糊的
-
相关函数
-
CGContextSetShadow
-
CGContextSetShadowWithColor:唯一区别是设置了阴影颜色
-
参数
- context:绘制画板
- offset :阴影偏移量,参考 context 的坐标系
- blur :非负数,决定阴影的模糊程度
-
-
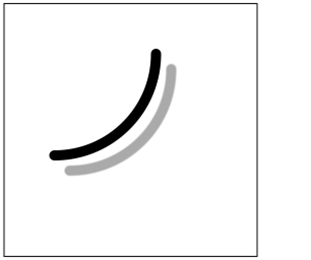
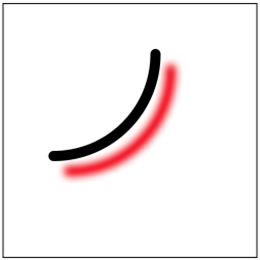
设置阴影
- (void)drawRect:(CGRect)rect { CGContextRef context = UIGraphicsGetCurrentContext(); CGContextAddArc(context, 50, 50, 100, 0, M_PI_2, 0); CGContextSetLineCap(context, kCGLineCapRound); CGContextSetLineWidth(context, 10.0); // 设置阴影 CGContextSetShadow(context, CGSizeMake(15.0, 15.0), 1.0); // CGContextSetShadowWithColor(context, CGSizeMake(15.0, 15.0), 8.0, [UIColor redColor].CGColor); CGContextStrokePath(context); }-
效果
-
2.10 Gradient 渐变
-
渐变无非就是从一种颜色逐渐变换到另一种颜色,Quartz 2D 提供了两种渐变模型。通过这两种渐变的嵌套使用,Quartz 2D 能够绘制出非常漂亮的图形。
-
axial gradient:线性渐变,使用的时候设置好两个顶点的颜色,也可以设置中间过渡色。
-
radial gradient:圆形渐变,这种模式的渐变允许一个圆到另一个圆的渐变,一个点到一个圆的渐变。
-
-
可以对渐变结束或者开始的额外区域使用指定颜色填充。
-
渐变的两种绘制模型
-
CGGradient:使用这种数据类型只需要制定两个顶点的颜色,以及绘制模式,其余的 Quartz 2D 会给绘制,但是渐变的数学模型不灵活。
-
CGShading :使用这种数据类型需要自己定义 CFFunction 来计算每一个点的渐变颜色,较为复杂,但是能够更灵活的绘制。
-
1、CGGradient 绘制
-
创建一个 CGGradient 对象,指定颜色域(一般就是 RGB),指定颜色变化的数组,指定对应颜色位置的数组,指定每个数组数据的个数。
-
用 CGContextDrawLinearGradient 或者 CGContextDrawRadialGradient 绘制。
-
释放 CGGradient 对象。
-
CGGradientCreateWithColorComponents 函数
CGGradientRef __nullable CGGradientCreateWithColorComponents(CGColorSpaceRef cg_nullable space, const CGFloat * cg_nullable components, const CGFloat * __nullable locations, size_t count) 参数: space :颜色域 components:颜色变化的数组 locations :对应颜色位置的数组 count :每个数组数据的个数 -
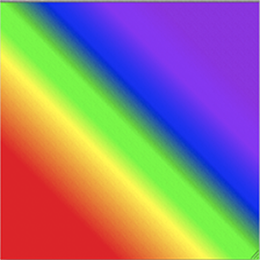
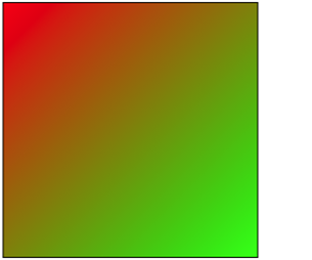
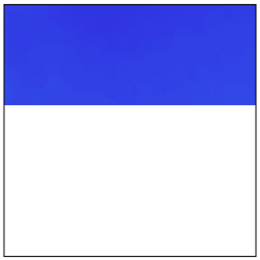
线性渐变
- (void)drawRect:(CGRect)rect { CGContextRef context = UIGraphicsGetCurrentContext(); // 设置渐变 CGColorSpaceRef deviceRGB = CGColorSpaceCreateDeviceRGB(); CGFloat components[8] = {1.0, 0.0, 0.0, 1.0, // 红色 0.0, 1.0, 0.0, // 绿色 1.0}; CGFloat locations[2] = {0.0, 1.0}; size_t num_of_locations = 2; CGGradientRef gradient = CGGradientCreateWithColorComponents(deviceRGB, components, locations, num_of_locations); // 渐变开始结束点位置 CGPoint startPoint = CGPointMake(0, 0); CGPoint endPoint = CGPointMake(250, 250); // 创建线性渐变 CGContextDrawLinearGradient(context, gradient, startPoint, endPoint, 0); CGColorSpaceRelease(deviceRGB); CGGradientRelease(gradient); }-
效果
-
-
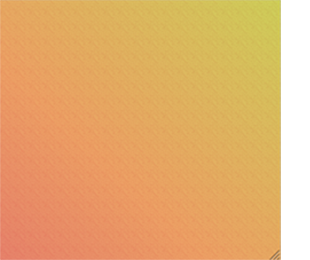
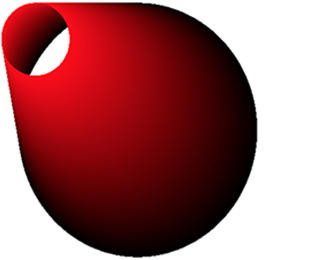
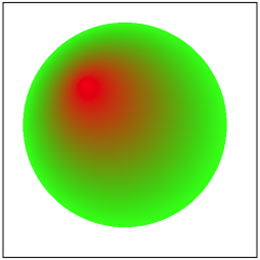
圆形渐变
- (void)drawRect:(CGRect)rect { CGContextRef context = UIGraphicsGetCurrentContext(); // 设置渐变 CGColorSpaceRef deviceRGB = CGColorSpaceCreateDeviceRGB(); CGFloat components[8] = {1.0, 0.0, 0.0, 1.0, // 红色 0.0, 1.0, 0.0, // 绿色 1.0}; CGFloat locations[2] = {0.0, 1.0}; size_t num_of_locations = 2; CGGradientRef gradient = CGGradientCreateWithColorComponents(deviceRGB, components, locations, num_of_locations); // 渐变开始结束圆心位置 CGPoint startCenter = CGPointMake(80, 80); CGPoint endCenter = CGPointMake(120, 120); // 渐变开始结束半径 CGFloat startRadius = 0.0; CGFloat endRadius = 100.0; // 创建圆形渐变 CGContextDrawRadialGradient(context, gradient, startCenter, startRadius, endCenter, endRadius, 0); CGColorSpaceRelease(deviceRGB); CGGradientRelease(gradient); }-
效果
-
-
-
2.11 Bitmap 位图
-
Bitmap 叫做位图,每一个像素点由 1-32bit 组成。每个像素点包括多个颜色组件和一个 Alpha 组件(例如:RGBA)。
-
iOS 中指出如下格式的图片 JPEG, GIF, PNG, TIF, ICO, GMP, XBM 和 CUR。其他格式的图片要给 Quartz 2D 传入图片的数据分布信息。
-
数据类型 CGImageRef,在 Quartz 2D 中,Bitmap 的数据由 CGImageRef 封装。由以下几个函数可以创建 CGImageRef 对象
-
CGImageCreate:最灵活,但也是最复杂的一种方式,要传入 11 个参数。
-
CGImageSourceCreate:ImageAtIndex:通过已经存在的 Image 对象来创建
-
CGImageSourceCreate:ThumbnailAtIndex:和上一个函数类似,不过这个是创建缩略图
-
CGBitmapContextCreateImage:通过 Copy Bitmap Graphics 来创建
-
CGImageCreateWith:ImageInRect:通过在某一个矩形内数据来创建
-
函数 CGImageCreate
CGImageRef _Nullable CGImageCreate(size_t width, size_t height, size_t bitsPerComponent, size_t bitsPerPixel, size_t bytesPerRow, CGColorSpaceRef _Nullable space, CGBitmapInfo bitmapInfo, CGDataProviderRef _Nullable provider, const CGFloat * _Nullable decode, bool shouldInterpolate, CGColorRenderingIntent intent); 参数: width/height :图片的像素宽度,高度 bitsPerComponent:每个 component 的占用 bit 个数,和上文提到的一样 bitsPerPixel :每个像素点占用的 bit 个数。例如 32bit RGBA 中,就是 32 bytesPerRow :每一行占用的 byte 个数 colorspace :颜色空间 bitmapInfo :和上文提到的那个函数一样 provider :bitmap 的数据源 decode :解码 array,传入 null,则保持原始数据 interpolation :是否要像素差值来平滑图像 intent :指定了从一个颜色空间 map 到另一个颜色空间的方式 -
函数 CGBitmapContextCreate
	CGContextRef _Nullable CGBitmapContextCreate(void * _Nullable data,
	                                             size_t width,
	                                             size_t height,
	                                             size_t bitsPerComponent,
	                                             size_t bytesPerRow,
	                                             CGColorSpaceRef _Nullable space,
	                                             uint32_t bitmapInfo);
	参数:
		data         :是一个指针,指向存储绘制的 bitmap context 的实际数据的地址,最少大小为 bytesPerRow * height。可以传入 null,让 Quartz 自动分配计算
		width, height:bitmap 的宽度,高度,以像素为单位
		bytesPerRow  :每一行的 byte 数目。如果 data 传入 null,这里传入 0,则会自动计算一个 component 占据多少位。对于 32bit 的 RGBA 空间,则是 8(8*4=32)
		space        :颜色空间,一般就是 DeviceRGB
		bitmapInfo   :一个常量,指定了是否具有 alpha 通道,alpha 通道的位置,像素点存储的数据类型是 float 还是 Integer 等信息

	其中 bitmapInfo 可以传入的参数如下

		enum CGImageAlphaInfo {
		   	kCGImageAlphaNone,
		   	kCGImageAlphaPremultipliedLast,
		   	kCGImageAlphaPremultipliedFirst,
		   	kCGImageAlphaLast,
		   	kCGImageAlphaFirst,
		   	kCGImageAlphaNoneSkipLast,
		   	kCGImageAlphaNoneSkipFirst,
		   	kCGImageAlphaOnly
		};
-
-
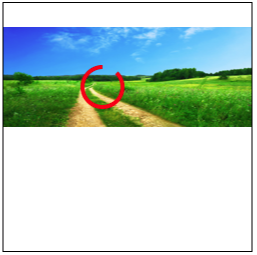
1、重绘图片
-
原图(2560 * 1600)

-
重新绘制成 250 * 100,并在图片中间加上我们自定义的绘制
- (void)drawRect:(CGRect)rect { CGColorSpaceRef rgb = CGColorSpaceCreateDeviceRGB(); // 图片绘图区域的大小 CGSize targetSize = CGSizeMake(250, 125); // 获取图形上下文 CGContextRef bitmapCtx = CGBitmapContextCreate(NULL, targetSize.width, targetSize.height, 8, targetSize.width * 4, rgb, kCGImageAlphaPremultipliedFirst); // 绘制图片 CGRect imageRect; imageRect.origin = CGPointMake(0, 0); // 设置图片的位置,左下角坐标系 imageRect.size = CGSizeMake(250, 100); // 设置图片的大小 UIImage *imageToDraw = [UIImage imageNamed:@"image.jpg"]; CGContextDrawImage(bitmapCtx, imageRect, imageToDraw.CGImage); // 绘制自定义图形 CGContextAddArc(bitmapCtx, 100, 40, 20, M_PI_4, M_PI_2, true); CGContextSetLineWidth(bitmapCtx, 4.0); CGContextSetStrokeColorWithColor(bitmapCtx, [UIColor redColor].CGColor); CGContextStrokePath(bitmapCtx); // 渲染生成 CGImage CGImageRef imageRef = CGBitmapContextCreateImage(bitmapCtx); // 转换成 UIImage UIImage *image = [[UIImage alloc] initWithCGImage:imageRef]; CGImageRelease(imageRef); CGContextRelease(bitmapCtx); CGColorSpaceRelease(rgb); UIImageView *imageView = [[UIImageView alloc] initWithImage:image]; [self addSubview:imageView]; }-
效果
-
-
-
2、截取图片
-
截取图片
- (void)drawRect:(CGRect)rect { CGColorSpaceRef rgb = CGColorSpaceCreateDeviceRGB(); // 图片绘图区域的大小 CGSize targetSize = CGSizeMake(250, 125); // 获取图形上下文 CGContextRef bitmapCtx = CGBitmapContextCreate(NULL, targetSize.width, targetSize.height, 8, targetSize.width * 4, rgb, kCGImageAlphaPremultipliedFirst); UIImage *imageToDraw = [UIImage imageNamed:@"image.jpg"]; // 渲染生成 CGImage CGRect imageRect = CGRectMake(0, 0, 250, 100); // 左上角坐标系,位置设置不起作用 CGImageRef partImageRef = CGImageCreateWithImageInRect(imageToDraw.CGImage, imageRect); // 转换成 UIImage UIImage *image = [[UIImage alloc] initWithCGImage:partImageRef]; CGImageRelease(partImageRef); CGContextRelease(bitmapCtx); CGColorSpaceRelease(rgb); UIImageView *imageView = [[UIImageView alloc] initWithImage:image]; [self addSubview:imageView]; }-
效果
-
-
3、Quartz 2D 常用函数
-
1、常用拼接路径函数
// 新建一个起点 void CGContextMoveToPoint(CGContextRef c, CGFloat x, CGFloat y) // 添加新的线段到某个点 void CGContextAddLineToPoint(CGContextRef c, CGFloat x, CGFloat y) // 封闭路径 void CGContextClosePath(CGContextRef cg_nullable c) // 添加一个矩形 void CGContextAddRect(CGContextRef c, CGRect rect) // 添加一个椭圆 void CGContextAddEllipseInRect(CGContextRef context, CGRect rect) // 添加一个圆弧 void CGContextAddArc(CGContextRef c, CGFloat x, CGFloat y, CGFloat radius, CGFloat startAngle, CGFloat endAngle, int clockwise) -
2、常用绘制路径函数
// Mode 参数决定绘制的模式 void CGContextDrawPath(CGContextRef c, CGPathDrawingMode mode) // 绘制空心路径 void CGContextStrokePath(CGContextRef c) // 绘制实心路径 void CGContextFillPath(CGContextRef c)- 一般以 CGContextDraw、CGContextStroke、CGContextFill 开头的函数,都是用来绘制路径的。
-
3、图形上下文栈的操作函数
// 将当前的上下文 Copy 一份,保存到栈顶(那个栈叫做 “图形上下文栈”) void CGContextSaveGState(CGContextRef c) // 将栈顶的上下文出栈,替换掉当前的上下文 void CGContextRestoreGState(CGContextRef c) -
4、矩阵操作函数
// 缩放 void CGContextScaleCTM(CGContextRef c, CGFloat sx, CGFloat sy) // 旋转 void CGContextRotateCTM(CGContextRef c, CGFloat angle) // 平移 void CGContextTranslateCTM(CGContextRef c, CGFloat tx, CGFloat ty)- 利用矩阵操作,能让绘制到上下文中的所有路径一起发生变化。
4、贝塞尔路径
-
贝塞尔路径(UIBezierPath)是 UIKit 框架中对 Quartz 2D 绘图的封装。实际操作起来,使用贝塞尔路径,更为方便。用法与 CGContextRef 类似,但是 OC 对其进行了封装,更加面向对象。
-
具体讲解见 Quartz 2D 贝塞尔曲线
-
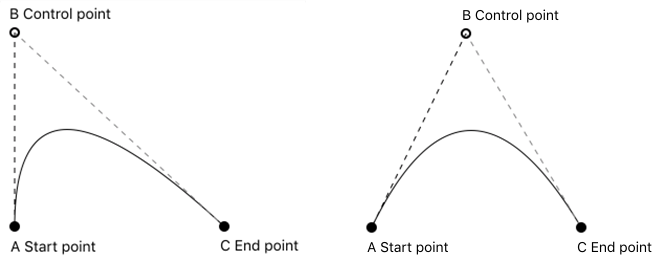
二阶贝塞尔曲线示意图
-
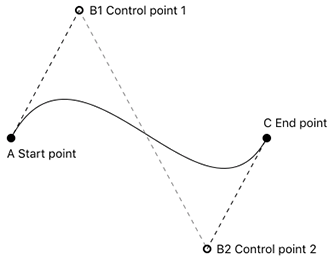
三阶贝塞尔曲线示意图
-
贝塞尔路径常用的方法
	// 设置起始点
	- (void)moveToPoint:(CGPoint)point;

	// 添加直线到一点
	- (void)addLineToPoint:(CGPoint)point;

	// 封闭闭路径
	- (void)closePath;

	// 返回一个描述椭圆的路径
	+ (UIBezierPath *)bezierPathWithOvalInRect:(CGRect)rect;

	// 贝塞尔曲线
	- (void)addQuadCurveToPoint:(CGPoint)endPoint controlPoint:(CGPoint)controlPoint;

	// 三次贝塞尔曲线
	- (void)addCurveToPoint:(CGPoint)endPoint controlPoint1:(CGPoint)controlPoint1 controlPoint2:(CGPoint)controlPoint2;

	// 绘制圆弧
	- (void)addArcWithCenter:(CGPoint)center radius:(CGFloat)radius startAngle:(CGFloat)startAngle endAngle:(CGFloat)endAngle clockwise:(BOOL)clockwise;
5、基本图形绘制
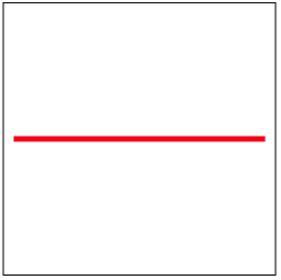
5.1 绘制直线
-
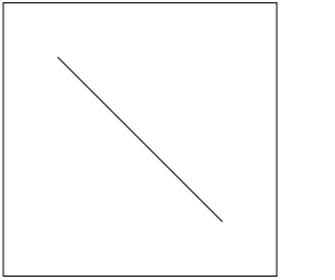
1、绘制直线
-
在 Quartz 2D 中,使用方法 CGContextMoveToPoint 移动画笔到一个点来开始新的子路径,使用 CGContextAddLineToPoint 来从当前开始点添加一条线到结束点,CGContextAddLineToPoint 调用后,此时的终点会重新设置为新的开始点。贝塞尔路径是对 Quartz 2D 绘图的 OC 封装。
-
方式 1,最原始方式
- (void)drawRect:(CGRect)rect { // 获取上下文 CGContextRef ctx = UIGraphicsGetCurrentContext(); // 创建路径 CGMutablePathRef path = CGPathCreateMutable(); // 描述路径, 设置起点,path:给哪个路径设置起点 CGPathMoveToPoint(path, NULL, 50, 50); // 添加一根线到某个点 CGPathAddLineToPoint(path, NULL, 200, 200); // 把路径添加到上下文 CGContextAddPath(ctx, path); // 渲染上下文 CGContextStrokePath(ctx); } -
方式 2,简化方式
- (void)drawRect:(CGRect)rect { // 获取上下文 CGContextRef ctx = UIGraphicsGetCurrentContext(); // 描述路径,设置起点 CGContextMoveToPoint(ctx, 50, 50); // 添加一根线到某个点 CGContextAddLineToPoint(ctx, 200, 200); // 渲染上下文 CGContextStrokePath(ctx); } -
方式 3,贝塞尔路径方式
- (void)drawRect:(CGRect)rect { // 创建路径 UIBezierPath *path = [UIBezierPath bezierPath]; // 设置起点 [path moveToPoint:CGPointMake(50, 50)]; // 添加一根线到某个点 [path addLineToPoint:CGPointMake(200, 200)]; // 绘制路径 [path stroke]; } -
方式 4,原始方式和贝塞尔路径方式同时使用
	- (void)drawRect:(CGRect)rect {

		// 创建路径
		UIBezierPath *path = [UIBezierPath bezierPath];
		[path moveToPoint:CGPointMake(10, 125)];
		[path addLineToPoint:CGPointMake(240, 125)];

		// 获取上下文
		CGContextRef ctx = UIGraphicsGetCurrentContext();

		// 添加路径
		CGContextAddPath(ctx, path.CGPath);

		// 设置属性
		CGContextSetStrokeColorWithColor(ctx, [UIColor redColor].CGColor);
		CGContextSetLineWidth(ctx, 5);

		// 绘制路径
		CGContextStrokePath(ctx);
	}
- (void)drawRect:(CGRect)rect { // 获取上下文,描述路径 CGContextRef ctx = UIGraphicsGetCurrentContext(); CGContextMoveToPoint(ctx, 50, 50); CGContextAddLineToPoint(ctx, 200, 200); // 创建贝塞尔路径 UIBezierPath *path = [UIBezierPath bezierPath]; // 添加路径 CGContextAddPath(ctx, path.CGPath); // 设置属性 [[UIColor redColor] set]; path.lineWidth = 5; // 绘制路径 [path stroke]; } -
效果
-
-
2、设置画线状态
-
线的顶端模式,使用 CGContextSetLineCap 来设置,一共有三种
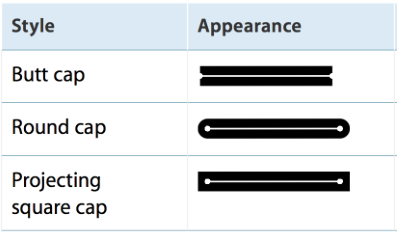
-
线的相交模式,使用CGContextSetLineJoin 来设置,一共也有三种
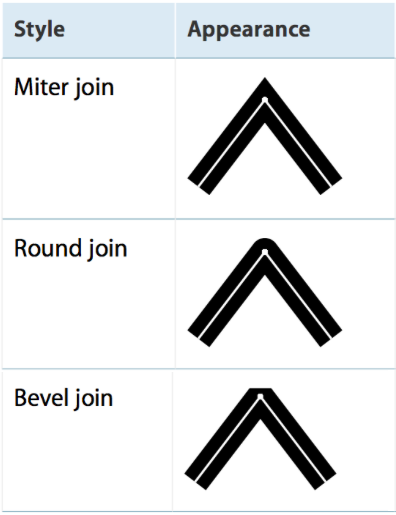
-
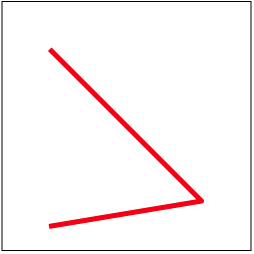
方式 1,原始方式
- (void)drawRect:(CGRect)rect { // 画线 // 获取上下文 CGContextRef ctx = UIGraphicsGetCurrentContext(); // 描述路径 CGContextMoveToPoint(ctx, 50, 50); CGContextAddLineToPoint(ctx, 200, 200); // 画第二条线,默认下一根线的起点就是上一根线终点 // CGContextMoveToPoint(ctx, 200, 50); CGContextAddLineToPoint(ctx, 50, 225); // 设置画线状态,一定要放在渲染之前 // 设置颜色 CGContextSetStrokeColorWithColor(ctx, [UIColor redColor].CGColor); // 设置线宽 CGContextSetLineWidth(ctx, 5); // 设置相交样式 CGContextSetLineJoin(ctx, kCGLineJoinRound); // 设置顶端样式 CGContextSetLineCap(ctx, kCGLineCapSquare); // 渲染 CGContextStrokePath(ctx); } -
方式 2,贝塞尔路径方式
- (void)drawRect:(CGRect)rect { // 画线 // 创建路径 UIBezierPath *path = [UIBezierPath bezierPath]; // 描述路径 [path moveToPoint:CGPointMake(50, 50)]; [path addLineToPoint:CGPointMake(200, 200)]; // 画第二条线,默认下一根线的起点就是上一根线终点 // [path moveToPoint:CGPointMake(200, 50)]; [path addLineToPoint:CGPointMake(50, 225)]; // 设置画线状态,一定要放在渲染之前 // 设置颜色 [[UIColor redColor] set]; // 设置线宽 path.lineWidth = 5; // 设置相交样式 path.lineJoinStyle = kCGLineJoinRound; // 设置顶端样式 path.lineCapStyle = kCGLineCapSquare; // 渲染 [path stroke]; } -
效果
-
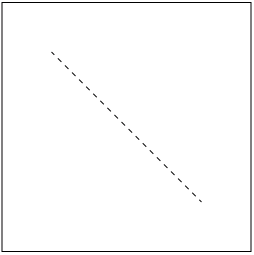
5.2 绘制虚线
-
绘制虚线
-
方式 1,原始方式
- (void)drawRect:(CGRect)rect { // phase :第一个虚线段从哪里开始,例如传入 3,则从第 3 个单位开始 // lengths:一个 C 数组,表示绘制部分和空白部分的分配。例如传入 [2, 2],则绘制 2 个单位,然后空白 2 个单位,以此重复 // count : lengths 的数量 // 获取上下文 CGContextRef ctx = UIGraphicsGetCurrentContext(); // 绘制直线 CGContextMoveToPoint(ctx, 50, 50); CGContextAddLineToPoint(ctx, 200, 200); // 设置虚线 CGFloat lengths[] = {5}; CGContextSetLineDash(ctx, 1, lengths, 1); // 渲染 CGContextStrokePath(ctx); } -
方式 2,贝塞尔路径方式
- (void)drawRect:(CGRect)rect { // phase :第一个虚线段从哪里开始,例如传入 3,则从第 3 个单位开始 // pattern:一个 C 数组,表示绘制部分和空白部分的分配。例如传入 [2, 2],则绘制 2 个单位,然后空白 2 个单位,以此重复 // count : lengths 的数量 // 创建路径 UIBezierPath *path = [UIBezierPath bezierPath]; // 绘制直线 [path moveToPoint:CGPointMake(50, 50)]; [path addLineToPoint:CGPointMake(200, 200)]; // 设置虚线 CGFloat lengths[] = {5}; [path setLineDash:lengths count:1 phase:1]; // 渲染 [path stroke]; } -
效果
-
5.3 绘制曲线
-
Quartz 2D 使用计算机图形学中的多项式来绘制曲线,支持二次和三次曲线。
-
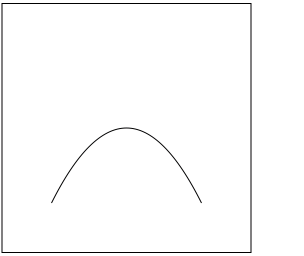
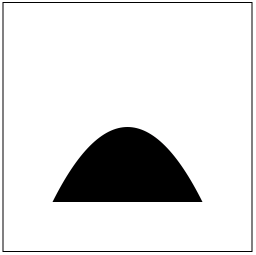
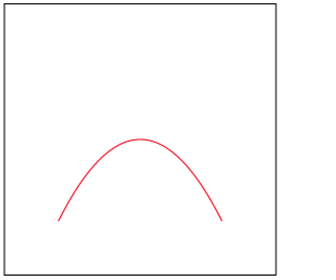
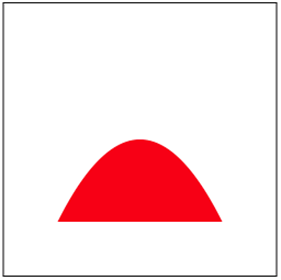
1、绘制二次曲线
-
方式 1,原始方式
- (void)drawRect:(CGRect)rect { // cpx, cpy:控制点 // x, y :曲线终点 // 获取上下文 CGContextRef ctx = UIGraphicsGetCurrentContext(); // 设置起点 CGContextMoveToPoint(ctx, 50, 200); // 绘制曲线 CGContextAddQuadCurveToPoint(ctx, 125, 50, 200, 200); // 绘制空心路径 CGContextStrokePath(ctx); // 绘制实心路径 // CGContextFillPath(ctx); } -
方式 2,贝塞尔路径方式
- (void)drawRect:(CGRect)rect { // controlPoint:控制点 // endPoint :曲线终点 // 创建路径 UIBezierPath *path = [UIBezierPath bezierPath]; // 设置起点 [path moveToPoint:CGPointMake(50, 200)]; // 绘制曲线 [path addQuadCurveToPoint:CGPointMake(200, 200) controlPoint:CGPointMake(125, 50)]; // 绘制空心路径 [path stroke]; // 绘制实心路径 // [path fill]; } -
效果
-
-
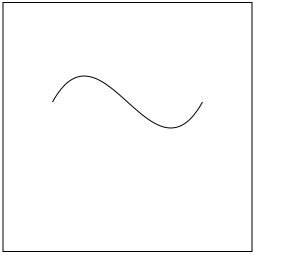
2、绘制三次曲线
-
方式 1,原始方式
- (void)drawRect:(CGRect)rect { // cp1x, cp1y:控制点 1 // cp2x, cp2y:控制点 2 // x, y :曲线终点 // 获取上下文 CGContextRef ctx = UIGraphicsGetCurrentContext(); // 设置起点 CGContextMoveToPoint(ctx, 50, 100); // 绘制曲线 CGContextAddCurveToPoint(ctx, 100, 10, 150, 190, 200, 100); // 绘制空心路径 CGContextStrokePath(ctx); // 绘制实心路径 // CGContextFillPath(ctx); } -
方式 2,贝塞尔路径方式
- (void)drawRect:(CGRect)rect { // controlPoint1:控制点 1 // controlPoint2:控制点 2 // endPoint :曲线终点 // 创建路径 UIBezierPath *path = [UIBezierPath bezierPath]; // 设置起点 [path moveToPoint:CGPointMake(50, 100)]; // 绘制曲线 [path addCurveToPoint:CGPointMake(200, 100) controlPoint1:CGPointMake(100, 10) controlPoint2:CGPointMake(150, 190)]; // 绘制空心路径 [path stroke]; // 绘制实心路径 // [path fill]; } -
效果
-
-
3、绘制图形设置
-
方式 1,原始方式
// 设置空心路径的颜色 CGContextSetStrokeColorWithColor(ctx, [UIColor redColor].CGColor); // 设置实心路径的填充颜色 CGContextSetFillColorWithColor(ctx, [UIColor redColor].CGColor); // 绘制空心路径 CGContextStrokePath(ctx); // 绘制实心路径 CGContextFillPath(ctx); -
方式 2,贝塞尔路径方式
// 设置空心路径的颜色 [[UIColor redColor] setStroke]; // 设置实心路径的填充颜色 [[UIColor redColor] setFill]; // 设置空心路径和实心路径的颜色 [[UIColor redColor] set]; // 绘制空心路径 [path stroke]; // 绘制实心路径 [path fill]; -
效果
-
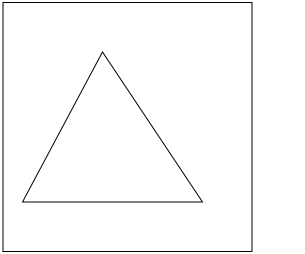
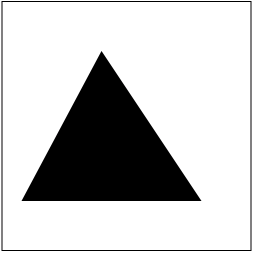
5.4 绘制三角形
-
绘制三角形
-
方式 1,原始方式
- (void)drawRect:(CGRect)rect { // 获取上下文 CGContextRef ctx = UIGraphicsGetCurrentContext(); // 描述路径 CGContextMoveToPoint(ctx, 100, 50); CGContextAddLineToPoint(ctx, 20, 200); CGContextAddLineToPoint(ctx, 200, 200); // 封闭路径,自动连接首尾 CGContextClosePath(ctx); // 渲染 // 绘制空心路径 CGContextStrokePath(ctx); // 绘制实心路径 // CGContextFillPath(ctx); } -
方式 2,贝塞尔路径方式
- (void)drawRect:(CGRect)rect { // 创建路径 UIBezierPath *path = [UIBezierPath bezierPath]; // 描述路径 [path moveToPoint:CGPointMake(100, 50)]; [path addLineToPoint:CGPointMake(20, 200)]; [path addLineToPoint:CGPointMake(200, 200)]; // 封闭路径,自动连接首尾 [path closePath]; // 渲染 // 绘制空心路径 [path stroke]; // 绘制实心路径 // [path fill]; } -
效果
-
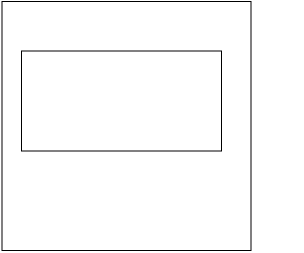
5.5 绘制矩形
-
绘制矩形
-
方式 1,原始方式
- (void)drawRect:(CGRect)rect { // 获取上下文 CGContextRef ctx = UIGraphicsGetCurrentContext(); // 描述路径 CGContextAddRect(ctx, CGRectMake(20, 50, 200, 100)); // 绘制空心路径 CGContextStrokePath(ctx); // 绘制实心路径 // CGContextFillPath(ctx); } -
方式 2,贝塞尔路径方式
- (void)drawRect:(CGRect)rect { // 创建路径,绘制图形 UIBezierPath *path = [UIBezierPath bezierPathWithRect:CGRectMake(20, 50, 200, 100)]; // 绘制空心路径 [path stroke]; // 绘制实心路径 // [path fill]; } -
效果

-
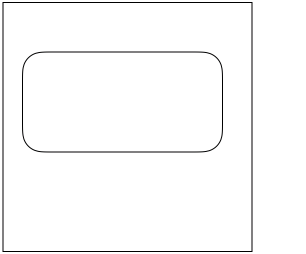
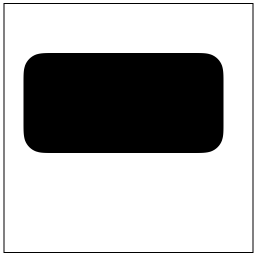
5.6 绘制圆角矩形
-
绘制圆角矩形
-
方式 1,原始方式
- (void)drawRect:(CGRect)rect { // x1, y1:圆角两个切线的交点 // x2, y2:圆角终点 // radius:圆角半径 // 获取上下文 CGContextRef ctx = UIGraphicsGetCurrentContext(); CGFloat x = 20; CGFloat y = 50; CGFloat w = 200; CGFloat h = 100; CGFloat r = 20; CGContextMoveToPoint(ctx, x, y + r); CGContextAddArcToPoint(ctx, x, y, x + r, y, r); // 左上角 CGContextAddLineToPoint(ctx, x + w - r, y); CGContextAddArcToPoint(ctx, x + w, y, x + w, y + r, r); // 右上角 CGContextAddLineToPoint(ctx, x + w, y + h - r); CGContextAddArcToPoint(ctx, x + w, y + h, x + w - r, y + h, r); // 右下角 CGContextAddLineToPoint(ctx, x + r, y + h); CGContextAddArcToPoint(ctx, x, y + h, x, y + h - r, r); // 左下角 CGContextClosePath(ctx); // 绘制空心路径 CGContextStrokePath(ctx); // 绘制实心路径 // CGContextFillPath(ctx); } -
方式 2,贝塞尔路径方式
- (void)drawRect:(CGRect)rect { // rect :矩形位置尺寸 // cornerRadius:圆角半径 // 创建路径,绘制图形 UIBezierPath *path = [UIBezierPath bezierPathWithRoundedRect:CGRectMake(20, 50, 200, 100) cornerRadius:20]; // 绘制空心路径 [path stroke]; // 绘制实心路径 // [path fill]; } -
效果
-
5.7 绘制圆弧
-
绘制圆弧
-
Quartz 2D 提供了两个方法来绘制圆弧
-
CGContextAddArc,普通的圆弧一部分(以某圆心,某半径,某弧度的圆弧)。
-
CGContextAddArcToPoint,用来绘制圆角。
-
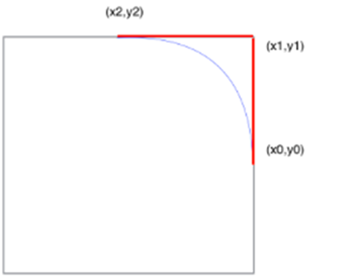
函数体
void CGContextAddArcToPoint(CGContextRef cg_nullable c, CGFloat x1, CGFloat y1, CGFloat x2, CGFloat y2, CGFloat radius) -
参数
c :图形上下文 x1, y1:和当前点 (x0, y0) 决定了第一条切线(x0, y0)-> (x1, y1) x2, y2:和 (x1, y1) 决定了第二条切线 radius:相切的半径。 -
也就是说,绘制一个半径为 radius 的圆弧,和上述两条直线都相切。图中的两条红线就是上文提到的两条线,分别是 (x0,y0) -> (x1,y1) 和 (x1,y1) -> (x2,y2),那么和这两条线都想切的自然就是图中的蓝色圆弧了.
-
-
-
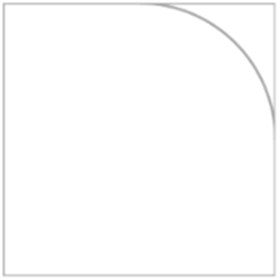
方式 1,原始方式
	- (void)drawRect:(CGRect)rect {

		// x, y      :圆心
		// radius    :半径
		// startAngle:开始弧度
		// endAngle  :结束弧度
		// clockwise :方向,false 顺时针,true 逆时针

		// 获取上下文
		CGContextRef ctx = UIGraphicsGetCurrentContext();

		// 描述路径
		CGContextAddArc(ctx, 125, 125, 100, 0, M_PI_2, false);

		// 绘制空心路径
		CGContextStrokePath(ctx);

		// 绘制实心路径
		// CGContextFillPath(ctx);
	}
- (void)drawRect:(CGRect)rect { // x1, y1:圆角两个切线的交点 // x2, y2:圆角终点 // radius:圆角半径 // 获取上下文 CGContextRef ctx = UIGraphicsGetCurrentContext(); // 设置起点 CGContextMoveToPoint(ctx, 225, 125); // 绘制圆弧 CGContextAddArcToPoint(ctx, 225, 225, 125, 225, 100); // 绘制空心路径 CGContextStrokePath(ctx); // 绘制实心路径 // CGContextFillPath(ctx); } -
方式 2,贝塞尔路径方式
	- (void)drawRect:(CGRect)rect {

		// Center    :圆心
		// radius    :半径
		// startAngle:开始弧度
		// endAngle  :结束弧度
		// clockwise :方向,YES 顺时针,NO 逆时针

		// 创建路径,绘制图形
		UIBezierPath *path = [UIBezierPath bezierPathWithArcCenter:CGPointMake(125, 125)
		                                                    radius:100
		                                                startAngle:0
		                                                  endAngle:M_PI_2
		                                                 clockwise:YES];

		// 绘制空心路径
		[path stroke];

		// 绘制实心路径
		// [path fill];
	}
- (void)drawRect:(CGRect)rect { // Center :圆心 // radius :半径 // startAngle:开始弧度 // endAngle :结束弧度 // clockwise :方向,YES 顺时针,NO 逆时针 // 创建路径,绘制图形 UIBezierPath *path = [UIBezierPath bezierPath]; // 设置起点 [path moveToPoint:CGPointMake(225, 125)]; // 绘制圆弧 [path addArcWithCenter:CGPointMake(125, 125) radius:100 startAngle:0 endAngle:M_PI_2 clockwise:YES]; // 绘制空心路径 [path stroke]; // 绘制实心路径 // [path fill]; } -
效果
-
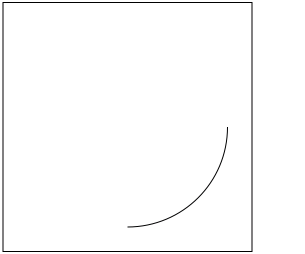
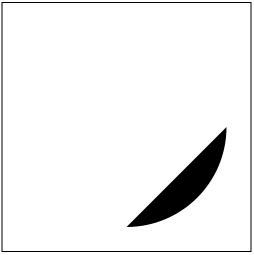
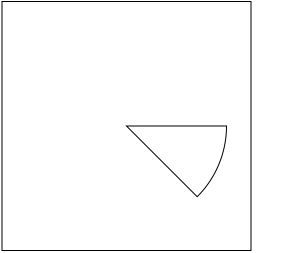
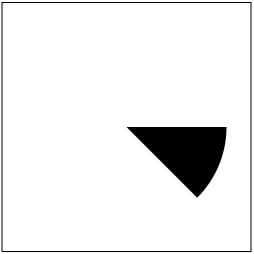
5.8 绘制扇形
-
绘制扇形
-
方式 1,原始方式
- (void)drawRect:(CGRect)rect { // 获取上下文 CGContextRef ctx = UIGraphicsGetCurrentContext(); // 描述路径 CGContextAddArc(ctx, 125, 125, 100, 0, M_PI_4, NO); // 绘制到圆心的直线 CGContextAddLineToPoint(ctx, 125, 125); // 封闭路径 CGContextClosePath(ctx); // 绘制空心路径 CGContextStrokePath(ctx); // 绘制实心路径 // CGContextFillPath(ctx); } -
方式 2,贝塞尔路径方式
- (void)drawRect:(CGRect)rect { // 创建路径,绘制图形 UIBezierPath *path = [UIBezierPath bezierPathWithArcCenter:CGPointMake(125, 125) radius:100 startAngle:0 endAngle:M_PI_4 clockwise:YES]; // 绘制到圆心的直线 [path addLineToPoint:CGPointMake(125, 125)]; // 封闭路径 [path closePath]; // 绘制空心路径 [path stroke]; // 绘制实心路径 // [path fill]; } -
效果
-
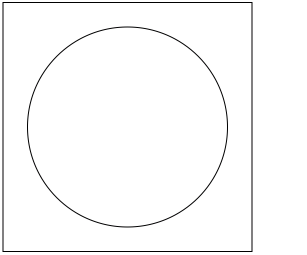
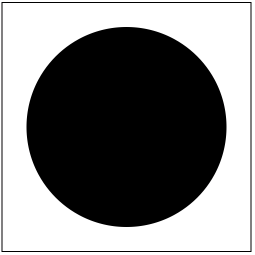
5.9 绘制圆形
-
绘制圆形
-
方式 1,原始方式
- (void)drawRect:(CGRect)rect { // 获取上下文 CGContextRef ctx = UIGraphicsGetCurrentContext(); // 描述路径 CGContextAddArc(ctx, 125, 125, 100, 0, M_PI * 2, NO); // 绘制空心路径 CGContextStrokePath(ctx); // 绘制实心路径 // CGContextFillPath(ctx); } -
方式 2,贝塞尔路径方式
- (void)drawRect:(CGRect)rect { // 创建路径,绘制图形 UIBezierPath *path = [UIBezierPath bezierPathWithArcCenter:CGPointMake(125, 125) radius:100 startAngle:0 endAngle:M_PI * 2 clockwise:YES]; // 绘制空心路径 [path stroke]; // 绘制实心路径 // [path fill]; } -
效果
-
5.10 绘制椭圆形
-
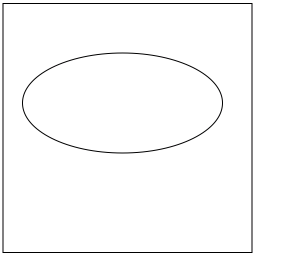
绘制椭圆形
-
在矩形中设置不同的宽高方式创建。
-
方式 1,原始方式
- (void)drawRect:(CGRect)rect { // 获取上下文 CGContextRef ctx = UIGraphicsGetCurrentContext(); // 描述路径 CGContextAddEllipseInRect(ctx, CGRectMake(20, 50, 200, 100)); // 绘制空心路径 CGContextStrokePath(ctx); // 绘制实心路径 // CGContextFillPath(ctx); } -
方式 2,贝塞尔路径方式
- (void)drawRect:(CGRect)rect { // 创建路径,绘制图形 UIBezierPath *path = [UIBezierPath bezierPathWithOvalInRect:CGRectMake(20, 50, 200, 100)]; // 绘制空心路径 [path stroke]; // 绘制实心路径 // [path fill]; } -
效果

-
6、统计图绘制
6.1 绘制折线图
-
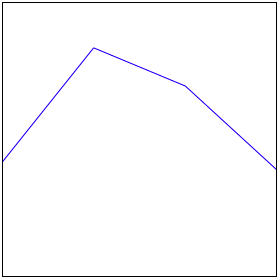
绘制折线图
-
方式 1,原始方式
- (void)drawRect:(CGRect)rect { CGFloat x1 = 0; CGFloat x2 = 0; CGFloat h1 = 0; CGFloat h2 = 0; CGFloat y1 = 0; CGFloat y2 = 0; CGFloat w = rect.size.width / (self.datas.count - 1); CGFloat largeNum = [self.datas[0] floatValue]; for (int i = 0; i < self.datas.count; i++) { if ([self.datas[i] floatValue] > largeNum) { largeNum = [self.datas[i] floatValue]; } } for (int i = 0; i < self.datas.count - 1; i++) { x1 = w * i; x2 = w * (i + 1); h1 = [self.datas[i] floatValue] / (largeNum * 1.2) * rect.size.height; h2 = [self.datas[i + 1] floatValue] / (largeNum * 1.2) * rect.size.height; y1 = rect.size.height - h1; y2 = rect.size.height - h2; CGContextRef ctx = UIGraphicsGetCurrentContext(); CGContextMoveToPoint(ctx, x1, y1); CGContextAddLineToPoint(ctx, x2, y2); CGContextSetStrokeColorWithColor(ctx, self.color.CGColor); CGContextStrokePath(ctx); } } -
方式 2,贝塞尔路径方式
- (void)drawRect:(CGRect)rect { CGFloat x1 = 0; CGFloat x2 = 0; CGFloat h1 = 0; CGFloat h2 = 0; CGFloat y1 = 0; CGFloat y2 = 0; CGFloat w = rect.size.width / (self.datas.count - 1); CGFloat largeNum = [self.datas[0] floatValue]; for (int i = 0; i < self.datas.count; i++) { if ([self.datas[i] floatValue] > largeNum) { largeNum = [self.datas[i] floatValue]; } } for (int i = 0; i < self.datas.count - 1; i++) { x1 = w * i; x2 = w * (i + 1); h1 = [self.datas[i] floatValue] / (largeNum * 1.2) * rect.size.height; h2 = [self.datas[i + 1] floatValue] / (largeNum * 1.2) * rect.size.height; y1 = rect.size.height - h1; y2 = rect.size.height - h2; UIBezierPath *path = [UIBezierPath bezierPath]; [path moveToPoint:CGPointMake(x1, y1)]; [path addLineToPoint:CGPointMake(x2, y2)]; [self.color set]; [path stroke]; } } -
使用
// LineView.h @interface LineView : UIView @property (nonatomic, strong) NSArray<NSNumber *> *datas; @property (nonatomic, strong) UIColor *color; + (instancetype)lineViewWithFrame:(CGRect)frame datas:(NSArray<NSNumber *> *)datas colors:(UIColor *)color; @end // LineView.m + (instancetype)lineViewWithFrame:(CGRect)frame datas:(NSArray<NSNumber *> *)datas colors:(UIColor *)color { LineView *line = [[self alloc] init]; line.frame = frame; line.datas = datas; line.color = color; return line; } // ViewController.m CGRect frame = CGRectMake(50, 40, self.view.bounds.size.width - 100, self.view.bounds.size.width - 100); NSArray *datas = @[@30, @60, @50, @28]; LineView *lineView = [LineView lineViewWithFrame:frame datas:datas colors:[UIColor blueColor]]; lineView.layer.borderWidth = 1; [self.view addSubview:lineView]; -
效果
-
6.2 绘制柱形图
-
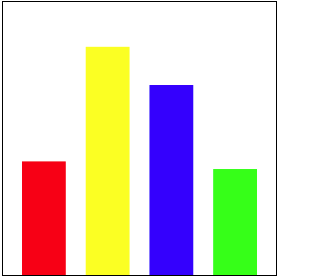
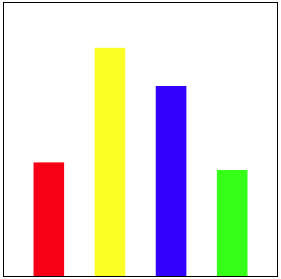
绘制柱形图
-
方式 1,原始方式
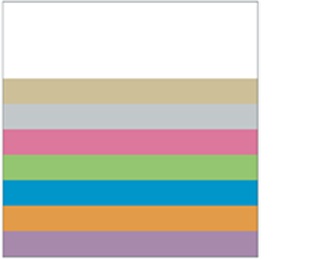
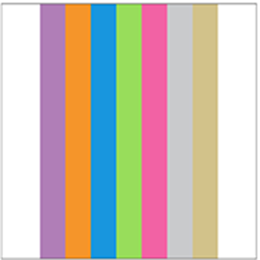
- (void)drawRect:(CGRect)rect { CGFloat x = 0; CGFloat y = 0; CGFloat h = 0; CGFloat m = self.margin; CGFloat w = self.margin ? ((rect.size.width - m) / (self.datas.count) - m) : (rect.size.width / (2 * self.datas.count + 1)); CGFloat largeNum = [self.datas[0] floatValue]; for (int i = 0; i < self.datas.count; i++) { if ([self.datas[i] floatValue] > largeNum) { largeNum = [self.datas[i] floatValue]; } } for (int i = 0; i < self.datas.count; i++) { x = self.margin ? ((m + w) * i + m) : (2 * w * i + w); h = [self.datas[i] floatValue] / (largeNum * 1.2) * rect.size.height; y = rect.size.height - h; CGContextRef ctx = UIGraphicsGetCurrentContext(); CGContextAddRect(ctx, CGRectMake(x, y, w, h)); CGContextSetFillColorWithColor(ctx, self.colors[i].CGColor); CGContextFillPath(ctx); } } -
方式 2,贝塞尔路径方式
- (void)drawRect:(CGRect)rect { CGFloat x = 0; CGFloat y = 0; CGFloat h = 0; CGFloat m = self.margin; CGFloat w = self.margin ? ((rect.size.width - m) / (self.datas.count) - m) : (rect.size.width / (2 * self.datas.count + 1)); CGFloat largeNum = [self.datas[0] floatValue]; for (int i = 0; i < self.datas.count; i++) { if ([self.datas[i] floatValue] > largeNum) { largeNum = [self.datas[i] floatValue]; } } for (int i = 0; i < self.datas.count; i++) { x = self.margin ? ((m + w) * i + m) : (2 * w * i + w); h = [self.datas[i] floatValue] / (largeNum * 1.2) * rect.size.height; y = rect.size.height - h; UIBezierPath *path = [UIBezierPath bezierPathWithRect:CGRectMake(x, y, w, h)]; [self.colors[i] set]; [path fill]; } } -
使用
// BarView.h @interface BarView : UIView @property (nonatomic, strong) NSArray<NSNumber *> *datas; @property (nonatomic, strong) NSArray<UIColor *> *colors; @property (nonatomic, assign) CGFloat margin; + (instancetype)barViewWithFrame:(CGRect)frame datas:(NSArray<NSNumber *> *)datas colors:(NSArray<UIColor *> *)colors margin:(CGFloat)margin; @end // BarView.m + (instancetype)barViewWithFrame:(CGRect)frame datas:(NSArray<NSNumber *> *)datas colors:(NSArray<UIColor *> *)colors margin:(CGFloat)margin { BarView *bar = [[self alloc] init]; bar.frame = frame; bar.datas = datas; bar.colors = colors; bar.margin = margin; return bar; } // ViewController.m CGRect frame = CGRectMake(50, 40, self.view.bounds.size.width - 100, self.view.bounds.size.width - 100); NSArray *datas = @[@30, @60, @50, @28]; NSArray *colors = @[[UIColor redColor], [UIColor yellowColor], [UIColor blueColor], [UIColor greenColor]]; CGFloat margin = 20; BarView *barView = [BarView barViewWithFrame:frame datas:datas colors:colors margin:margin]; barView.layer.borderWidth = 1; [self.view addSubview:barView]; -
效果
-
6.3 绘制饼图
-
绘制饼图
-
方式 1,原始方式
- (void)drawRect:(CGRect)rect { CGFloat radius = MIN(rect.size.width, rect.size.height) * 0.5; CGFloat rx = rect.size.width * 0.5; CGFloat ry = rect.size.height * 0.5; CGFloat startA = self.startAngle; CGFloat angle = 0; CGFloat endA = startA; CGFloat sum = 0; for (int i = 0; i < self.datas.count; i++) { sum += [self.datas[i] floatValue]; } for (int i = 0; i < self.datas.count; i++) { startA = endA; angle = [self.datas[i] floatValue] / sum * M_PI * 2; endA = startA + angle; CGContextRef ctx = UIGraphicsGetCurrentContext(); CGContextAddArc(ctx, rx, ry, radius, startA, endA, NO); CGContextAddLineToPoint(ctx, rx, ry); CGContextClosePath(ctx); CGContextSetFillColorWithColor(ctx, self.colors[i].CGColor); CGContextFillPath(ctx); } } -
方式 2,贝塞尔路径方式
- (void)drawRect:(CGRect)rect { CGFloat radius = MIN(rect.size.width, rect.size.height) * 0.5; CGPoint center = CGPointMake(rect.size.width * 0.5, rect.size.height * 0.5); CGFloat startA = self.startAngle; CGFloat angle = 0; CGFloat endA = startA; CGFloat sum = 0; for (int i = 0; i < self.datas.count; i++) { sum += [self.datas[i] floatValue]; } for (int i = 0; i < self.datas.count; i++) { startA = endA; angle = [self.datas[i] floatValue] / sum * M_PI * 2; endA = startA + angle; UIBezierPath *path = [UIBezierPath bezierPathWithArcCenter:center radius:radius startAngle:startA endAngle:endA clockwise:YES]; [path addLineToPoint:center]; [path closePath]; [self.colors[i] set]; [path fill]; } } -
使用
// PieView.h @interface PieView : UIView @property (nonatomic, strong) NSArray<NSNumber *> *datas; @property (nonatomic, strong) NSArray<UIColor *> *colors; @property (nonatomic, assign) CGFloat startAngle; + (instancetype)pieViewWithFrame:(CGRect)frame datas:(NSArray<NSNumber *> *)datas colors:(NSArray<UIColor *> *)colors startAngle:(CGFloat)startAngle; @end // PieView.m + (instancetype)pieViewWithFrame:(CGRect)frame datas:(NSArray<NSNumber *> *)datas colors:(NSArray<UIColor *> *)colors startAngle:(CGFloat)startAngle { PieView *pie = [[self alloc] init]; pie.frame = frame; pie.datas = datas; pie.colors = colors; pie.startAngle = startAngle; return pie; } // ViewController.m CGRect frame = CGRectMake(50, 40, self.view.bounds.size.width - 100, self.view.bounds.size.width - 100); NSArray *datas = @[@30, @60, @50, @28]; NSArray *colors = @[[UIColor redColor], [UIColor yellowColor], [UIColor blueColor], [UIColor greenColor]]; CGFloat startAngle = -M_PI_2; PieView *pieView = [PieView pieViewWithFrame:frame datas:datas colors:colors startAngle:startAngle]; pieView.layer.borderWidth = 1; [self.view addSubview:pieView]; -
效果

-
7、使用第三方框架绘制图表
-
使用第三方框架 Charts 绘制 iOS 图表,Charts 是一款用于绘制图表的框架,可以绘制柱状图、折线图、K线图、饼状图等。GitHub 源码 Charts
-
具体讲解见 Quartz 2D 第三方框架绘制图表
-
效果
-
折线图
-
柱状图
-
饼图
-
8、文本处理
8.1 在控件视图上绘制/添加文本
-
如果绘制东西到 view 等视图控件上面,必须写在 drawRect 方法里面,不管有没有手动获取到上下文。
-
1、绘制/添加文本
-
在指定位置绘制文本,文本不会自动换行
- (void)drawRect:(CGRect)rect { NSString *string = @"QianChia"; // 不设置文本属性 [string drawAtPoint:CGPointZero withAttributes:nil]; // 设置文本属性 [string drawAtPoint:CGPointZero withAttributes:@{NSFontAttributeName:[UIFont systemFontOfSize:50]}]; } -
在指定区域绘制文本,文本会自动换行
- (void)drawRect:(CGRect)rect { NSString *string = @"QianChia"; // 不设置文本属性 [string drawInRect:rect withAttributes:nil]; // 设置文本属性 [string drawInRect:rect withAttributes:@{NSFontAttributeName:[UIFont systemFontOfSize:50]}]; } -
效果
-
-
2、设置文本属性
NSMutableDictionary *textDict = [NSMutableDictionary dictionary]; // 设置文本字体 textDict[NSFontAttributeName] = [UIFont systemFontOfSize:50]; // 设置文本颜色 textDict[NSForegroundColorAttributeName] = [UIColor redColor]; // 设置文本的空心线条宽度 textDict[NSStrokeWidthAttributeName] = @5; // 设置文本的空心线条颜色,要使此设置有效必须设置空心线条宽度,此设置有效时前景色设置项无效 textDict[NSStrokeColorAttributeName] = [UIColor blueColor]; // 设置文本阴影,用 drawInRect 方式绘制,不添加空心属性时,文字自动换行后此设置无效 NSShadow *shadow = [[NSShadow alloc] init]; shadow.shadowColor = [UIColor blackColor]; shadow.shadowOffset = CGSizeMake(4, 4); shadow.shadowBlurRadius = 3; textDict[NSShadowAttributeName] = shadow;-
效果
-
9、图片处理
9.1 在控件视图上绘制/添加图片
-
如果绘制东西到 view 等视图控件上面,必须写在 drawRect 方法里面,不管有没有手动获取到上下文。
-
跟 view 相关联的上下文是 layer 图层上下文,需要在在 view 的 drawRect 方法中获取。跟 image 相关的上下文是 Bitmap 位图上下文,需要我们手动创建。
-
1、绘制/添加图片
-
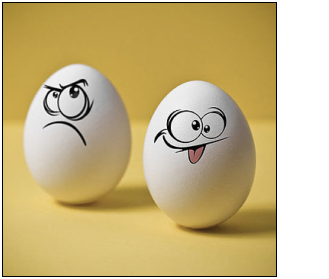
在指定位置绘制图片,图片不会进行缩放
- (void)drawRect:(CGRect)rect { UIImage *image = [UIImage imageNamed:@"demo2"]; [image drawAtPoint:CGPointZero]; } -
在指定区域绘制图片,图片会进行缩放
- (void)drawRect:(CGRect)rect { UIImage *image = [UIImage imageNamed:@"demo2"]; [image drawInRect:rect]; } -
在指定区域绘制图片,图片会以平铺的样式填充
- (void)drawRect:(CGRect)rect { UIImage *image = [UIImage imageNamed:@"demo3"]; [image drawAsPatternInRect:rect]; } -
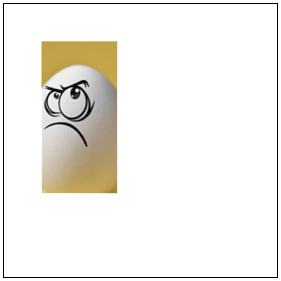
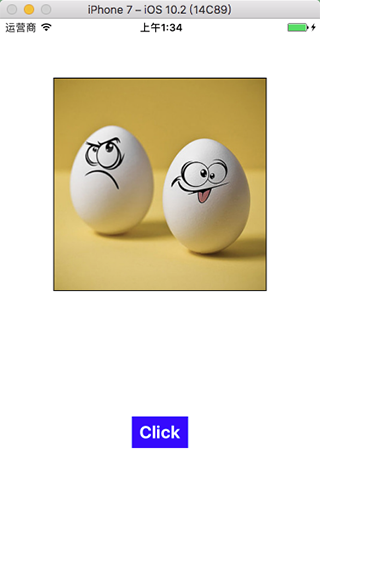
在图片上绘制图片,不是绘制在 view 视图控件上,不需写在 drawRect 方法里面
UIImage *backImage = [UIImage imageNamed:@"demo5"]; UIImage *headImage = [UIImage imageNamed:@"demo6"]; // size :图片画板(上下文)尺寸(新图片的尺寸) // opaque:是否透明,NO 不透明,YES 透明 // scale :缩放,如果不缩放,设置为 0 // 开启一个位图上下文 UIGraphicsBeginImageContextWithOptions(backImage.size, NO, 0); // UIGraphicsBeginImageContext(backImage.size); // 绘制背景图片 CGRect backRect = CGRectMake(0, 0, backImage.size.width, backImage.size.height); [backImage drawInRect:backRect]; // 绘制头像图片 CGFloat scale = 5; CGFloat w = backRect.size.width / scale; CGFloat h = backRect.size.height / scale; CGFloat x = (backRect.size.width - w) / 2; CGFloat y = (backRect.size.height - h) / 2; CGRect headRect = CGRectMake(x, y, w, h); [headImage drawInRect:headRect]; // 获取绘制好的图片 UIImage *newImage = UIGraphicsGetImageFromCurrentImageContext(); // 关闭位图上下文 UIGraphicsEndImageContext(); -
效果


-
-
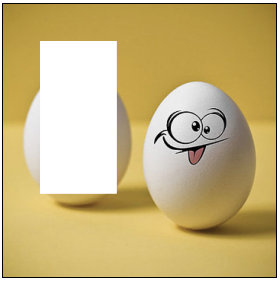
2、图片修剪
-
裁剪图片
-
先设置裁剪区域,再在指定的区域绘制图片,再裁剪/遮盖掉裁剪区域之外的部分。
UIImage *image = [UIImage imageNamed:@"demo2"]; // 开启图片上下文 UIGraphicsBeginImageContextWithOptions(image.size, NO, 0); // UIGraphicsBeginImageContext(image.size); // 设置裁剪区域,超出裁剪区域的内容全部裁剪/遮盖掉,必须放在绘制图片之前 UIRectClip(CGRectMake(50, 50, 100, 200)); // 绘制图片 [image drawInRect:CGRectMake(0, 0, image.size.width, image.size.height)]; // 获取绘制好的图片 UIImage *newImage = UIGraphicsGetImageFromCurrentImageContext(); // 关闭图片上下文 UIGraphicsEndImageContext(); -
效果

-
-
擦除图片
-
先在指定的区域绘制图片,再擦除/遮盖掉擦除区域之内的部分。
UIImage *image = [UIImage imageNamed:@"demo2"]; // 开启图片上下文 UIGraphicsBeginImageContextWithOptions(image.size, NO, 0); // UIGraphicsBeginImageContext(image.size); // 获取图片上下文 CGContextRef ctx = UIGraphicsGetCurrentContext(); // 绘制图片 [image drawInRect:CGRectMake(0, 0, image.size.width, image.size.height)]; // 设置擦除区域,擦除/遮盖掉指定区域的图片,必须放在绘制图片之后 CGContextClearRect(ctx, CGRectMake(50, 50, 100, 200)); // 获取绘制好的图片 UIImage *newImage = UIGraphicsGetImageFromCurrentImageContext(); // 关闭图片上下文 UIGraphicsEndImageContext(); -
效果

-
-
切割图片
-
切割掉切割区域之外的部分。
UIImage *image = [UIImage imageNamed:@"demo2"]; // 设置切割区域 CGRect cutRect = CGRectMake(0, 0, image.size.width / 2, image.size.height); // 切割图片 CGImageRef cgImage = CGImageCreateWithImageInRect(image.CGImage, cutRect); // 转换为 UIImage 格式图片 UIImage *newImage = [[UIImage alloc] initWithCGImage:cgImage]; CGImageRelease(cgImage); -
效果

-
-
9.2 截取屏幕
-
具体实现代码见 GitHub 源码 QExtension
-
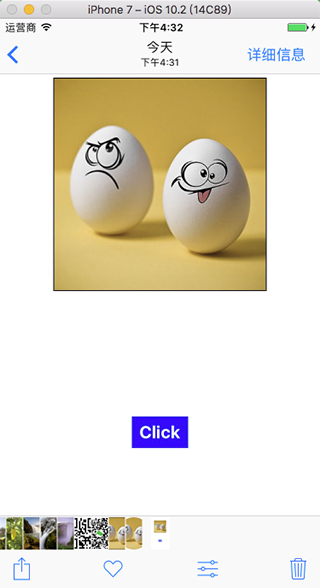
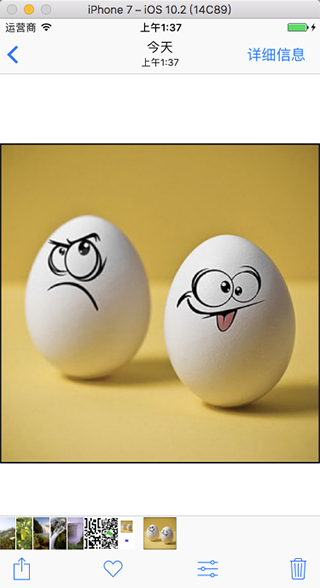
1、截取全屏幕图
	@implementation UIImage (Draw)

	+ (UIImage *)q_imageWithScreenShot {

	    UIWindow *keyWindow = [UIApplication sharedApplication].keyWindow;

	    // 开启图片上下文
	    UIGraphicsBeginImageContextWithOptions(keyWindow.bounds.size, NO, [UIScreen mainScreen].scale);
	    // UIGraphicsBeginImageContext(keyWindow.bounds.size);

	    // 获取图片上下文
	    CGContextRef context = UIGraphicsGetCurrentContext();

	    // 在 context 上渲染
	    [keyWindow.layer renderInContext:context];

	    // 从图片上下文获取当前图片
	    UIImage *screenShot = UIGraphicsGetImageFromCurrentImageContext();

	    // 关闭图片上下文
	    UIGraphicsEndImageContext();

	    return screenShot;
	}

	@end
// 截取全屏幕图 UIImage *image = [UIImage q_imageWithScreenShot]; UIImageWriteToSavedPhotosAlbum(image, nil, nil, nil);-
效果

-
-
2、截取指定视图控件屏幕图
	@implementation UIImage (Draw)

	+ (UIImage *)q_imageWithScreenShotFromView:(UIView *)view {

	    // 开启图片上下文
	    UIGraphicsBeginImageContextWithOptions(view.bounds.size, NO, [UIScreen mainScreen].scale);
	    // UIGraphicsBeginImageContext(view.bounds.size);

	    // 获取图片上下文
	    CGContextRef context = UIGraphicsGetCurrentContext();

	    // 在 context 上渲染
	    [view.layer renderInContext:context];

	    // 从图片上下文获取当前图片
	    UIImage *screenShot = UIGraphicsGetImageFromCurrentImageContext();

	    // 关闭图片上下文
	    UIGraphicsEndImageContext();

	    return screenShot;
	}

	@end
// 截取指定视图控件屏幕图 UIImage *image = [UIImage q_imageWithScreenShotFromView:self.imageView]; UIImageWriteToSavedPhotosAlbum(image, nil, nil, nil);-
效果
-
9.3 调整图片尺寸
-
具体实现代码见 GitHub 源码 QExtension
-
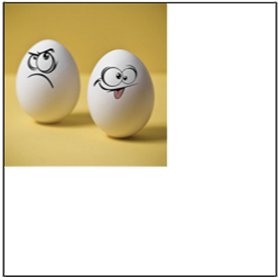
调整图片尺寸
	@implementation UIImage (Draw)

	- (UIImage *)q_imageByScalingAndCroppingToSize:(CGSize)size {

	    // 开启图片上下文
	    UIGraphicsBeginImageContextWithOptions(size, NO, 0);
	    // UIGraphicsBeginImageContext(size);

	    // 在指定的区域内绘制图片
	    [self drawInRect:CGRectMake(0, 0, size.width, size.height)];

	    // 从图片上下文获取当前图片
	    UIImage *image = UIGraphicsGetImageFromCurrentImageContext();

	    // 关闭图片上下文
	    UIGraphicsEndImageContext();

	    return image;
	}

	@end
// 调整图片的尺寸 UIImage *image = [UIImage imageNamed:@"demo2"]; UIImage *newImage = [image q_imageByScalingAndCroppingToSize:CGSizeMake(150, 150)];-
效果

-
9.4 裁剪圆形图片
-
具体实现代码见 GitHub 源码 QExtension
-
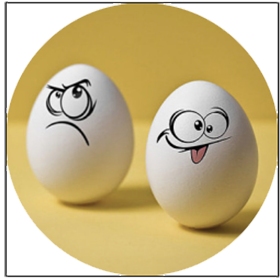
裁剪圆形图片
	@implementation UIImage (Draw)

	- (UIImage *)q_imageByCroppingToRound {

	    // 开启图片上下文
	    UIGraphicsBeginImageContextWithOptions(self.size, NO, 0);
	    // UIGraphicsBeginImageContext(self.size);

	    // 设置裁剪路径
	    CGFloat w = self.size.width;
	    CGFloat h = self.size.height;
	    CGFloat wh = MIN(self.size.width, self.size.height);
	    CGRect clipRect = CGRectMake((w - wh) / 2, (h - wh) / 2, wh, wh);
	    UIBezierPath *path = [UIBezierPath bezierPathWithOvalInRect:clipRect];

	    // 裁剪
	    [path addClip];

	    // 绘制图片
	    [self drawAtPoint:CGPointZero];

	    // 从图片上下文获取当前图片
	    UIImage *image = UIGraphicsGetImageFromCurrentImageContext();

	    // 关闭图片上下文
	    UIGraphicsEndImageContext();

	    // 切割图片
	    CGRect cutRect = CGRectMake(w - wh, h - wh, wh * 2, wh * 2);
	    CGImageRef imageRef = image.CGImage;
	    CGImageRef cgImage = CGImageCreateWithImageInRect(imageRef, cutRect);
	    UIImage *newImage = [[UIImage alloc] initWithCGImage:cgImage];
	    CGImageRelease(cgImage);

	    return newImage;
	}

	@end
// 裁剪圆形图片 UIImage *image = [UIImage imageNamed:@"demo2"]; UIImage *newImage = [image q_imageByCroppingToRound];-
效果

-
9.5 添加图片水印
-
具体实现代码见 GitHub 源码 QExtension
-
水印在图片上加的防止他人盗图的半透明 logo、文字、图标。有时候,在手机客户端 app 中也需要用到水印技术。比如,用户拍完照片后,可以在照片上打个水印,标识这个图片是属于哪个用户的。
-
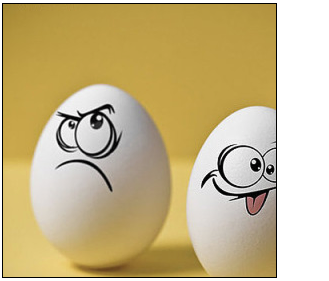
添加图片水印
	@implementation UIImage (Draw)

	- (UIImage *)q_imageWithWaterMarkString:(nullable NSString *)string
	                             attributes:(nullable NSDictionary<NSString *, id> *)attrs
	                                  image:(nullable UIImage *)image
	                                  frame:(CGRect)frame {

	    // 开启图片上下文
	    UIGraphicsBeginImageContextWithOptions(self.size, NO, 0);
	    // UIGraphicsBeginImageContext(self.size);

	    // 绘制背景图片
	    CGRect backRect = CGRectMake(0, 0, self.size.width, self.size.height);
	    [self drawInRect:backRect];

	    CGRect strRect = frame;

	    // 添加图片水印
	    if (image) {

	        if ((frame.origin.x == -1) && (frame.origin.y == -1)) {

	            CGFloat w  = frame.size.width;
	            CGFloat h = frame.size.height;
	            CGFloat x = (backRect.size.width - w) / 2;
	            CGFloat y = (backRect.size.height - h) / 2;

	            [image drawInRect:CGRectMake(x, y, w, h)];
	        } else {

	            [image drawInRect:frame];

	            strRect = CGRectMake(frame.origin.x + frame.size.width + 5, frame.origin.y, 1, 1);
	        }
	    }

	    // 添加文字水印
	    if (string) {

	        if ((frame.origin.x == -1) && (frame.origin.y == -1)) {

	        } else {
	            [string drawAtPoint:strRect.origin withAttributes:attrs];
	        }
	    }

	    // 获取绘制好的图片
	    UIImage *newImage = UIGraphicsGetImageFromCurrentImageContext();

	    // 关闭位图上下文
	    UIGraphicsEndImageContext();

	    return newImage;
	}
	@end
UIImage *image = [UIImage imageNamed:@"demo2"]; // 设置水印文本属性 NSMutableDictionary *textAttrs = [NSMutableDictionary dictionary]; textAttrs[NSFontAttributeName] = [UIFont boldSystemFontOfSize:50]; textAttrs[NSForegroundColorAttributeName] = [[UIColor redColor] colorWithAlphaComponent:0.2]; textAttrs[NSStrokeWidthAttributeName] = @5; // 添加图片水印 self.imageView.image = [image q_imageWithWaterMarkString:@"QianChia" attributes:textAttrs image:nil frame:CGRectMake(30, 300, 50, 50)];UIImage *image = [UIImage imageNamed:@"demo5"]; // 添加图片水印 self.imageView.image = [image q_imageWithWaterMarkString:nil attributes:nil image:[UIImage imageNamed:@"demo8"] frame:CGRectMake(-1, -1, 88, 88)];-
效果

-
10、Quartz 2D 的使用
10.1 绘制下载进度按钮
-
具体实现代码见 GitHub 源码 QExtension
-
具体讲解见 Quartz 2D 下载进度按钮绘制
// 创建进度按钮 QProgressButton *progressButton = [QProgressButton q_progressButtonWithFrame:CGRectMake(100, 100, 100, 50) title:@"开始下载" lineWidth:10 lineColor:[UIColor blueColor] textColor:[UIColor redColor] backgroundColor:[UIColor yellowColor] isRound:YES]; // 设置按钮点击事件 [progressButton addTarget:self action:@selector(progressUpdate:) forControlEvents:UIControlEventTouchUpInside]; // 将按钮添加到当前控件显示 [self.view addSubview:progressButton]; // 设置按钮的进度值 self.progressButton.progress = progress; // 设置按钮的进度终止标题,一旦设置了此标题进度条就会停止 self.progressButton.stopTitle = @"下载完成"; -
效果
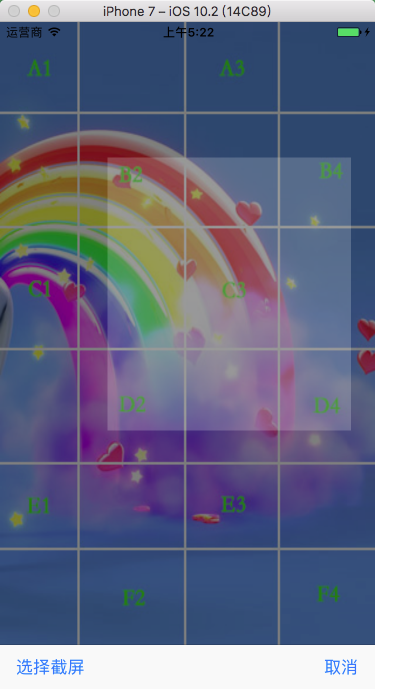
10.2 绘制手势截屏
-
具体实现代码见 GitHub 源码 QExtension
-
具体讲解见 Quartz 2D 手势截屏绘制
// 创建手势截屏视图 QTouchClipView *touchClipView = [QTouchClipView q_touchClipViewWithView:self.imageView clipResult:^(UIImage * _Nullable image) { // 获取处理截屏结果 if (image) { UIImageWriteToSavedPhotosAlbum(image, self, @selector(image:didFinishSavingWithError:contextInfo:), nil); } }]; // 添加手势截屏视图 [self.view addSubview:touchClipView]; -
效果
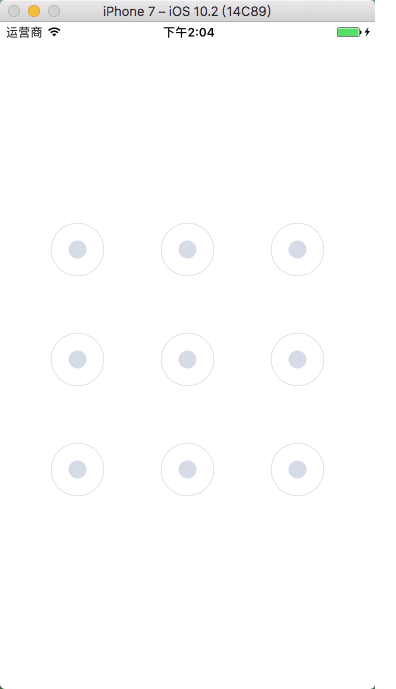
10.3 绘制手势锁
-
具体实现代码见 GitHub 源码 QExtension
-
具体讲解见 Quartz 2D 手势锁绘制
// 设置 frame CGFloat margin = 50; CGFloat width = self.view.bounds.size.width - margin * 2; CGRect frame = CGRectMake(margin, 200, width, width); // 创建手势锁视图界面,获取滑动结果 QTouchLockView *touchLockView = [QTouchLockView q_touchLockViewWithFrame:frame pathResult:^(BOOL isSucceed, NSString * _Nonnull result) { // 处理手势触摸结果 [self dealTouchResult:result isSucceed:isSucceed]; }]; [self.view addSubview:touchLockView];-
效果
-
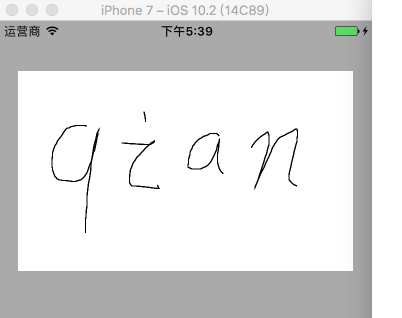
10.4 绘制画板
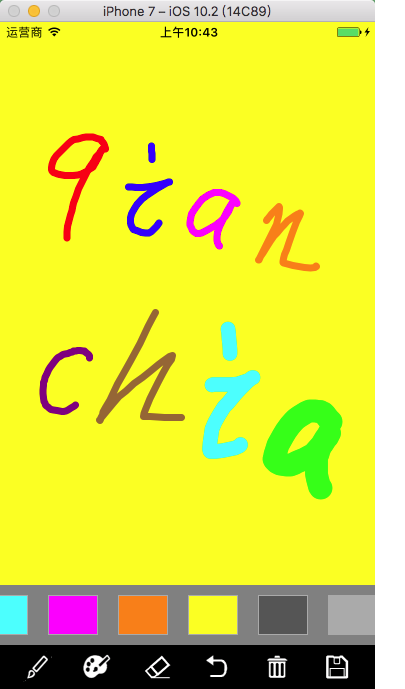
- 具体讲解见 Quartz 2D 画板绘制
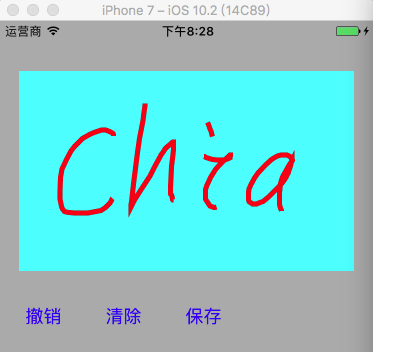
10.4.1 绘制简单画板
-
绘制简单画板
// 创建画板 CGRect frame = CGRectMake(20, 50, self.view.bounds.size.width - 40, 200); PaintBoardView *paintBoard = [[PaintBoardView alloc] initWithFrame:frame]; [self.view addSubview:paintBoard]; -
效果
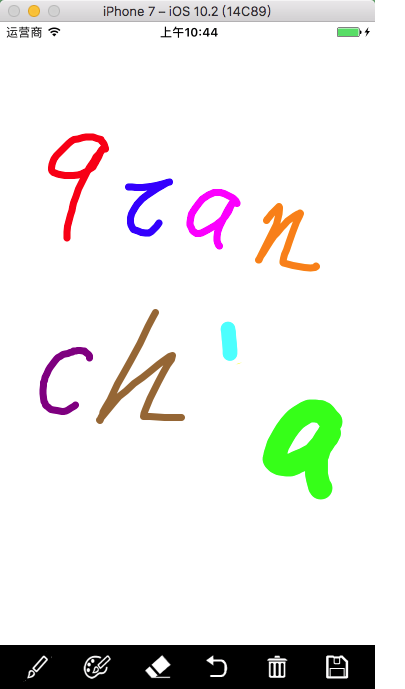
10.4.2 绘制画板封装
-
具体实现代码见 GitHub 源码 QExtension
-
1、创建简单画板
// 创建简单画板 CGRect frame = CGRectMake(20, 50, self.view.bounds.size.width - 40, 200); QPaintBoardView *paintBoardView = [QPaintBoardView q_paintBoardViewWithFrame:frame]; // 可选属性值设置 paintBoardView.paintLineWidth = 5; // default is 1 paintBoardView.paintLineColor = [UIColor redColor]; // default is blackColor paintBoardView.paintBoardColor = [UIColor cyanColor]; // default is whiteColor [self.view addSubview:paintBoardView]; self.paintBoardView = paintBoardView; // 撤销绘画结果 [self.paintBoardView q_back]; // 清除绘画结果 [self.paintBoardView q_clear]; // 获取绘画结果 UIImage *image = [self.paintBoardView q_getPaintImage];-
效果
-
-
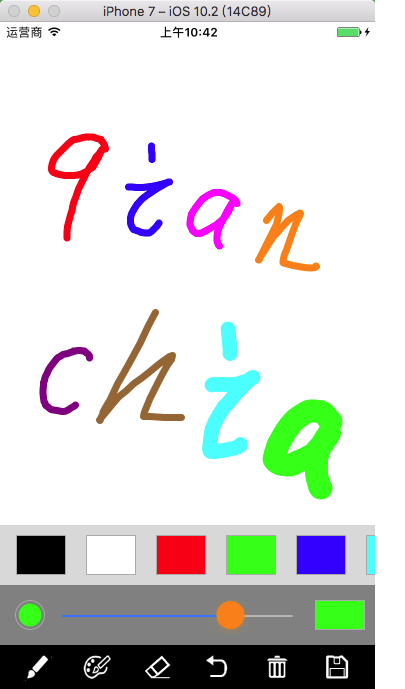
2、创建画板
// 创建画板 QPaintBoardView *paintBoard = [QPaintBoardView q_paintBoardViewWithFrame:self.view.bounds lineWidth:0 lineColor:nil boardColor:nil paintResult:^(UIImage * _Nullable image) { if (image) { NSData *data = UIImagePNGRepresentation(image); [data writeToFile:@"/Users/JHQ0228/Desktop/Images/pic.png" atomically:YES]; } }]; [self.view addSubview:paintBoard];-
效果
-
10.5 刮奖模拟
-
刮奖
- (IBAction)scratchBtnClick:(id)button { [button removeFromSuperview]; [self.forImageView removeFromSuperview]; } - (void)touchesBegan:(NSSet<UITouch *> *)touches withEvent:(UIEvent *)event { CGPoint startPoint = [touches.anyObject locationInView:self.cerImageView]; CGRect startRect = CGRectMake(startPoint.x - 10, startPoint.y - 10, 20, 20); [self clearRect:startRect imageView:self.cerImageView]; } - (void)touchesMoved:(NSSet<UITouch *> *)touches withEvent:(UIEvent *)event { CGPoint touchPoint = [touches.anyObject locationInView:self.cerImageView]; CGRect touchRect = CGRectMake(touchPoint.x - 10, touchPoint.y - 10, 20, 20); [self clearRect:touchRect imageView:self.cerImageView]; } - (void)clearRect:(CGRect)rect imageView:(UIImageView *)imageView { UIGraphicsBeginImageContextWithOptions(imageView.bounds.size, NO, 0); CGContextRef ctx = UIGraphicsGetCurrentContext(); [imageView.layer renderInContext:ctx]; // 设置擦除区域 CGContextClearRect(ctx, rect); UIImage *newImage = UIGraphicsGetImageFromCurrentImageContext(); imageView.image = newImage; UIGraphicsEndImageContext(); }-
效果
-