最近发现SpringCloud构建微服务架构中,网上很多只是用到了SpringBoot2.x之前的版本,显然使用SpringBoot2.x之后构建,网上的资料会给初学者带来很多不方便,而且没有多大的参考价值,所以,这里将使用SpringBoot2.0.0版本,构建SpringCloud Eureka服务治理。
服务治理分了两部分:注册中心和服务提供者
工具环境:IntelliJ IDEA
一、搭建注册中心
1、打开IDEA,File->new->Project->maven...
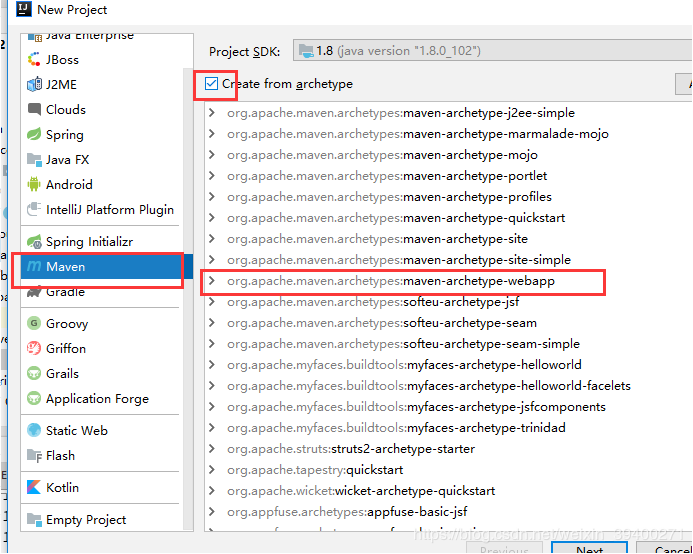
如上图所示,这一步很重要,因为创建maven项目可以有很多种方式,如果构建简单的项目,可以选择快速maven,但是SpringCloud Eureka肯定必须要选择那个webapp项目,不然的话,结果出来会无法正常访问Spring Eureka页面。创建项目的后续操作这里不详细述说,相信很多玩过maven项目的都会。
2、配置pom文件,导入相关包
<!-- SpringBoot 2.0.0 依赖 -->
<parent>
<groupId>org.springframework.boot</groupId>
<artifactId>spring-boot-starter-parent</artifactId>
<version>2.0.0.RELEASE</version>
<relativePath/>
</parent>

<!-- JUnit测试依赖 -->
<dependencies>
<dependency>
<groupId>junit</groupId>
<artifactId>junit</artifactId>
<version>4.11</version>
<scope>test</scope>
</dependency>

<!-- 添加spring-boot-starter-web模块依赖 -->
<dependency>
<groupId>org.springframework.boot</groupId>
<artifactId>spring-boot-starter-web</artifactId>
</dependency>

<!-- spring cloud 配置依赖, 这个可以先不导入 -->
<dependency>
<groupId>org.springframework.cloud</groupId>
<artifactId>spring-cloud-starter-config</artifactId>
</dependency>

<!-- SpringCloud Eureka依赖 -->
<dependency>
<groupId>org.springframework.cloud</groupId>
<artifactId>spring-cloud-starter-netflix-eureka-server</artifactId>
</dependency>

</dependencies>

<!-- Spring Cloud 管理依赖 -->
<dependencyManagement>
<dependencies>
<dependency>
<groupId>org.springframework.cloud</groupId>
<artifactId>spring-cloud-dependencies</artifactId>
<version>Finchley.RELEASE</version>
<type>pom</type>
<scope>import</scope>
</dependency>
</dependencies>
</dependencyManagement>
上面的信息是主要的依赖导入,这里特别需要指出几个注意点:
①eureka-server包

对于SpringBoot2.0.0,是使用spring-cloud-starter-netflix-eureka-server;对于一些低版本的SpringBoot,是使用spring-cloud-starter-eureka-server;如果使用版本不匹配,就会无法导入@EnableEurekaServer。
②SpringCloud集中管理版本

对于SpringBoot2.x版本,SpringCloud应该使用Finchley版本,SpringCloud的版本命名是根据英国街道名字,具体可以百科一下,下面给出不同SpringBoot版本对应的SpringCloud版本代号:

详细可以参考:https://blog.csdn.net/54powerman/article/details/79163440
3、配置application.properties文件(有些人喜欢用yaml,这里使用.properties)
完整application.properties配置如下:
server.port=1111
eureka.instance.hostname=localhost
spring.application.name=hello-service1
#由于该应用是注册中心,false:代表不向注册中心注册自己;true:代表注册自己
eureka.client.register-with-eureka=false
#是否启动检测服务,由于注册中心的职责是维护服务实例,所以它不需要检服务
eureka.client.fetch-registry=false
eureka.client.service-url.defaultZone=http://${eureka.instance.hostname}:${server.port}/eureka/
4、配置启动类
package com.cjs;

import org.springframework.boot.SpringApplication;
import org.springframework.boot.autoconfigure.SpringBootApplication;
import org.springframework.cloud.netflix.eureka.server.EnableEurekaServer;

/**
* Hello world!
*
*/
@SpringBootApplication
@EnableEurekaServer
public class App
{
    public static void main( String[] args )
    {
        System.out.println( "Hello World!" );
        SpringApplication.run(App.class, args);
    }
}
@EnableEurekaServer表示,此项目作为Eureka服务中心
最后,启动项目,在网页上输入:http://127.0.0.1:1111,就会跳到Spring Eureka的界面,如下图:

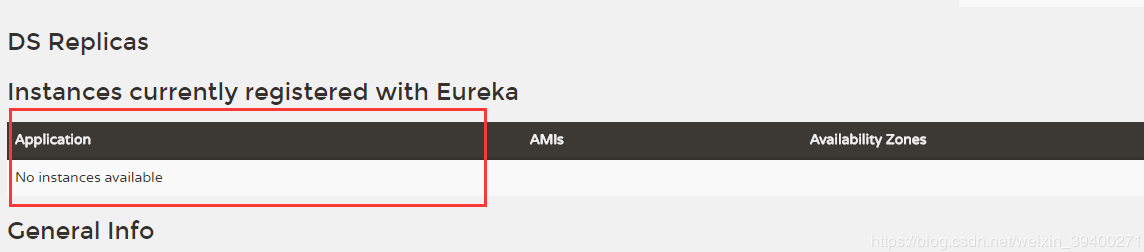
出现上面图片,证明搭建注册中心成功。注意红色框,显示没有“实例”(“服务”)可用,当然了,首先,properties文件已经关掉服务中心自己注册自己的功能,其次,没有其他服务提供者使用1111端口管理。
二、搭建服务提供者
步骤跟搭建注册中心一模一样,可以直接copy过去,需要修改几点位置:
①properties文件
#设置服务提供者名字
spring.application.name=hello-server-index

eureka.instance.hostname=localhost

eureka.client.service-url.defaultZone=http://${eureka.instance.hostname}:1111/eureka/
②启动类文件
package com.cjs;

import org.springframework.boot.SpringApplication;
import org.springframework.boot.autoconfigure.SpringBootApplication;
import org.springframework.cloud.client.discovery.EnableDiscoveryClient;
import org.springframework.cloud.netflix.eureka.server.EnableEurekaServer;

@SpringBootApplication
@EnableDiscoveryClient
public class App {
    public static void main(String[] args){
        System.out.println("启动————提供服务者");
        SpringApplication.run(App.class, args);
    }
}
在注册中心是使用@EnableEurekaServer,而在服务提供者这里,要使用@EnableDiscoveryClient。
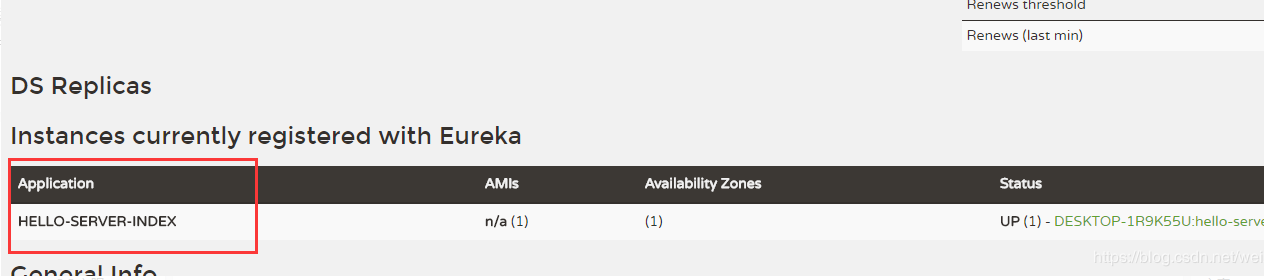
最后,在启动注册中心的基础上,再将此项目也启动一下,再次访问http:127.0.0.1:1111,这是就会发现:

这里可以看到刚才创建的服务提供者的名字。
接下来,再服务提供者项目里创建一个简单的Controller,用来测试,
package com.cjs.controller;

import org.springframework.beans.factory.annotation.Autowired;
import org.springframework.stereotype.Controller;
import org.springframework.web.bind.annotation.RequestMapping;
import org.springframework.web.bind.annotation.ResponseBody;

import java.util.logging.Logger;

@Controller
public class HelloController {
    @Autowired
    private DiscoveryClient client;

    @RequestMapping("/index")
    @ResponseBody
    public String index() {
        return "hello World";
    }
}
访问http://127.0.0.1:8080/index(注意:这里端口为8080),会出现下面效果:
以上就是简单搭建Eureka的注册中心和服务提供者的操作步骤与注意点,希望对于各位读者有帮助。