系统 centos7
远程连接工具MobaXterm
一、虚拟机
虚拟机配置
下载安装VMware Station,下载centos7
新建虚拟机
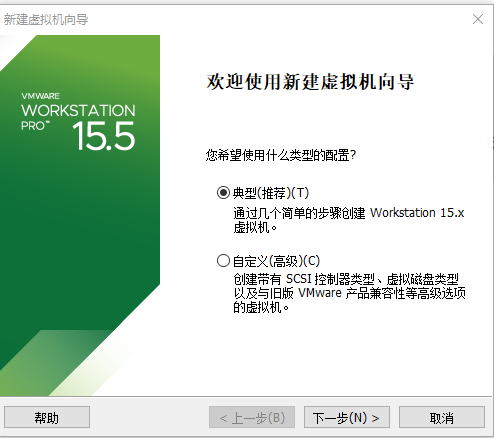
下一步

稍后安装操作系统,下一步
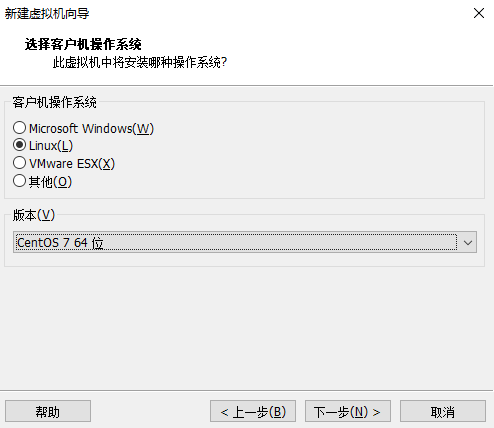
操作系统选择,下一步

修改名称和位置,下一步
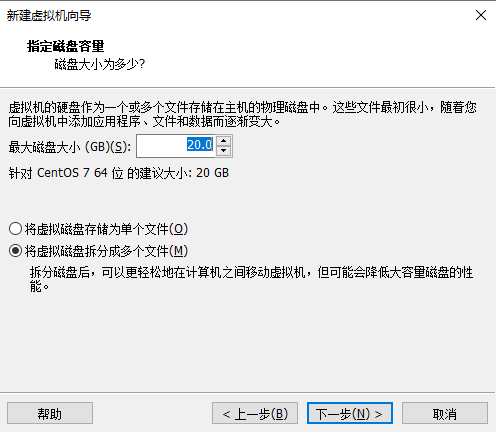
下一步
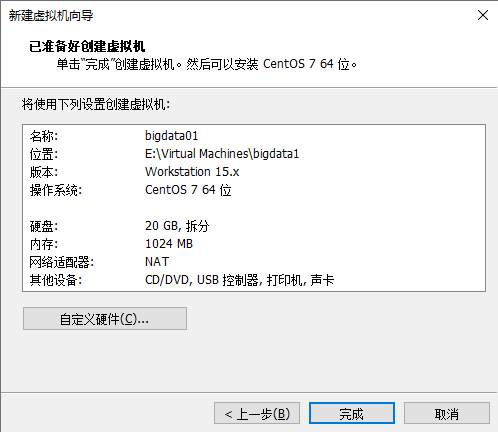
完成
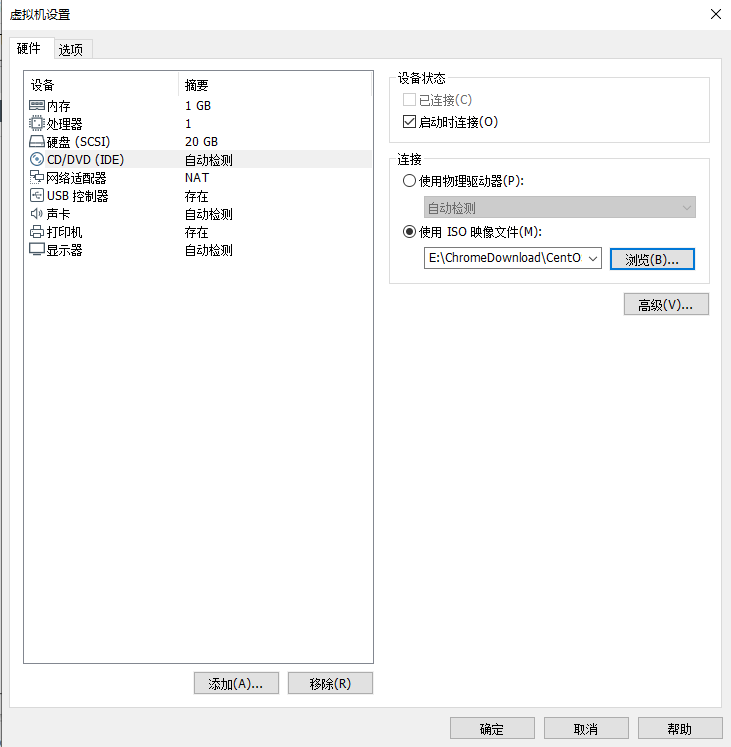
新建虚拟机右键,虚拟机设置,CD/DVD选择ISO映像文件
开启虚拟机
选择语言

继续

点 安装位置
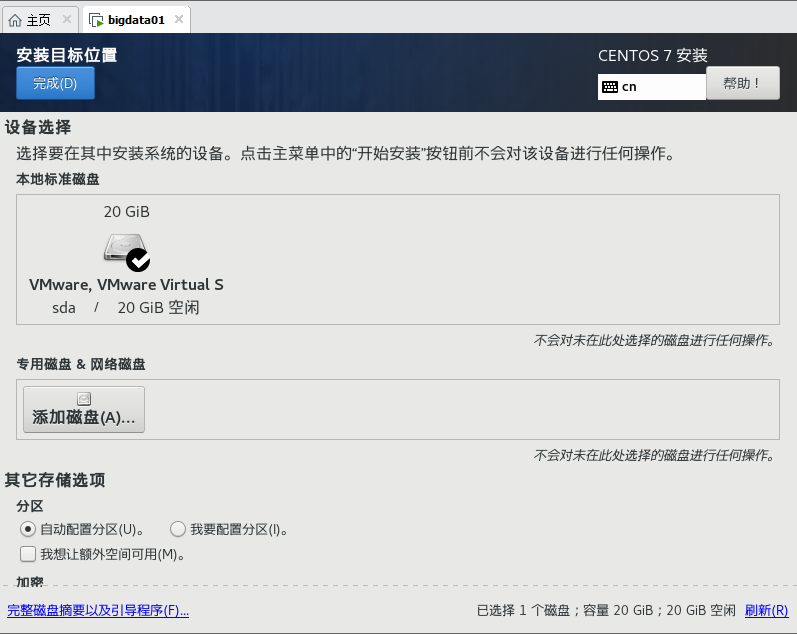
点 完成
软件选择 保持最小安装
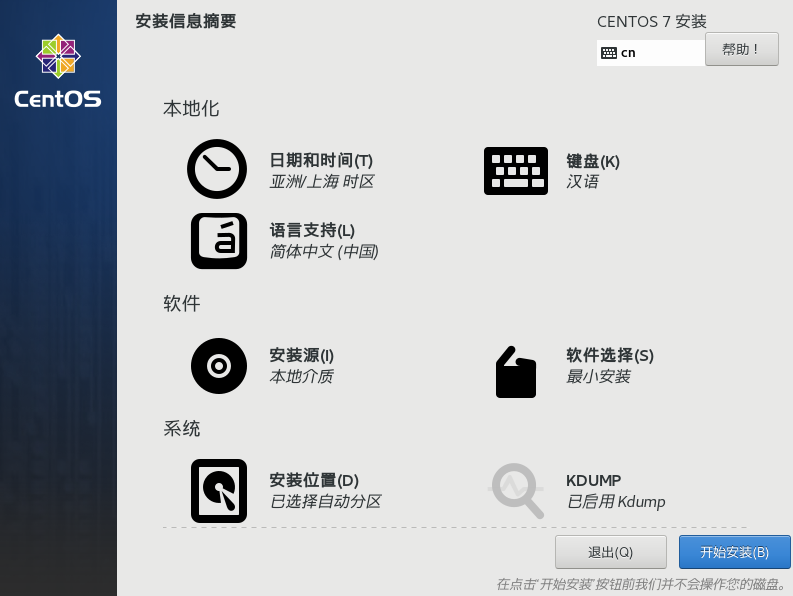
开始安装
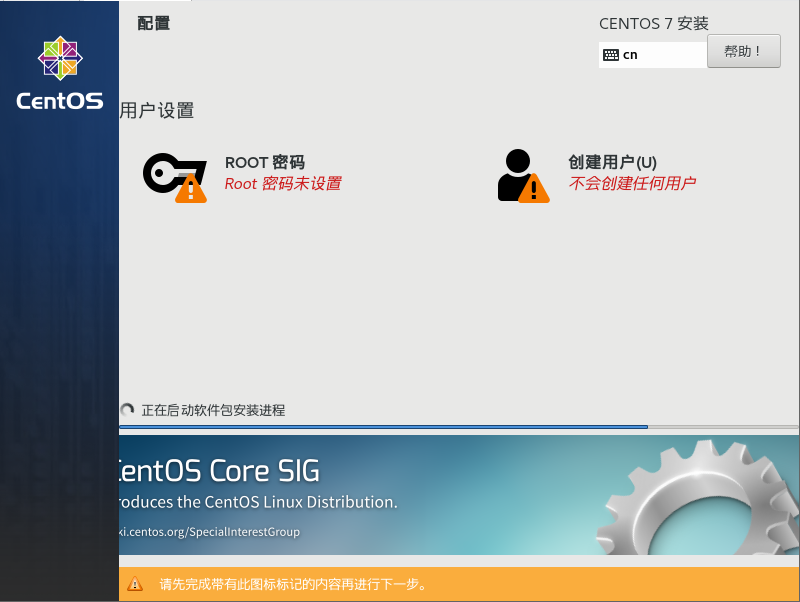
设置ROOT密码
zh**j**123
安装完成重启
打开网络连接
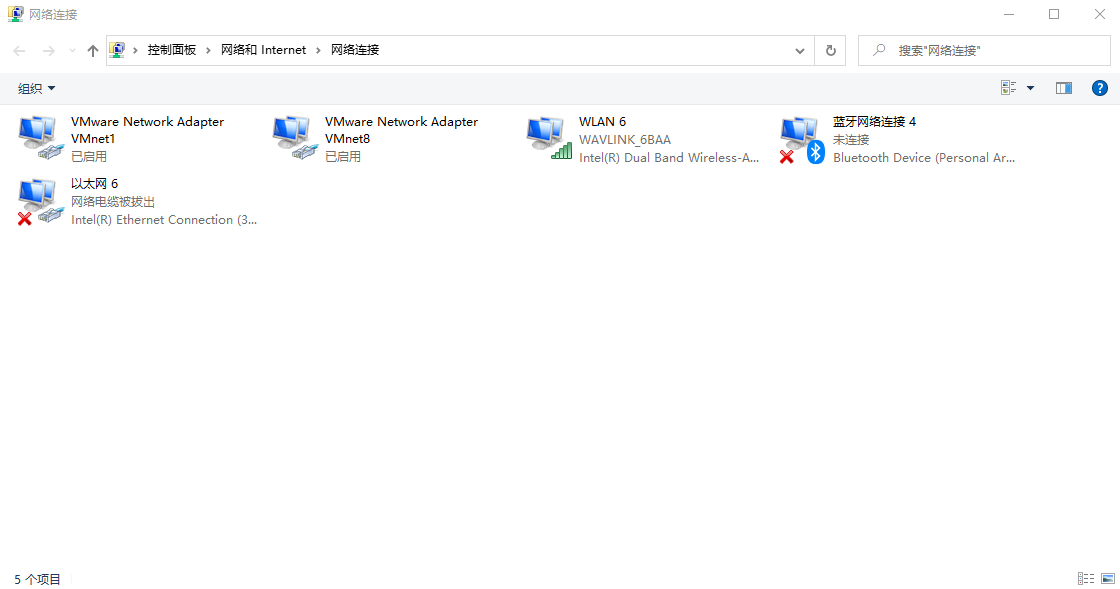
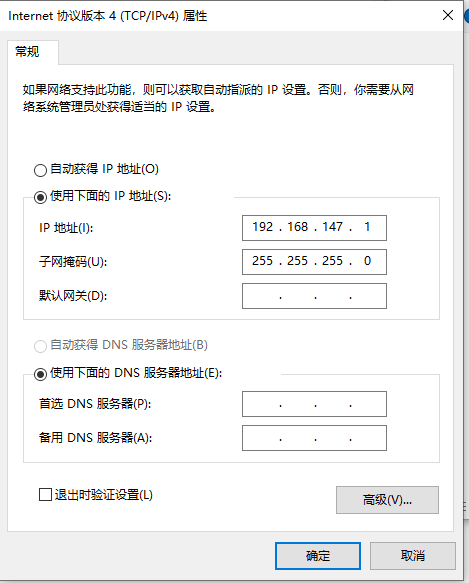
查看VMnet8属性,查看Internet协议版本4
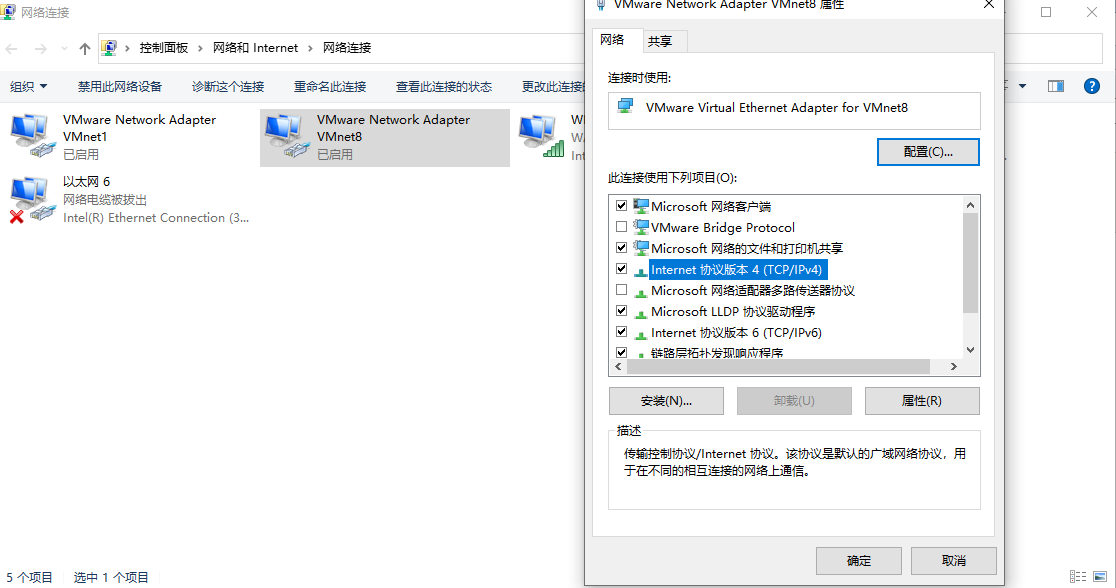
记住IP地址和子网掩码
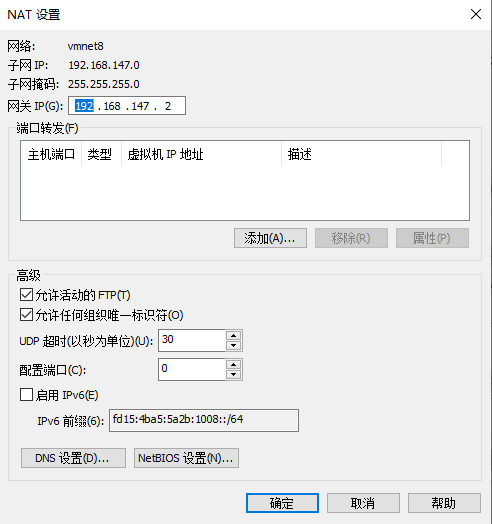
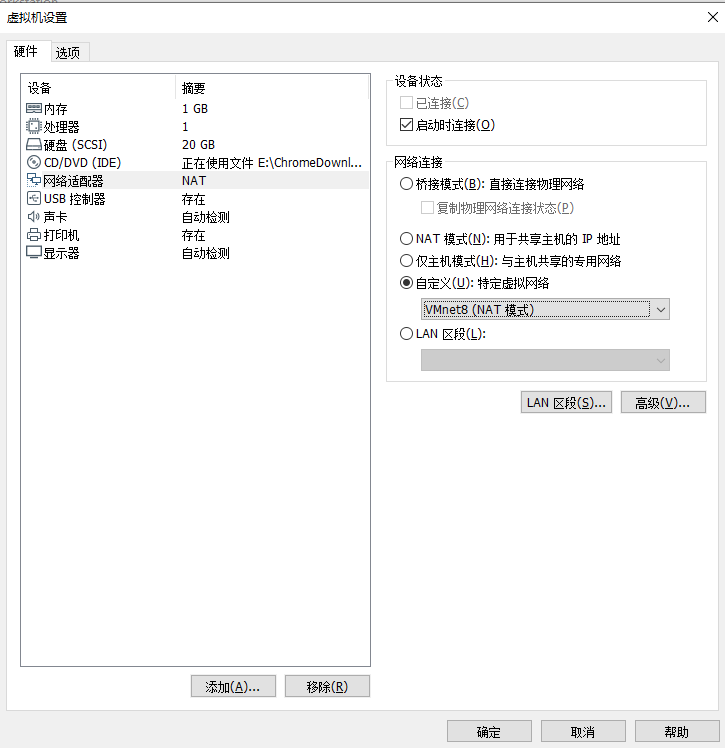
编辑,虚拟网络编辑器,选 VMnet8,取消勾选 使用本地DHCP服务将IP地址分配给虚拟机

点 NAT 设置,记住网关IP
虚拟机--->设置--->网络适配器,网络连接点 自定义,选VMnet8
进入系统
进入/etc/sysconfig/network-scripts目录,修改ifcfg-ens33
vi /etc/sysconfig/network-scripts/ifcfg-ens33
修改配置
TYPE=Ethernet
PROXY_METHOD=none
BROWSER_ONLY=no
BOOTPROTO=static
DEFROUTE=yes
IPV4_FAILURE_FATAL=no
IPV6INIT=yes
IPV6_AUTOCONF=yes
IPV6_DEFROUTE=yes
IPV6_FAILURE_FATAL=no
IPV6_ADDR_GEN_MODE=stable-privacy
NAME=ens33
UUID=aae5b9e2-96b2-416f-a009-f8e0c041edca
DEVICE=ens33
ONBOOT=yes
IPADDR=192.168.147.8
NETMASK=255.255.255.0
GATEWAY=192.168.147.2
DNS=192.168.147.2
DNS1=8.8.8.8
BOOTPROTO=static,设置网卡引导协议为 静态ONBOOT=yes,设置网卡启动方式为 开机启动 并且可以通过系统服务管理器 systemctl 控制网卡重启网络服务
systemctl restart network测试
[root@localhost network-scripts]# ping www.baidu.com
PING www.wshifen.com (104.193.88.77) 56(84) bytes of data.
64 bytes from 104.193.88.77 (104.193.88.77): icmp_seq=2 ttl=128 time=256 ms
64 bytes from 104.193.88.77 (104.193.88.77): icmp_seq=3 ttl=128 time=321 ms
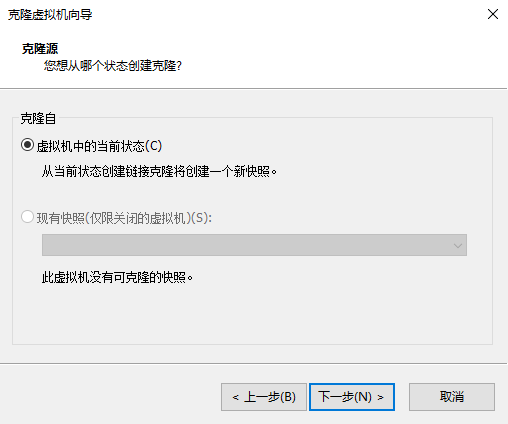
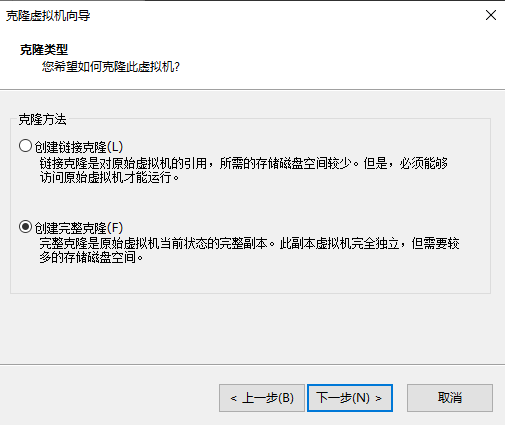
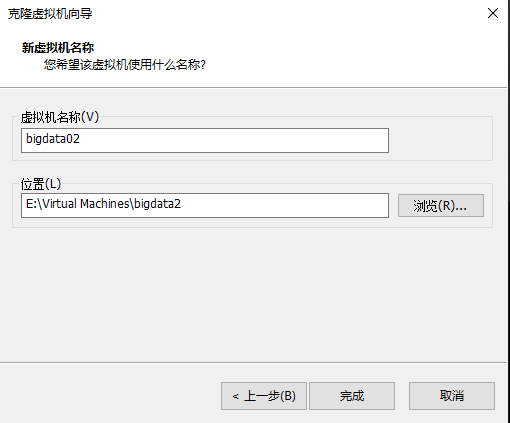
克隆另外两台主机,名称为bigdata2,bigdata3,ip为192.168.147.9、192.168.147.10
下一步
下一步
下一步
二、阿里云
2.1 阿里云准备
1.三台CES
2.若需要,购买公网弹性IP并绑定
3.若需要,可以购买云盘
挂载数据盘
阿里云购买的第2块云盘默认是不自动挂载的,需要手动配置挂载上。
(1)查看SSD云盘
sudo fdisk -l

可以看到SSD系统已经识别为/dev/vdb
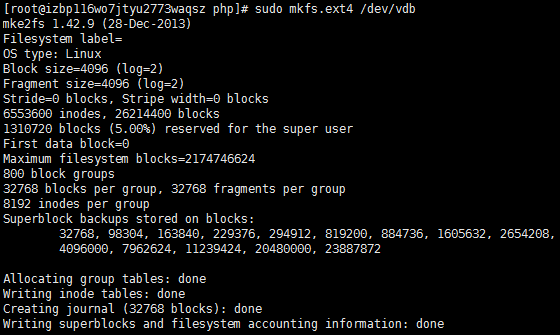
(2)格式化云盘
sudo mkfs.ext4 /dev/vdb
(3)挂载
sudo mount /dev/vdb /opt
将云盘挂载到/opt目录下。
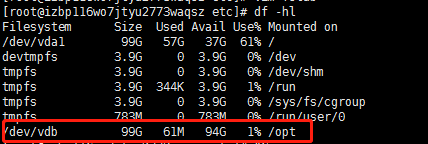
(4)配置开机自动挂载
修改/etc/fstab文件,文件末尾添加:
/dev/vdb /opt ext4 defaults 0 0
然后df -hl就可以看到第二块挂载成功咯
如果是正在使用中的系统盘容量不够了,扩容系统盘
yum install cloud-utils-growpart

growpart /dev/vda 1

resize2fs /dev/vda1
三、准备
关闭防火墙
centos 7 默认使用的是firewall,不是iptables
 systemctl stop firewalld.service
 systemctl mask firewalld.service
关闭SELinux(所有节点)
 vim /etc/selinux/config

 设置SELINUX=disabled
修改主机名
分别命名为node01、node02、node03
以node01为例
[root@node01 ~]# hostnamectl set-hostname node01
[root@node01 ~]# cat /etc/hostname
node01
已经修改,重新登录即可。
修改 /etc/hosts文件
127.0.0.1   localhost localhost.localdomain localhost4 localhost4.localdomain4
::1         localhost localhost.localdomain localhost6 localhost6.localdomain6
192.168.147.8 node01
192.168.147.9 node02
192.168.147.10 node03
配置免密登录
生成私钥和公钥
ssh-keygen -t rsa
将公钥拷贝到要免密登录的目标机器上
ssh-copy-id node01
ssh-copy-id node02
ssh-copy-id node03
编写几个有用的脚本文件
使用rsync编写xsync
#!/bin/sh
# 获取输入参数个数,如果没有参数,直接退出
pcount=$#
if((pcount==0)); then
        echo no args...;
        exit;
fi

# 获取文件名称
p1=$1
fname=`basename $p1`
echo fname=$fname
# 获取上级目录到绝对路径
pdir=`cd -P $(dirname $p1); pwd`
echo pdir=$pdir
# 获取当前用户名称
user=`whoami`
# 循环
for((host=1; host<=3; host++)); do
        echo $pdir/$fname $user@slave$host:$pdir
        echo ==================slave$host==================
        rsync -rvl $pdir/$fname $user@slave$host:$pdir
done
#Note:这里的slave对应自己主机名,需要做相应修改。另外,for循环中的host的边界值由自己的主机编号决定
xcall.sh
#! /bin/bash

for host in node01 node02 node03
do
    echo ------------ $i -------------------
    ssh $i "$*"
done
执行上面脚本之前将/etc/profile中的环境变量追加到~/.bashrc中,否则ssh执行命令会报错
[root@node01 bigdata]# cat /etc/profile >> ~/.bashrc
[root@node02 bigdata]# cat /etc/profile >> ~/.bashrc
[root@node03 bigdata]# cat /etc/profile >> ~/.bashrc
创建/bigdata目录
JDK配置
下载JDK,这里我们下载JDK8,https://www.oracle.com/java/technologies/javase/javase-jdk8-downloads.html
需要Oracale账号密码,可以网络搜索
上传JDK到各个节点的/bigdata目录下
解压缩
tar -zxvf jdk-8u241-linux-x64.tar.gz
文件属主和属组如果不是root进行修改,下面是

Linux系统按文件所有者、文件所有者同组用户和其他用户来规定了不同的文件访问权限。
1、chgrp:更改文件属组
语法:
chgrp [-R] 属组名 文件名2、chown:更改文件属主,也可以同时更改文件属组
语法:
chown [–R] 属主名 文件名
chown [-R] 属主名:属组名 文件名
创建软连接
ln -s /root/bigdata/jdk1.8.0_241/ /usr/local/jdk
配置环境变量
vi /etc/profile
在最后面添加
export JAVA_HOME=/usr/local/jdk
export PATH=$PATH:${JAVA_HOME}/bin
加载配置文件
source /etc/profile
查看Java版本
[root@node03 bigdata]# java -version
java version "1.8.0_241"
Java(TM) SE Runtime Environment (build 1.8.0_241-b07)
Java HotSpot(TM) 64-Bit Server VM (build 25.241-b07, mixed mode)
安装成功
安装MySQL
安装Maven
http://maven.apache.org/download.cgi
下载,解压
tar -zxvf apache-maven-3.6.1-bin.tar.gz
建立软连接
ln -s /bigdata/apache-maven-3.6.3 /usr/local/maven
加入/etc/profile中
export M2_HOME=/usr/local/maven3
export PATH=$PATH:$M2_HOME/bin
安装Git
yum install git
四、Cloudera Manager 6.3.1安装
JDK位置
JAVA_HOME 一定要是 /usr/java/java-version
三台节点下载第三方依赖
yum install bind-utils psmisc cyrus-sasl-plain cyrus-sasl-gssapi fuse portmap fuse-libs /lib/lsb/init-functions httpd mod_ssl openssl-devel python-psycopg2 MySQL-python libxslt
配置仓库
版本 6.3.1
| RHEL 7 Compatible | https://archive.cloudera.com/cm6/6.3.1/redhat7/yum/ | cloudera-manager.repo |
下载cloudera-manager.repo 文件,放到Cloudera Manager Server节点的 /etc/yum.repos.d/ 目录 中
[root@node01 ~]# cat /etc/yum.repos.d/cloudera-manager.repo
[cloudera-manager]
name=Cloudera Manager 6.3.1
baseurl=https://archive.cloudera.com/cm6/6.3.1/redhat7/yum/
gpgkey=https://archive.cloudera.com/cm6/6.3.1/redhat7/yum/RPM-GPG-KEY-cloudera
gpgcheck=1
enabled=1
autorefresh=0
安装Cloudera Manager Server
yum install cloudera-manager-daemons cloudera-manager-agent cloudera-manager-server
如果速度太慢,可以去 https://archive.cloudera.com/cm6/6.3.1/redhat7/yum/RPMS/x86_64/ 下载rpm包,上传到服务器进行安装
rpm -ivh cloudera-manager-agent-6.3.1-1466458.el7.x86_64.rpm cloudera-manager-daemons-6.3.1-1466458.el7.x86_64.rpm cloudera-manager-server-6.3.1-1466458.el7.x86_64.rpm
安装完后
[root@node01 cm]# ll /opt/cloudera/
total 16
drwxr-xr-x 27 cloudera-scm cloudera-scm 4096 Mar  3 19:36 cm
drwxr-xr-x  8 root         root         4096 Mar  3 19:36 cm-agent
drwxr-xr-x  2 cloudera-scm cloudera-scm 4096 Sep 25 16:34 csd
drwxr-xr-x  2 cloudera-scm cloudera-scm 4096 Sep 25 16:34 parcel-repo
所有节点
server_host=node01
配置数据库
安装mysql
修改密码,配置权限
移动引擎日志文件
将旧的InnoDB log files /var/lib/mysql/ib_logfile0 和 /var/lib/mysql/ib_logfile1 从 /var/lib/mysql/ 中移动到其他你指定的地方做备份
[root@node01 ~]# mv /var/lib/mysql/ib_logfile0 /bigdata
[root@node01 ~]# mv /var/lib/mysql/ib_logfile1 /bigdata
更新my.cnf文件
默认在/etc/my.cnf目录中
[root@node01 etc]# mv my.cnf my.cnf.bak
[root@node01 etc]# vi my.cnf
官方推荐配置
[mysqld]
datadir=/var/lib/mysql
socket=/var/lib/mysql/mysql.sock
transaction-isolation = READ-COMMITTED
# Disabling symbolic-links is recommended to prevent assorted security risks;
# to do so, uncomment this line:
symbolic-links = 0

key_buffer_size = 32M
max_allowed_packet = 32M
thread_stack = 256K
thread_cache_size = 64
query_cache_limit = 8M
query_cache_size = 64M
query_cache_type = 1

max_connections = 550
#expire_logs_days = 10
#max_binlog_size = 100M

#log_bin should be on a disk with enough free space.
#Replace '/var/lib/mysql/mysql_binary_log' with an appropriate path for your
#system and chown the specified folder to the mysql user.
log_bin=/var/lib/mysql/mysql_binary_log

#In later versions of MySQL, if you enable the binary log and do not set
#a server_id, MySQL will not start. The server_id must be unique within
#the replicating group.
server_id=1

binlog_format = mixed

read_buffer_size = 2M
read_rnd_buffer_size = 16M
sort_buffer_size = 8M
join_buffer_size = 8M

# InnoDB settings
innodb_file_per_table = 1
innodb_flush_log_at_trx_commit  = 2
innodb_log_buffer_size = 64M
innodb_buffer_pool_size = 4G
innodb_thread_concurrency = 8
innodb_flush_method = O_DIRECT
innodb_log_file_size = 512M

[mysqld_safe]
log-error=/var/log/mysqld.log
pid-file=/var/run/mysqld/mysqld.pid

sql_mode=STRICT_ALL_TABLES
确保开机启动
systemctl enable mysqld
启动MySql
systemctl start mysqld
安装JDBC驱动
下载
wget https://dev.mysql.com/get/Downloads/Connector-J/mysql-connector-java-5.1.46.tar.gz
解压缩
tar zxvf mysql-connector-java-5.1.46.tar.gz
拷贝驱动到 /usr/share/java/ 目录中并重命名,如果没有创建该目录
[root@node01 etc]# mkdir -p /usr/share/java/
[root@node01 etc]# cd mysql-connector-java-5.1.46
[root@node01 mysql-connector-java-5.1.46]# cp mysql-connector-java-5.1.46-bin.jar /usr/share/java/mysql-connector-java.jar
为CM组件配置MySQL数据库
Cloudera Manager Server, Oozie Server, Sqoop Server, Activity Monitor, Reports Manager, Hive Metastore Server, Hue Server, Sentry Server, Cloudera Navigator Audit Server, and Cloudera Navigator Metadata Server这些组件都需要建立数据库
| Service | Database | User |
|---|---|---|
| Cloudera Manager Server | scm | scm |
| Activity Monitor | amon | amon |
| Reports Manager | rman | rman |
| Hue | hue | hue |
| Hive Metastore Server | metastore | hive |
| Sentry Server | sentry | sentry |
| Cloudera Navigator Audit Server | nav | nav |
| Cloudera Navigator Metadata Server | navms | navms |
| Oozie | oozie | oozie |
登录mysql,输入密码
mysql -u root -p
Create databases for each service deployed in the cluster using the following commands. You can use any value you want for the <database>, <user>, and <password> parameters. The Databases for Cloudera Software table, below lists the default names provided in the Cloudera Manager configuration settings, but you are not required to use them.
Configure all databases to use the utf8 character set.
Include the character set for each database when you run the CREATE DATABASE statements described below.
为每个部属在集里的服务创建数据库,所有数据库都使用 utf8 character set
CREATE DATABASE <database> DEFAULT CHARACTER SET utf8 DEFAULT COLLATE utf8_general_ci;
赋权限
GRANT ALL ON <database>.* TO '<user>'@'%' IDENTIFIED BY '<password>';
实例
mysql> CREATE DATABASE amon DEFAULT CHARACTER SET utf8 DEFAULT COLLATE utf8_general_ci;
Query OK, 1 row affected (0.00 sec)

mysql> CREATE DATABASE scm DEFAULT CHARACTER SET utf8 DEFAULT COLLATE utf8_general_ci;
Query OK, 1 row affected (0.00 sec)

mysql> CREATE DATABASE hive DEFAULT CHARACTER SET utf8 DEFAULT COLLATE utf8_general_ci;
Query OK, 1 row affected (0.00 sec)

mysql> CREATE DATABASE oozie DEFAULT CHARACTER SET utf8 DEFAULT COLLATE utf8_general_ci;
Query OK, 1 row affected (0.00 sec)

mysql> CREATE DATABASE hue DEFAULT CHARACTER SET utf8 DEFAULT COLLATE utf8_general_ci;
Query OK, 1 row affected (0.01 sec)

mysql> CREATE DATABASE rman DEFAULT CHARACTER SET utf8 DEFAULT COLLATE utf8_general_ci;
Query OK, 1 row affected (0.00 sec)

mysql> CREATE DATABASE sentry DEFAULT CHARACTER SET utf8 DEFAULT COLLATE utf8_general_ci;
Query OK, 1 row affected (0.01 sec)

mysql>
mysql> CREATE DATABASE nav DEFAULT CHARACTER SET utf8 DEFAULT COLLATE utf8_general_ci;                             Query OK, 1 row affected (0.00 sec)

mysql> CREATE DATABASE metastore DEFAULT CHARACTER SET utf8 DEFAULT COLLATE utf8_general_ci;
Query OK, 1 row affected (0.00 sec)
mysql> GRANT ALL ON scm.* TO 'scm'@'%' IDENTIFIED BY '@Zhaojie123';
Query OK, 0 rows affected, 1 warning (0.01 sec)

mysql> GRANT ALL ON amon.* TO 'amon'@'%' IDENTIFIED BY '@Zhaojie123';
Query OK, 0 rows affected, 1 warning (0.00 sec)

mysql> GRANT ALL ON hive.* TO 'hive'@'%' IDENTIFIED BY '@Zhaojie123';
Query OK, 0 rows affected, 1 warning (0.00 sec)

mysql> GRANT ALL ON oozie.* TO 'oozie'@'%' IDENTIFIED BY '@Zhaojie123';
Query OK, 0 rows affected, 1 warning (0.00 sec)

mysql> GRANT ALL ON hue.* TO 'hue'@'%' IDENTIFIED BY '@Zhaojie123';
Query OK, 0 rows affected, 1 warning (0.00 sec)

mysql> GRANT ALL ON rman.* TO 'rman'@'%' IDENTIFIED BY '@Zhaojie123';
Query OK, 0 rows affected, 1 warning (0.01 sec)

mysql> GRANT ALL ON metastore.* TO 'metastore'@'%' IDENTIFIED BY '@Zhaojie123';
Query OK, 0 rows affected, 1 warning (0.00 sec)

mysql> GRANT ALL ON nav.* TO 'nav'@'%' IDENTIFIED BY '@Zhaojie123';
Query OK, 0 rows affected, 1 warning (0.00 sec)

mysql> GRANT ALL ON navms.* TO 'navms'@'%' IDENTIFIED BY '@Zhaojie123';
Query OK, 0 rows affected, 1 warning (0.00 sec)

mysql> GRANT ALL ON sentry.* TO 'sentry'@'%' IDENTIFIED BY '@Zhaojie123';
Query OK, 0 rows affected, 1 warning (0.01 sec)
flush privileges;Record the values you enter for database names, usernames, and passwords. The Cloudera Manager installation wizard requires this information to correctly connect to these databases.
建立Cloudera Manager数据库
使用CM自带脚本创建
/opt/cloudera/cm/schema/scm_prepare_database.sh <databaseType> <databaseName> <databaseUser>
实例
[root@node01 cm]# /opt/cloudera/cm/schema/scm_prepare_database.sh mysql scm scm
Enter SCM password:
JAVA_HOME=/usr/local/jdk
Verifying that we can write to /etc/cloudera-scm-server
Creating SCM configuration file in /etc/cloudera-scm-server
Executing:  /usr/local/jdk/bin/java -cp /usr/share/java/mysql-connector-java.jar:/usr/share/java/oracle-connector-java.jar:/usr/share/java/postgresql-connector-java.jar:/opt/cloudera/cm/schema/../lib/* com.cloudera.enterprise.dbutil.DbCommandExecutor /etc/cloudera-scm-server/db.properties com.cloudera.cmf.db.
Tue Mar 03 19:46:36 CST 2020 WARN: Establishing SSL connection without server's identity verification is not recommended. According to MySQL 5.5.45+, 5.6.26+ and 5.7.6+ requirements SSL connection must be established by default if explicit option isn't set. For compliance with existing applications not using SSL the verifyServerCertificate property is set to 'false'. You need either to explicitly disable SSL by setting useSSL=false, or set useSSL=true and provide truststore for server certificate verification.
2020-03-03 19:46:36,866 [main] INFO  com.cloudera.enterprise.dbutil.DbCommandExecutor  - Successfully connected to database.
All done, your SCM database is configured correctly!
主节点
vim /etc/cloudera-scm-server/db.properties
com.cloudera.cmf.db.type=mysql
com.cloudera.cmf.db.host=node01
com.cloudera.cmf.db.name=scm
com.cloudera.cmf.db.user=scm
com.cloudera.cmf.db.setupType=EXTERNAL
com.cloudera.cmf.db.password=@Z
准备parcels,将CDH相关文件拷贝到主节点
[root@node01 parcel-repo]# pwd
/opt/cloudera/parcel-repo
[root@node01 parcel-repo]# ll
total 2035084
-rw-r--r-- 1 root root 2083878000 Mar  3 21:27 CDH-6.3.1-1.cdh6.3.1.p0.1470567-el7.parcel
-rw-r--r-- 1 root root         40 Mar  3 21:15 CDH-6.3.1-1.cdh6.3.1.p0.1470567-el7.parcel.sha1
-rw-r--r-- 1 root root      33887 Mar  3 21:15 manifest.json
[root@node01 parcel-repo]# mv CDH-6.3.1-1.cdh6.3.1.p0.1470567-el7.parcel.sha1 CDH-6.3.1-1.cdh6.3.1.p0.1470567-el7.parcel.sha
[root@node01 parcel-repo]# ll
total 2035084
-rw-r--r-- 1 root root 2083878000 Mar  3 21:27 CDH-6.3.1-1.cdh6.3.1.p0.1470567-el7.parcel
-rw-r--r-- 1 root root         40 Mar  3 21:15 CDH-6.3.1-1.cdh6.3.1.p0.1470567-el7.parcel.sha
-rw-r--r-- 1 root root      33887 Mar  3 21:15 manifest.json
启动
主节点
systemctl start cloudera-scm-server
systemctl start cloudera-scm-agent
从节点
systemctl start cloudera-scm-agent
浏览器输入地址 ip:7180,登录,用户名和密码均为admin

继续
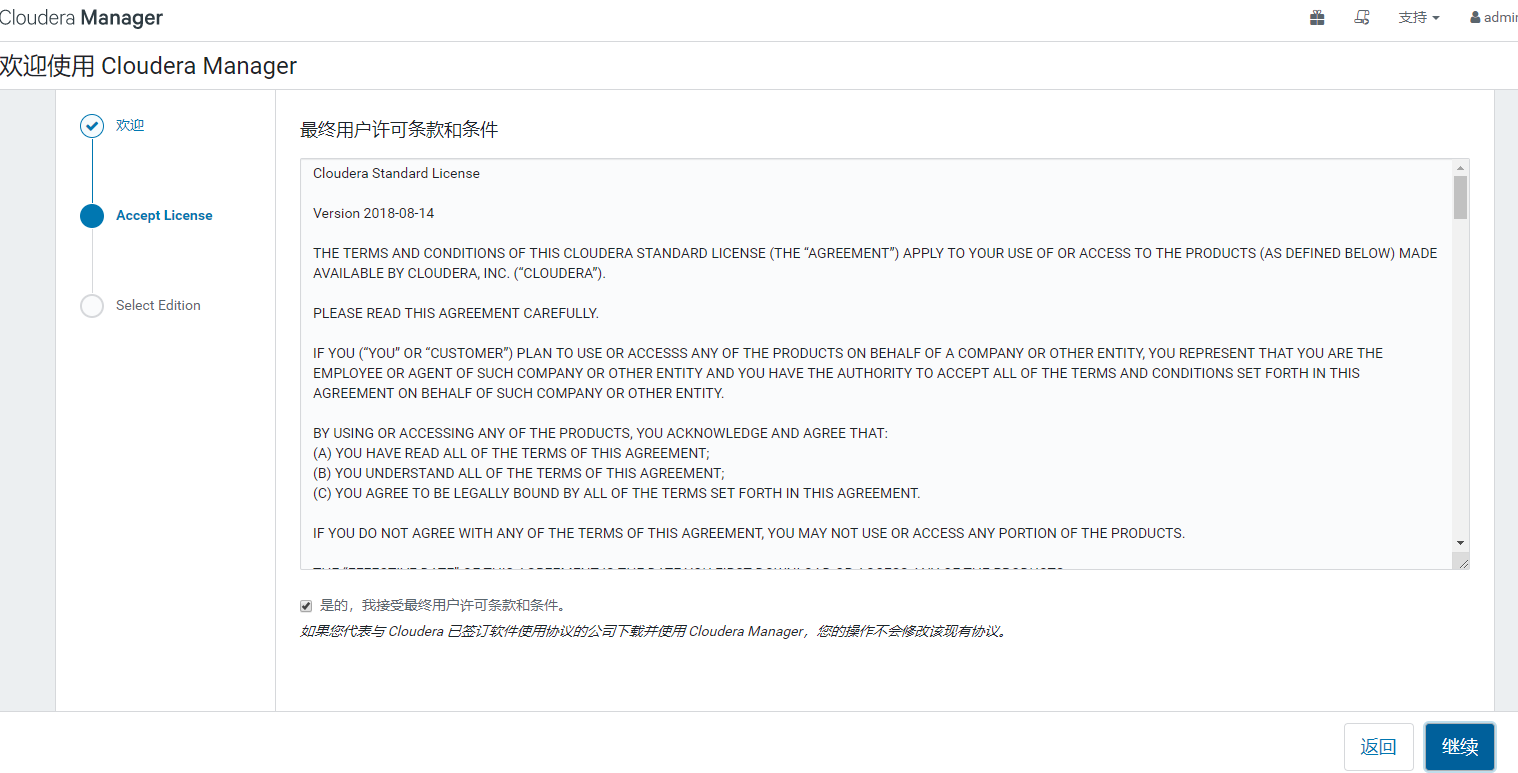
接受协议,继续
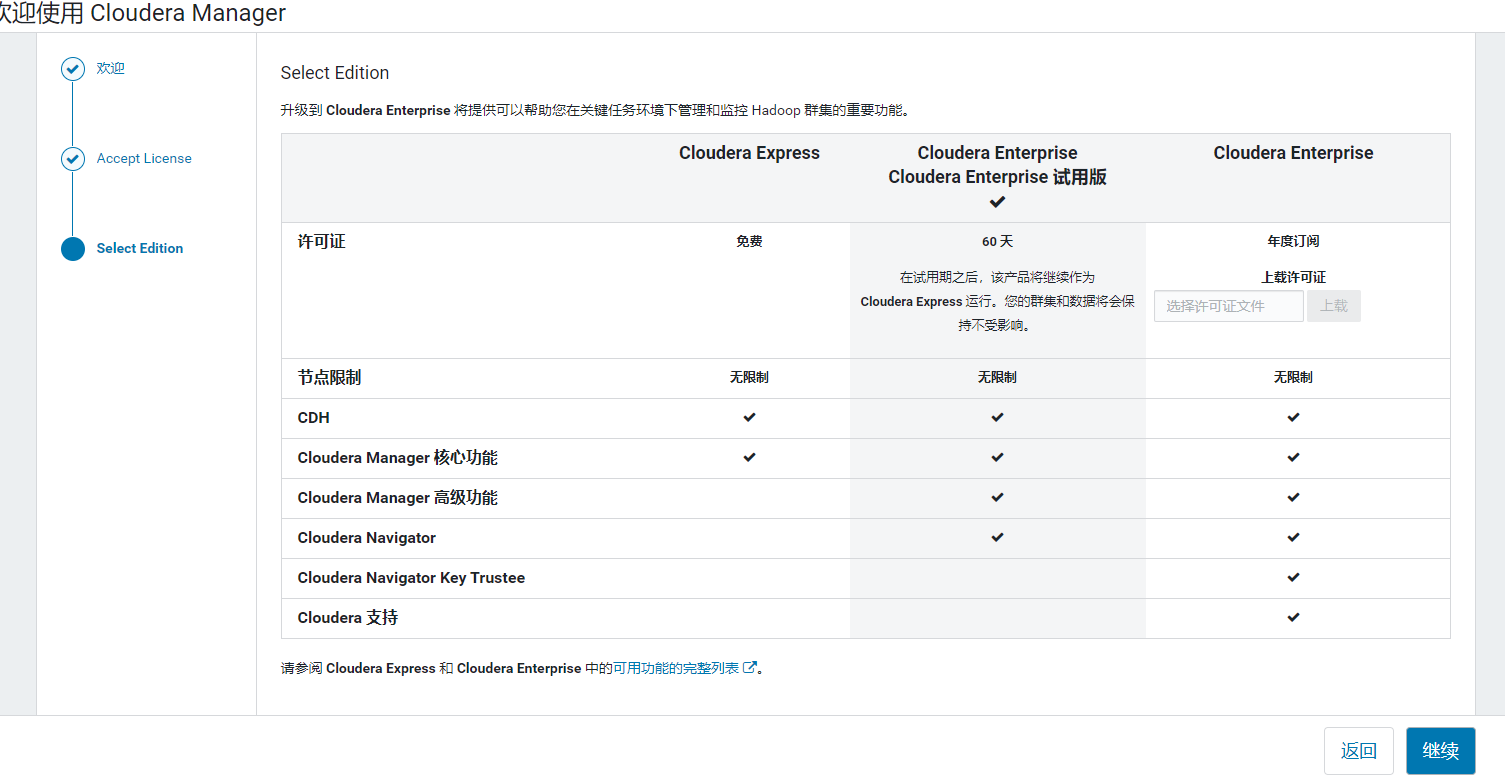
选择版本,继续
进入集群安装欢迎页
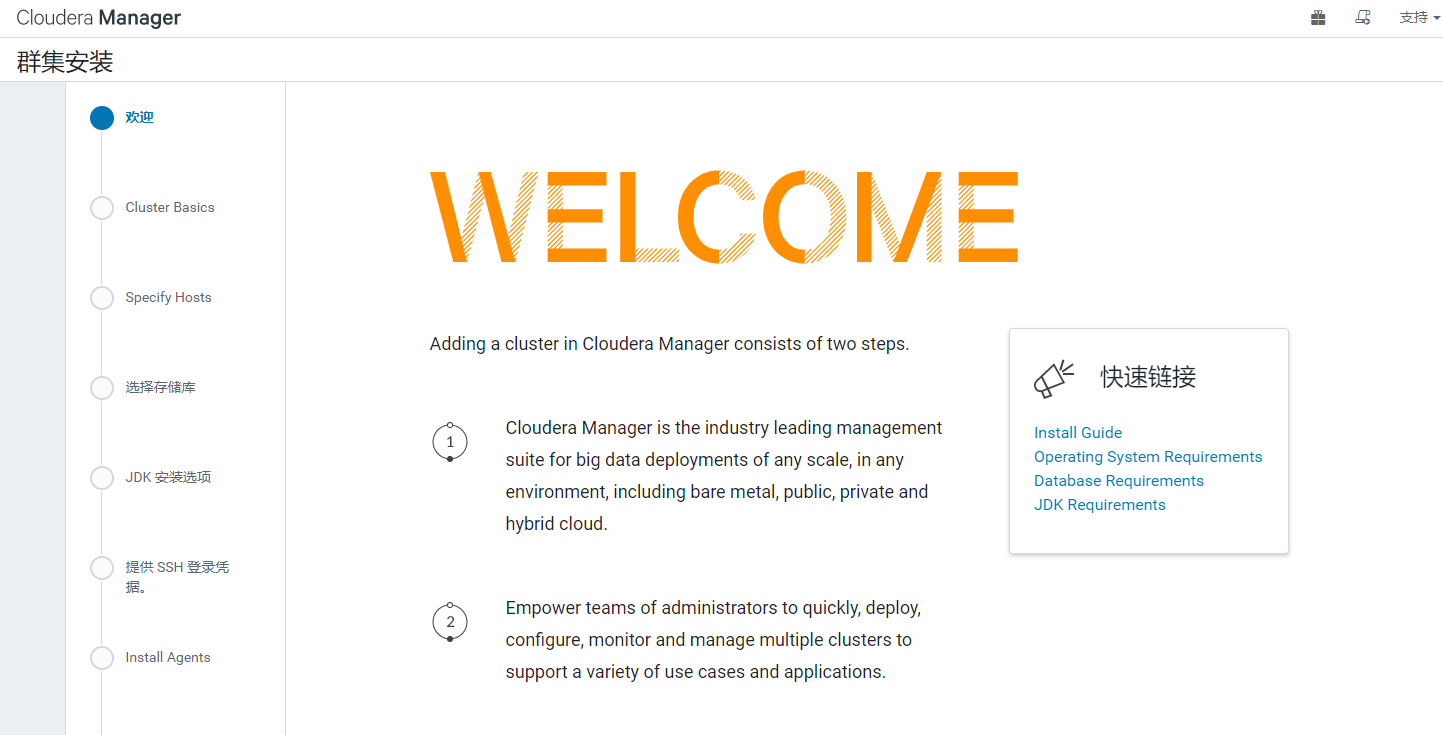
继续, 为集群命名,

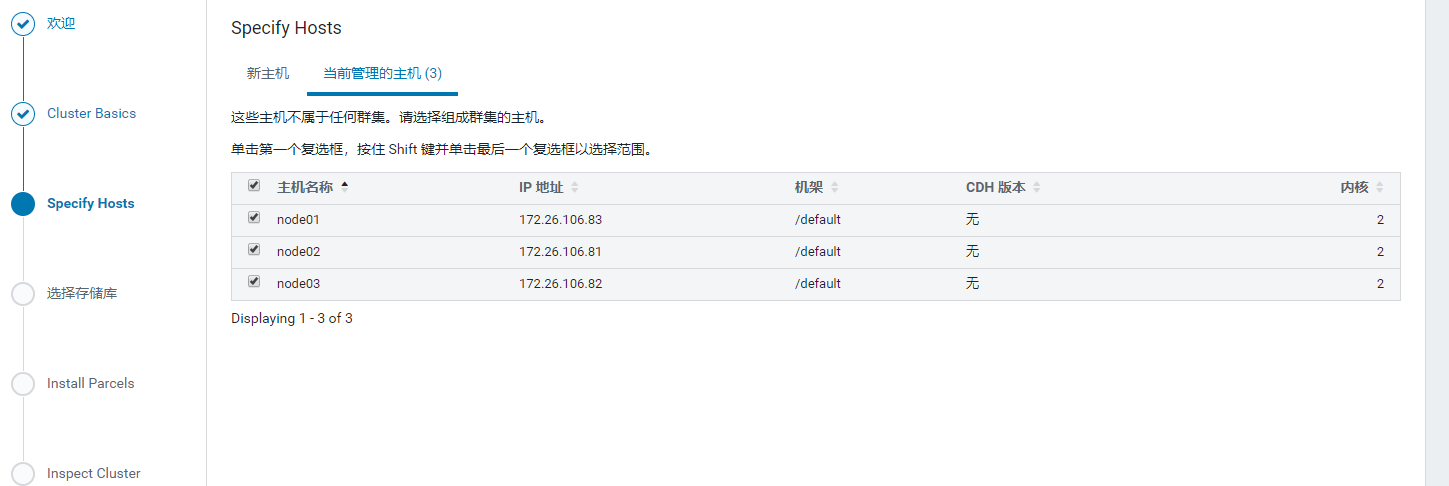
继续, 选择管理的主机
选择CDH版本
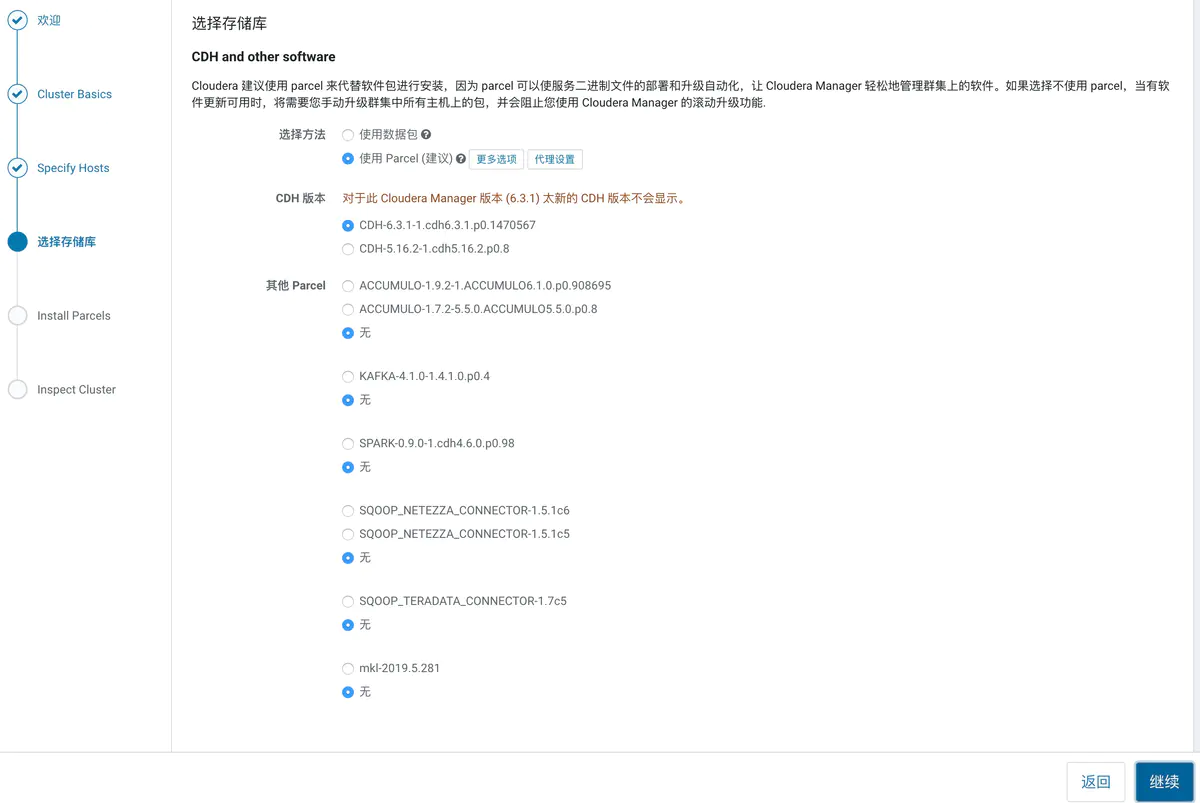
集群安装

速度慢,可去https://archive.cloudera.com/cdh6/6.3.2/parcels/下载
检测网络和主机
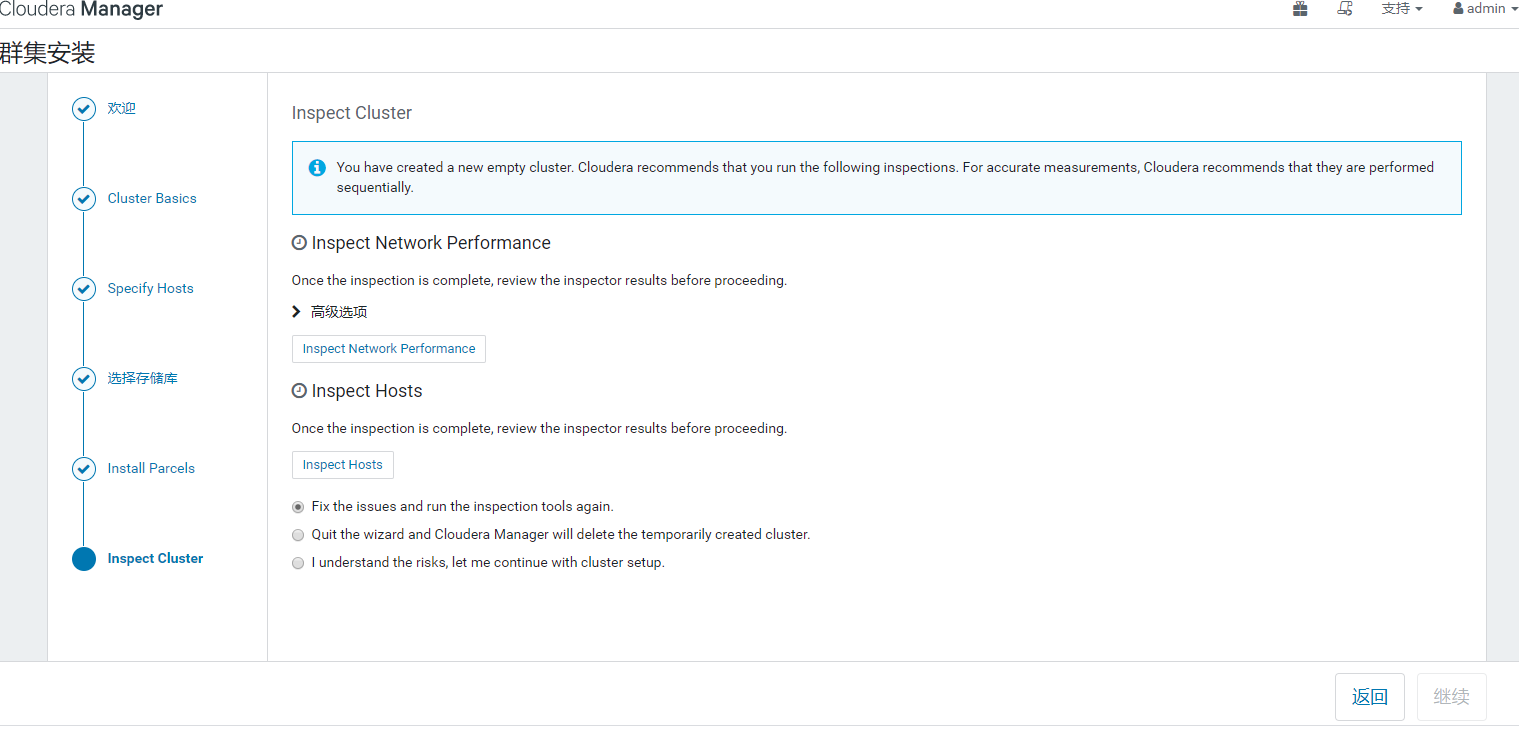
不断继续
服务暂时选HDFS、YARN、Zookeeper
分配角色
继续直到完成
配置Hadoop支持LZO
LzoCodec和LzopCodec区别
两种压缩编码LzoCodec和LzopCodec区别:
1. LzoCodec比LzopCodec更快, LzopCodec为了兼容LZOP程序添加了如 bytes signature, header等信息。
2. LzoCodec作为Reduce输出,结果文件扩展名为 ”.lzo_deflate” ,无法被lzop读取;使用LzopCodec作为Reduce输出,生成扩展名为 ”.lzo” 的文件,可被lzop读取。
3. LzoCodec结果(.lzo_deflate文件) 不能由 lzo index job 的 "DistributedLzoIndexer" 创建index。
4. “.lzo_deflate” 文件不能作为MapReduce输入。而这些 “.LZO” 文件都支持。
综上所述,map输出的中间结果使用LzoCodec,reduce输出使用 LzopCodec。另外:org.apache.hadoop.io.compress.LzoCodec和com.hadoop.compression.lzo.LzoCodec功能一样,都是源码包中带的,生成的都是 lzo_deflate 文件。
在线Parcel安装Lzo
下载地址:修改6.x.y为对应版本
CDH6:https://archive.cloudera.com/gplextras6/6.x.y/parcels/
CDH5:https://archive.cloudera.com/gplextras5/parcels/5.x.y/
1. 在CDH的 Parcel 配置中,“远程Parcel存储库URL”,点击 “+” 号,添加地址栏:
    CDH6:https://archive.cloudera.com/gplextras6/6.0.1/parcels/
    CDH5:http://archive.cloudera.com/gplextras/parcels/latest/
其他离线方式:
下载parcel放到 /opt/cloudera/parcel-repo 目录下
或者
搭建httpd,更改parcel URL地址,再在按远程安装

2. 返回Parcel列表,延迟几秒后会看到多出了 GPLEXTRAS(CDH6) 或者 HADOOP_LZO (CDH5),
下载 -- 分配 -- 激活。
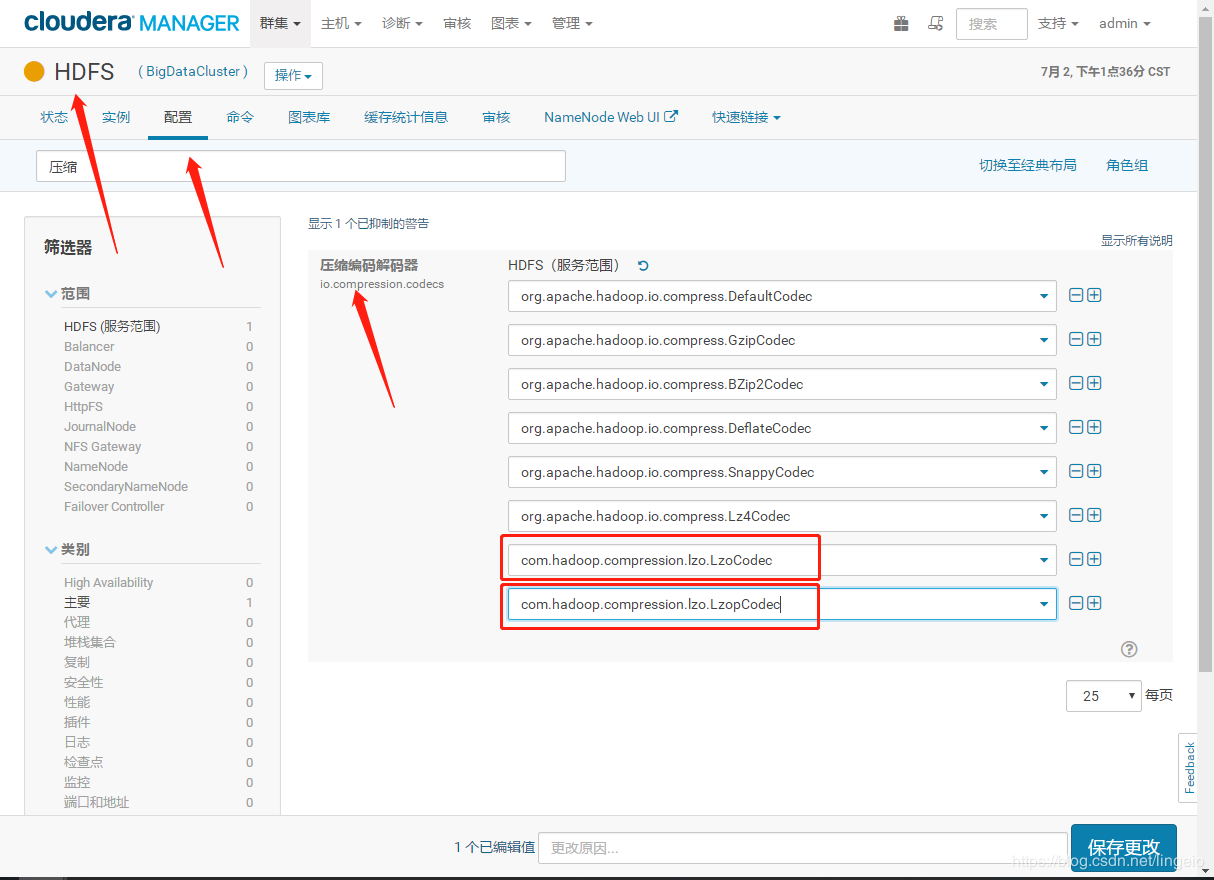
3. 安装完LZO后,打开HDFS配置,找到“压缩编码解码器”,点击 “+” 号,
添加:
com.hadoop.compression.lzo.LzoCodec
com.hadoop.compression.lzo.LzopCodec
4. YARN配置,找到 “MR 应用程序 Classpath”(mapreduce.application.classpath)
添加:
/opt/cloudera/parcels/GPLEXTRAS/lib/hadoop/lib/*

5. 重启更新过期配置
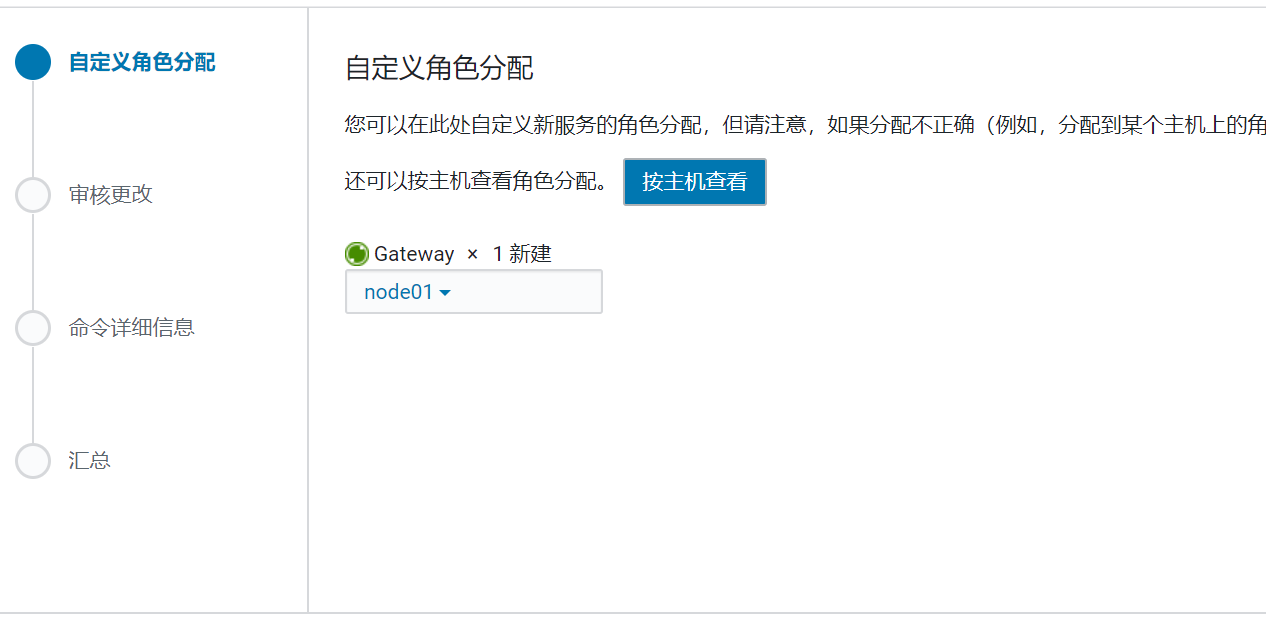
添加sqoop

继续
Spark安装
添加服务,添加spark
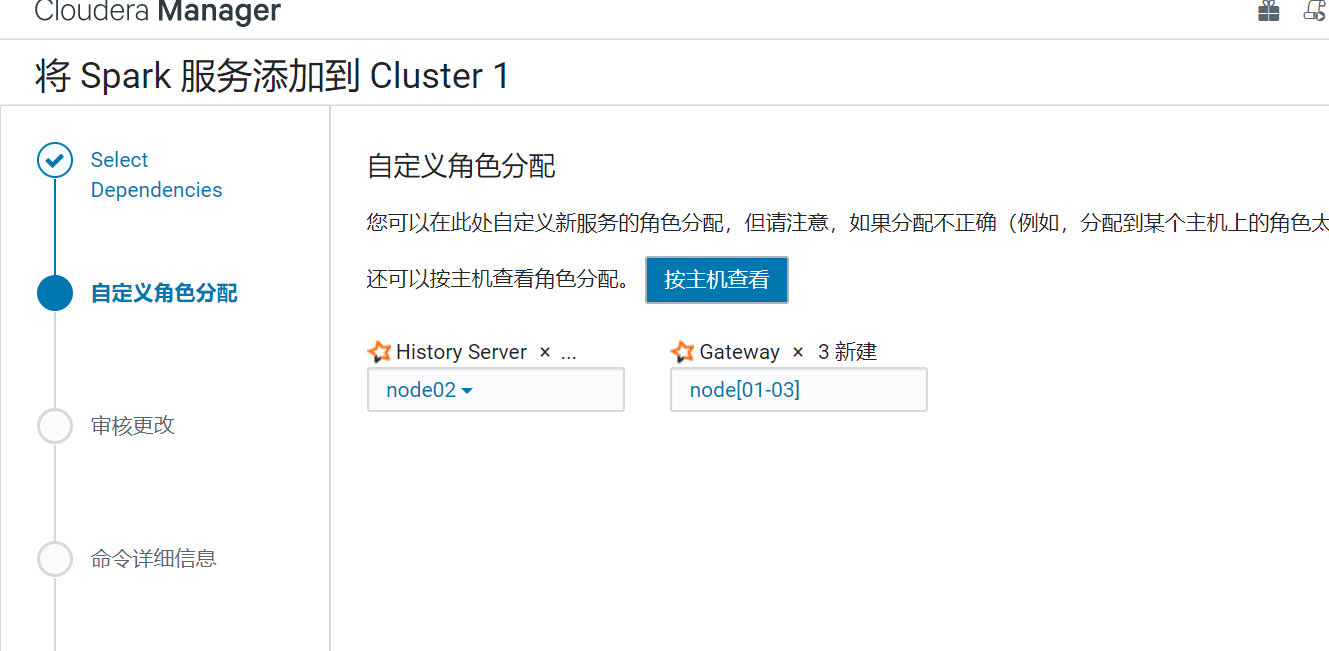
服务添加完成后,去节点进行配置
三台节点都要配置
进入目录
cd /opt/cloudera/parcels/CDH/lib/spark/conf
添加JAVA路径
vi spark-env.sh
末尾添加
export JAVA_HOME=/usr/local/jdk
创建slaves文件
添加work节点
node02
node03
删除软连接work

rm -r work
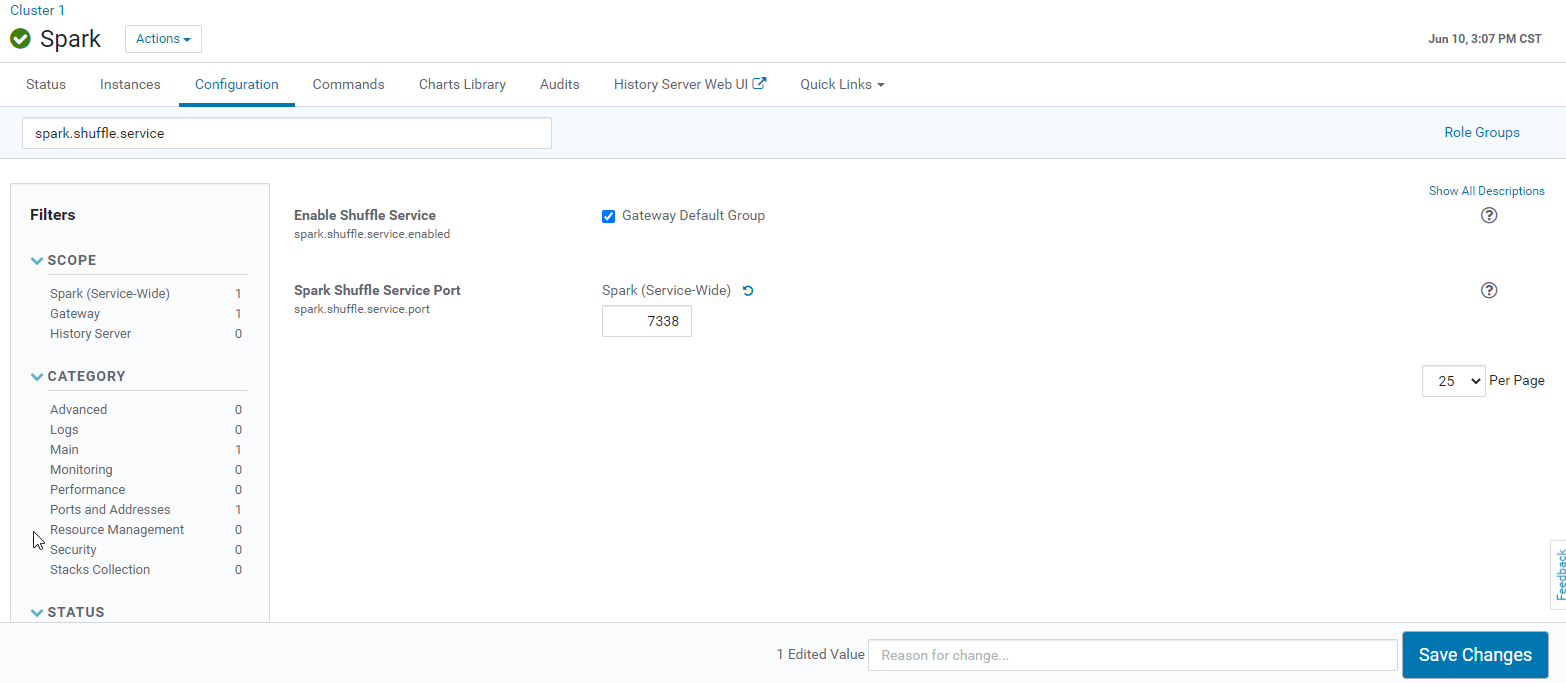
修改端口,防止与yarn冲突
vi spark-defaults.conf
spark.shuffle.service.port=7337 可改为7338
启动时发现
[root@node01 sbin]# ./start-all.sh
WARNING: User-defined SPARK_HOME (/opt/cloudera/parcels/CDH-6.3.1-1.cdh6.3.1.p0.1470567/lib/spark) overrides detected (/opt/cloudera/parcels/CDH/lib/spark).
WARNING: Running start-master.sh from user-defined location.
/opt/cloudera/parcels/CDH/lib/spark/bin/load-spark-env.sh: line 77: /opt/cloudera/parcels/CDH-6.3.1-1.cdh6.3.1.p0.1470567/lib/spark/bin/start-master.sh: No such file or directory
WARNING: User-defined SPARK_HOME (/opt/cloudera/parcels/CDH-6.3.1-1.cdh6.3.1.p0.1470567/lib/spark) overrides detected (/opt/cloudera/parcels/CDH/lib/spark).
WARNING: Running start-slaves.sh from user-defined location.
/opt/cloudera/parcels/CDH/lib/spark/bin/load-spark-env.sh: line 77: /opt/cloudera/parcels/CDH-6.3.1-1.cdh6.3.1.p0.1470567/lib/spark/bin/start-slaves.sh: No such file or directory
将sbin目录下的文件拷贝到bin目录下
[root@node01 bin]# xsync start-slave.sh
[root@node01 bin]# xsync start-master.sh
启动成功
jps命令查看,node1又master,node2和node3有worker
进入shell
[root@node01 bin]# spark-shell
Setting default log level to "WARN".
To adjust logging level use sc.setLogLevel(newLevel). For SparkR, use setLogLevel(newLevel).
20/03/04 13:22:07 WARN cluster.YarnSchedulerBackend$YarnSchedulerEndpoint: Attempted to request executors before the AM has registered!
Spark context Web UI available at http://node01:4040
Spark context available as 'sc' (master = yarn, app id = application_1583295431127_0001).
Spark session available as 'spark'.
Welcome to
      ____              __
     / __/__  ___ _____/ /__
    _ / _ / _ `/ __/  '_/
   /___/ .__/\_,_/_/ /_/\_   version 2.4.0-cdh6.3.1
      /_/

Using Scala version 2.11.12 (Java HotSpot(TM) 64-Bit Server VM, Java 1.8.0_241)
Type in expressions to have them evaluated.
Type :help for more information.

scala> var h =1
h: Int = 1

scala> h + 3
res1: Int = 4


scala> :quit
在网页修改才会持续修改,在文件中修改,重启CDH会被复原。
Flink安装
本人编译号的Flink
链接:https://pan.baidu.com/s/1lIqeBtNpj0wR-Q8KAEAIsg
提取码:89wi1、环境
Jdk 1.8、centos7.6、Maven 3.2.5、Scala-2.122、源码和CDH 版本
Flink 1.10.0 、 CDH 6.3.1(Hadoop 3.0.0)
flink重新编译
修改maven的配置文件
vi settings.xml
配置maven源
<mirrors>
        <mirror>
                <id>alimaven</id>
                <mirrorOf>central</mirrorOf>
                <name>aliyun maven</name>
                <url>http://maven.aliyun.com/nexus/content/repositories/central/</url>
        </mirror>
        <mirror>
                <id>alimaven</id>
                <name>aliyun maven</name>
                <url>http://maven.aliyun.com/nexus/content/groups/public/</url>
                <mirrorOf>central</mirrorOf>
        </mirror>
        <mirror>
                <id>central</id>
                <name>Maven Repository Switchboard</name>
                <url>http://repo1.maven.org/maven2/</url>
                <mirrorOf>central</mirrorOf>
        </mirror>
        <mirror>
                <id>repo2</id>
                <mirrorOf>central</mirrorOf>
                <name>Human Readable Name for this Mirror.</name>
                <url>http://repo2.maven.org/maven2/</url>
        </mirror>
        <mirror>
                <id>ibiblio</id>
                <mirrorOf>central</mirrorOf>
                <name>Human Readable Name for this Mirror.</name>
                <url>http://mirrors.ibiblio.org/pub/mirrors/maven2/</url>
        </mirror>
        <mirror>
                <id>jboss-public-repository-group</id>
                <mirrorOf>central</mirrorOf>
                <name>JBoss Public Repository Group</name>
                <url>http://repository.jboss.org/nexus/content/groups/public</url>
        </mirror>
        <mirror>
                <id>google-maven-central</id>
                <name>Google Maven Central</name>
                <url>https://maven-central.storage.googleapis.com
                </url>
                <mirrorOf>central</mirrorOf>
        </mirror>
        <mirror>
                <id>maven.net.cn</id>
                <name>oneof the central mirrors in china</name>
                <url>http://maven.net.cn/content/groups/public/</url>
                <mirrorOf>central</mirrorOf>
        </mirror>
  </mirrors>
下载依赖的 flink-shaded 源码
不同的 Flink 版本使用的 Flink-shaded不同,1.10 版本使用 10.0
https://mirrors.tuna.tsinghua.edu.cn/apache/flink/flink-shaded-10.0/flink-shaded-10.0-src.tgz
解压后,在 pom.xml 中,添加如下,加入到标签中
<profile>
        <id>vendor-repos</id>
        <activation>
                <property>
                        <name>vendor-repos</name>
                </property>
        </activation>
        <!-- Add vendor maven repositories -->
        <repositories>
                <!-- Cloudera -->
                <repository>
                        <id>cloudera-releases</id>
                        <url>https://repository.cloudera.com/artifactory/cloudera-repos</url>
                        <releases>
                                <enabled>true</enabled>
                        </releases>
                        <snapshots>
                                <enabled>false</enabled>
                        </snapshots>
                </repository>
                <!-- Hortonworks -->
                <repository>
                        <id>HDPReleases</id>
                        <name>HDP Releases</name>
                        <url>https://repo.hortonworks.com/content/repositories/releases/</url>
                        <snapshots><enabled>false</enabled></snapshots>
                        <releases><enabled>true</enabled></releases>
                </repository>
                <repository>
                        <id>HortonworksJettyHadoop</id>
                        <name>HDP Jetty</name>
                        <url>https://repo.hortonworks.com/content/repositories/jetty-hadoop</url>
                        <snapshots><enabled>false</enabled></snapshots>
                        <releases><enabled>true</enabled></releases>
                </repository>
                <!-- MapR -->
                <repository>
                        <id>mapr-releases</id>
                        <url>https://repository.mapr.com/maven/</url>
                        <snapshots><enabled>false</enabled></snapshots>
                        <releases><enabled>true</enabled></releases>
                </repository>
        </repositories>
</profile>
在flink-shade目录下运行下面的命令,进行编译
mvn -T2C clean install -DskipTests -Pvendor-repos -Dhadoop.version=3.0.0-cdh6.3.1 -Dscala-2.12 -Drat.skip=true
下载flink源码 https://mirrors.aliyun.com/apache/flink/flink-1.10.0/
解压,进入目录,修改文件
[root@node02 ~]# cd /bigdata/
[root@node02 bigdata]# cd flink
[root@node02 flink]# cd flink-1.10.0
[root@node02 flink-1.10.0]# cd flink-runtime-web/
[root@node02 flink-runtime-web]# ll
total 24
-rw-r--r-- 1 501 games 8726 Mar  7 23:31 pom.xml
-rw-r--r-- 1 501 games 3505 Feb  8 02:18 README.md
drwxr-xr-x 4 501 games 4096 Feb  8 02:18 src
drwxr-xr-x 3 501 games 4096 Mar  7 23:19 web-dashboard
[root@node02 flink-runtime-web]# vi pom.xml
加入国内的下载地址,否则很可能报错
<execution>
    <id>install node and npm</id>
    <goals>
        <goal>install-node-and-npm</goal>
    </goals>
    <configuration>
<nodeDownloadRoot>http://npm.taobao.org/mirrors/node/</nodeDownloadRoot>
<npmDownloadRoot>http://npm.taobao.org/mirrors/npm/</npmDownloadRoot>
        <nodeVersion>v10.9.0</nodeVersion>
    </configuration>
</execution>
在flink源码解压目录下运行下列命令,编译 Flink 源码
mvn clean install -DskipTests -Dfast -Drat.skip=true -Dhaoop.version=3.0.0-cdh6.3.1 -Pvendor-repos -Dinclude-hadoop -Dscala-2.12 -T2C
提取出 flink-1.10.0 二进制包即可
目录地址:
flink-1.10.0/flink-dist/target/flink-1.10.0-bin
flink on yarn模式
三个节点配置环境变量
export HADOOP_HOME=/opt/cloudera/parcels/CDH-6.3.1-1.cdh6.3.1.p0.1470567
export HADOOP_CONF_DIR=/etc/hadoop/conf
export PATH=$PATH:$HADOOP_HOME/bin:$HADOOP_HOME/sbin
source下配置文件
如果机器上安装了spark,其worker端口8081会和flink的web端口冲突进行修改
进入一个节点flink目录下conf目录中的的配置文件
vi flink-conf.yaml
设置
rest.port: 8082
并继续在该文件中添加或修改
high-availability: zookeeper
high-availability.storageDir: hdfs://node01:8020/flink_yarn_ha
high-availability.zookeeper.path.root: /flink-yarn
high-availability.zookeeper.quorum: node01:2181,node02:2181,node03:2181
yarn.application-attempts: 10
将flink分发到各个节点
xsync flink-1.10.0
hdfs上面创建文件夹
node01执行以下命令创建hdfs文件夹
hdfs dfs -mkdir -p /flink_yarn_ha
建立测试文件
vim wordcount.txt
内容如下
hello world

flink hadoop

hive spark
hdfs上面创建文件夹并上传文件
hdfs dfs -mkdir -p /flink_input

hdfs dfs -put wordcount.txt  /flink_input
测试
[root@node01 flink-1.10.0]# bin/flink run -m yarn-cluster ./examples/batch/WordCount.jar -input hdfs://node01:8020/flink_input -output hdfs://node01:8020/out_result1/out_count.txt -yn 2 -yjm 1024 -ytm 1024
查看输出结果
hdfs dfs -cat hdfs://node01:8020/out_result/out_count.txt
Kafka
下载 http://archive.cloudera.com/kafka/parcels/4.0.0/

分配,激活
添加服务,三个节点都分配borker角色,其他不用配置
可以修改Java Heap Size of Broker
创建topic
/opt/cloudera/parcels/KAFKA-4.0.0-1.4.0.0.p0.1/bin/kafka-topics --zookeeper node01:2181,node02:2181,node03:2181 --create --replication-factor 1 --partitions 1 --topic test
查看主题
/opt/cloudera/parcels/KAFKA-4.0.0-1.4.0.0.p0.1/bin/kafka-topics --zookeeper node01:2181 --list
产生消息
/opt/cloudera/parcels/KAFKA-4.0.0-1.4.0.0.p0.1/bin/kafka-console-producer --broker-list node01:9092 --topic test
消费消息
/opt/cloudera/parcels/KAFKA-4.0.0-1.4.0.0.p0.1/bin/kafka-console-consumer --bootstrap-server node01:9092 --topic test
五、原生安装
https://archive.apache.org/dist/
Hadoop 2.8.5
HBase 2.1.8
Flume
Sqoop
Kafka
Storm
spark 2.4.6
Flink
Zookeeper
https://www.cnblogs.com/aidata/p/12441506.html#_label1_2
三节点
集群规划
在node01、node02和node03三个节点上部署Zookeeper。
解压安装
(1)解压Zookeeper安装包到/opt/module/目录下
[root@hadoop101 software]$ tar -zxvf zookeeper-3.4.10.tar.gz -C /opt/module/
(2)同步/opt/module/zookeeper-3.4.10目录内容到hadoop103、hadoop104
[root@hadoop101 module]$ xsync zookeeper-3.4.10/
配置服务器编号
(1)在/opt/module/zookeeper-3.4.10/这个目录下创建zkData
[root@hadoop101 zookeeper-3.4.10]$ mkdir -p zkData
(2)在/opt/module/zookeeper-3.4.10/zkData目录下创建一个myid的文件
[root@hadoop101 zkData]$ touch myid
添加myid文件,注意一定要在linux里面创建,在notepad++里面很可能乱码
(3)编辑myid文件
[root@hadoop101 zkData]$ vi myid
在文件中添加与server对应的编号 1
(4)拷贝配置好的zookeeper到其他机器上
[root@hadoop101 zkData]$ xsync myid
并分别在hadoop102、hadoop103上修改myid文件中内容为2、3
配置zoo.cfg文件
(1)重命名/opt/module/zookeeper-3.4.10/conf这个目录下的zoo_sample.cfg为zoo.cfg
[root@hadoop101 conf]$ mv zoo_sample.cfg zoo.cfg
(2)打开zoo.cfg文件
[root@hadoop101 conf]$ vim zoo.cfg
修改数据存储路径配置
dataDir=/opt/module/zookeeper-3.4.10/zkData
增加如下配置
#######################cluster##########################
server.1=hadoop101:2888:3888
server.2=hadoop102:2888:3888
server.3=hadoop103:2888:3888
(3)同步zoo.cfg配置文件
[root@hadoop101 conf]$ xsync zoo.cfg
(4)配置参数解读
server.A=B:C:D。
A是一个数字,表示这个是第几号服务器;
集群模式下配置一个文件myid,这个文件在dataDir目录下,这个文件里面有一个数据就是A的值,Zookeeper启动时读取此文件,拿到里面的数据与zoo.cfg里面的配置信息比较从而判断到底是哪个server。
B是这个服务器的ip地址;
C是这个服务器与集群中的Leader服务器交换信息的端口;
D是万一集群中的Leader服务器挂了,需要一个端口来重新进行选举,选出一个新的Leader,而这个端口就是用来执行选举时服务器相互通信的端口。
集群操作
(1)分别启动Zookeeper
[root@hadoop101 zookeeper-3.4.10]$ bin/zkServer.sh start
[root@hadoop102 zookeeper-3.4.10]$ bin/zkServer.sh start
[root@hadoop103 zookeeper-3.4.10]$ bin/zkServer.sh start
(2)查看状态

[root@hadoop101 zookeeper-3.4.10]# bin/zkServer.sh status
JMX enabled by default
Using config: /opt/module/zookeeper-3.4.10/bin/../conf/zoo.cfg
Mode: follower
[root@hadoop102 zookeeper-3.4.10]# bin/zkServer.sh status
JMX enabled by default
Using config: /opt/module/zookeeper-3.4.10/bin/../conf/zoo.cfg
Mode: leader
[root@hadoop103 zookeeper-3.4.5]# bin/zkServer.sh status
JMX enabled by default
Using config: /opt/module/zookeeper-3.4.10/bin/../conf/zoo.cfg
Mode: follower

id在集群中必须是唯一的,其值应在1到255之间。
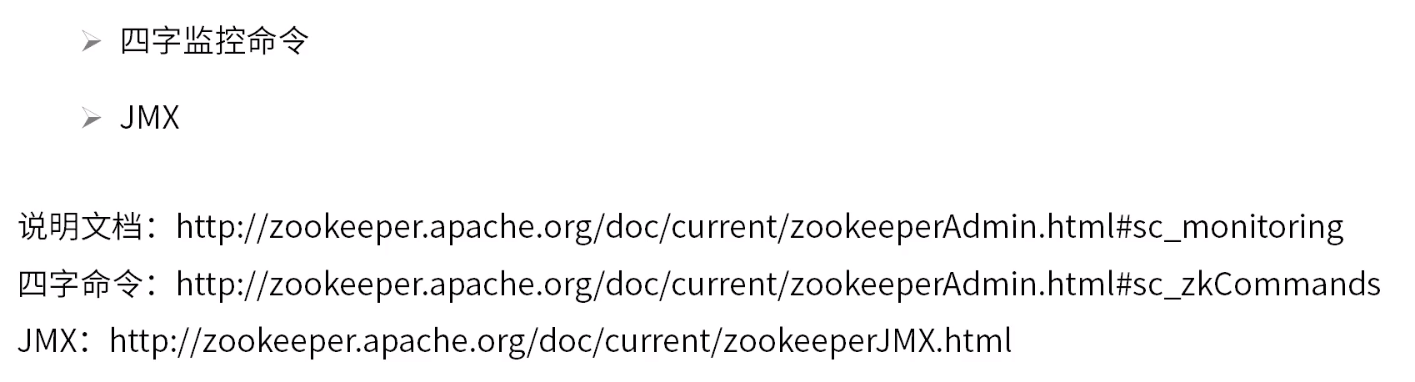
常用服务命令
1. 启动ZK服务: bin/zkServer.sh start
2. 查看ZK服务状态: bin/zkServer.sh status
3. 停止ZK服务: bin/zkServer.sh stop
4. 重启ZK服务: bin/zkServer.sh restart
5. 连接服务器: zkCli.sh -server 127.0.0.1:2181
集群监控
如果出现错误
[myid:1] - WARN  [QuorumPeer[myid=1](plain=[0:0:0:0:0:0:0:0]:2181)(secure=disabled):QuorumCnxManager@685] - Cannot open channel to 3 at election address k8s-node3/10.0.2.15:17888
java.net.ConnectException: Connection refused (Connection refused)
        at java.net.PlainSocketImpl.socketConnect(Native Method)
        at java.net.AbstractPlainSocketImpl.doConnect(AbstractPlainSocketImpl.java:350)
        at java.net.AbstractPlainSocketImpl.connectToAddress(AbstractPlainSocketImpl.java:206)
        at java.net.AbstractPlainSocketImpl.connect(AbstractPlainSocketImpl.java:188)
        at java.net.SocksSocketImpl.connect(SocksSocketImpl.java:392)
        at java.net.Socket.connect(Socket.java:606)
        at org.apache.zookeeper.server.quorum.QuorumCnxManager.connectOne(QuorumCnxManager.java:656)
        at org.apache.zookeeper.server.quorum.QuorumCnxManager.connectOne(QuorumCnxManager.java:713)
        at org.apache.zookeeper.server.quorum.QuorumCnxManager.connectAll(QuorumCnxManager.java:741)
        at org.apache.zookeeper.server.quorum.FastLeaderElection.lookForLeader(FastLeaderElection.java:910)
        at org.apache.zookeeper.server.quorum.QuorumPeer.run(QuorumPeer.java:1229)
如hadoop101
server.1=0.0.0.0:2888:3888
server.2=hadoop102:2888:3888
server.3=hadoop103:2888:3888
其他节点一样
本机用节点 用 0.0.0.0 IP代替主机名
How have defined the ip of the local server in each node? If you have given the public ip, then the listener would have failed to connect to the port. You must specify 0.0.0.0 for the current node
server.1=0.0.0.0:2888:3888
server.2=192.168.10.10:2888:3888
server.3=192.168.2.1:2888:3888
This change must be performed at the other nodes too.
安装脚本
#! /bin/bash

echo "====================zookeeper安装==============================="
echo "====================下载zookeeper==============================="
#wget https://mirrors.tuna.tsinghua.edu.cn/apache/zookeeper/zookeeper-3.5.8/apache-zookeeper-3.5.8-bin.tar.gz
#tar -zxvf apache-zookeeper-3.5.8-bin.tar.gz
#xsync apache-zookeeper-3.5.8-bin/

# 循环
i=0
for host in node01 node02 node03; do
        echo ==================node$host==================
        ssh $host "mkdir -p /bigdata/apache-zookeeper-3.5.8-bin/zkData"
        ssh $host "touch /bigdata/apache-zookeeper-3.5.8-bin/zkData/myid"
        ssh $host "echo $i > /bigdata/apache-zookeeper-3.5.8-bin/zkData/myid"
        ssh $host "cp /bigdata/apache-zookeeper-3.5.8-bin/conf/zoo_sample.cfg /bigdata/apache-zookeeper-3.5.8-bin/conf/zoo.cfg"
        ssh $host 'sed -i "s#^dataDir=.*#dataDir=/bigdata/apache-zookeeper-3.5.8-bin/zkData#" /bigdata/apache-zookeeper-3.5.8-bin/conf/zoo.cfg'
        ssh $host 'echo "server.1=node01:2888:3888" >> /bigdata/apache-zookeeper-3.5.8-bin/conf/zoo.cfg'
        ssh $host 'echo "server.2=node02:2888:3888" >> /bigdata/apache-zookeeper-3.5.8-bin/conf/zoo.cfg'
        ssh $host 'echo "server.3=node03:2888:3888" >> /bigdata/apache-zookeeper-3.5.8-bin/conf/zoo.cfg'
let 'i+=1'
done
启动脚本
#!/bin/sh

# 循环
for((host=1; host<=3; host++)); do
        echo ==================k8s-node$host==================
        ssh root@k8s-node$host "source /etc/profile;/opt/module/apache-zookeeper-3.5.7-bin/bin/zkServer.sh start"
done
修改为你自己的主机名和目录
关闭所有节点
#!/bin/sh

# 循环
for((host=1; host<=3; host++)); do
        echo ==================k8s-node$host==================
        ssh root@k8s-node$host "source /etc/profile;/opt/module/apache-zookeeper-3.5.7-bin/bin/zkServer.sh stop"
done
查看所有节点状态
#!/bin/sh

# 循环
for((host=1; host<=3; host++)); do
        echo ==================k8s-node$host==================
        ssh root@k8s-node$host "source /etc/profile;/opt/module/apache-zookeeper-3.5.7-bin/bin/zkServer.sh status"
done
综合为一个
#! /bin/bash

case $1 in
"start"){
    for host in node01 node02 node03; do
        ssh $host "/bigdata/apache-zookeeper-3.5.8-bin/bin/zkServer.sh start"
    done
};;
"stop"){
    for host in node01 node02 node03; do
        ssh $host "/bigdata/apache-zookeeper-3.5.8-bin/bin/zkServer.sh stop"
    done
};;
"status"){
    for host in node01 node02 node03; do
        ssh $host "/bigdata/apache-zookeeper-3.5.8-bin/bin/zkServer.sh status"
    done
};;
esac
mysql
Hadoop
配置HDFS
core-site.xml
<?xml version="1.0" encoding="UTF-8"?>
<?xml-stylesheet type="text/xsl" href="configuration.xsl"?>
<!--
  Licensed under the Apache License, Version 2.0 (the "License");
  you may not use this file except in compliance with the License.
  You may obtain a copy of the License at

    http://www.apache.org/licenses/LICENSE-2.0

  Unless required by applicable law or agreed to in writing, software
  distributed under the License is distributed on an "AS IS" BASIS,
  WITHOUT WARRANTIES OR CONDITIONS OF ANY KIND, either express or implied.
  See the License for the specific language governing permissions and
  limitations under the License. See accompanying LICENSE file.
-->

<!-- Put site-specific property overrides in this file. -->

<configuration>
    <!-- 指定hdfs的nameservice名称空间为ns -->
    <property>
        <name>fs.defaultFS</name>
        <value>hdfs://ns</value>
    </property>
    <!-- 指定hadoop临时目录,默认在/tmp/{$user}目录下,不安全,每次开机都会被清空-->
    <property>
        <name>hadoop.tmp.dir</name>
        <value>/usr/local/hadoop/hdpdata/</value>
        <description>需要手动创建hdpdata目录</description>
    </property>
    <!-- 指定zookeeper地址 -->
    <property>
        <name>ha.zookeeper.quorum</name>
        <value>node01:2181,node02:2181,node03:2181</value>
        <description>zookeeper地址,多个用逗号隔开</description>
    </property>
</configuration>
hdfs-site.xml
<?xml version="1.0" encoding="UTF-8"?>
<?xml-stylesheet type="text/xsl" href="configuration.xsl"?>
<!--
  Licensed under the Apache License, Version 2.0 (the "License");
  you may not use this file except in compliance with the License.
  You may obtain a copy of the License at

    http://www.apache.org/licenses/LICENSE-2.0

  Unless required by applicable law or agreed to in writing, software
  distributed under the License is distributed on an "AS IS" BASIS,
  WITHOUT WARRANTIES OR CONDITIONS OF ANY KIND, either express or implied.
  See the License for the specific language governing permissions and
  limitations under the License. See accompanying LICENSE file.
-->

<!-- Put site-specific property overrides in this file. -->

<configuration>
    <!-- NameNode HA配置 -->
    <property>
        <name>dfs.nameservices</name>
        <value>ns</value>
        <description>指定hdfs的nameservice为ns,需要和core-site.xml中的保持一致</description>
    </property>
    <property>
        <name>dfs.ha.namenodes.ns</name>
        <value>nn1,nn2</value>
        <description>ns命名空间下有两个NameNode,逻辑代号,随便起名字,分别是nn1,nn2</description>
    </property>
    <property>
        <name>dfs.namenode.rpc-address.ns.nn1</name>
        <value>node01:9000</value>
        <description>nn1的RPC通信地址</description>
    </property>
    <property>
        <name>dfs.namenode.http-address.ns.nn1</name>
        <value>node01:50070</value>
        <description>nn1的http通信地址</description>
    </property>
    <property>
        <name>dfs.namenode.rpc-address.ns.nn2</name>
        <value>node02:9000</value>
        <description>nn2的RPC通信地址</description>
    </property>
    <property>
        <name>dfs.namenode.http-address.ns.nn2</name>
        <value>node02:50070</value>
        <description>nn2的http通信地址</description>
    </property>
    <!--JournalNode配置 -->
    <property>
        <name>dfs.namenode.shared.edits.dir</name>
        <value>qjournal://node01:8485;node02:8485;node03:8485/ns</value>
    </property>
    <property>
        <name>dfs.journalnode.edits.dir</name>
        <value>/usr/local/hadoop/journaldata</value>
        <description>指定JournalNode在本地磁盘存放数据的位置</description>
    </property>
    <!--namenode高可用主备切换配置 -->
    <property>
        <name>dfs.ha.automatic-failover.enabled</name>
        <value>true</value>
        <description>开启NameNode失败自动切换</description>
    </property>
    <property>
        <name>dfs.client.failover.proxy.provider.ns</name>
        <value>org.apache.hadoop.hdfs.server.namenode.ha.ConfiguredFailoverProxyProvider</value>
        <description>配置失败自动切换实现方式,使用内置的zkfc</description>
    </property>
    <property>
        <name>dfs.ha.fencing.methods</name>
        <value>
            sshfence
            shell(/bin/true)
        </value>
        <description>配置隔离机制,多个机制用换行分割,先执行sshfence,执行失败后执行shell(/bin/true),/bin/true会直接返回0表示成功</description>
    </property>
    <property>
        <name>dfs.ha.fencing.ssh.private-key-files</name>
        <value>/root/.ssh/id_rsa</value>
        <description>使用sshfence隔离机制时需要ssh免登陆</description>
    </property>
    <property>
        <name>dfs.ha.fencing.ssh.connect-timeout</name>
        <value>30000</value>
        <description>配置sshfence隔离机制超时时间</description>
    </property>
    <!--dfs文件属性设置-->
    <property>
        <name>dfs.replication</name>
        <value>3</value>
        <description>默认block副本数为3,测试环境这里设置为1,注意生产环境一定要设置3个副本以上</description>
    </property>

    <property>
        <name>dfs.block.size</name>
        <value>134217728</value>
        <description>设置block大小是128M</description>
    </property>

</configuration>
配置YARN
mapred-site.xml
<?xml version="1.0"?>
<?xml-stylesheet type="text/xsl" href="configuration.xsl"?>
<!--
  Licensed under the Apache License, Version 2.0 (the "License");
  you may not use this file except in compliance with the License.
  You may obtain a copy of the License at

    http://www.apache.org/licenses/LICENSE-2.0

  Unless required by applicable law or agreed to in writing, software
  distributed under the License is distributed on an "AS IS" BASIS,
  WITHOUT WARRANTIES OR CONDITIONS OF ANY KIND, either express or implied.
  See the License for the specific language governing permissions and
  limitations under the License. See accompanying LICENSE file.
-->

<!-- Put site-specific property overrides in this file. -->

<configuration>
    <property>
        <name>mapreduce.framework.name</name>
        <value>yarn</value>
        <description>指定mr框架为yarn方式 </description>
    </property>
    <!-- 历史日志服务jobhistory相关配置 -->
    <property>
        <name>mapreduce.jobhistory.address</name>
        <value>node02:10020</value>
        <description>历史服务器端口号</description>
    </property>
    <property>
        <name>mapreduce.jobhistory.webapp.address</name>
        <value>node02:19888</value>
        <description>历史服务器的WEB UI端口号</description>
    </property>
</configuration>
yarn-site.xml
<?xml version="1.0"?>
<!--
  Licensed under the Apache License, Version 2.0 (the "License");
  you may not use this file except in compliance with the License.
  You may obtain a copy of the License at

    http://www.apache.org/licenses/LICENSE-2.0

  Unless required by applicable law or agreed to in writing, software
  distributed under the License is distributed on an "AS IS" BASIS,
  WITHOUT WARRANTIES OR CONDITIONS OF ANY KIND, either express or implied.
  See the License for the specific language governing permissions and
  limitations under the License. See accompanying LICENSE file.
-->
<configuration>
    <!-- 开启RM高可用 -->
    <property>
        <name>yarn.resourcemanager.ha.enabled</name>
        <value>true</value>
    </property>
    <!-- 指定RM的cluster id,一组高可用的rm共同的逻辑id -->
    <property>
        <name>yarn.resourcemanager.cluster-id</name>
        <value>yarn-ha</value>
    </property>
    <!-- 指定RM的名字,可以随便自定义 -->
    <property>
        <name>yarn.resourcemanager.ha.rm-ids</name>
        <value>rm1,rm2</value>
    </property>
    <!-- 分别指定RM的地址 -->
    <property>
        <name>yarn.resourcemanager.hostname.rm1</name>
        <value>node01</value>
    </property>
    <property>
        <name>yarn.resourcemanager.webapp.address.rm1</name>
        <value>${yarn.resourcemanager.hostname.rm1}:8088</value>
        <description>HTTP访问的端口号</description>
    </property>
    <property>
        <name>yarn.resourcemanager.hostname.rm2</name>
        <value>node02</value>
    </property>
    <property>
        <name>yarn.resourcemanager.webapp.address.rm2</name>
        <value>${yarn.resourcemanager.hostname.rm2}:8088</value>
    </property>
    <!-- 指定zookeeper集群地址 -->
    <property>
        <name>yarn.resourcemanager.zk-address</name>
        <value>node01:2181,node02:2181,node03:2181</value>
    </property>
    <!--NodeManager上运行的附属服务,需配置成mapreduce_shuffle,才可运行MapReduce程序-->
    <property>
        <name>yarn.nodemanager.aux-services</name>
        <value>mapreduce_shuffle</value>
    </property>
    <!-- 开启日志聚合 -->
    <property>
        <name>yarn.log-aggregation-enable</name>
        <value>true</value>
    </property>
    <!-- 日志聚合HDFS目录 -->
    <property>
        <name>yarn.nodemanager.remote-app-log-dir</name>
        <value>/data/hadoop/yarn-logs</value>
    </property>
    <!-- 日志保存时间3days,单位秒 -->
    <property>
        <name>yarn.log-aggregation.retain-seconds</name>
        <value>259200</value>
    </property>
</configuration>
在/usr/local/hadoop路径下创建hdpdata文件夹
cd /usr/local/hadoop
mkdir hdpdata
修改/usr/local/hadoop/etc/hadoop下的slaves文件
设置datanode和nodemanager启动节点主机名称
在slaves文件中添加节点的主机名称
node02
node03
将hadoop文件夹复制到各个节点
集群启动
(注意严格按照顺序启动)
启动journalnode(分别在node01、node02、node03上执行启动)
/usr/local/hadoop/sbin/hadoop-daemon.sh start journalnode
运行jps命令检验,node01、node02、node03上多了JournalNode进程
格式化HDFS
在node01上执行命令:
hdfs namenode -format
格式化成功之后会在core-site.xml中的hadoop.tmp.dir指定的路径下生成dfs文件夹,将该文件夹拷贝到node02的相同路径下
scp -r hdpdata root@node02:/usr/local/hadoop
在node01上执行格式化ZKFC操作
hdfs zkfc -formatZK
执行成功,日志输出如下信息
INFO ha.ActiveStandbyElector: Successfully created /hadoop-ha/ns in ZK
在node01上启动HDFS
sbin/start-dfs.sh
在node02上启动YARN
sbin/start-yarn.sh
在node01单独启动一个ResourceManger作为备份节点
sbin/yarn-daemon.sh start resourcemanager
在node02上启动JobHistoryServer
sbin/mr-jobhistory-daemon.sh start historyserver
启动完成node02会增加一个JobHistoryServer进程
hadoop安装启动完成
HDFS HTTP访问地址
NameNode (active):http://node01:50070
NameNode (standby):http://node02:50070
ResourceManager HTTP访问地址
ResourceManager :http://node02:8088
历史日志HTTP访问地址
JobHistoryServer:http:/node02:19888
集群验证
验证HDFS 是否正常工作及HA高可用首先向hdfs上传一个文件
hadoop fs -put /usr/local/hadoop/README.txt /
在active节点手动关闭active的namenode
sbin/hadoop-daemon.sh stop namenode
通过HTTP 50070端口查看standby namenode的状态是否转换为active
手动启动上一步关闭的namenode
sbin/hadoop-daemon.sh start namenode
验证ResourceManager HA高可用
手动关闭node02的ResourceManager
sbin/yarn-daemon.sh stop resourcemanager
通过HTTP 8088端口访问node01的ResourceManager查看状态
手动启动node02 的ResourceManager
sbin/yarn-daemon.sh start resourcemanager
安装脚本
#! /bin/bash

tar -zxvf /bigdata/downloads/hadoop-2.8.5.tar.gz -C /bigdata
cp /bigdata/downloads/yarn-site.xml /usr/local/hadoop/etc/hadoop/
cp /bigdata/downloads/mapred-site.xml /usr/local/hadoop/etc/hadoop/
cp /bigdata/downloads/hdfs-site.xml /usr/local/hadoop/etc/hadoop/
cp /bigdata/downloads/core-site.xml /usr/local/hadoop/etc/hadoop/
cat /dev/null > /usr/local/hadoop/etc/hadoop/slaves"
echo "node02" >> /usr/local/hadoop/etc/hadoop/slaves'
echo "node03" >> /usr/local/hadoop/etc/hadoop/slaves'

xsync /bigdata/hadoop-2.8.5
# 追加环境变量
echo 'export HADOOP_HOME=/usr/local/hadoop' >> /etc/profile
echo 'export HADOOP_CONF_DIR=$HADOOP_HOME/etc/hadoop' >> /etc/profile
echo 'export YARN_HOME=$HADOOP_HOME' >> /etc/profile
echo 'export YARN_CONF_DIR=$HADOOP_HOME/etc/hadoop' >> /etc/profile
echo 'export PATH=$PATH:${HADOOP_HOME}/bin:${HADOOP_HOME}/sbin' >> /etc/profile

xsync /etc/profile

# 循环
i=0
for host in node01 node02 node03; do
        echo ==================node$host==================
        # 建立软连接
        #ssh $host "ln -s /bigdata/hadoop-2.8.5 /usr/local/hadoop"
        # 环境变量生效
        ssh $host "source /etc/profile"
done
格式化,初次启动集群
#! /bin/bash

for host in node01 node02 node03; do
        echo ==================node$host==================
        # 启动journalnode
        ssh $host "/usr/local/hadoop/sbin/hadoop-daemon.sh start journalnode"
done

/usr/local/hadoop/bin/hdfs namenode -format
scp -r /usr/local/hadoop/hdpdata root@node02:/usr/local/hadoop
/usr/local/hadoop/bin/hdfs zkfc -formatZK
/usr/local/hadoop/sbin/start-dfs.sh
ssh node02 "/usr/local/hadoop/sbin/start-yarn.sh"
/usr/local/hadoop/sbin/yarn-daemon.sh start resourcemanager
ssh node02 "/usr/local/hadoop/sbin/mr-jobhistory-daemon.sh start historyserver"
Hive
这里笔者的MySql使用的是docker,在hvie-site.xml根据主机实际情况配置即可
1.创建HDFS数据仓库目录
hadoop fs -mkdir -p /user/hive/warehouse
2.为所有用户添加数据仓库目录的写权限
hadoop fs -chmod a+w /user/hive/warehouse
3.开放HDFS 中tmp临时目录的权限
hadoop fs -chmod -R 777 /tmp
5.将Hive安装包解压到/bigdata/安装目录
tar -zxvf apache-hive-1.2.2-bin.tar.gz -C /bigdata
6.创建软链接
ln -s /bigdata/apache-hive-1.2.2-bin /usr/local/hive

7.设置环境变量
vim /etc/profile
添加如下内容:
 export HIVE_HOME=/usr/local/hive

export PATH=$PATH:$PATH:${HIVE_HOME}/bin

8.重新编译使环境变量生效
source /etc/profile
9.hive-site.xml配置文件上传到hive/conf目录中,添加用于存储元数据的MySQL数据库配置信息
<?xml version="1.0" encoding="UTF-8" standalone="no"?>
<?xml-stylesheet type="text/xsl" href="configuration.xsl"?>
<!--
Licensed to the Apache Software Foundation (ASF) under one or more
contributor license agreements. See the NOTICE file distributed with
this work for additional information regarding copyright ownership.
The ASF licenses this file to You under the Apache License, Version 2.0
(the "License"); you may not use this file except in compliance with
the License. You may obtain a copy of the License at
http://www.apache.org/licenses/LICENSE-2.0
Unless required by applicable law or agreed to in writing, software
distributed under the License is distributed on an "AS IS" BASIS,
WITHOUT WARRANTIES OR CONDITIONS OF ANY KIND, either express or implied.
See the License for the specific language governing permissions and
limitations under the License.
-->
<configuration>
<property>
<name>javax.jdo.option.ConnectionURL</name>
<value>jdbc:mysql://192.168.10.100:3307/hive?createDatabaseIfNotExist=true&useSSL=false</value>
</property>
<property>
<name>javax.jdo.option.ConnectionDriverName</name>
<value>com.mysql.jdbc.Driver</value>
</property>
<property>
<name>javax.jdo.option.ConnectionUserName</name>
<value>hive</value>
</property>
<property>
<name>javax.jdo.option.ConnectionPassword</name>
<value>hive1234</value>
</property>
</configuration>

10.将mysql驱动jar文件拷贝到${HIVE_HOME}/lib目录下


11.登录MySQL创建用户hive
登录MySQL:mysql -u root -p
创建用户:create user 'hive'@'%' identified by 'hive1234';
查询用户表确定用户创建成功:select user,host from mysql.user;
为用户授权:grant all privileges on *.* to 'hive'@'%';
刷新权限:flush privileges;

12.启动hive
/usr/local/hive/bin/hive

脚本
mysql已经配置好
hiveInstall.sh
#! /bin/bash
hadoop fs -mkdir -p /user/hive/warehouse
hadoop fs -chmod a+w /user/hive/warehouse
hadoop fs -chmod -R 777 /tmp
tar -zxvf /bigdata/apache-hive-2.3.6-bin.tar.gz -C /bigdata
ln -s /bigdata/apache-hive-2.3.6-bin /usr/local/hive
echo 'export HIVE_HOME=/usr/local/hive' >> /etc/profile
echo 'export PATH=$PATH:$PATH:${HIVE_HOME}/bin' >> /etc/profile
source /etc/profile

cp /bigdata/downloads/hive-site.xml /usr/local/hive/conf/
cp /bigdata/downloads/mysql-connector-java-5.1.47.jar /usr/local/hive/lib
如果脚本中设置了环境变量,执行脚本的时候用source或 .
. hiveInstall.sh
或
source hiveInstall.sh
否则使用
./hiveInstall.sh
会通过子shell执行
则里面的source /etc/profile只在子shell中生效,执行完脚本退出子shell,回到当前shell,环境变量没有生效
初始化hive,在mysql中生成相关数据
schematool -dbType mysql -initSchema
启动hive
/usr/local/hive/bin/hive
https://www.cnblogs.com/aidata/p/11571111.html#_label3
Hbase
conf目录下:
配置hbase-env.sh
设置jdk路径:export JAVA_HOME=/usr/local/jdk
启用外部zookeeper:export HBASE_MANAGES_ZK=false
配置hbase-site.xml
<configuration>
    <property>
        <name>hbase.zookeeper.property.dataDir</name>
        <value>/usr/local/zookeeper/data</value>
    </property>
    <property>
        <name>hbase.cluster.distributed</name>
        <value>true</value>
    </property>
    <property>
        <name>hbase.rootdir</name>
        <value>hdfs://node02:9000/user/hbase</value>
    </property>
    <property>
        <name>hbase.zookeeper.quorum</name>
        <value>node01:2181,node02:2181,node03:2181</value>
    </property>
</configuration>
配置regionservers
node02
node03
新建文件backup-masters
node02
进入lib下,拷贝client-facing-thirdparty下的jar包到lib目录:
cp client-facing-thirdparty/htrace-core-3.1.0-incubating.jar
安装脚本
#! /bin/bash

tar -zxvf /bigdata/downloads/hbase-2.1.8-bin.tar.gz -C /bigdata
# 循环
for host in node01 node02 node03; do
        echo ==================node$host==================
        # 建立软连接
        ssh $host "ln -s /bigdata/hbase-2.1.8 /usr/local/hbase"

done
# 覆盖配置文件
cp /bigdata/downloads/hbase-site.xml /usr/local/hbase/conf
# 配置regionservers
cat /dev/null > /usr/local/hbase/conf/regionservers
echo "node02" >> /usr/local/hbase/conf/regionservers
echo "node03" >> /usr/local/hbase/conf/regionservers
# 创建backup-masters
touch /usr/local/hbase/conf/backup-masters
echo "node02" >> /usr/local/hbase/conf/backup-masters
cp /usr/local/hbase/lib/client-facing-thirdparty/htrace-core-3.1.0-incubating.jar /usr/local/hbase/lib

xsync /bigdata/hbase-2.1.8-bin
启动
bin目录下
./start-hbase.sh
./hbase shell
Kafka
1.集群规划
使用3台机器部署,分别是node01、node02、node03
2.下载Kafka安装包
下载地址http://kafka.apache.org/downloads,选择Kafka版本kafka_2.11-0.10.2.1.tgz
3.安装kafka
将安装包上传到其中一台机器node01上,并解压到/bigdata目录下
tar -zxvf kafka_2.11-0.10.2.1.tgz
创建软连接
ln -s /bigdata/kafka_2.11-0.10.2.1 /usr/local/kafka
4.添加到环境变量:vim /etc/profile
添加内容
export KAFKA_HOME=/usr/local/kafka
export PATH=$PATH:${KAFKA_HOME}/bin
刷新环境变量:source /etc/profile
5.修改配置文件
cd /usr/local/kafka/config
vim server.properties
6.在/usr/local/kafka中创建kafka-logs文件夹
mkdir /usr/local/kafka/kafka-logs
7.使用scp将配置好的kafka安装包拷贝到node02和node03两个节点
scp -r /bigdata/kafka_2.11-0.10.2.1 root@node02:/bigdata/
scp -r /bigdata/kafka_2.11-0.10.2.1 root@node03:/bigdata/
8.分别修改node02和node03的配置文件server.properties 具体文件在下面
8.1 node02的server.properties修改项
broker.id=1
host.name=node02
8.2 node03的server.properties修改项
broker.id=2
host.name=node03
9.分别在node01、node02、node03启动kafka
cd /usr/local/kafka
启动的时候使用-daemon选项,则kafka将以守护进程的方式启动
bin/kafka-server-start.sh -daemon config/server.properties
10.日志目录
默认在kafka安装路径生成的logs文件夹中
server.properties
############################# Server Basics #############################

#每个borker的id是唯一的,多个broker要设置不同的id
broker.id=0

#访问端口号
port=9092

#访问地址
host.name=node01

#允许删除topic
delete.topic.enable=true


# The number of threads handling network requests
num.network.threads=3

# The number of threads doing disk I/O
num.io.threads=8

# The send buffer (SO_SNDBUF) used by the socket server
socket.send.buffer.bytes=102400

# The receive buffer (SO_RCVBUF) used by the socket server
socket.receive.buffer.bytes=102400

# The maximum size of a request that the socket server will accept (protection against OOM)
socket.request.max.bytes=104857600


############################# Log Basics #############################

#存储数据路径,默认是在/tmp目录下,需要修改
log.dirs=/usr/local/kafka/kafka-logs

#创建topic默认分区数
num.partitions=1

# The number of threads per data directory to be used for log recovery at startup and flushing at shutdown.
# This value is recommended to be increased for installations with data dirs located in RAID array.
num.recovery.threads.per.data.dir=1

############################# Log Flush Policy #############################

# Messages are immediately written to the filesystem but by default we only fsync() to sync
# the OS cache lazily. The following configurations control the flush of data to disk.
# There are a few important trade-offs here:
#    1. Durability: Unflushed data may be lost if you are not using replication.
#    2. Latency: Very large flush intervals may lead to latency spikes when the flush does occur as there will be a lot of data to flush.
#    3. Throughput: The flush is generally the most expensive operation, and a small flush interval may lead to exceessive seeks.
# The settings below allow one to configure the flush policy to flush data after a period of time or
# every N messages (or both). This can be done globally and overridden on a per-topic basis.

# The number of messages to accept before forcing a flush of data to disk
#log.flush.interval.messages=10000

# The maximum amount of time a message can sit in a log before we force a flush
#log.flush.interval.ms=1000

############################# Log Retention Policy #############################

# The following configurations control the disposal of log segments. The policy can
# be set to delete segments after a period of time, or after a given size has accumulated.
# A segment will be deleted whenever *either* of these criteria are met. Deletion always happens
# from the end of the log.

#数据保存时间,默认7天,单位小时
log.retention.hours=168

# A size-based retention policy for logs. Segments are pruned from the log as long as the remaining
# segments don't drop below log.retention.bytes. Functions independently of log.retention.hours.
#log.retention.bytes=1073741824

# The maximum size of a log segment file. When this size is reached a new log segment will be created.
log.segment.bytes=1073741824

# The interval at which log segments are checked to see if they can be deleted according
# to the retention policies
log.retention.check.interval.ms=300000

############################# Zookeeper #############################

#zookeeper地址,多个地址用逗号隔开
zookeeper.connect=node01:2181,node02:2181,node03:2181

# Timeout in ms for connecting to zookeeper
zookeeper.connection.timeout.ms=6000
如果想要内网中连接kafka集群,如windows中IDEA操作虚拟机中的Kafka,添加配置
listeners=PLAINTEXT://192.168.10.108:9092
advertised.listeners=PLAINTEXT://192.168.10.108:9092
如果是公网则需进一步设置
listeners 是kafka真正bind的地址
advertised.listeners 是暴露给外部的listeners,如果没有设置,会用listeners,将Broker的Listener信息发布到Zookeeper中
分别在三个节点启动kafka
bin/kafka-server-start.sh -daemon config/server.properties
创建主题
bin/kafka-topics.sh --create --zookeeper node01:2181 --topic topic1 --replication-factor 2 --partitions 2
查看主题信息
bin/kafka-topics.sh --describe --zookeeper node01:2181 --topic topic1
查看kafka中已经创建的主题列表
bin/kafka-topics.sh --list --zookeeper node01:2181
删除topic:
bin/kafka-topics.sh --delete --zookeeper node01:2181 --topic topic1
增加分区
bin/kafka-topics.sh --alter --zookeeper node01:2181 --topic topic1 --partitions 3
生产端
bin/kafka-console-producer.sh --broker-list node01:9092,node02:9092,node03:9092 --topic topic1
消费端
bin/kafka-console-consumer.sh --bootstrap-server node01:9092 --from-beginning --topic topic1
安装脚本
#! /bin/bash

tar -zxvf /bigdata/downloads/kafka_2.12-2.2.1.tgz -C /bigdata
# 循环
for host in node01 node02 node03; do
        echo ==================node$host==================
        # 建立软连接
        ssh $host "ln -s /bigdata/kafka_2.12-2.2.1 /usr/local/kafka"
        ssh $host 'echo "export KAFKA_HOME=/usr/local/kafka" >> /etc/profile'
        ssh $host "echo 'export PATH=$PATH:${KAFKA_HOME}/bin' >> /etc/profile"
        #ssh $host 'source /etc/profile' # 无效
done
## 覆盖配置文件
cp /bigdata/downloads/server.properties /usr/local/kafka/config
#
mkdir -p /usr/local/kafka/kafka-logs
#xsync /bigdata/kafka_2.12-2.2.1
## 循环
m=0
for host in node01 node02 node03; do
        echo ==================node$host==================
        ssh $host "sed -i s#^broker.id=.*#broker.id="$m"# /usr/local/kafka/config/server.properties"
        ssh $host "sed -i s#^host.name=.*#host.name=node0"`expr $m + 1`"# /usr/local/kafka/config/server.properties"
        let 'm+=1'
done
Flume
下载
解压
flume-env.sh
export JAVA_HOME=/usr/local/jdk
Sqoop
Spark
- 在所有节点上下载或上传spark文件,解压缩安装,建立软连接
- 配置所有节点spark安装目录下的spark-evn.sh文件
- 配置slaves
- 配置spark-default.conf
- 配置所有节点的环境变量
spark-evn.sh
[root@node01 conf]# mv spark-env.sh.template spark-env.sh
[root@node01 conf]# vi spark-env.sh
加入
export JAVA_HOME=/usr/local/jdk
#export SCALA_HOME=/software/scala-2.11.8
export HADOOP_HOME=/usr/local/hadoop
export HADOOP_CONF_DIR=/usr/local/hadoop/etc/hadoop
#Spark历史服务分配的内存尺寸
#export SPARK_DAEMON_MEMORY=512m
#下面的这一项就是Spark的高可用配置,如果是配置master的高可用,master就必须有;如果是slave的高可用,slave就必须有;但是建议都配置。
export SPARK_DAEMON_JAVA_OPTS="-Dspark.deploy.recoveryMode=ZOOKEEPER -Dspark.deploy.zookeeper.url=node01:2181,node02:2181,node03:2181 -Dspark.deploy.zookeeper.dir=/spark"

#当启用了Spark的高可用之后,下面的这一项应该被注释掉(即不能再被启用,后面通过提交应用时使用--master参数指定高可用集群节点)
#export SPARK_MASTER_IP=master01
#export SPARK_WORKER_MEMORY=1500m
#export SPARK_EXECUTOR_MEMORY=100m
-Dspark.deploy.recoveryMode=ZOOKEEPER #说明整个集群状态是通过zookeeper来维护的,整个集群状态的恢复也是通过zookeeper来维护的。就是说用zookeeper做了spark的HA配置,Master(Active)挂掉的话,Master(standby)要想变成Master(Active)的话,Master(Standby)就要像zookeeper读取整个集群状态信息,然后进行恢复所有Worker和Driver的状态信息,和所有的Application状态信息;
-Dspark.deploy.zookeeper.url=potter2:2181,potter3:2181,potter4:2181,potter5:2181#将所有配置了zookeeper,并且在这台机器上有可能做master(Active)的机器都配置进来;(我用了4台,就配置了4台)
-Dspark.deploy.zookeeper.dir=/spark
-Dspark.deploy.zookeeper.dir是保存spark的元数据,保存了spark的作业运行状态;
zookeeper会保存spark集群的所有的状态信息,包括所有的Workers信息,所有的Applactions信息,所有的Driver信息,如果集群
slaves
[root@node03 conf]# mv slaves.template slaves
[root@node03 conf]# vi slaves
将localhost删掉,三个节点都加进去
node01
node02
node03
配置环境变量
vi /etc/profile
添加
export SPARK_HOME=/usr/local/spark
export PATH=$PATH:$SPARK_HOME/bin
source /etc/profile
配置spark-default.conf
spark默认本地模式
修改下面一项:
spark.master spark://node01:7077,node02:7077,node03:7077
以上工作是在所有节点都要进行的
启动
zookeeper启动
hadoop启动
在一个节点上
/usr/local/spark/sbin/start-all.sh
在另外两个节点上单独启动master,实现高可用
/usr/local/spark/sbin/start-master.sh
spark-shell命令可以启动shell
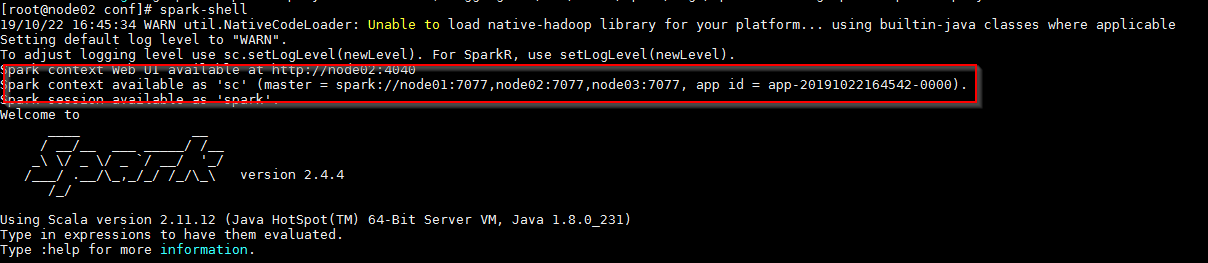
web界面
node01:8080
node02:8080
node03:8080
如果8080被占用,spark默认会加1
安装脚本
#! /bin/bash

tar -zxvf /bigdata/downloads/spark-2.4.6-bin-hadoop2.7.tgz -C /bigdata
# 循环
for host in node01 node02 node03; do
        echo ==================node$host==================
        # 建立软连接
        ssh $host "ln -s /bigdata/spark-2.4.6-bin-hadoop2.7 /usr/local/spark"
        ssh $host "echo 'export SPARK_HOME=/usr/local/spark' >> /etc/profile"
        ssh $host "echo 'export PATH=$PATH:$SPARK_HOME/bin' >> /etc/profile"
done
mv /usr/local/spark/conf/spark-env.sh.template /usr/local/spark/conf/spark-env.sh
echo "export JAVA_HOME=/usr/local/jdk" >> /usr/local/spark/conf/spark-env.sh
echo "export HADOOP_HOME=/usr/local/hadoop" >> /usr/local/spark/conf/spark-env.sh
echo "export HADOOP_CONF_DIR=/usr/local/hadoop/etc/hadoop" >> /usr/local/spark/conf/spark-env.sh
echo 'export SPARK_DAEMON_JAVA_OPTS="-Dspark.deploy.recoveryMode=ZOOKEEPER -Dspark.deploy.zookeeper.url=node01:2181,node02:2181,node03:2181 -Dspark.deploy.zookeeper.dir=/spark"
' >> /usr/local/spark/conf/spark-env.sh
mv /usr/local/spark/conf/slaves.template /usr/local/spark/conf/slaves
cat /dev/null > /usr/local/spark/conf/slaves
echo "node01" >> /usr/local/spark/conf/slaves
echo "node02" >> /usr/local/spark/conf/slaves
echo "node03" >> /usr/local/spark/conf/slaves
mv /usr/local/spark/conf/spark-defaults.conf.template /usr/local/spark/conf/spark-defaults.conf
echo "spark.master spark://node01:7077,node02:7077,node03:7077" >> /usr/local/spark/conf/spark-defaults.conf

xsync /bigdata/spark-2.4.6-bin-hadoop2.7
https://www.cnblogs.com/aidata/p/11453991.html#_label0
Flink
下载 https://flink.apache.org/downloads.html
flink-1.10.1-bin-scala_2.12
flink-shaded-hadoop-2-uber-2.8.3-10.0.jar
解压缩
[root@node01 software]# tar -zxvf flink-1.10.1-bin-scala_2.12.tgz -C /bigdata/application/
配置环境变量,建立软连接
ln -s /bigdata/flink-1.10.1 /usr/local/flink
将官网hadoop的jar包 flink-shaded-hadoop-2-uber-2.8.3-10.0.jar 放入lib目录下
编辑flink-conf.yaml
jobmanager.rpc.address:值设置成你master节点的IP地址
taskmanager.heap.mb:每个TaskManager可用的总内存
taskmanager.numberOfTaskSlots:每台机器上可用CPU的总数
parallelism.default:每个Job运行时默认的并行度
taskmanager.tmp.dirs:临时目录
jobmanager.heap.mb:每个节点的JVM能够分配的最大内存
jobmanager.rpc.port: 6123
jobmanager.web.port: 8081
################################################################################
#  Licensed to the Apache Software Foundation (ASF) under one
#  or more contributor license agreements.  See the NOTICE file
#  distributed with this work for additional information
#  regarding copyright ownership.  The ASF licenses this file
#  to you under the Apache License, Version 2.0 (the
#  "License"); you may not use this file except in compliance
#  with the License.  You may obtain a copy of the License at
#
#      http://www.apache.org/licenses/LICENSE-2.0
#
#  Unless required by applicable law or agreed to in writing, software
#  distributed under the License is distributed on an "AS IS" BASIS,
#  WITHOUT WARRANTIES OR CONDITIONS OF ANY KIND, either express or implied.
#  See the License for the specific language governing permissions and
# limitations under the License.
################################################################################


#==============================================================================
# Common
#==============================================================================

# The external address of the host on which the JobManager runs and can be
# reached by the TaskManagers and any clients which want to connect. This setting
# is only used in Standalone mode and may be overwritten on the JobManager side
# by specifying the --host <hostname> parameter of the bin/jobmanager.sh executable.
# In high availability mode, if you use the bin/start-cluster.sh script and setup
# the conf/masters file, this will be taken care of automatically. Yarn/Mesos
# automatically configure the host name based on the hostname of the node where the
# JobManager runs.

jobmanager.rpc.address: node03

# The RPC port where the JobManager is reachable.

jobmanager.rpc.port: 6123


# The heap size for the JobManager JVM

jobmanager.heap.size: 1024m


# The heap size for the TaskManager JVM

taskmanager.heap.size: 1024m


# The number of task slots that each TaskManager offers. Each slot runs one parallel pipeline.

taskmanager.numberOfTaskSlots: 2

# The parallelism used for programs that did not specify and other parallelism.

parallelism.default: 2

# The default file system scheme and authority.
#
# By default file paths without scheme are interpreted relative to the local
# root file system 'file:///'. Use this to override the default and interpret
# relative paths relative to a different file system,
# for example 'hdfs://mynamenode:12345'
#
fs.default-scheme: hdfs://ns/

#==============================================================================
# High Availability
#==============================================================================

# The high-availability mode. Possible options are 'NONE' or 'zookeeper'.
#
high-availability: zookeeper

# The path where metadata for master recovery is persisted. While ZooKeeper stores
# the small ground truth for checkpoint and leader election, this location stores
# the larger objects, like persisted dataflow graphs.
#
# Must be a durable file system that is accessible from all nodes
# (like HDFS, S3, Ceph, nfs, ...)
#
high-availability.storageDir: hdfs://ns/flink/ha/


# The list of ZooKeeper quorum peers that coordinate the high-availability
# setup. This must be a list of the form:
# "host1:clientPort,host2:clientPort,..." (default clientPort: 2181)
#
high-availability.zookeeper.quorum: node01:2181,node02:2181,node03:2181
high-availability.zookeeper.path.root: /flink

# ACL options are based on https://zookeeper.apache.org/doc/r3.1.2/zookeeperProgrammers.html#sc_BuiltinACLSchemes
# It can be either "creator" (ZOO_CREATE_ALL_ACL) or "open" (ZOO_OPEN_ACL_UNSAFE)
# The default value is "open" and it can be changed to "creator" if ZK security is enabled
#
# high-availability.zookeeper.client.acl: open

#==============================================================================
# Fault tolerance and checkpointing
#==============================================================================

# The backend that will be used to store operator state checkpoints if
# checkpointing is enabled.
#
# Supported backends are 'jobmanager', 'filesystem', 'rocksdb', or the
# <class-name-of-factory>.
#
state.backend: filesystem

# Directory for checkpoints filesystem, when using any of the default bundled
# state backends.
#
state.checkpoints.dir: hdfs://ns/flink-checkpoints

# Default target directory for savepoints, optional.
#
state.savepoints.dir: hdfs://ns/flink-checkpoints

# Flag to enable/disable incremental checkpoints for backends that
# support incremental checkpoints (like the RocksDB state backend).
#
# state.backend.incremental: false

#==============================================================================
# Rest & web frontend
#==============================================================================

# The port to which the REST client connects to. If rest.bind-port has
# not been specified, then the server will bind to this port as well.
#
rest.port: 8081

# The address to which the REST client will connect to
#
#rest.address: 0.0.0.0

# Port range for the REST and web server to bind to.
#
#rest.bind-port: 8080-8090

# The address that the REST & web server binds to
#
#rest.bind-address: 0.0.0.0

# Flag to specify whether job submission is enabled from the web-based
# runtime monitor. Uncomment to disable.

web.submit.enable: true

#==============================================================================
# Advanced
#==============================================================================

# Override the directories for temporary files. If not specified, the
# system-specific Java temporary directory (java.io.tmpdir property) is taken.
#
# For framework setups on Yarn or Mesos, Flink will automatically pick up the
# containers' temp directories without any need for configuration.
#
# Add a delimited list for multiple directories, using the system directory
# delimiter (colon ':' on unix) or a comma, e.g.:
#     /data1/tmp:/data2/tmp:/data3/tmp
#
# Note: Each directory entry is read from and written to by a different I/O
# thread. You can include the same directory multiple times in order to create
# multiple I/O threads against that directory. This is for example relevant for
# high-throughput RAIDs.
#
# io.tmp.dirs: /tmp

# Specify whether TaskManager's managed memory should be allocated when starting
# up (true) or when memory is requested.
#
# We recommend to set this value to 'true' only in setups for pure batch
# processing (DataSet API). Streaming setups currently do not use the TaskManager's
# managed memory: The 'rocksdb' state backend uses RocksDB's own memory management,
# while the 'memory' and 'filesystem' backends explicitly keep data as objects
# to save on serialization cost.
#
# taskmanager.memory.preallocate: false

# The classloading resolve order. Possible values are 'child-first' (Flink's default)
# and 'parent-first' (Java's default).
#
# Child first classloading allows users to use different dependency/library
# versions in their application than those in the classpath. Switching back
# to 'parent-first' may help with debugging dependency issues.
#
# classloader.resolve-order: child-first

# The amount of memory going to the network stack. These numbers usually need
# no tuning. Adjusting them may be necessary in case of an "Insufficient number
# of network buffers" error. The default min is 64MB, the default max is 1GB.
#
# taskmanager.network.memory.fraction: 0.1
# taskmanager.network.memory.min: 64mb
# taskmanager.network.memory.max: 1gb

#==============================================================================
# Flink Cluster Security Configuration
#==============================================================================

# Kerberos authentication for various components - Hadoop, ZooKeeper, and connectors -
# may be enabled in four steps:
# 1. configure the local krb5.conf file
# 2. provide Kerberos credentials (either a keytab or a ticket cache w/ kinit)
# 3. make the credentials available to various JAAS login contexts
# 4. configure the connector to use JAAS/SASL

# The below configure how Kerberos credentials are provided. A keytab will be used instead of
# a ticket cache if the keytab path and principal are set.

# security.kerberos.login.use-ticket-cache: true
# security.kerberos.login.keytab: /path/to/kerberos/keytab
# security.kerberos.login.principal: flink-user

# The configuration below defines which JAAS login contexts

# security.kerberos.login.contexts: Client,KafkaClient

#==============================================================================
# ZK Security Configuration
#==============================================================================

# Below configurations are applicable if ZK ensemble is configured for security

# Override below configuration to provide custom ZK service name if configured
# zookeeper.sasl.service-name: zookeeper

# The configuration below must match one of the values set in "security.kerberos.login.contexts"
# zookeeper.sasl.login-context-name: Client

#==============================================================================
# HistoryServer
#==============================================================================

# The HistoryServer is started and stopped via bin/historyserver.sh (start|stop)

# Directory to upload completed jobs to. Add this directory to the list of
# monitored directories of the HistoryServer as well (see below).
#jobmanager.archive.fs.dir: hdfs:///completed-jobs/

# The address under which the web-based HistoryServer listens.
#historyserver.web.address: 0.0.0.0

# The port under which the web-based HistoryServer listens.
historyserver.web.port: 8082

# Comma separated list of directories to monitor for completed jobs.
#historyserver.archive.fs.dir: hdfs:///completed-jobs/

# Interval in milliseconds for refreshing the monitored directories.
#historyserver.archive.fs.refresh-interval: 10000

yarn.application-attempts: 10
编辑master文件
node03:8086
node01:8086
编辑slaves文件
node01
node02
node03
编辑zoo.cfg文件
################################################################################
#  Licensed to the Apache Software Foundation (ASF) under one
#  or more contributor license agreements.  See the NOTICE file
#  distributed with this work for additional information
#  regarding copyright ownership.  The ASF licenses this file
#  to you under the Apache License, Version 2.0 (the
#  "License"); you may not use this file except in compliance
#  with the License.  You may obtain a copy of the License at
#
#      http://www.apache.org/licenses/LICENSE-2.0
#
#  Unless required by applicable law or agreed to in writing, software
#  distributed under the License is distributed on an "AS IS" BASIS,
#  WITHOUT WARRANTIES OR CONDITIONS OF ANY KIND, either express or implied.
#  See the License for the specific language governing permissions and
# limitations under the License.
################################################################################

# The number of milliseconds of each tick
tickTime=2000

# The number of ticks that the initial  synchronization phase can take
initLimit=10

# The number of ticks that can pass between  sending a request and getting an acknowledgement
syncLimit=5

# The directory where the snapshot is stored.
# dataDir=/tmp/zookeeper

# The port at which the clients will connect
clientPort=2181

# ZooKeeper quorum peers
server.1=node01:2888:3888
server.2=node02:2888:3888
server.3=node03:2888:3888
# server.2=host:peer-port:leader-port
将配置好的flink目录复制到各个节点,配置环境变量,软连接
启动
bin下通过 start-cluster.sh 启动
访问node03:8086
安装脚本
#! /bin/bash

tar -zxvf /bigdata/downloads/flink-1.10.1-bin-scala_2.12.tgz -C /bigdata

# 循环
for host in node01 node02 node03; do
        echo ==================node$host==================
        # 建立软连接
        ssh $host "ln -s /bigdata/flink-1.10.1 /usr/local/flink"
        ssh $host "echo 'export FLINK_HOME=/usr/local/flink' >> /etc/profile"
        ssh $host "echo 'export PATH=$PATH:$FLINK_HOME/bin' >> /etc/profile"
done
# 复制jar包
cp /bigdata/downloads/flink-shaded-hadoop-2-uber-2.8.3-10.0.jar /usr/local/flink/lib
cp /bigdata/downloads/flink-conf.yaml /usr/local/flink/conf
# 编辑masters和slaves
cat /dev/null > /usr/local/flink/conf/masters
cat /dev/null > /usr/local/flink/conf/slaves
echo "node01" >> /usr/local/flink/conf/slaves
echo "node02" >> /usr/local/flink/conf/slaves
echo "node03" >> /usr/local/flink/conf/slaves
echo "node03:8086" >> /usr/local/flink/conf/masters
echo "node01:8086" >> /usr/local/flink/conf/masters
cp /bigdata/downloads/zoo.cfg /usr/local/flink/conf

xsync /bigdata/flink-1.10.1
ClickHouse
Rpm包下载 http://repo.red-soft.biz/repos/clickhouse/stable/el7/
下载到了downloads目录下了
# 可能用到的相关依赖
rpm -ivh downloads/libtool-ltdl-2.4.2-21.el7_2.x86_64.rpm
rpm -ivh downloads/unixODBC-2.3.1-11.el7.x86_64.rpm
yum install libicu.x86_64


rpm -ivh downloads/clickhouse-server-common-1.1.54236-4.el7.x86_64.rpm
rpm -ivh downloads/clickhouse-server-1.1.54236-4.el7.x86_64.rpm

#安装server
rpm -ivh downloads/clickhouse-server-1.1.54236-4.el7.x86_64.rpm
rpm -ivh downloads/clickhouse-debuginfo-1.1.54236-4.el7.x86_64.rpm
rpm -ivh downloads/clickhouse-client-1.1.54236-4.el7.x86_64.rpm
rpm -ivh downloads/clickhouse-compressor-1.1.54236-4.el7.x86_64.rpm


#clickhouse-server配置文件目录
cd /etc/clickhouse-server/
config.xml配置相应的IP地址(《listen host》)
允许远程连接
    <!-- Listen specified host. use :: (wildcard IPv6 address), if you want to accept connections both with IPv4 and IPv6 from everywhere. -->
    <!-- <listen_host>::</listen_host> -->
    <listen_host>0.0.0.0</listen_host>
可修改端口
<tcp_port>9006</tcp_port>
users.xml(配置相应的IP地址)(<networks><ip>)
允许所有连接
<networks incl="networks" replace="replace">
   <ip>::/0</ip>
</networks>
启动服务
clickhouse-server --config-file=/etc/clickhouse-server/config.xml
client连接
clickhouse-client --host=192.168.10.108 --port=9006
简单操作
show tables;
select 1;
关闭ClickHouse服务
ps -aux|grep clickhouse-server
后台托管启动服务
nohup clickhouse-server --config-file=/etc/clickhouse-server/config.xml >null 2>&1 &