本文转载于:奥怪的小栈
这篇文章告诉你如何在2019快速上手搭建一个像我一样的博客:基于HEXO+Github搭建。并完成SEO优化,打造一个炫酷博客。
本站基于HEXO+Github搭建。
所以你需要准备好HEXO+Github等相关软件和工具。
前言
现在已经是2019年了,你还没有自己的博客就out了!所以,我为了赶上时代的潮流,花费了几天的时间,从零基础到入门。搞出来了这样的一个博客。
在这里跟大家分享一下经验。
由于网上已经有很多而且很详细的hexo搭博客教程了,我就不再学习他们,把全部过程都放出来了,小白可以看 致谢 部分内的文章。
!HEXO文档和NexT主题文档真的很有帮助!一定要看!
!!我会把本站独特的优化放到这篇文章里:https://aoguai.top/archives/dccf2fa6.html,方便大家查看(当然你得先看完这篇文章)。!!
致谢
官方文档:
hexo文档:https://hexo.io/zh-cn/
NexT主题文档:http://theme-next.iissnan.com/getting-started.html
参考文章:
暂时放着参考文章先,有空再自己写一下。
我也是看着以下大佬的文章照葫芦画瓢写出来的:(从入门到个性化,按开始搭建到个性化配置的顺序排序)
PS:其中SEO优化部分有些方法已经失效!请勿再从里面复制粘贴!特别是百度自动推送插件那部分!
PS:点击鼠标出现❤好像已经失效了!
使用hexo+github搭建免费个人博客详细教程 - 我是小茗同学 - 博客园| ookamiAntD's Blog:https://www.cnblogs.com/liuxianan/p/build-blog-website-by-hexo-github.html)
基于Hexo+Github+Coding搭建个人博客——基础篇(从菜鸟到放弃) | ookamiAntD's Blog:https://yangbingdong.com/2017/build-blog-hexo-base/)
基于Hexo搭建个人博客——进阶篇(从入门到入土) | ookamiAntD's Blog:http://yangbingdong.com/2017/build-blog-hexo-advanced/#%E5%9F%9F%E5%90%8D%E7%BB%91%E5%AE%9A%E7%AF%87)
Hexo 的 NexT 主题个性化教程:打造炫酷网站:http://shenzekun.cn/hexo%E7%9A%84next%E4%B8%BB%E9%A2%98%E4%B8%AA%E6%80%A7%E5%8C%96%E9%85%8D%E7%BD%AE%E6%95%99%E7%A8%8B.html
打造个性超赞博客 Hexo + NexT + GitHub Pages 的超深度优化:https://io-oi.me/tech/hexo-next-optimization.html
Hexo常见问题解决方案:https://xuanwo.io/2014/08/14/hexo-usual-problem/
SEO优化基础(复制粘贴就能用)推荐看这个,亲测(不排除再失效,慎重的自测一下)没问题:
Hexo博客之后续SEO优化 - 简书:https://www.jianshu.com/p/c20bb9df1867?utm_campaign=maleskine&utm_content=note&utm_medium=seo_notes&utm_source=recommendation
Hexo-Next搭建个人博客(SEO优化):https://yfzhou.coding.me/2018/08/29/Hexo-Next%E6%90%AD%E5%BB%BA%E4%B8%AA%E4%BA%BA%E5%8D%9A%E5%AE%A2%EF%BC%88SEO%E4%BC%98%E5%8C%96%EF%BC%89/
一些你可能会用到的网站的官网:
免费域名申请,网速对国内玩家不友好,建议自备梯子。
Freenom:https://www.freenom.com/zh/index.html?lang=zh)
DNS解析,腾讯的。不需要梯子。
dnspod:https://www.dnspod.cn/
如果你连github的用途都不知道,建议回去看上面的文章。
github:https://github.com/
可以将博客图片上传到这来。(这个比较麻烦,新手慎重)
七牛云:https://portal.qiniu.com/
免费图床,也可以将博客图片上传到这来。
SM.MS:https://sm.ms/
本博客评论系统官网。(搭建方法可以看NexT主题文档)
来必力:https://www.livere.com
SEO优化用
百度搜索资源平台:http://zhanzhang.baidu.com/)
Google提交入口:https://www.google.com/webmasters/tools/home?hl=zh-CN)
360提交入口:http://info.so.360.cn/site_submit.html)
常用的命令
hexo常用命令:
```
hexo new "title" # 生成新文章: source\_posts itle.md
hexo new page "title" # 生成新的页面, 后面可在主题配置文件中配置页面
生成文章或页面的模板放在博客文件夹根目录下的 scaffolds/ 文件夹里面, 文章对应的是 post.md , 页面对应的是page.md, 草稿的是draft.md
hexo init [folder] # 初始化一个网站. 如果没有设置 folder , Hexo 默认在目前的文件夹建立网站
hexo new [layout] <title> # 新建一篇文章. 如果没有设置 layout 的话, 默认使用 _config.yml 中的 default_layout 参数代替. 如果标题包含空格的话, 请使用引号括起来
hexo version # 查看版本
hexo clean # 清除缓存文件 (db.json) 和已生成的静态文件 (public)
hexo g # 等于hexo generate # 生成静态文件
hexo s # 等于hexo server # 本地预览
hexo d # 等于hexo deploy # 部署, 可与hexo g合并为 hexo d -g
git config --global user.name "YOURUSERNAME" # 修改git用户名
git config --global user.email "YOUREMAIL" # 修改git邮箱
npm uninstall XXX,卸载某个插件 例如
npm uninstall hexo-generator-sitemap --save
npm uninstall hexo-generator-baidu-sitemap --save
npm uninstall hexo-abbrlink --save
```
文章的模版文件:
用 Hexo 写文章是直接用 Markdown 写的,
你可以直接通过在~/blog/source/_posts/下新建.md结尾的文件来写新的文章。
你可以通过自定义文章的模版文件,从而每次命令行新建的文章都会有你自定义的内容。
注意:如果自己直接新建文件,一定要记得加上文件最上方的参数,即下面的相关内容,还有编码请用 UTF-8。
关于文件最上方的参数,参见 Hexo 官方文档的 Front-matter 和页面变量,下面是总结:
```
/* !!!!!!!!!!
** 每一项的 : 后面均有一个空格
** 且 : 为英文符号
** !!!!!!!!!!
*/
title:
/* 文章标题,可以为中文 */
date:
/* 建立日期,如果自己手动添加,请按固定格式
** 就算不写,页面每篇文章顶部的发表于……也能显示
** 只要在主题配置文件中,配置了 created_at 就行
** 那为什么还要自己加上?
** 自定义文章发布的时间
*/
updated:
/* 更新日期,其它与上面的建立日期类似
** 不过在页面每篇文章顶部,是更新于……
** 在主题配置文件中,是 updated_at
*/
permalink:
/* 若站点配置文件下的 permalink 配置了 title
** 则可以替换文章 URL 里面的 title(文章标题)
*/
categories:
/* 分类,支持多级,比如:
- technology
- computer
- computer-aided-art
则为 technology/computer/computer-aided-art
(不适用于 layout: page)
*/
tags:
/* 标签
** 多个可以这样写 [标签1,标签2,标签3]
** (不适用于 layout: page)
*/
description:
/* 文章的描述,在每篇文章标题下方显示
** 并且作为网页的 description 元数据
** 如果不写,则自动取 <!-- more -->
** 之前的文字作为网页的 description 元数据
*/
keywords:
/* 关键字,并且作为网页的 keywords 元数据
** 如果不写,则自动取 tags 里的项
** 作为网页的 keywords 元数据
*/
comments:
/* 是否开启评论
** 默认值是 true
** 要关闭写 false
*/
layout:
/* 页面布局,默认值是 post,默认值可以在
** 站点配置文件中修改 default_layout
** 另:404 页面可能用到,将其值改为 false
*/
type:
/* categories,目录页面
** tags,标签页面
** picture,用来生成 group-pictures
** quote?
** https://io-oi.me/tech/test.html
*/
photos:
/* Gallery support,用来支持画廊╱相册,用法如下:
- photo_url_1
- photo_url_2
- photo_url_3
https://io-oi.me/tech/test.html
*/
link:
/* 文章的外部链接
** https://io-oi.me/tech/test.html
*/
image:
/* 自定义的文章摘要图片,只在页面展示,文章内消失
** 此项只有参考本文 5.14 节配置好,否则请勿添加!
*/
sticky:
/* 文章置顶
** 此项只有参考本文 5.15 节配置好,否则请勿添加!
*/
password:
/* 文章密码,此项只有参考教程:
** http://shenzekun.cn/hexo的next主题个性化配置教程.html
** 第 24 节,配置好,否则请勿添加!
** 发现还是有 bug 的,就是右键在新标签中打开
** 然后无论是否输入密码,都能看到内容
*/
```
Markdown 语法(写文章时候用):
```
1.[//]: # (注释,不会在浏览器中显示。)
————————————————————————————————————————————————————————————————————
2.使用= 和 -,标记一级和二级 标题。
例如:
一级标题
=
二级标题
-
使用 #,可以表示 1-6级 标题。
# 第一级标题 `<h1>`
## 第二级标题 `<h2>`
### 第三级标题 `<h3>`
#### 第二四级标题 `<h4>`
##### 第五级标题 `<h5>`
###### 第六级标题 `<h6>`
————————————————————————————————————————————————————————————————————
3.段落的前后要有空行,所谓的空行是指没有文字内容。若想在段内强制换行的方式是使用两个以上空格加上回车(引用中换行省略回车)
————————————————————————————————————————————————————————————————————
4.在段落的每行或者只在第一行使用符号 > ,还可使用多个嵌套引用,如:
> 区块引用
> > 嵌套引用
> > >三嵌套引用
> > > > 四嵌套引用
————————————————————————————————————————————————————————————————————
5.代码区块的建立是在每行加上4个空格或者一个制表符(如同写代码一样)。如普通段落:
fun main(args: Array<String>) {
println("Hello World!")
println("sum = ${sum(34, 67)}")
println("sum = ${sum(34, 67)}")
println("sum = ${sum(34, 6, 57, 34)}")
printSum(237, 57)
printSum(234, 567, 8)
vars(1, 4, 6, 78, 0, 6, 9, 8)
val sumLambda: (Int, Int) -> Int = { x, y -> x + y }
println("sumLambda = ${sumLambda(3, 6)}")
————————————————————————————————————————————————————————————————————
6.在强调内容两侧分别加上 *或者 -,如:
*斜体* ,_斜体_
**加粗**,__粗体__
————————————————————————————————————————————————————————————————————
7.使用 . 、+、或- 标记无序列表,如:
- 第一项
+ 第二项
- 第三项
+ 第四项
- 第五项
+ 第六项
————————————————————————————————————————————————————————————————————
8.分割线最常使用就是三个或以上的 * , ======</font>还可以使用 - 和 _。
示例md代码:
***
---
_____
======
————————————————————————————————————————————————————————————————————
9.链接可以由两种形式生成,行内式 和 参考式。
行内式:
示例md代码:
[GitHub](http://github.com)
自动生成连接 <http://www.github.com/>
参考试:
[GitHub][1]
[1]:http://github.com
自动生成连接 <http://www.github.com/>
————————————————————————————————————————————————————————————————————
10.添加图片形式和链接相似,只需要在链接的基础上前方加一个 !号。
示例md代码:
格式: 
————————————————————————————————————————————————————————————————————
11.表格:
示例md代码:
第一格表头 | 第二格表头
---------| -------------
内容单元格 第一列第一格 | 内容单元格第二列第一格
内容单元格 第一列第二格 多加文字 | 内容单元格第二列第二格
内容单元格 第一列第三格 多加文字 | 内容单元格第二列第三格
内容单元格 第一列第四格 多加文字 | 内容单元格第二列第四格
```
一些站内SEO优化方法和提醒
百度搜索资源平台提交注意事项:
文件验证文件:
使用 文件验证文件 存放的位置需要放在source文件夹下,如果是html文件那么hexo就会将其编译,所以必须要加上
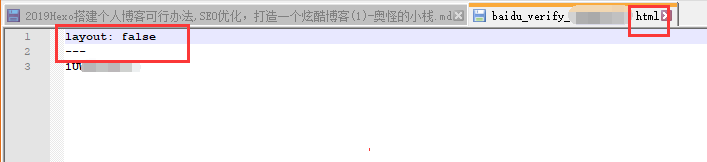
```
layout: false
---
```
这样就不会被hexo编译。(如果验证文件是txt格式的就不需要)
####一些提交时候的坑:
+ 如果你添加的是http协议的话,要保证http协议头能访问,并且不能http转。https
+ 如果你添加的是自定义域名的话,提交失败可以试试把www去掉
我的示例:

文章和代码优化:
``` bash
相关内容可以在 _config.yml 文件下修改
```
title优化:
+ 首页title写法:首页的title写法格式一般是“总标题-特别重要的关键词或者一句话含有特别重要关键词的描述”。注意这里的“-”是英文,计算机只对英语敏感性较高,而对汉语敏感性不太高。
+ 栏目页title写法:栏目页title的写法有两种,关键词名称命名写法是“栏目名称-总名称”,非关键词命名写法是:“栏目名称 栏目关键词-总名称”。
+ 分类列表页的title写法:用关键词为这个栏目起名,然后按照下列顺序填写便可了“分类列表页名称-栏目名称-总名称”。
注意事项:
+ 每个标题应该是根据当前内容设置的独特不重复的。
+ 字数限制。不能太长,要不然搜索引擎结果列表会显示不全。最好不超过 25 个中文字。最好是在 10~20 之间。
+ 切勿堆砌关键词。这是很多人常犯的错误
+ 关键词最好出现在最前面
+ 标题有吸引力。毕竟有吸引力的标题才能让用户点击
+ 连词符的使用。可以使用 |->
+ 不要使用没有意义的句子
keywords优化:
好多站长在keywords堆砌关键词,所以好多搜索引擎不太重视keywords了。建议大家还是认真填写keywords,有的搜索引擎还是很重视的,由于现在词频和密度对于 SEO 影响不大,所以只要保持你的正文中出现 4~6 次关键词就可以了。千万不能堆砌关键词。
注意事项:
+ 首页keywords写法:首页keywords按照选定的栏目名称,在首页的keywords中加入总名称、栏目名称和一两个关键词。
+ 栏目keywords写法:栏目的keywords其栏目下所有分类列表的名称列出,加上栏目关键字,写法是“栏目名称,栏目关键字,栏目分类列表名称”
+ 分类列表页keywords写法:将你这个栏目中的主要关键字写入。
Description优化:
description一般不超过100个字符。对于个人站点而言,描述标签最好是一句通顺的句子,如果不能的话,则宁可不要。
注意事项:
+ 首页description写法:description的写法就是将首页的标题、关键词和一些特殊栏目的内容融合到里面,写成简单的介绍形式,不要只写关键词。
+ 栏目description写法:将栏目的标题、关键字、分类列表名称,尽量的写入description中,仍是尽量写成介绍形式。
+ 分类description写法:是将你这个栏目中的主要关键字写入。
H标签优化:
H 标签的重要性可能是仅次与页面标签。H1->H6 的重要性依次降低。
所以建议在页面的 H1 和 H2 标签中混入关键词。
备注
网站外链的推广度、数量和质量
网站的内链足够强大
网站的原创质量
网站的年龄时间
网站的更新频率(更新次数越多越好)
网站的服务器
网站的流量:流量越高网站的权重越高
网站的关键词排名:关键词排名越靠前,网站的权重越高
网站的收录数量:网站百度收录数量越多,网站百度权重越高
网站的浏览量及深度:用户体验越好,网站的百度权重越高
附录:我的custom.styl样式文件
不建议直接全部复制粘贴!!
custom.styl样式文件路径:~ hemes
extsourcecss\_customcustom.styl
``` [更新时间:2019/7/21]
// Custom styles.
/*******************首页样式*****************************/
// 网站背景
body {
background:url(https://img.zcool.cn/community/019d8f5c8db2d1a801208f8bd92bb7.png@1280w_1l_2o_100sh.png);
background-repeat: repeat; //重复
background-attachment:fixed;
background-position:0% 0%;
}
//改变背景色和透明度等
.main-inner {
background: #000;
padding: 25px;
opacity: 0.75; //整体透明度,包括字体
border-radius: 10px;
}
// 字体颜色
.post-body {
color: #fff; //黑色
}
.post {
margin-top: 60px;
margin-bottom: 60px;
padding: 25px;
-webkit-box-shadow: 0 0 5px rgba(202, 203, 203, .5);
-moz-box-shadow: 0 0 5px rgba(202, 203, 204, .5);
}
// 网站描述
.site-subtitle{ font-size: 15px; color: white; }
// 网站标题
.site-title {
font-size: 30px; //字体大小
font-weight: bold; //字体:粗体
}
// 标题背景
.brand{
background: transparent; //透明
}
// 菜单栏
.menu {
margin-top: 20px;
padding-left: 0;
text-align: center;
background: rgba(0, 0, 0, 0.5); //菜单栏背景色
margin-left: auto;
margin-right: auto;
530px;
border-radius: initial;
}
// 菜单图表链接 以及 超链接样式
a {
color: rgba(0,0,0,1);
}
a:hover {
color: #ff106c;
border-bottom-color: #ff106c;
}
// 菜单
.menu .menu-item a {
font-size: 14px; //字体大小
}
.menu .menu-item a:hover {
border-bottom-color: #ff106c;
}
.posts-expand .post-title-link {
display: inline-block;
position: relative;
color: #fff; // 文章标题颜色
border-bottom: none;
line-height: 1.2;
vertical-align: top;
}
// 头部inner
.header-inner {
padding: 45px 0 25px;
700px;
}
// 站点描述
.site-description {
font-size: 16px;
}
// 作者名
.site-author-name {
font-family: 'Comic Sans MS', sans-serif;
font-size: 20px;
/*******************文章样式*****************************/
// 文章背景框框
.post {
margin-top: 10px;
margin-bottom: 40px;
padding: 18px;
-webkit-box-shadow: 0 0 5px rgba(202, 203, 203, 0.8);
}
// 文章之间的分割线
.posts-expand .post-eof {
margin: 40px auto 40px;
background: white;
}
// 文章小标题颜色块
.post-body h2, h3, h4, h5, h6 {
border-left: 4px solid #2780e3;
padding-left: 10px;
}
}
// ``代码块样式
code {
color: #E6006B;
background: white;
border-radius: 3px;
}
// 文章代码块顶部样式
.highlight figcaption {
margin: 0em;
padding: 0.5em;
background: #eee;
border-bottom: 1px solid #e9e9e9;
}
.highlight figcaption a {
color: rgb(80, 115, 184);
}
// 修改选中字符的颜色
/* webkit, opera, IE9 */
::selection {
background: #00c4b6;
color: #f7f7f7;
}
/* firefox */
::-moz-selection {
background: #00c4b6;
color: #f7f7f7;
}
// 文章标题动态效果 next/source/css/_common/components/post/post-title.styl中.posts-expand .post-title-link确保`position: relative;`属性存在, 如果需要标题呈现链接效果颜色, 将`color`元素去除即可
.posts-expand .post-title-link::before {
background-image: linear-gradient(90deg, #a166ab 0%, #ef4e7b 25%, #f37055 50%, #ef4e7b 75%, #a166ab 100%);
}
// 文章内标题样式(左边的竖线)
.post-body h2, h3, h4, h5, h6 {
border-left: 4px solid #657b83;
padding-left: 10px;
}
.post-body h1 {
border-left: 5px solid #657b83;
padding-left: 10px;
}
body {
color: #fff; // 文章文本颜色
font-size: 16px;
}
.posts-expand .post-meta {
margin: 3px 0 60px 0;
color: #fff; // 文章标签文本颜色
font-family: 'Lato', "PingFang SC", "Microsoft YaHei", sans-serif;
font-size: 12px;
text-align: center;
}
// 文章分类颜色
a {
color: rgba(255, 255, 255, 1);
}
// 去掉图片边框
.posts-expand .post-body img {
border: none;
padding: 0px;
}
.post-copyright {
margin: 2em 0 0;
padding: 0.5em 1em;
border-left: 3px solid #ff1700;
background-color: #f9f9f900; // 版权信息背景色透明
list-style: none;
}
/*******************其他样式*****************************/
// 按钮样式
.btn {
margin-top: 20px;
}
// 自定义的侧栏时间样式
#days {
display: block;
color: #999999;
font-size: 14px;
margin-top: 15px;
}
// 右下角返回顶部按钮样式
.back-to-top {
line-height: 1.5;
right: 10px;
padding-right: 5px;
padding-left: 5px;
padding-top: 2.5px;
padding-bottom: 2.5px;
background-color: rgba(34, 34, 34, 0.75);
border-radius: 5px;
box-shadow: 0px 0px 10px 0px rgba(0, 0, 0, 0.35);
}
// 自定义页脚跳动的心样式
@keyframes heartAnimate {
0%,100%{transform:scale(1);}
10%,30%{transform:scale(0.9);}
20%,40%,60%,80%{transform:scale(1.1);}
50%,70%{transform:scale(1.1);}
}
#heart {
animation: heartAnimate 1.33s ease-in-out infinite;
}
.with-love {
color: rgb(255, 113, 168);
}
/*******************写作用样式*****************************/
// 下载样式
a#download {
display: inline-block;
padding: 0 10px;
color: #fff;
background: transparent;
border: 2px solid #fff;
border-radius: 2px;
transition: all .5s ease;
font-weight: bold;
&:hover {
background: #fff;
color: #fff;
}
}
/ /颜色块-黄
span#inline-yellow {
display:inline;
padding:.2em .6em .3em;
font-size:80%;
font-weight:bold;
line-height:1;
color:#fff;
text-align:center;
white-space:nowrap;
vertical-align:baseline;
border-radius:0;
background-color: #f0ad4e;
}
// 颜色块-绿
span#inline-green {
display:inline;
padding:.2em .6em .3em;
font-size:80%;
font-weight:bold;
line-height:1;
color:#fff;
text-align:center;
white-space:nowrap;
vertical-align:baseline;
border-radius:0;
background-color: #5cb85c;
}
// 颜色块-蓝
span#inline-blue {
display:inline;
padding:.2em .6em .3em;
font-size:80%;
font-weight:bold;
line-height:1;
color:#fff;
text-align:center;
white-space:nowrap;
vertical-align:baseline;
border-radius:0;
background-color: #2780e3;
}
// 颜色块-紫
span#inline-purple {
display:inline;
padding:.2em .6em .3em;
font-size:80%;
font-weight:bold;
line-height:1;
color:#fff;
text-align:center;
white-space:nowrap;
vertical-align:baseline;
border-radius:0;
background-color: #9954bb;
}
// 左侧边框红色块级
p#div-border-left-red {
display: block;
padding: 10px;
margin: 10px 0;
border: 1px solid #ccc;
border-left- 5px;
border-radius: 3px;
border-left-color: #df3e3e;
}
// 左侧边框黄色块级
p#div-border-left-yellow {
display: block;
padding: 10px;
margin: 10px 0;
border: 1px solid #ccc;
border-left- 5px;
border-radius: 3px;
border-left-color: #f0ad4e;
}
// 左侧边框绿色块级
p#div-border-left-green {
display: block;
padding: 10px;
margin: 10px 0;
border: 1px solid #ccc;
border-left- 5px;
border-radius: 3px;
border-left-color: #5cb85c;
}
// 左侧边框蓝色块级
p#div-border-left-blue {
display: block;
padding: 10px;
margin: 10px 0;
border: 1px solid #ccc;
border-left- 5px;
border-radius: 3px;
border-left-color: #2780e3;
}
// 左侧边框紫色块级
p#div-border-left-purple {
display: block;
padding: 10px;
margin: 10px 0;
border: 1px solid #ccc;
border-left- 5px;
border-radius: 3px;
border-left-color: #9954bb;
}
// 右侧边框红色块级
p#div-border-right-red {
display: block;
padding: 10px;
margin: 10px 0;
border: 1px solid #ccc;
border-right- 5px;
border-radius: 3px;
border-right-color: #df3e3e;
}
// 右侧边框黄色块级
p#div-border-right-yellow {
display: block;
padding: 10px;
margin: 10px 0;
border: 1px solid #ccc;
border-right- 5px;
border-radius: 3px;
border-right-color: #f0ad4e;
}
// 右侧边框绿色块级
p#div-border-right-green {
display: block;
padding: 10px;
margin: 10px 0;
border: 1px solid #ccc;
border-right- 5px;
border-radius: 3px;
border-right-color: #5cb85c;
}
// 右侧边框蓝色块级
p#div-border-right-blue {
display: block;
padding: 10px;
margin: 10px 0;
border: 1px solid #ccc;
border-right- 5px;
border-radius: 3px;
border-right-color: #2780e3;
}
// 右侧边框紫色块级
p#div-border-right-purple {
display: block;
padding: 10px;
margin: 10px 0;
border: 1px solid #ccc;
border-right- 5px;
border-radius: 3px;
border-right-color: #9954bb;
}
// 上侧边框红色
p#div-border-top-red {
display: block;
padding: 10px;
margin: 10px 0;
border: 1px solid #ccc;
border-top- 5px;
border-radius: 3px;
border-top-color: #df3e3e;
}
// 上侧边框黄色
p#div-border-top-yellow {
display: block;
padding: 10px;
margin: 10px 0;
border: 1px solid #ccc;
border-top- 5px;
border-radius: 3px;
border-top-color: #f0ad4e;
}
// 上侧边框绿色
p#div-border-top-green {
display: block;
padding: 10px;
margin: 10px 0;
border: 1px solid #ccc;
border-top- 5px;
border-radius: 3px;
border-top-color: #5cb85c;
}
// 上侧边框蓝色
p#div-border-top-blue {
display: block;
padding: 10px;
margin: 10px 0;
border: 1px solid #ccc;
border-top- 5px;
border-radius: 3px;
border-top-color: #2780e3;
}
// 上侧边框紫色
p#div-border-top-purple {
display: block;
padding: 10px;
margin: 10px 0;
border: 1px solid #ccc;
border-top- 5px;
border-radius: 3px;
border-top-color: #9954bb;
}
后语
更多消息请关注我,奥怪的小栈:https://aoguai.github.io/
待补充......