bbs--文章后台
需求分析
在个人文章后台中
1 有添加文章的接口
展示文章标题输入框
文本编辑框
标签 分类 选择框
提交
2 编辑文章的接口
页面与添加文章相同,就是把该文章的内容展示到文本编辑框中
3 删除文章的接口
点击删除,文章清除
4 页面2 10布局,左侧有添加文章功能
右侧以列表形式展现每一条文章,且有分页功能
文章发布
模块及插件引入
2 BS4模块<a>
安装
pip install beautifulsoup4
简单使用

1. from bs4 import BeautifulSoup
# 对一段HTML格式的内容做解析
soup = BeautifulSoup('html内容', 'html.parser')
2. 找标签:
soup.a
3. 找标签的样式:
soup.a["class"]
4. 找特定的标签
soup.select("script")
5. 删除标签
.decompose()
6. 取text文本内容
soup.text
7. 格式化html内容
soup.prettify()
代码思路
页面展示
1 前端页面布局,然后添加文本编辑按照kindeditor插件的说明,进行配置
2 这里说一下图片展示
前端方面按照kindeditor插件的说明
后端单独写一个专门对图片的视图函数
1 接受前端发送的图片文件对象
2 把文件对象写入我们自己定义的media下的文件夹中
3 将文件路径,以url形式返回给前端
文章发布
1 前端通过form的post请求,发送 文章标题 内容 标签
2 后端接受上面的数据,保存数据 文章记录 和 文章详情记录 事务链接
这里要注意的是接受的文章内容为html标签
我们要通过bs4模块将接受的内容进行编辑
1 将文本内容,切前150个数据作为文章描述
2 将得到的文章格式化成字符串,保存在文章详情数据库中
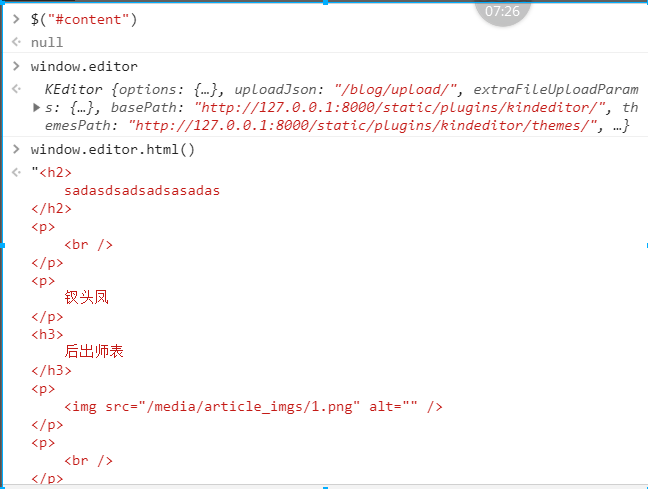
如果想用ajax获取文本内容


实际操作
html

<!DOCTYPE html>
<html lang="en">
<head>
    <meta charset="UTF-8">
    <title>添加新页面</title>
    <link rel="stylesheet" href="/static/bootstrap-3.3.7/css/bootstrap.css">
</head>
<body>
<div class="container">
    <div class="row">
        <div class="col-md-12">
            <form action="" method="post">
            {% csrf_token %}
                <div class="form-group">
                    <label for="title">标题</label>
                    <input type="text" class="form-control" id="title" name="title" placeholder="标题">
                </div>
                <div class="form-group">
                    <label for="content">内容</label>
                    <textarea class="form-control" name="content" id="content" cols="30" rows="20"></textarea>
                </div>

                <div class="form-group">
                    <label for="category">文章分类</label>
                    <select name="category" id="category" class="form-control">
                        {% for category in category_list %}
                            <option value="{{ category.id }}">{{ category.title }}</option>
                        {% endfor %}
                    </select>
                </div>
                <button type="submit" class="btn btn-success">发布</button>
            </form>
        </div>
    </div>
</div>
<script src="/static/js/jquery.js"></script>
<script charset="utf-8" src="/static/plugins/kindeditor/kindeditor-all.js"></script>
<script charset="utf-8" src="/static/plugins/kindeditor/lang/zh-CN.js"></script>
<script>
        KindEditor.ready(function(K) {
                window.editor = K.create('#content', {
                    "uploadJson": "/blog/upload/",
                    "extraFileUploadParams": {"csrfmiddlewaretoken": $("[name='csrfmiddlewaretoken']").val()}
                });
        });
</script>
</body>
</html>
views

# 添加新文章
def add_article(request):
    if request.method == "POST":
        # 获取用户填写的文章内容
        title = request.POST.get("title")
        content = request.POST.get("content")
        category_id = request.POST.get("category")

        # 清洗用户发布的文章的内容,去掉script标签
        soup = BeautifulSoup(content, "html.parser")
        script_list = soup.select("script")
        for i in script_list:
            i.decompose()
        # print(soup.text)
        # print(soup.prettify())

        # 写入数据库
        with transaction.atomic():
            # 1. 先创建文章记录
            article_obj = models.Article.objects.create(
                title=title,
                desc=soup.text[0:150],
                user=request.user,
                category_id=category_id
            )
            # 2. 创建文章详情记录
            models.ArticleDetail.objects.create(
                content=soup.prettify(),
                article=article_obj
            )
        return redirect("/blog/backend/")

    # 把当前博客的文章分类查询出来
    category_list = models.Category.objects.filter(blog__userinfo=request.user)
    return render(request, "add_article.html", {"category_list": category_list})


# 富文本编辑器的图片上传
def upload(request):
    res = {"error": 0}
    print(request.FILES)
    file_obj = request.FILES.get("imgFile")
    file_path = os.path.join(settings.MEDIA_ROOT, "article_imgs", file_obj.name)
    with open(file_path, "wb") as f:
        for chunk in file_obj.chunks():
            f.write(chunk)
    # url = settings.MEDIA_URL + "article_imgs/" + file_obj.name
    url = "/media/article_imgs/" + file_obj.name
    res["url"] = url
    return JsonResponse(res)
删除文章
代码思路
1 js 点击删除,获取对应这条文章的id,传给后端
2 后端删除数据
修改文章
与文章发布相同
1 点击编辑,通过get请求得到文章的id,
2 后端通过文章id,查询出文章内容,传给后端。
代码思路
