引言
hbase 提供很方便的 shell 脚本,可以对数据表进行 CURD 操作,但是毕竟是有一定的学习成本的,基本上对于开发来讲,sql 语句都是看家本领,那么,有没有一种方法可以把 sql 语句转换成 hbase的原生API呢? 这样就可以通过普通平常的 sql 来对hbase 进行数据的管理,使用成本大大降低。
Apache Phoenix 组件就完成了这种需求,官方注解为 “Phoenix - we put the SQL back in NoSql”,通过官方说明,Phoenix 的性能很高,相对于 hbase 原生的scan 并不会差多少,而对于类似的组件 hive、Impala等,性能有着显著的提升,详细请阅读 https://phoenix.apache.org/performance.html。
Apache Phoenix 官方站点:https://phoenix.apache.org/
Phoenix支持的sql语句: https://phoenix.apache.org/language/index.html
Phoenix 支持的DataTypes:https://phoenix.apache.org/language/datatypes.html
Phoenix 支持的函数:https://phoenix.apache.org/language/functions.html
安装使用
Phoenix 安装很简单,下载对应 hbase 版本的 Phoenix,将下载文件 apache-phoenix-4.15.0-HBase-1.4-bin.tar 解压,将 phoenix-4.15.0-HBase-1.4-server.jar 拷贝到 hbase 安装目录的 lib 目录下,注意:每台 regionserver 均需要拷贝,重启 hbase server 即可,官方如下:
download and expand the latest phoenix-[version]-bin.tar.

- Add the phoenix-[version]-server.jar to the classpath of all HBase region server and master and remove any previous version. An easy way to do this is to copy it into the HBase lib directory (use phoenix-core-[version].jar for Phoenix 3.x)
- restart the region servers
- Add the phoenix-[version]-client.jar to the classpath of any Phoenix client.
- download and setup SQuirrel as your SQL client so you can issue adhoc SQL against your HBase cluster
shell 命令
通过案例,create 表,插入语句,更新语句,删除语句案例
详细可参考:https://phoenix.apache.org/faq.html
Phoenix 连接hbase的命令如下,sqlline.py [zookeeper] :
[node-01@root bin]$ ./sqlline.py node-01
Setting property: [isolation, TRANSACTION_READ_COMMITTED]
issuing: !connect jdbc:phoenix:10.35.66.72 none none org.apache.phoenix.jdbc.PhoenixDriver
Connecting to jdbc:phoenix:node-01
15/06/24 13:06:29 WARN util.NativeCodeLoader: Unable to load native-hadoop library for your platform... using builtin-java classes where applicable
Connected to: Phoenix (version 4.15)
Driver: PhoenixEmbeddedDriver (version 4.15)
Autocommit status: true
Transaction isolation: TRANSACTION_READ_COMMITTED
Building list of tables and columns for tab-completion (set fastconnect to true to skip)...
193/193 (100%) Done
Done
sqlline version 1.1.2
0: jdbc:phoenix:node-01>!tables
+------------------------------------------+------------------------------------------+------------------------------------------+-------------------+
|                TABLE_CAT                 |               TABLE_SCHEM                |                TABLE_NAME                |                TA |
+------------------------------------------+------------------------------------------+------------------------------------------+-------------------+
| null                                     | WL                                       | BIG_LOG_DEVUTRACEID_INDEX                | INDEX             |
| null                                     | WL                                       | MSGCENTER_PUSHMESSAGE_V2_OWNERPAGE_INDEX | INDEX             |
| null                                     | SYSTEM                                   | CATALOG                                  | SYSTEM TABLE      |
| null                                     | SYSTEM                                   | SEQUENCE                                 | SYSTEM TABLE      |
| null                                     | SYSTEM                                   | STATS                                    | SYSTEM TABLE      |
| null                                     | DMO                                      | SOWNTOWN_STATICS                         | TABLE             |
| null                                     | OL                                       | BIGLOG                                   | TABLE             |
| null                                     | WL                                       | BIG_LOG                                  | TABLE             |
| null                                     | WL                                       | ERROR_LOG                                | TABLE             |
| null                                     | WL                                       | MSGCENTER_PUSHMESSAGE                    | TABLE             |
| null                                     | WL                                       | MSGCENTER_PUSHMESSAGE_V2                 | TABLE             |
+------------------------------------------+------------------------------------------+------------------------------------------+----------------
从上面能够看到,已经连接到了hbase集群上面,输入Phoenix支持的命令 !tables 可以查看当前集群中存在的数据表,能够看到有些是 SYSTEM TABLE,其它的都是自己建立的;
下面通过脚本来模拟下使用Phoenix建立数据表、修改表、添加数据、修改数据、删除数据、删除表等操作:
建表
新建一张Person表,含有IDCardNum,Name,Age 三个字段 ,test 为 table_schem ,标准sql如下:
create table IF NOT EXISTS test.Person (IDCardNum INTEGER not null primary key, Name varchar(20),Age INTEGER);
在 Phoenix 中使用如下:
0: jdbc:phoenix:10.35.66.72> create table IF NOT EXISTS test.Person (IDCardNum INTEGER not null primary key, Name varchar(20),Age INTEGER);
No rows affected (0.344 seconds)
0: jdbc:phoenix:10.35.66.72> !tables
+------------------------------------------+------------------------------------------+------------------------------------------+-------------------+
|                TABLE_CAT                 |               TABLE_SCHEM                |                TABLE_NAME                |                TA |
+------------------------------------------+------------------------------------------+------------------------------------------+-------------------+
| null                                     | WL                                       | BIG_LOG_DEVUTRACEID_INDEX                | INDEX             |
| null                                     | WL                                       | MSGCENTER_PUSHMESSAGE_V2_OWNERPAGE_INDEX | INDEX             |
| null                                     | SYSTEM                                   | CATALOG                                  | SYSTEM TABLE      |
| null                                     | SYSTEM                                   | SEQUENCE                                 | SYSTEM TABLE      |
| null                                     | SYSTEM                                   | STATS                                    | SYSTEM TABLE      |
| null                                     | DMO                                      | SOWNTOWN_STATICS                         | TABLE             |
| null                                     | OL                                       | BIGLOG                                   | TABLE             |
| null                                     | TEST                                     | PERSON                                  | TABLE             |
| null                                     | WL                                       | BIG_LOG                                  | TABLE             |
| null                                     | WL                                       | ERROR_LOG                                | TABLE             |
| null                                     | WL                                       | MSGCENTER_PUSHMESSAGE                    | TABLE             |
| null                                     | WL                                       | MSGCENTER_PUSHMESSAGE_V2                 | TABLE             |
+------------------------------------------+------------------------------------------+------------------------------------------+-------------------+
0: jdbc:phoenix:10.35.66.72> select * from TEST.PERSON;
+------------------------------------------+----------------------+------------------------------------------+
|                IDCARDNUM                 |         NAME         |                   AGE                    |
+------------------------------------------+----------------------+------------------------------------------+
+------------------------------------------+----------------------+------------------------------------------+
可以看到,hbase中已经存在数据表 Person了,包含了三列。
插入数据
对表进行插入操作,sql如下:
insert into Person (IDCardNum,Name,Age) values (100,'小明',12);
insert into Person (IDCardNum,Name,Age) values (101,'小红',15);
insert into Person (IDCardNum,Name,Age) values (103,'小王',22);
在 Phoenix 中插入的语句为 upsert ,具体如下:
0: jdbc:phoenix:10.35.66.72> upsert into test.Person (IDCardNum,Name,Age) values (100,'小明',12);
1 row affected (0.043 seconds)
0: jdbc:phoenix:10.35.66.72> upsert into test.Person (IDCardNum,Name,Age) values (101,'小红',15);
1 row affected (0.018 seconds)
0: jdbc:phoenix:10.35.66.72> upsert into test.Person (IDCardNum,Name,Age) values (103,'小王',22);
1 row affected (0.009 seconds)
0: jdbc:phoenix:10.35.66.72> select * from test.Person;
+------------------------------------------+----------------------+------------------------------------------+
|                IDCARDNUM                 |         NAME         |                   AGE                    |
+------------------------------------------+----------------------+------------------------------------------+
| 100                                      | 小明                   | 12                                       |
| 101                                      | 小红                   | 15                                       |
| 103                                      | 小王                   | 22                                       |
+------------------------------------------+----------------------+------------------------------------------+
3 rows selected (0.115 seconds)
从上面可以看到,三条数据已经进入hbase里面了;好了,现在要对表添加一列 sex 性别操作,怎么办?
修改数据
alter 修改表数据,sql如下:
ALTER TABLE test.Persion ADD sex varchar(10);
Phoenix 中操作如下:
0: jdbc:phoenix:10.35.66.72> ALTER TABLE test.Person ADD sex varchar(10);
No rows affected (0.191 seconds)
: jdbc:phoenix:10.35.66.72> select * from test.person;
+------------------------------------------+----------------------+------------------------------------------+------------+
|                IDCARDNUM                 |         NAME         |                   AGE                    |    SEX     |
+------------------------------------------+----------------------+------------------------------------------+------------+
| 100                                      | 小明                   | 12                                       | null       |
| 101                                      | 小红                   | 15                                       | null       |
| 103                                      | 小王                   | 22                                       | null       |
+------------------------------------------+----------------------+------------------------------------------+------------+
3 rows selected (0.113 seconds)
上图看到已经新增了列sex,每行的默认值为 null ,那么怎么样修改这些值呢?
更新表数据 ,标准的sql 如下:
update test.Person set sex='男' where IDCardNum=100;
update test.Person set sex='女' where IDCardNum=101;
update test.Person set sex='男' where IDCardNum=103;
Phoenix中不存在update的语法关键字,而是upsert ,功能上替代了Insert+update,官方说明为:
UPSERT VALUES
Inserts if not present and updates otherwise the value in the table. The list of columns is optional and if not present, the values will map to the column in the order they are declared in the schema. The values must evaluate to constants.
根据介绍,只需要在upsert语句中制定存在的idcardnum即可实现更新,在 Phoenix 客户端中操作如下
0: jdbc:phoenix:10.35.66.72> upsert into test.person (idcardnum,sex) values (100,'男');
1 row affected (0.083 seconds)
0: jdbc:phoenix:10.35.66.72> upsert into test.person (idcardnum,sex) values (101,'女');
1 row affected (0.012 seconds)
0: jdbc:phoenix:10.35.66.72> upsert into test.person (idcardnum,sex) values (103,'男');
1 row affected (0.008 seconds)
0: jdbc:phoenix:10.35.66.72> select * from test.person;
+------------------------------------------+----------------------+------------------------------------------+------------+
|                IDCARDNUM                 |         NAME         |                   AGE                    |    SEX     |
+------------------------------------------+----------------------+------------------------------------------+------------+
| 100                                      | 小明                   | 12                                       | 男          |
| 101                                      | 小红                   | 15                                       | 女          |
| 103                                      | 小王                   | 22                                       | 男          |
+------------------------------------------+----------------------+------------------------------------------+------------+
3 rows selected (0.087 seconds)
查询数据
通过Phoenix可以支持 where、group by、case when 等复杂的查询条件,案例如下:
# 现增加几条数据
0: jdbc:phoenix:10.35.66.72> upsert into test.Person (IDCardNum,Name,Age,sex) values (104,'小张',23,'男');
1 row affected (0.012 seconds)
0: jdbc:phoenix:10.35.66.72> upsert into test.Person (IDCardNum,Name,Age,sex) values (105,'小李',28,'男');
1 row affected (0.015 seconds)
0: jdbc:phoenix:10.35.66.72> upsert into test.Person (IDCardNum,Name,Age,sex) values (106,'小李',33,'男');
1 row affected (0.011 seconds)
0: jdbc:phoenix:10.35.66.72> select * from test.person;
+------------------------------------------+----------------------+------------------------------------------+------------+
|                IDCARDNUM                 |         NAME         |                   AGE                    |    SEX     |
+------------------------------------------+----------------------+------------------------------------------+------------+
| 100                                      | 小明                   | 12                                       | 男          |
| 101                                      | 小红                   | 15                                       | 女          |
| 103                                      | 小王                   | 22                                       | 男          |
| 104                                      | 小张                   | 23                                       | 男          |
| 105                                      | 小李                   | 28                                       | 男          |
| 106                                      | 小李                   | 33                                       | 男          |
+------------------------------------------+----------------------+------------------------------------------+------------+
6 rows selected (0.09 seconds)
where + group by 语句例子:
jdbc:phoenix:10.35.66.72> select sex ,count(sex) as num from test.person where age >20 group by sex;
+------------+------------------------------------------+
|    SEX     |                   NUM                    |
+------------+------------------------------------------+
| 男          | 4                                        |
+------------+------------------------------------------+
case when 的例子:
0: jdbc:phoenix:10.35.66.72> select (case name when '小明' then '明明啊' when '小红' then '红红啊' else name end) as showname from test.person;
+------------------------------------------+
|                 SHOWNAME                 |
+------------------------------------------+
| 明明啊                                      |
| 红红啊                                      |
| 小王                                       |
| 小张                                       |
| 小李                                       |
| 小李                                       |
+------------------------------------------+
更多支持语法参考:https://phoenix.apache.org/language/index.html
删除数据
删除数据及删除表,标准sql如下:
delete from test.Person where idcardnum=100;
drop table test.person;
Phoenix中同标准sql一样,案例如下:
0: jdbc:phoenix:10.35.66.72> delete from test.Person where idcardnum=100;
1 row affected (0.072 seconds)
0: jdbc:phoenix:10.35.66.72> select * from test.Person where idcardnum=100;
+------------------------------------------+----------------------+------------------------------------------+------------+
|                IDCARDNUM                 |         NAME         |                   AGE                    |    SEX     |
+------------------------------------------+----------------------+------------------------------------------+------------+
+------------------------------------------+----------------------+------------------------------------------+------------+

0: jdbc:phoenix:10.35.66.72> drop table test.person;
No rows affected (1.799 seconds)
0: jdbc:phoenix:10.35.66.72> select * from test.person;
Error: ERROR 1012 (42M03): Table undefined. tableName=TEST.PERSON (state=42M03,code=1012)
0: jdbc:phoenix:10.35.66.72> !tables
+------------------------------------------+------------------------------------------+------------------------------------------+-------------------+
|                TABLE_CAT                 |               TABLE_SCHEM                |                TABLE_NAME                |                TA |
+------------------------------------------+------------------------------------------+------------------------------------------+-------------------+
| null                                     | WL                                       | BIG_LOG_DEVUTRACEID_INDEX                | INDEX             |
| null                                     | WL                                       | MSGCENTER_PUSHMESSAGE_V2_OWNERPAGE_INDEX | INDEX             |
| null                                     | SYSTEM                                   | CATALOG                                  | SYSTEM TABLE      |
| null                                     | SYSTEM                                   | SEQUENCE                                 | SYSTEM TABLE      |
| null                                     | SYSTEM                                   | STATS                                    | SYSTEM TABLE      |
| null                                     | DMO                                      | SOWNTOWN_STATICS                         | TABLE             |
| null                                     | OL                                       | BIGLOG                                   | TABLE             |
| null                                     | WL                                       | BIG_LOG                                  | TABLE             |
| null                                     | WL                                       | ERROR_LOG                                | TABLE             |
| null                                     | WL                                       | MSGCENTER_PUSHMESSAGE                    | TABLE             |
| null                                     | WL                                       | MSGCENTER_PUSHMESSAGE_V2                 | TABLE             |
+------------------------------------------+------------------------------------------+------------------------------------------+-------------------+
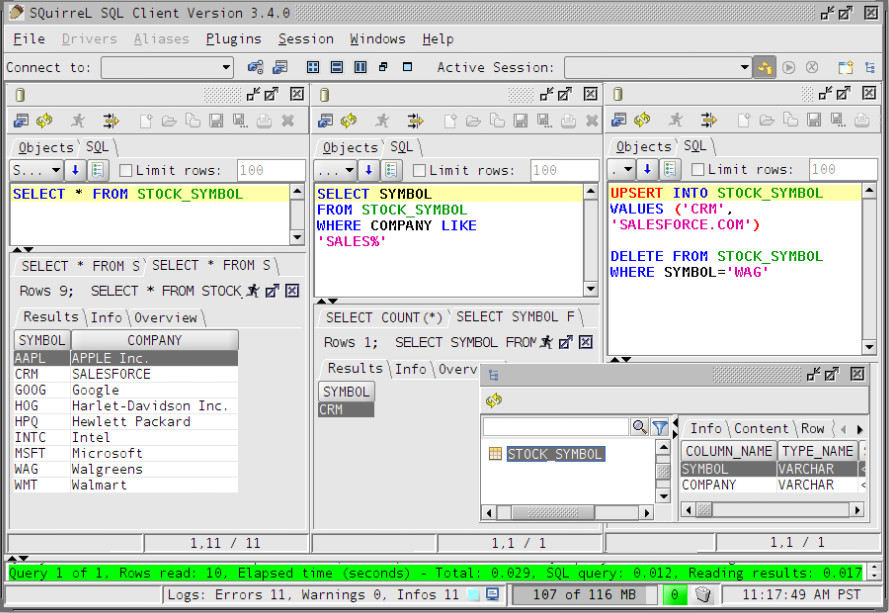
图形化客户端SQuirrel使用
如果你不喜欢 终端下的脚本命令,青睐于GUI化的客户端,那么 SQuirrel是个好的选择,就跟平日里使用 MsSqlServer client、Navicat client 一样,效果如下图:
使用方法:(可以参照官网英文说明)
- 下载SQuirrel 客户端 ,地址 http://squirrel-sql.sourceforge.net/
- 解压缩,删除 lib/ 下老版本的 phoenix-[oldversion]-client.jar 文件,将你刚刚下载的Phoenix文件夹下最新的文件拷贝过去;
- 启动 SQuirrel 客户端,选择 Drivers-new driver ,名称随便,url格式: jdbc:phoenix:(zk地址) ,class name textbox 填写org.apache.phoenix.jdbc.PhoenixDriver
- ok, 点击 connect即可完成连接
squirrel 客户端的用法 和 Phoenix 自带终端一样,都是常见的 sql 语句,大家可以自己搭建练习。
java client api 使用
创建 maven 项目导入 phoenix 依赖包
<!-- https://mvnrepository.com/artifact/org.apache.phoenix/phoenix-client -->
<dependency>
    <groupId>org.apache.phoenix</groupId>
    <artifactId>phoenix-client</artifactId>
    <version>4.15.0-HBase-1.4</version>
</dependency>
java api 完全可以采用传统的 jdbc 连接的形式,案例如官方提供:
创建test.java 类,内容如下:
import java.sql.Connection;
import java.sql.DriverManager;
import java.sql.ResultSet;
import java.sql.SQLException;
import java.sql.PreparedStatement;
import java.sql.Statement;

public class test {

    public static void main(String[] args) throws SQLException {
        Statement stmt = null;
        ResultSet rset = null;

        Connection con = DriverManager.getConnection("jdbc:phoenix:[zookeeper]");
        stmt = con.createStatement();

        stmt.executeUpdate("create table test (mykey integer not null primary key, mycolumn varchar)");
        stmt.executeUpdate("upsert into test values (1,'Hello')");
        stmt.executeUpdate("upsert into test values (2,'World!')");
        con.commit();

        PreparedStatement statement = con.prepareStatement("select * from test");
        rset = statement.executeQuery();
        while (rset.next()) {
            System.out.println(rset.getString("mycolumn"));
        }
        statement.close();
        con.close();
    }
}