-
为基于 Spring 的开发提供更快的入门体验
-
开箱即用,没有代码生成,也无需 XML 配置。同时也可以修改默认值来满足特定的需求。
-
提供了一些大型项目中常见的非功能性特性,如嵌入式服务器、安全、指标,健康检测、外部配置等。
-
Spring Boot 并不是不对 Spring 功能上的增强,而是提供了一种快速使用 Spring 的方式。
快速入门案例:
最终pom.xml:


<?xml version="1.0" encoding="UTF-8"?>

<project xmlns="http://maven.apache.org/POM/4.0.0" xmlns:xsi="http://www.w3.org/2001/XMLSchema-instance"
         xsi:schemaLocation="http://maven.apache.org/POM/4.0.0 http://maven.apache.org/xsd/maven-4.0.0.xsd">
    <!--自己项目本身所属的父工程-->
    <parent>
        <artifactId>project_demo</artifactId>
        <groupId>com.zy</groupId>
        <version>1.0-SNAPSHOT</version>
    </parent>
    <modelVersion>4.0.0</modelVersion>

    <artifactId>springboot_demo</artifactId>

    <!--变更jdk版本-->
    <properties>
        <java.version>1.7</java.version>
    </properties>

    <!--自己项目本身是有parent的情况-->
    <!--type 是 pom scope 是 import 这种类型的dependency只能在 dependencyManagement 标签中声明-->
    <dependencyManagement>
        <dependencies>
            <dependency>
                <groupId>org.springframework.boot</groupId>
                <artifactId>spring-boot-dependencies</artifactId>
                <version>1.4.0.RELEASE</version>
                <type>pom</type>
                <scope>import</scope>
            </dependency>
        </dependencies>
    </dependencyManagement>


    <dependencies>
        <!--spring boot起步依赖-->
        <dependency>
            <groupId>org.springframework.boot</groupId>
            <artifactId>spring-boot-starter-web</artifactId>
        </dependency>

        <!--热部署 在idea中需要设置-->
        <dependency>
            <groupId>org.springframework.boot</groupId>
            <artifactId>spring-boot-devtools</artifactId>
        </dependency>

        <!--activemq 消息中间件-->
        <dependency>
            <groupId>org.springframework.boot</groupId>
            <artifactId>spring-boot-starter-activemq</artifactId>
        </dependency>
    </dependencies>
</project>
首先是我们的pom.xml文件:
1,官方示例中,让我们继承一个spring的 spring-boot-starter-parent 这个parent:
<parent>
    <groupId>org.springframework.boot</groupId>
    <artifactId>spring-boot-starter-parent</artifactId>
    <version>1.5.1.RELEASE</version>
</parent>

<dependencies>
    <dependency>
        <groupId>org.springframework.boot</groupId>
        <artifactId>spring-boot-starter-web</artifactId>
    </dependency>
</dependencies>
2,但是,一般情况下,在我们自己的项目中,会定义一下自己的 parent 项目,这种情况下,上面的这种做法就行不通了。那么,该如何来做呢?其实,在spring的官网也给出了变通的方法的:
<dependencyManagement>
    <dependencies>
        <dependency>
            <groupId>org.springframework.boot</groupId>
            <artifactId>spring-boot-dependencies</artifactId>
            <version>1.5.1.RELEASE</version>
            <type>pom</type>
            <scope>import</scope>
        </dependency>
    </dependencies>
</dependencyManagement>
3,然后,把我们项目中的 子项目 中,parent 的声明,修改为我们自己项目的 parent 项目就可以了
<?xml version="1.0" encoding="UTF-8"?>

<project xmlns="http://maven.apache.org/POM/4.0.0" xmlns:xsi="http://www.w3.org/2001/XMLSchema-instance"
         xsi:schemaLocation="http://maven.apache.org/POM/4.0.0 http://maven.apache.org/xsd/maven-4.0.0.xsd">
    <!--自己项目本身所属的父工程-->
    <parent>
        <artifactId>project_demo</artifactId>
        <groupId>com.zy</groupId>
        <version>1.0-SNAPSHOT</version>
    </parent>
    <modelVersion>4.0.0</modelVersion>

    <artifactId>springboot_demo</artifactId>

    <!--变更jdk版本-->
    <properties>
        <java.version>1.7</java.version>
    </properties>

    <!--自己项目本身是有parent的情况-->
    <!--type 是 pom scope 是 import 这种类型的dependency只能在 dependencyManagement 标签中声明-->
    <dependencyManagement>
        <dependencies>
            <dependency>
                <groupId>org.springframework.boot</groupId>
                <artifactId>spring-boot-dependencies</artifactId>
                <version>1.4.0.RELEASE</version>
                <type>pom</type>
                <scope>import</scope>
            </dependency>
        </dependencies>
    </dependencyManagement>


    <dependencies>
        <!--spring boot起步依赖-->
        <dependency>
            <groupId>org.springframework.boot</groupId>
            <artifactId>spring-boot-starter-web</artifactId>
        </dependency>
    </dependencies>
</project>
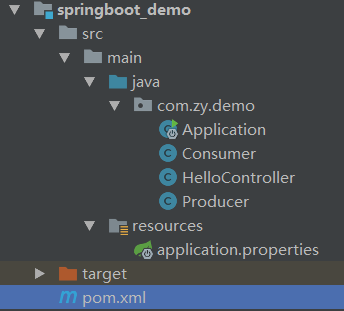
其他一些配置文件默认在resources下的application.properties文件中:
#修改tomcat端口
server.port=8088
#-------
url=http://www.1688.com
#activemq地址
spring.activemq.broker-url=tcp://192.168.25.128:61616
简单示例 HelloController:
package com.zy.demo;

import org.springframework.beans.factory.annotation.Autowired;
import org.springframework.core.env.Environment;
import org.springframework.web.bind.annotation.RequestMapping;
import org.springframework.web.bind.annotation.RestController;

@RestController
@RequestMapping("/hello")
public class HelloController {

    @Autowired
    private Environment env;

    @RequestMapping("/helloSpringBoot")
    public String hello() {
        return "hello springboot";
    }

    @RequestMapping("/info")
    public String info() {
        return "info:" + env.getProperty("url");
    }
}
我们现在想访问HelloController,所以需要创建一个引导类Application:
package com.zy.demo;

import org.springframework.boot.SpringApplication;
import org.springframework.boot.autoconfigure.SpringBootApplication;

@SpringBootApplication
public class Application {
    public static void main(String[] args) {
        SpringApplication.run(Application.class, args);
    }
}
现在就可以访问http://localhost:8088/hello/helloSpringBoot (由于我们在application.properties配置文件中修改了tomcat的端口为8088)。
SpringBoot整合ActiveMQ:
不需要其他配置,值需要在pom文件中引入ActiveMQ的依赖,并创建生产者 消费者即可:
<dependency>
    <groupId>org.springframework.boot</groupId>
    <artifactId>spring-boot-starter-activemq</artifactId>
</dependency>
生产者Producer:
package com.zy.demo;

import org.springframework.beans.factory.annotation.Autowired;
import org.springframework.jms.core.JmsMessagingTemplate;
import org.springframework.web.bind.annotation.RequestMapping;
import org.springframework.web.bind.annotation.RestController;

import java.util.HashMap;
import java.util.Map;

@RestController
public class Producer {
    //注入jsmtemplate
    @Autowired
    private JmsMessagingTemplate jmsMessagingTemplate;

    @RequestMapping("/sendMsg")
    public void sendMsg(String msg) {
        jmsMessagingTemplate.convertAndSend("my_msg", msg);
        System.out.println("msg发送成功");
    }

    @RequestMapping("/sendMap")
    public void sendMap() {
        Map map = new HashMap();
        map.put("mobile", "13888888888");
        map.put("content", "王总喜提兰博基尼");
        jmsMessagingTemplate.convertAndSend("my_map", map);
        System.out.println("map发送成功");
    }
}
消费者Consumer:
package com.zy.demo;

import org.springframework.jms.annotation.JmsListener;
import org.springframework.stereotype.Component;

import java.util.Map;

@Component
public class Consumer {
    @JmsListener(destination = "my_msg")
    public void readMsg(String text) {
        System.out.println("接收到消息:" + text);
    }

    @JmsListener(destination = "my_map")
    public void readMap(Map map) {
        System.out.println(map);
    }
}
访问http://localhost:8088/...... 即可。