环境:eclipse 4.6
spring版本:3.0.5
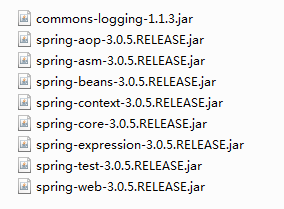
第一步,在lib中导入spring jar包,基础jar包如下:
第二步,配置spring配置文件,在src下新建spring.xml文件(可以使用其他名字),代码如下:
<?xml version="1.0" encoding="UTF-8"?>
<beans xmlns="http://www.springframework.org/schema/beans"
xmlns:xsi="http://www.w3.org/2001/XMLSchema-instance"
xsi:schemaLocation="http://www.springframework.org/schema/beans
http://www.springframework.org/schema/beans/spring-beans-3.0.xsd">
<bean id="helloWorld" class="helloworld.HelloWorld"></bean></beans>
第三步,建一个helloworld包,在该包下创建HelloWorld类:
package helloworld;
public class HelloWorld {
public void sayHello() {
System.out.println("Hello world");
}
}
public class HelloWorld {
public void sayHello() {
System.out.println("Hello world");
}
}
第四步,创建测试类testSpring,代码如下:
package helloworld;
import org.junit.Test;
import org.springframework.context.ApplicationContext;
import org.springframework.context.support.ClassPathXmlApplicationContext;
public class testSpring {
private ApplicationContext context;
private HelloWorld helloWorld;
@Test
public void test(){
context=new ClassPathXmlApplicationContext("spring.xml");
helloWorld=(HelloWorld)context.getBean("helloWorld");
helloWorld.sayHello();
}}