参考文献
https://github.com/happyfish100/
https://github.com/happyfish100/fastdfs/wiki
https://www.cnblogs.com/leechenxiang/p/5406548.html
https://www.cnblogs.com/leechenxiang/p/7089778.html
一、环境准备
Centos7.x 两台,分别安装tracker与storage
下载安装包:
libfatscommon:FastDFS分离出的一些公用函数包
FastDFS:FastDFS本体
fastdfs-nginx-module:FastDFS和nginx的关联模块
nginx:发布访问服务
二、安装步骤(tracker与storage都要执行)
1、安装c++编译环境
yum install -y gcc gcc-c++
yum -y install libevent
2、安装libfatscommon函数库
# 解压
tar -zxvf libfastcommon-1.0.42.tar.gz
#进入libfastcommon文件夹,编译并且安装
./make.sh
./make.sh install
3、安装fastdfs主程序文件
# 解压
tar -zxvf fastdfs-6.04.tar.gz

#进入到fastdfs目录,查看fastdfs安装配置

cd fastdfs-6.04/
vim make.sh
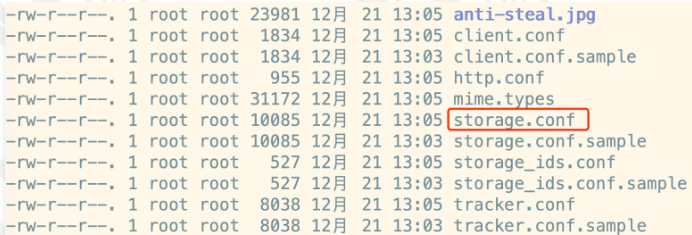
4、拷贝配置文件如下:
cp /home/software/FastDFS/fastdfs-6.04/conf/* /etc/fdfs/
三、配置tracker服务
说明:
tracker和storage都是同一个fastdfs的主程序的两个不同概念,配置不同的配置文件就可以设定为tracker或者storage
1、配置tracker
/etc/fdfs下都是一些配置文件,配置tracker即可
vim tracker.conf

修改tracker配置文件,此为tracker的工作目录,保存数据以及日志
配置参数:
base_path=/usr/local/fastdfs/tracker
mkdir /usr/local/fastdfs/tracker -p
2、启动tracker服务
/usr/bin/fdfs_trackerd /etc/fdfs/tracker.conf
3、检查进程如下
ps -ef|grep tracker
4、停止tracker
/usr/bin/stop.sh /etc/fdfs/tracker.conf
三、配置storage服务
1、修改storage配置文件
# 修改组名
group_name=imooc
# 修改storage的工作空间
base_path=/usr/local/fastdfs/storage
# 修改storage的存储空间
store_path0=/usr/local/fastdfs/storage
# 修改tracker的地址和端口号,用于心跳
tracker_server=192.168.1.153:22122

# 后续结合nginx的一个对外服务端口号
http.server_port=8888
创建目录
mkdir /usr/local/fastdfs/storage -p
2、启动storage
前提:必须首先启动tracker
/usr/bin/fdfs_storaged /etc/fdfs/storage.conf
3、检查进程如下:
ps -ef|grep storage
四、测试上传
1、修改的client配置文件 client.conf
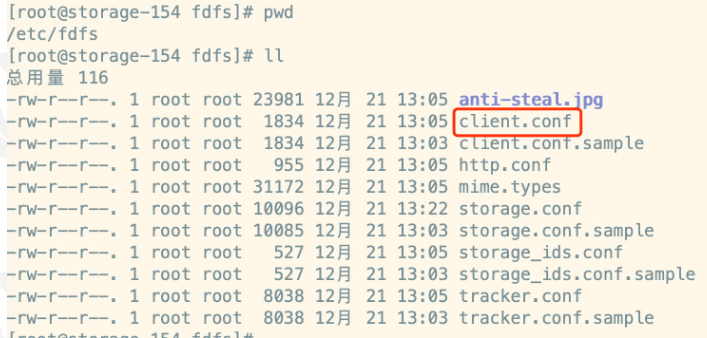
修改配置内容
  base_path=/usr/local/fastdfs/client
  tracker_server=192.168.1.153:22122
2、创建目录
mkdir /usr/local/fastdfs/client
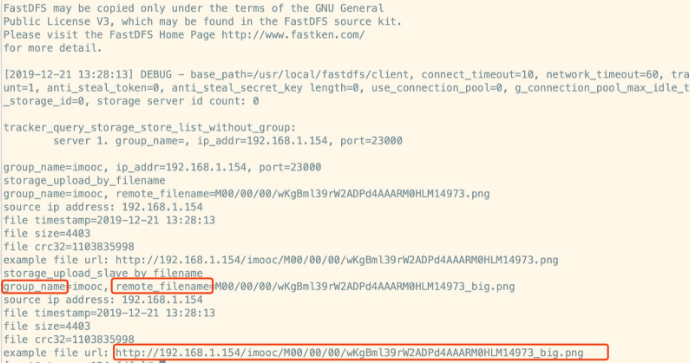
3、测试
/usr/bin/fdfs_test /etc/fdfs/client.conf upload imooc.jpg
上传成功
四、配置 nginx fastdfs 实现文件服务器
fastdfs安装好以后是无法通过http访问的,这个时候就需要借助nginx了,所以需要安装fastdfs的第三方模块到nginx中,就能使用了。
1、安装nginx插件
解压nginx的fastdfs压缩包
tar -zxvf fastdfs-nginx-module-1.22.tar.gz
复制配置文件如下:
cp mod_fastdfs.conf /etc/fdfs

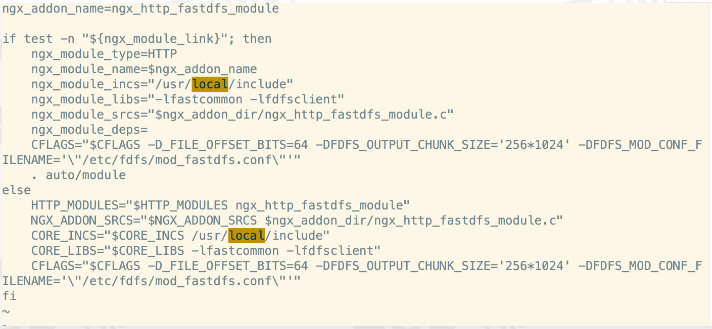
修改/fastdfs-nginx-module/src/config文件,主要是修改路径,把local删除,因为fastdfs安装的时候我们没有修改路径,原路径是/usr
2、安装nginx(略)
其中配置文件,主要新增一个第三方模块
--add-module=/home/fastdfs-nginx-module-1.22/src
./configure
--prefix=/usr/local/nginx
--pid-path=/var/run/nginx/nginx.pid
--lock-path=/var/lock/nginx.lock
--error-log-path=/var/log/nginx/error.log
--http-log-path=/var/log/nginx/access.log
--with-http_gzip_static_module
--http-client-body-temp-path=/var/temp/nginx/client
--http-proxy-temp-path=/var/temp/nginx/proxy
--http-fastcgi-temp-path=/var/temp/nginx/fastcgi
--http-uwsgi-temp-path=/var/temp/nginx/uwsgi
--http-scgi-temp-path=/var/temp/nginx/scgi
--add-module=/home/fastdfs-nginx-module-1.22/src
修改 mod_fastdfs.conf 配置文件:
base_path=/usr/local/fastdfs/tmp
tracker_server=192.168.1.153:22122
group_name=imooc
url_have_group_name = true
store_path0=/usr/local/fastdfs/storage
mkdir /usr/local/fastdfs/tmp
修改nginx.conf,添加如下虚拟主机:
server {
    listen       8888;
    server_name  localhost;

    location /imooc/M00 {
            ngx_fastdfs_module;
    }

}
3、启动nginx,测试图片
http://139.199.103.241:8888/imooc/M00/00/00/rBUABmBOBUCAdN_GAABWQ5zmh2g432.jpg