几个月前接触Android开发的时候曾经看过ListView的一些基础的使用方法,现在又基本上忘记了,这里总结一下,ListView分成两部分来写吧,首先讲一下最基本的ListView的使用方法,下一节介绍一下通过继承BaseAdapter来实现功能比较全面的ListView。其实我对ListView的使用还不是太透彻,若有大神忘不吝指教~
首先是布局文件,这里需要两个布局文件,一个是放置列表控件的Activity对应的布局文件 main.xml,另一个是ListView中每一行信息显示所对应的布局 list_item.xml 这一步需要注意的问题是ListView 控件的id要使用Android系统内置的 android:id="@android:id/list" [注意形式]
main.xml
<?xml version="1.0" encoding="utf-8"?>
<LinearLayout xmlns:android="http://schemas.android.com/apk/res/android"
    android:layout_width="match_parent"
    android:layout_height="match_parent"
    android:orientation="vertical" >

    <ListView
        android:id="@android:id/list"
        android:layout_width="match_parent"
        android:layout_height="match_parent"
        android:padding="20dip"/>


</LinearLayout>
list_item.xml
<?xml version="1.0" encoding="utf-8"?>
<LinearLayout xmlns:android="http://schemas.android.com/apk/res/android"
    android:layout_width="match_parent"
    android:layout_height="match_parent"
    android:orientation="horizontal" >

    <TextView
        android:id="@+id/user_name"
        android:layout_width="match_parent"
        android:layout_height="match_parent"
        android:layout_weight="1"/>
    <TextView
        android:id="@+id/user_id"
        android:layout_width="match_parent"
        android:layout_height="match_parent"
        android:layout_weight="1"/>


</LinearLayout>
然后就设置MainActivity中的代码了:基本思想就是先将数据添加到ArrayList中,然后在设置SimpleAdapter适配器完成设置,入下:
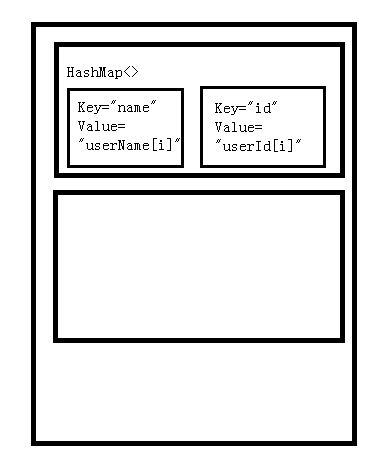
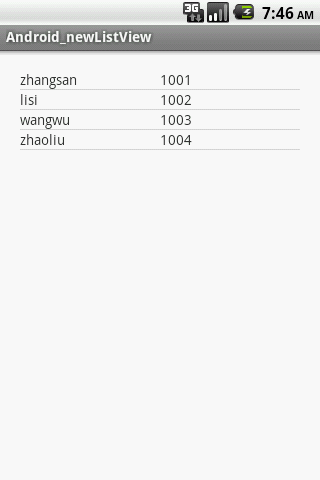
package com.example.android_newlistview;

import java.util.ArrayList;
import java.util.HashMap;
import java.util.Map;

import android.os.Bundle;
import android.app.Activity;
import android.app.ListActivity;
import android.view.Menu;
import android.widget.SimpleAdapter;

public class MainActivity extends ListActivity {


    String[] from={"name","id"};              //这里是ListView显示内容每一列的列名
    int[] to={R.id.user_name,R.id.user_id};   //这里是ListView显示每一列对应的list_item中控件的id

    String[] userName={"zhangsan","lisi","wangwu","zhaoliu"}; //这里第一列所要显示的人名
    String[] userId={"1001","1002","1003","1004"};  //这里是人名对应的ID

    ArrayList<HashMap<String,String>> list=null;
    HashMap<String,String> map=null;
    @Override
    protected void onCreate(Bundle savedInstanceState) {
        // TODO Auto-generated method stub
        super.onCreate(savedInstanceState);
        setContentView(R.layout.main);       //为MainActivity设置主布局
        //创建ArrayList对象;
        list=new ArrayList<HashMap<String,String>>();
        //将数据存放进ArrayList对象中,数据安排的结构是,ListView的一行数据对应一个HashMap对象,
        //HashMap对象,以列名作为键,以该列的值作为Value,将各列信息添加进map中,然后再把每一列对应
        //的map对象添加到ArrayList中

        for(int i=0; i<4; i++){
            map=new HashMap<String,String>();       //为避免产生空指针异常,有几列就创建几个map对象
            map.put("id", userId[i]);
            map.put("name", userName[i]);
            list.add(map);
        }

        //创建一个SimpleAdapter对象
        SimpleAdapter adapter=new SimpleAdapter(this,list,R.layout.list_item,from,to);
        //调用ListActivity的setListAdapter方法,为ListView设置适配器
        setListAdapter(adapter);


    }


}
另附图两张:
ListView数据结构示意图:
结果图:
另外对点击某一行作出响应的方法是覆写onListItemClick方法,根据返回的position(从0开始):
@Override
protected void onListItemClick(ListView l, View v, int position, long id) {
// TODO Auto-generated method stub
super.onListItemClick(l, v, position, id);
}
另外ListView进阶教程已出,见链接http://www.cnblogs.com/carlos-vic/p/Carlos_V_Android_6.html