在struts的crud上进行图片上传(crud参照:https://www.cnblogs.com/chenjiahao9527/p/11108602.html)。
文件上传:(主要是第二种)
三种上传方案
1、上传到tomcat服务器
2、上传到指定文件目录,添加服务器与真实目录的映射关系,从而解耦上传文件与tomcat的关系文件服务器
3、在数据库表中建立二进制字段,将图片存储到数据库
首先建一个图片上传页面:
<%@ page language="java" contentType="text/html; charset=UTF-8"
    pageEncoding="UTF-8"%>
<!DOCTYPE html PUBLIC "-//W3C//DTD HTML 4.01 Transitional//EN" "http://www.w3.org/TR/html4/loose.dtd">
<html>
<head>
<meta http-equiv="Content-Type" content="text/html; charset=UTF-8">
<title>Insert title here</title>
</head>
<body>
<form action="${pageContext.request.contextPath }/sy/clz_upload.action" method="post" enctype="multipart/form-data">
		<input type="hidden" name="cid" value="${clz.cid }" />
		<input type="hidden" name="cname" value="${clz.cname }" />
	    <input type="hidden" name="cteacher" value="${clz.cteacher }" />
		<!-- 注意:name对应的值决定了,子控制器action属性的命名 -->
		<input type="file" name="file" /> <input type="submit" />
	</form>

</body>
</html>
在原来的clazzAction 加下面代码:
    private File file;
    private String fileContentType;
    private String fileFileName;


public String upload() {

		try {
			//注意:在linux下没有D盘,linux下只有一个盘符,那么意味着,当打包到Linux服务器的时候需要改动代码
			//这个时候通常是这么解决的,将targetPath对应 目录,配置到资源文件中,通过Prooperties类进行动态属性
			//那么当需要将项目发布到linux服务器的时候,只需要改变xxx.properties文件中targetPath=D:/temp/img
			String targetDir="D:/temp/img";
			//存到数据库中的地址
			String severPath="/upload";
			//FileUtils.copyFile(file, new File(targetDir+"/"+fileFileName));
			copyBufFile(file, new File(targetDir+"/"+fileFileName));
			//注意:数据库存放是网络请求地址,而不是本地图片存放地址
			clz.setPic(severPath+"/"+fileFileName);
			this.clzDao.edit(clz);
		} catch (Exception e) {
			// TODO Auto-generated catch block
			e.printStackTrace();
		}
		return "toList";
	}

	/**
	 * 跳转文件上传页面
	 * @return
	 */
	public String preUpload() throws Exception{
		 Clazz c=	this.clzDao.list(clz, null).get(0);
		 request.setAttribute("clz", c);
		return "toUpload";
	}


        public File getFile() {
		return file;
	}

	public void setFile(File file) {
		this.file = file;
	}

	public String getFileContentType() {
		return fileContentType;
	}

	public void setFileContentType(String fileContentType) {
		this.fileContentType = fileContentType;
	}

	public String getFileFileName() {
		return fileFileName;
	}

	public void setFileFileName(String fileFileName) {
		this.fileFileName = fileFileName;
	}
在服务器的server.xml配置下面代码:
<Context path="Struts/upload" docBase="D:/temp/img/"></Context>
配置struts-sy.xml配置:
<result name="toUpload">/upload.jsp</result>
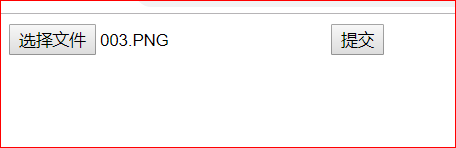
效果:

上传图片的底层代码:
	/**
	 *  FileUtils.copyFile的底层,通过了缓冲区进行了增强
	 * @param source
	 * @param target
	 * @throws Exception
	 */
	public void copyBufFile(File source,File target) throws Exception {
		BufferedInputStream in= new BufferedInputStream(new FileInputStream(source));
		BufferedOutputStream out=new  BufferedOutputStream(new FileOutputStream(target));
		byte[] bbuf=new byte[1024];
		int len=0;
		while((len = in.read(bbuf))!=-1) {
			out.write(bbuf, 0, len);
		}
		in.close();
		out.close();
	}
拦截器 Interceptor:
实现的2种方法:
implements Interceptor
extends AbstractInterceptor
与filter的区别:先过filter再过interceptor
然后在struts-sy.xml配置:
<?xml version="1.0" encoding="UTF-8"?>
<!DOCTYPE struts PUBLIC
	"-//Apache Software Foundation//DTD Struts Configuration 2.5//EN"
	"http://struts.apache.org/dtds/struts-2.5.dtd">
<struts>
    <!-- 这包能更加细分action的归类 -->
	<package name="sy" extends="base" namespace="/sy">
 <interceptors>
	    <interceptor name="one" class="com.chenjiahao.crud.interceptor.OneInterceptor"></interceptor>
	    <interceptor name="two" class="com.chenjiahao.crud.interceptor.TwoInterceptor"></interceptor>
	</interceptors>
	  <action name="/demo_*" class="com.chenjiahao.web.HelloAction" method="{1}">
	      <result name="rs">/rs.jsp</result>
	  </action>
	  <action name="/stack_*" class="com.chenjiahao.test.DomeAction" method="{1}">
	      <result name="rs">/rs.jsp</result>
	  </action>
	  <action name="/clz_*" class="com.chenjiahao.crud.web.ClazzAction" method="{1}">
	     <interceptor-ref name="one"></interceptor-ref>
	      <interceptor-ref name="two"></interceptor-ref>
	      <result name="list">/clzList.jsp</result>
	      <result name="preSave">/clzEdit.jsp</result>
          <result name="toList" type="redirectAction">/clz_list</result>
          <result name="toUpload">/upload.jsp</result>
	  </action>


	</package>
</struts>