

一: GET请求(最常用的)
wx.request({
    url: 'https://URL',  //这里''里面填写你的服务器API接口的路径
    data: {},  //这里是可以填写服务器需要的参数
    method: 'GET', // 声明GET请求
    // header: {}, // 设置请求的 header,GET请求可以不填
    success: function(res){
console.log("返回成功的数据:" + res.data ) //返回的会是对象,可以用JSON转字符串打印出来方便查看数据
console.log("返回成功的数据:"+ JSON.stringify(res.data)) //这样就可以愉快的看到后台的数据啦
    },
    fail: function(fail) {
      // 这里是失败的回调,取值方法同上,把res改一下就行了
    },
    complete: function(arr) {
      // 这里是请求以后返回的所以信息,请求方法同上,把res改一下就行了
    }
  })


二:POST请求(我主要用于上传数据的时候用)
基本和GET比较类似,需要注意的两个地方请看注释。
    var that = this //创建一个名为that的变量来保存this当前的值
wx.request({
      url: '',
      method: 'post',
      data: {
        openid: 'openid'  //这里是发送给服务器的参数(参数名:参数值)
      },
      header: {
        'content-type': 'application/x-www-form-urlencoded'  //这里注意POST请求content-type是小写,大写会报错
      },
      success: function (res) {
        that.setData({ //这里是修改data的值
          test: res.data //test等于服务器返回来的数据
        });
        console.log(res.data)
      }
    });


三:表单提交(这种方式也比较常用,方法也比较多样)
直接上代码,你没看错,表单提交就是这么简单。
1.使用GET的方式提交表单:
 //index.wxml
<form bindsubmit="formSubmit" bindreset="formReset">
 <input type="text" class="input-text" name="username" placeholder="请输入账号" />
         <input type="text" class="input-text" name="password" placeholder="请输入密码" />
         <button formType="submit">提交</button>
  </form>
//index.js
formSubmit: function (e) {
    var that = this;
    var formData = e.detail.value; //获取表单所有input的值
    wx.request({
      url: '',
      data: formData,
      header: { 'Content-Type': 'application/json' },
      success: function (res) {
        console.log(res.data)
      }
    })
  },

//2.使用POST的方式提交表单,index.wxml的代码和上面的一样,这里就不重复贴代码了

//index.wxss
.page{
  background: lavender;
  height: 1303rpx
}
.title {
  margin-left: 5px;
  vertical-align: middle;
  padding: 10rpx 10rpx 10rpx 20rpx;
  font-size: 35rpx;
  color: #818a8f;
}
.titles {
  vertical-align: middle;
  padding: 0rpx 0rpx 0rpx 0rpx;
  font-size: 35rpx;
  color: #818a8f;
}
.section1 { border: 2px solid #a1a1a1; margin: 10px 10px 15px 5px; height: 60rpx;}.section2 { border: 2px solid #a1a1a1; height: 165rpx;  90%; margin: 10px 10px 15px
5px;}
.plus { margin: 10px 10px 15px 5px; height: 120rpx;  120rpx;}.btn{ background: #b3d4db; margin: 60rpx 5px 5px 5px;}

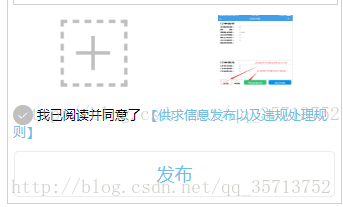
//四:上传图片并且把图片展示出来

先贴上效果图:


//这里也很简单,直接上完整代码,
<form bindsubmit="formSubmit" id='2' bindreset="formReset">
<input style='display:none' name='program_id' value='{{program_id}}'></input>
      <view class='caigou_centent'>描述说明(选填)</view>
      <textarea class='textarea' placeholder="" name="content" value='{{formdata}}' />

      <view class="big-logos">
        <image bindtap="upimg" src='../../images/jia.png'></image>
        <block wx:for="{{img_arr}}">
          <view class='logoinfo'>
            <image src='{{item}}'></image>
          </view>
        </block>
      </view>
      <button class='btn' formType="submit">发布</button>
    </form>

js
var adds = {};
Page({
  data: {
img_arr: [],
formdata: '',
},
  formSubmit: function (e) {
    var id = e.target.id
    adds = e.detail.value;
    adds.program_id = app.jtappid
    adds.openid = app._openid
    adds.zx_info_id = this.data.zx_info_id
    this.upload()
  },

  upload: function () {
    var that = this
      for (var i=0; i < this.data.img_arr.length; i++) {
        wx.uploadFile({
          url: 'https:***/submit',
          filePath: that.data.img_arr[i],
          name: 'content',
          formData: adds,
          success: function (res) {
            console.log(res)
            if (res) {
              wx.showToast({
                title: '已提交发布!',
                duration: 3000
              });
            }
          }
        })
      }
      this.setData({
        formdata: ''
      })
  },
  upimg: function () {
    var that = this;
    if (this.data.img_arr.length<3){
    wx.chooseImage({
      sizeType: ['original', 'compressed'],
      success: function (res) {
        that.setData({
          img_arr: that.data.img_arr.concat(res.tempFilePaths)
        })
      }
    })
    }else{
      wx.showToast({
        title: '最多上传三张图片',
        icon: 'loading',
        duration: 3000
      });
    }
  },

//Console出来如下图就证明上传成功了

转自:http://blog.csdn.net/qq_35713752/article/details/77970370