一、Overview
angular 入坑记录的笔记第四篇,介绍在 angular 中如何通过 HttpClient 类发起 http 请求,从而完成与后端的数据交互。
对应官方文档地址:
配套代码地址:angular-practice/src/http-guide
二、Contents
- Angular 从入坑到弃坑 - Angular 使用入门
- Angular 从入坑到挖坑 - 组件食用指南
- Angular 从入坑到挖坑 - 表单控件概览
- Angular 从入坑到挖坑 - HTTP 请求概览
三、Knowledge Graph
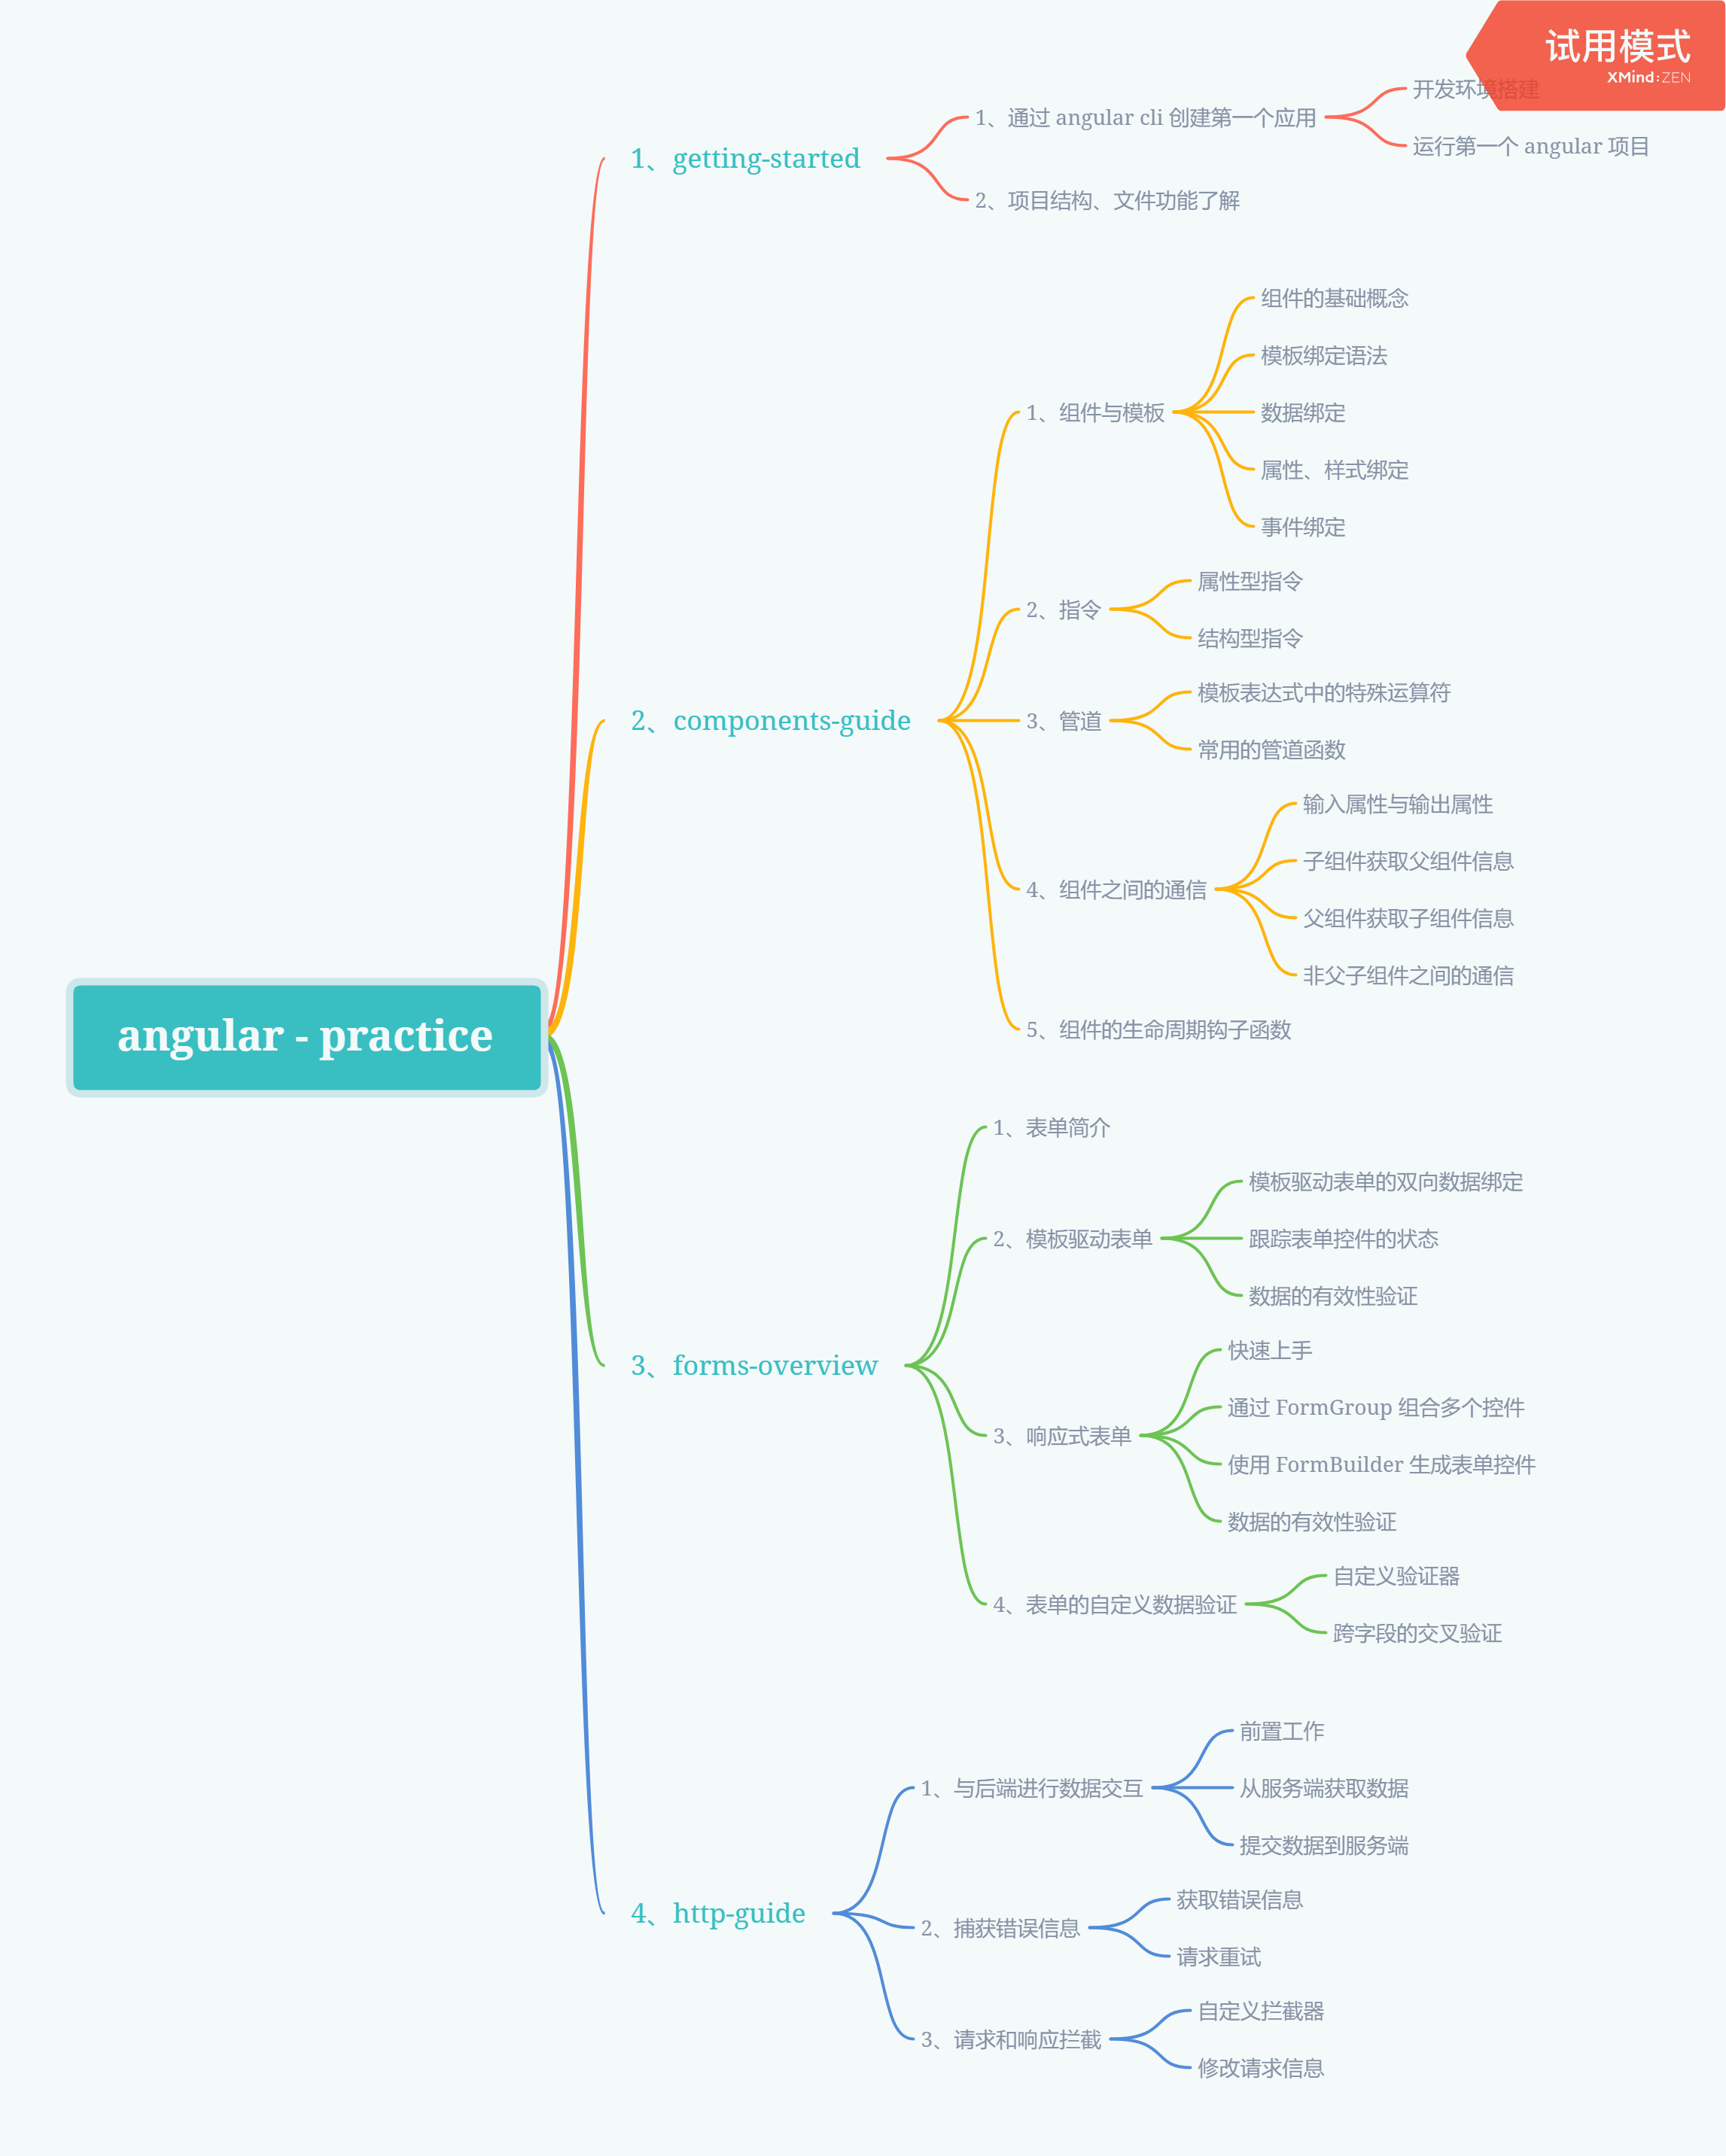
四、Step by Step
4.1、与后端进行数据交互
4.1.1、前置工作
在前端项目与后端进行数据交互时,绝大多数都是通过 HTTP 协议进行的,现代浏览器支持两种方式向后端发起 HTTP 请求:XMLHttpRequest 和 fetch
在以前的项目中,通常使用 jquery 的简化版 ajax 请求向后端请求数据,归根到底最终还是通过 XMLHttpRequest 与后端进行数据交互
在 Angular 中, 为了简化 XMLHttpRequest 的使用,框架提供了 HttpClient 类来封装 HTTP API,用来实现前端与后端的数据交互。
在使用之前,首先需要在应用的根模块中,引入 HttpClientModule 模块,并添加到 imports 数组中
import { BrowserModule } from '@angular/platform-browser';
import { NgModule } from '@angular/core';

import { AppRoutingModule } from './app-routing.module';
import { AppComponent } from './app.component';

// 添加对于 HttpClientModule 模块的引用
import { HttpClientModule } from '@angular/common/http';

@NgModule({
  declarations: [
    AppComponent
  ],
  imports: [
    BrowserModule,
    AppRoutingModule,
    HttpClientModule // 添加到根应用模块中
  ],
  providers: [],
  bootstrap: [AppComponent]
})
export class AppModule { }
在需要使用到的地方,引入 HttpClient 类,然后通过依赖注入的方式注入到应用类中
在通常情况下,我们需要将与后端进行交互的行为封装成服务,在这个服务中完成对于获取到的数据的处理,之后再注入到需要使用该服务的组件中,从而确保组件中仅仅包含的是必要的业务逻辑行为
import { Injectable } from '@angular/core';

// 引入 HttpClient 类
import { HttpClient } from '@angular/common/http';

@Injectable({
  providedIn: 'root'
})
export class AntiMotivationalQuotesServicesService {

  // 通过构造函数注入的方式依赖注入到使用的类中
  constructor(private http: HttpClient) { }
}
import { Component, OnInit } from '@angular/core';

// 引入服务
import { AntiMotivationalQuotesServicesService } from './../services/anti-motivational-quotes-services.service';

@Component({
  selector: 'app-anti-motivational-quotes',
  templateUrl: './anti-motivational-quotes.component.html',
  styleUrls: ['./anti-motivational-quotes.component.scss']
})
export class AntiMotivationalQuotesComponent implements OnInit {

  // 通过构造函数注入的方式使用服务
  constructor(private services: AntiMotivationalQuotesServicesService) { }

  ngOnInit(): void {
  }

}
4.1.2、从服务端获取数据
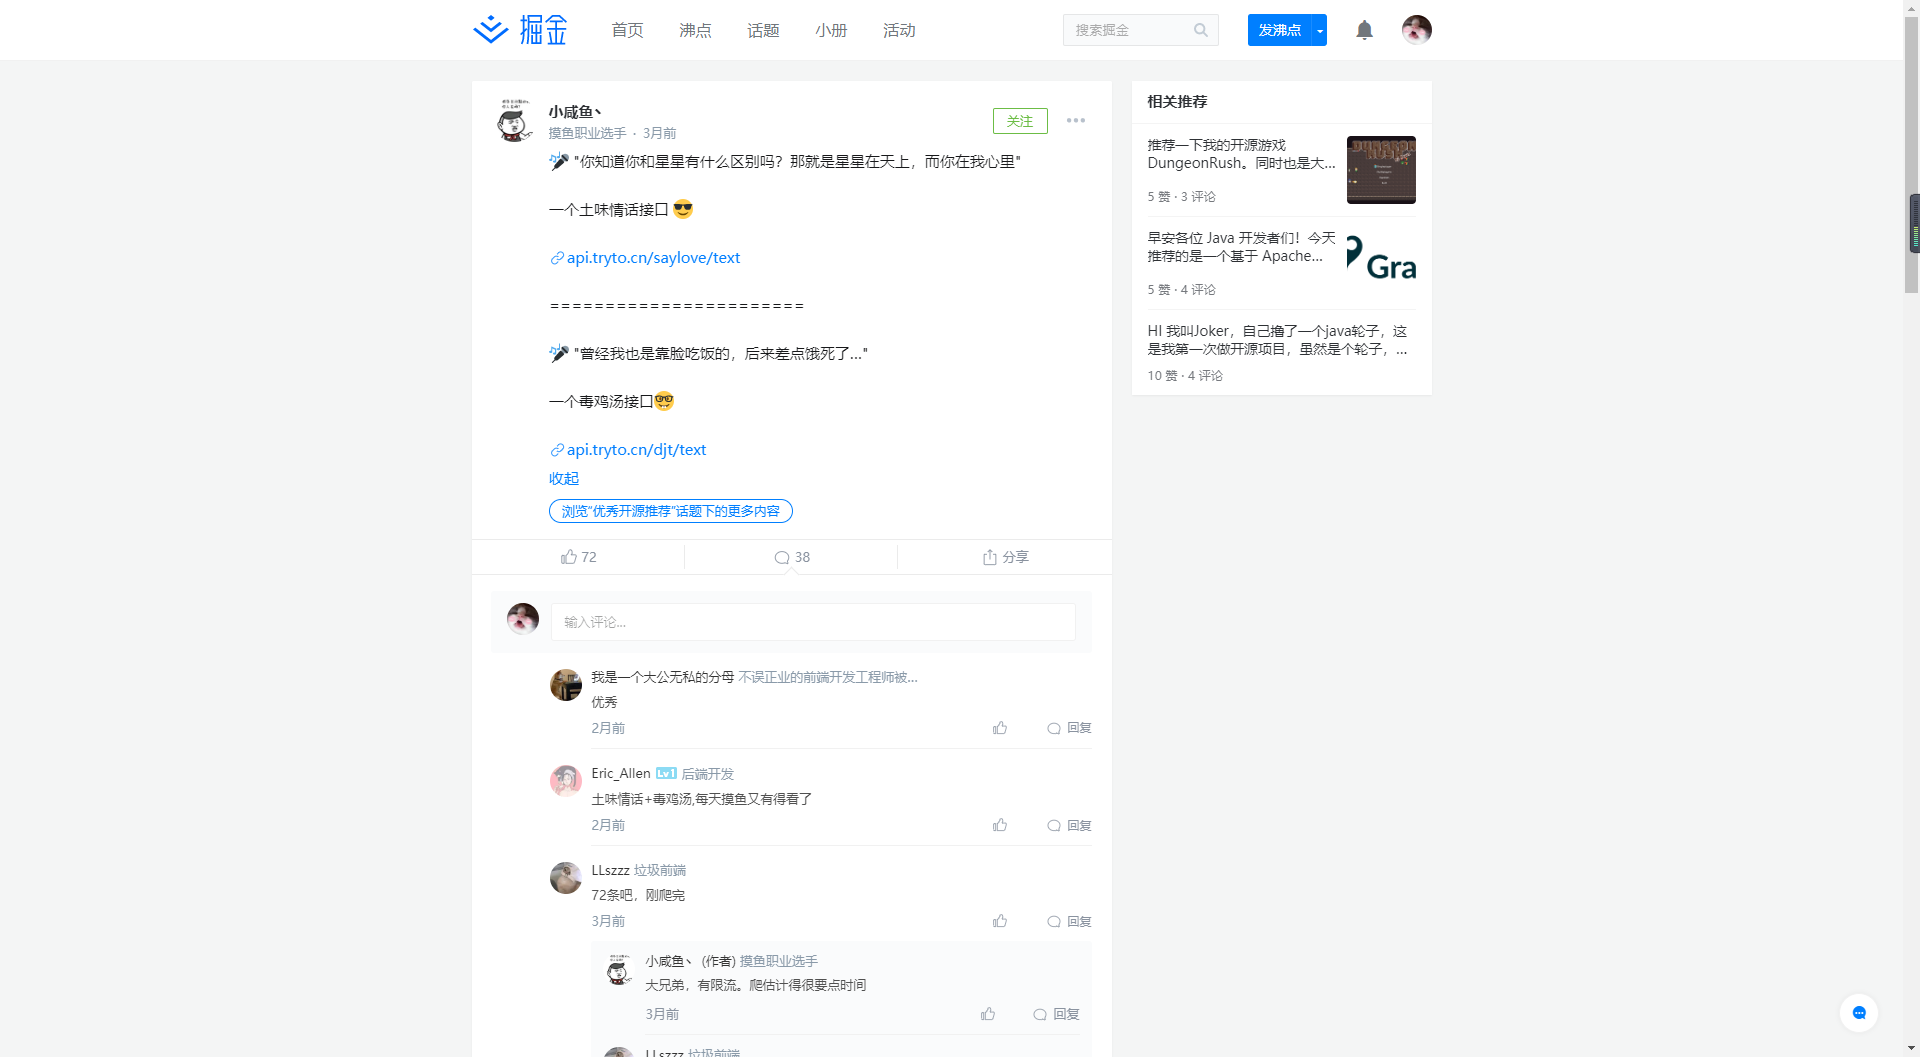
这里使用到的后端接口是掘金上一位朋友开发的毒鸡汤接口(https://api.tryto.cn/djt/text),所有权归属于小咸鱼丶
通过使用 postman 进行接口调用可以发现,接口返回的响应信息如下
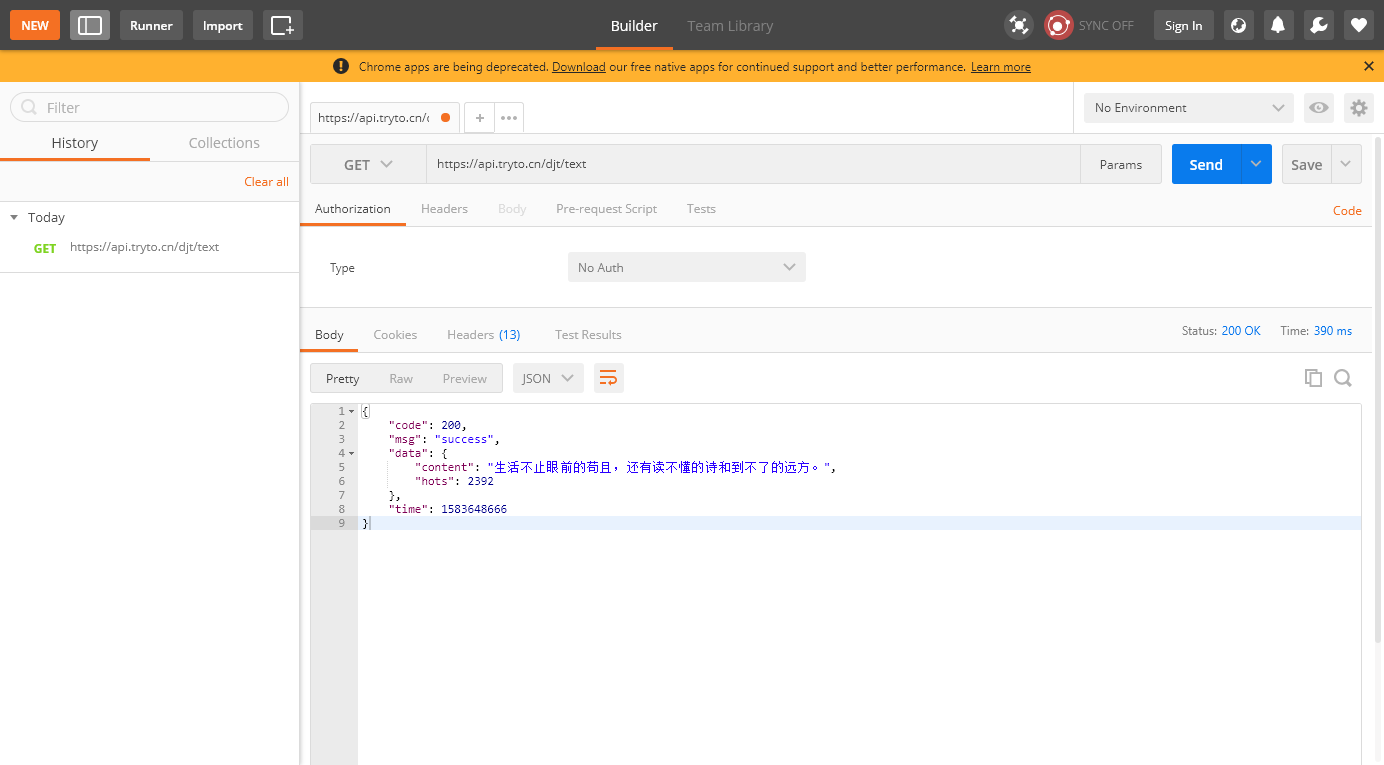
在项目中创建一个接口,按照后端返回的数据信息进行属性的定义,用来映射请求的响应信息(Angular 只能将请求响应对象转换成接口类型,不能自动转换成类实例)
ng g interface interfaces/get-quotes-response-model
export interface GetQuotesResponseModel {
  /**
   * 接口响应码
   */
  code: number;
  /**
   * 响应信息
   */
  msg: string;
  /**
   * 响应数据
   */
  data: ResponseData;
  /**
   * 响应时间
   */
  time: number;
}

/**
 * 接口响应的内容信息
 */
interface ResponseData {
  /**
   * 毒鸡汤
   */
  content: string;
  /**
   * 热度
   */
  hots: number;
}
在服务中,引入请求响应对象的接口定义,然后设定 get 请求的响应对象为 GetQuotesResponseModel,之后在使用时就可以以一种结构化数据的方式获取请求返回的数据信息
import { Injectable } from '@angular/core';
import { Observable } from 'rxjs';

// 引入 HttpClient 类
import { HttpClient } from '@angular/common/http';

// 引入接口响应类
import { GetQuotesResponseModel } from '../interfaces/get-quotes-response-model';

@Injectable({
  providedIn: 'root'
})
export class AntiMotivationalQuotesServicesService {

  // 通过构造函数注入的方式依赖注入到使用的类中
  constructor(private http: HttpClient) { }

  /**
   * 通过 get 请求获取毒鸡汤信息
   */
  getAntiMotivationalQuotes(): Observable<GetQuotesResponseModel> {
    const url = 'https://api.tryto.cn/djt/text';
    return this.http.get<GetQuotesResponseModel>(url);
  }
}
在组件中,通过调用注入的服务类完成接口数据的获取,因为是以一种结构化对象的形式获取到接口返回的数据,因此这里可以直接通过对象属性获取到指定的属性信息
import { Component, OnInit } from '@angular/core';

// 引入服务
import { AntiMotivationalQuotesServicesService } from './../services/anti-motivational-quotes-services.service';

// 引入接口响应对象
import { GetQuotesResponseModel } from '../interfaces/get-quotes-response-model';

@Component({
  selector: 'app-anti-motivational-quotes',
  templateUrl: './anti-motivational-quotes.component.html',
  styleUrls: ['./anti-motivational-quotes.component.scss']
})
export class AntiMotivationalQuotesComponent implements OnInit {

  public quoteResponse: GetQuotesResponseModel;

  // 通过构造函数注入的方式使用服务
  constructor(private services: AntiMotivationalQuotesServicesService) { }

  ngOnInit(): void {
  }

  /**
   * 获取毒鸡汤
   */
  getQuotes() {
    this.services.getAntiMotivationalQuotes().subscribe((response: GetQuotesResponseModel) => {
      this.quoteResponse = response;
    });
  }
}
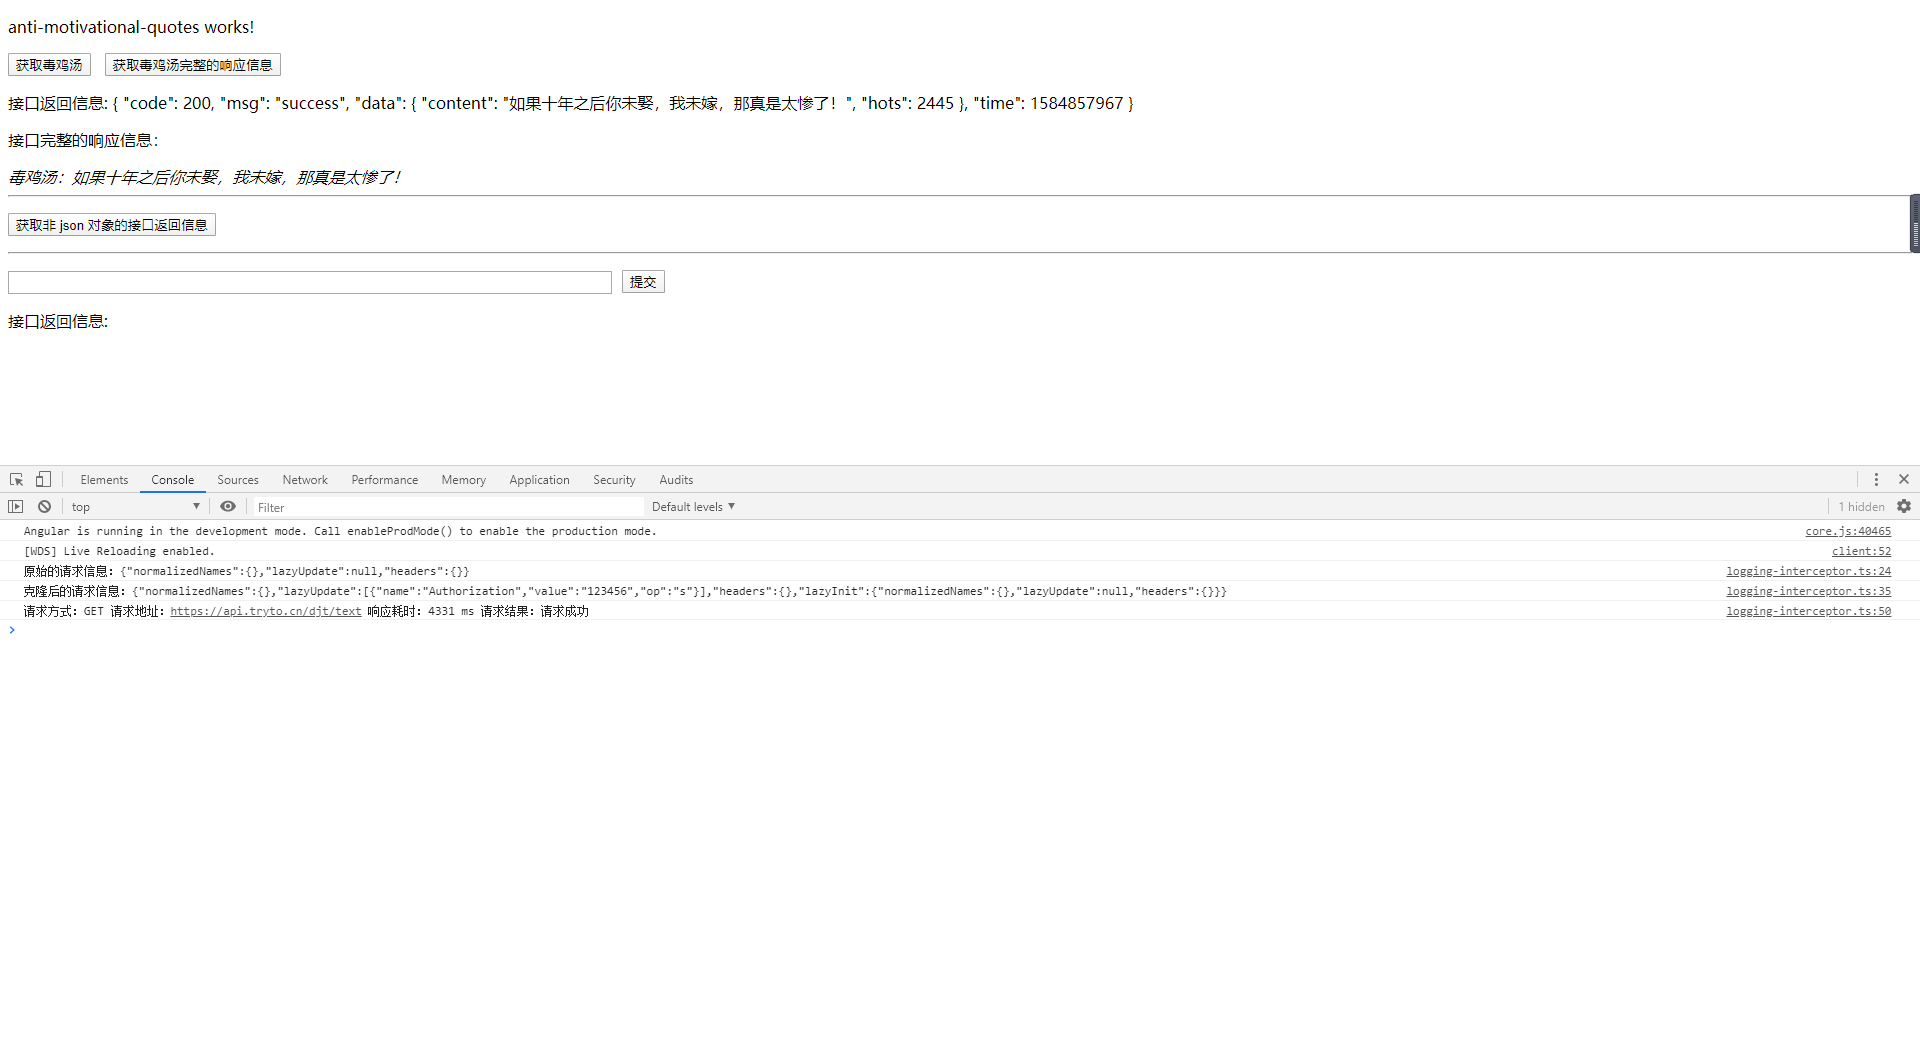
因为最终需要的信息是接口返回的响应信息对象中的一个属性,因此这里需要使用安全导航运算符(?)来确保模板的渲染不会因为空指针错误而中断
<p>
  <button (click)="getQuotes()">获取毒鸡汤</button>
</p>
<p>
  接口返回信息: {{quoteResponse | json}}
</p>
<i>
  毒鸡汤:{{quoteResponse?.data?.content}}
</i>
在执行服务中的方法时,有时会存在没有回调函数的情况,此时也必须执行 subscribe 方法,否则服务中的 HTTP 请求是没有真正发起的
服务中的 getAntiMotivationalQuotes 只能获取到接口返回的 body 里面的信息,某些情况下需要获取到完整的响应信息,此时需要通过 observe 参数来告诉 HttpClient 此方法需要返回完整的响应信息
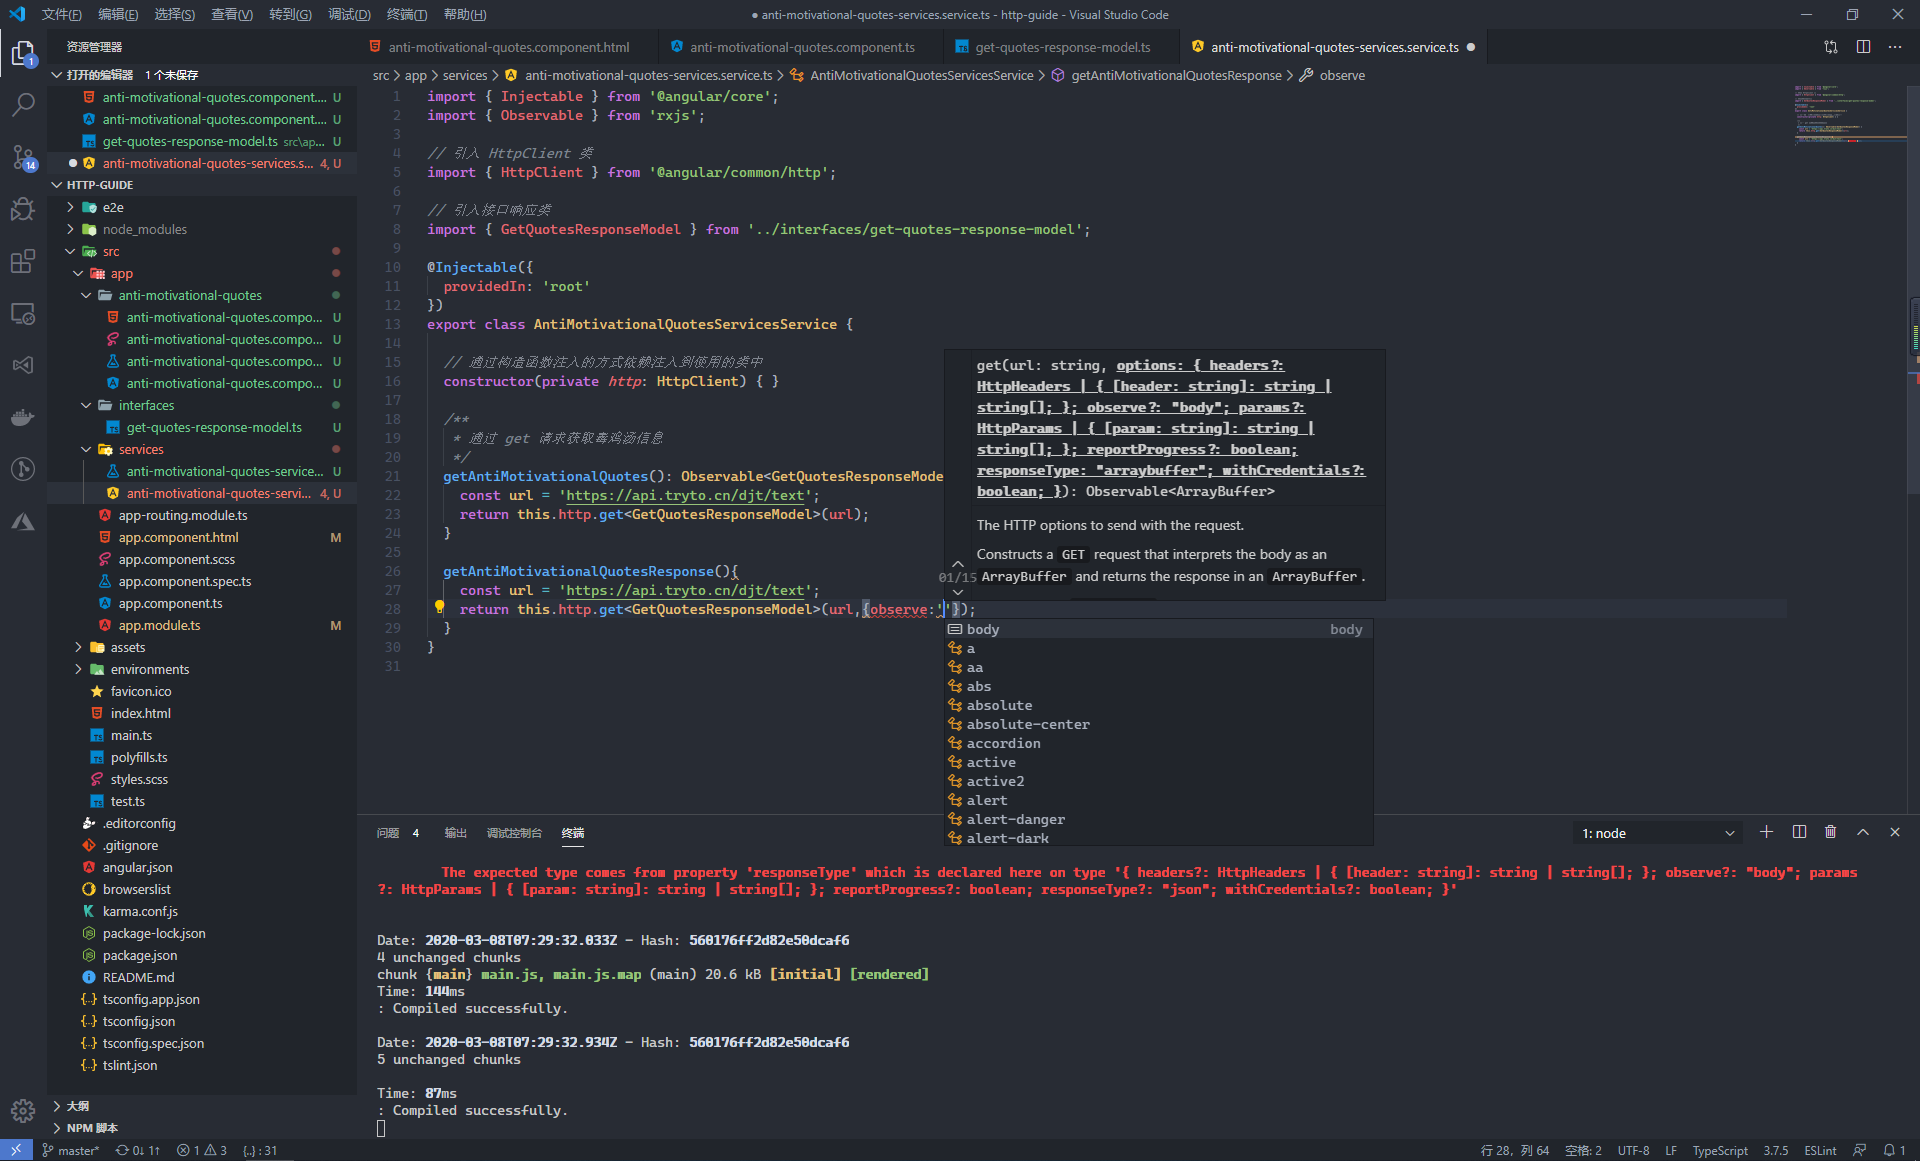
import { Injectable } from '@angular/core';
import { Observable } from 'rxjs';

// 引入 HttpClient 类
import { HttpClient, HttpResponse } from '@angular/common/http';

// 引入接口响应类
import { GetQuotesResponseModel } from '../interfaces/get-quotes-response-model';

@Injectable({
  providedIn: 'root'
})
export class AntiMotivationalQuotesServicesService {

  // 通过构造函数注入的方式依赖注入到使用的类中
  constructor(private http: HttpClient) { }

  /**
   * 获取完整的接口请求信息
   */
  getAntiMotivationalQuotesResponse(): Observable<HttpResponse<GetQuotesResponseModel>> {
    const url = 'https://api.tryto.cn/djt/text';
    return this.http.get<GetQuotesResponseModel>(url, { observe: 'response' });
  }
}
import { HttpResponse } from '@angular/common/http';
import { Component, OnInit } from '@angular/core';
// 引入服务
import { AntiMotivationalQuotesServicesService } from './../services/anti-motivational-quotes-services.service';
// 引入接口响应对象
import { GetQuotesResponseModel } from '../interfaces/get-quotes-response-model';
@Component({
selector: 'app-anti-motivational-quotes',
templateUrl: './anti-motivational-quotes.component.html',
styleUrls: ['./anti-motivational-quotes.component.scss']
})
export class AntiMotivationalQuotesComponent implements OnInit {
public quoteResponseInfo: HttpResponse<GetQuotesResponseModel>;
// 通过构造函数注入的方式使用服务
constructor(private services: AntiMotivationalQuotesServicesService) { }
ngOnInit(): void {
}
/**
* 获取毒鸡汤接口完整的请求信息
*/
getQuotesResponse() {
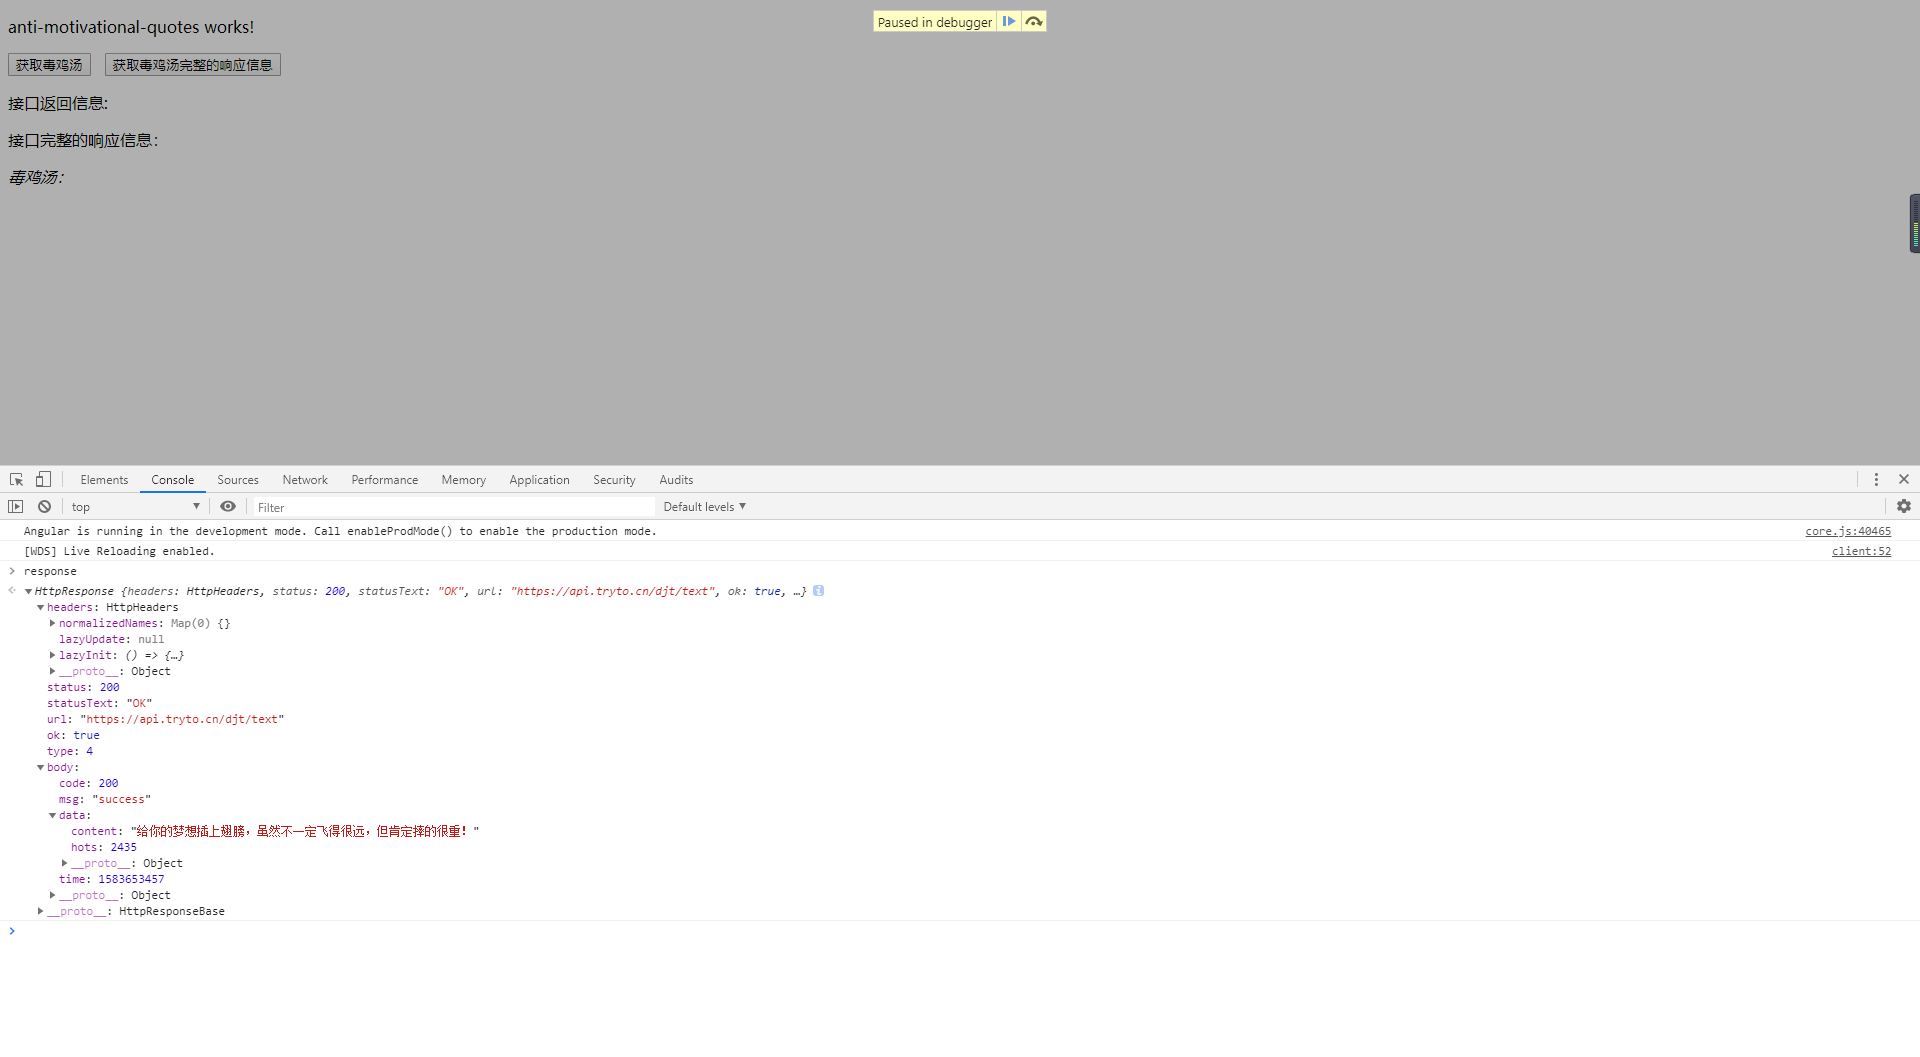
this.services.getAntiMotivationalQuotesResponse().subscribe((response: HttpResponse<GetQuotesResponseModel>) => {
this.quoteResponseInfo = response;
});
}
}
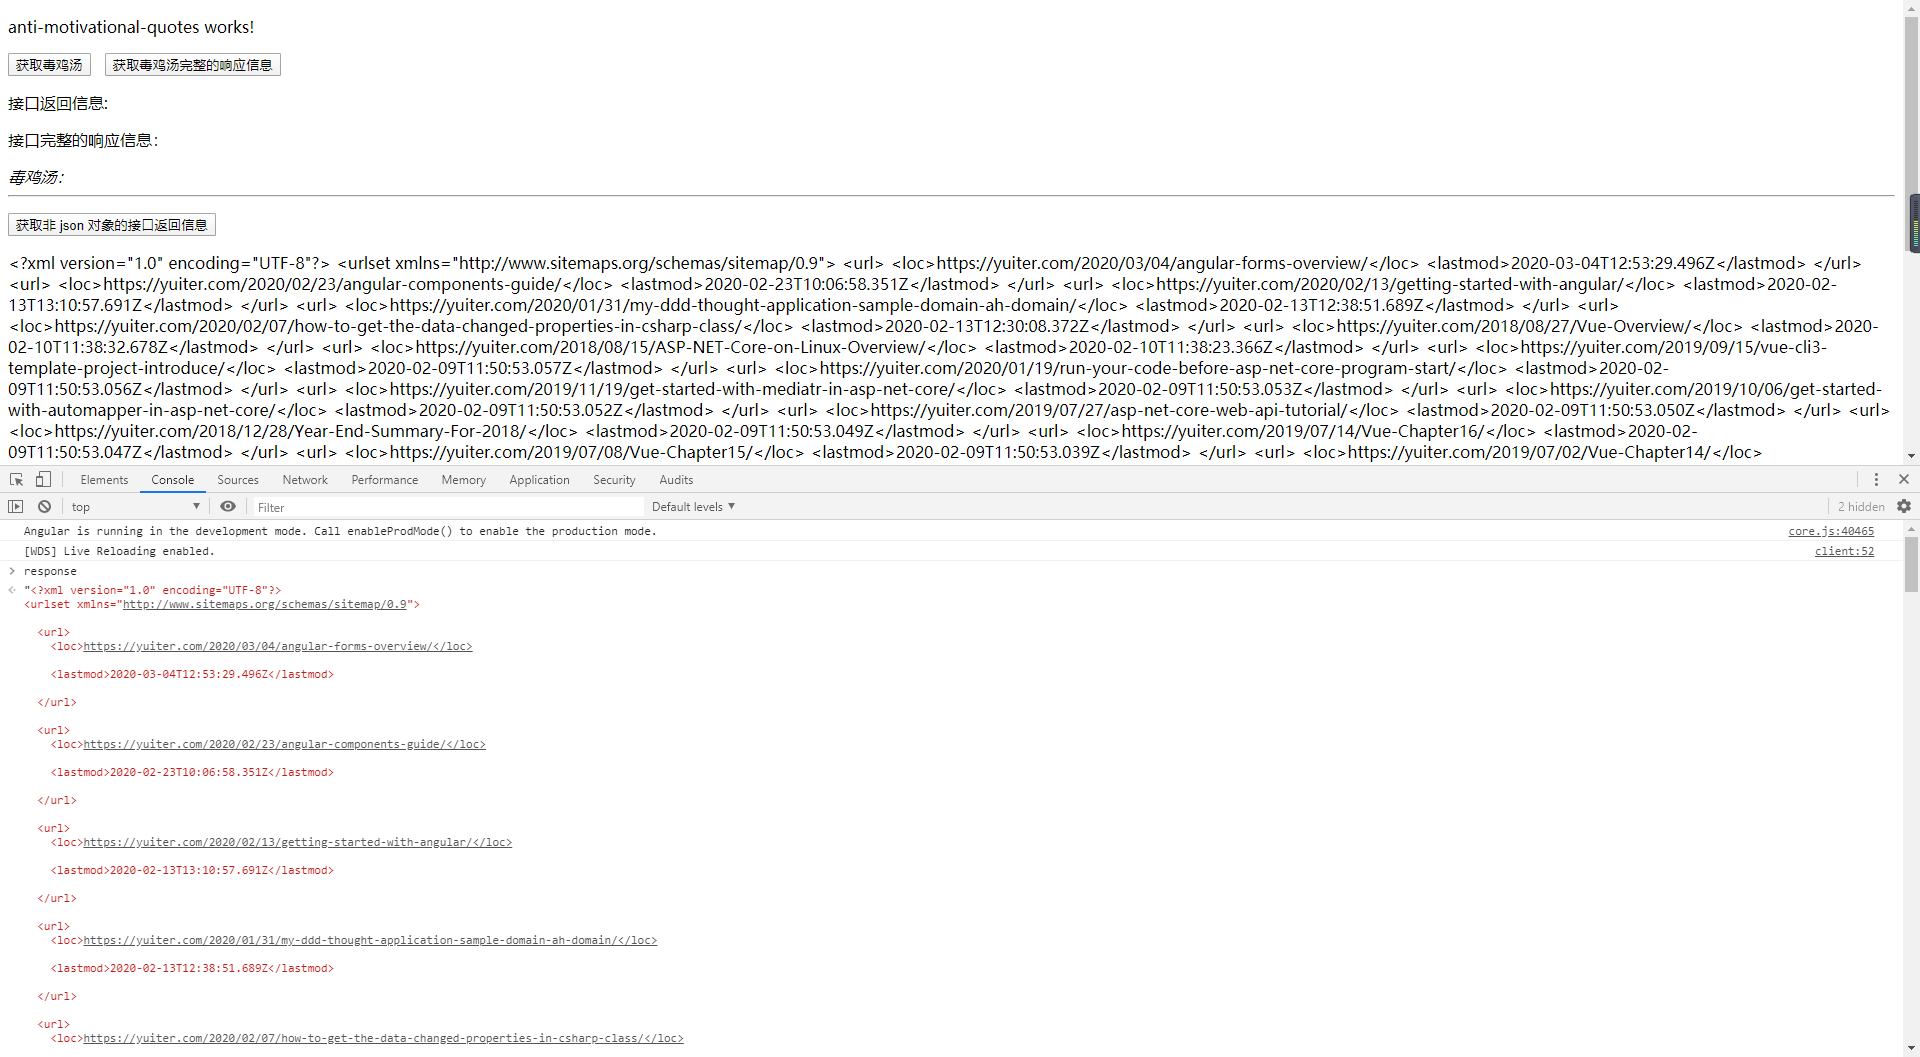
HttpClient 默认的返回信息格式都是 json 对象,在后端接口返回的并不是 json 对象的情况下,需要手动的设置响应类型(text、blob、arraybuffer...)
import { Injectable } from '@angular/core';
import { Observable } from 'rxjs';

// 引入 HttpClient 类
import { HttpClient, HttpResponse } from '@angular/common/http';

// 引入接口响应类
import { GetQuotesResponseModel } from '../interfaces/get-quotes-response-model';

@Injectable({
  providedIn: 'root'
})
export class AntiMotivationalQuotesServicesService {

  // 通过构造函数注入的方式依赖注入到使用的类中
  constructor(private http: HttpClient) { }

  /**
   * 获取响应类型非 json 对象的信息
   */
  getYuiterSitemap(): Observable<string> {
    const url = 'https://yuiter.com/sitemap.xml';
    return this.http.get(url, { responseType: 'text' });
  }
}
4.1.3、提交数据到服务端
在同后端接口进行交互时,获取数据一般用的是 get 请求,而当进行数据新增、更新、删除时则会使用 post、put、delete 这三个 HTTP 谓词
在毒鸡汤这个接口中,可以使用 post 方式调用 https://api.tryto.cn/djt/submit 进行毒鸡汤的提交

根据 postman 的调用示例,在服务中定义一个方法用来提交毒鸡汤信息,这里的 SetQuotesResponseModel 为接口返回的响应对象
import { Injectable } from '@angular/core';
import { Observable } from 'rxjs';

// 引入 HttpClient 类
import { HttpClient, HttpResponse } from '@angular/common/http';

// 引入接口响应类
import { SetQuotesResponseModel } from '../interfaces/set-quotes-response-model';

@Injectable({
  providedIn: 'root'
})
export class AntiMotivationalQuotesServicesService {

  // 通过构造函数注入的方式依赖注入到使用的类中
  constructor(private http: HttpClient) { }

  /**
   * 提交毒鸡汤信息
   * @param content 毒鸡汤
   */
  submitAntiMotivationalQuote(content: string): Observable<SetQuotesResponseModel> {
    const url = 'https://api.tryto.cn/djt/submit';
    return this.http.post<SetQuotesResponseModel>(url, {
      content
    });
  }
}

因为这里是以默认的表单提交的方式进行的数据提交,当后端需要修改请求的 body 格式时,则需要我们修改请求的 MIME 类型
当需要更改请求的 MIME 类型或是需要添加授权访问的 token 信息这一类的操作时,需要在使用 HttpClient 提供的请求方法时添加上 HTTP 请求头配置信息
import { Injectable } from '@angular/core';
import { Observable } from 'rxjs';

// 引入 HttpClient 类
import { HttpClient, HttpResponse, HttpHeaders } from '@angular/common/http';

@Injectable({
  providedIn: 'root'
})
export class AntiMotivationalQuotesServicesService {

  // 通过构造函数注入的方式依赖注入到使用的类中
  constructor(private http: HttpClient) { }

  public httpOptions = {
    headers: new HttpHeaders({
      'Content-Type': 'application/json',
      'Authorization': 'token'
    })
  };

  /**
   * 修改请求头信息
   */
  submitWithOptions() {
    const url = '';
    return this.http.post(url, {
      data: ''
    }, this.httpOptions);
  }
}
4.2、捕获错误信息
4.2.1、获取错误信息
在涉及到前后端交互的过程中,不可避免会出现各种状况,在出现错误时,可以在 subscribe 方法中,添加第二个回调方法来获取错误信息
getQuotes() {
    this.services.getAntiMotivationalQuotes().subscribe((response: GetQuotesResponseModel) => {
      this.quoteResponse = response;
    }, error => {
      console.error(error);
    });
}
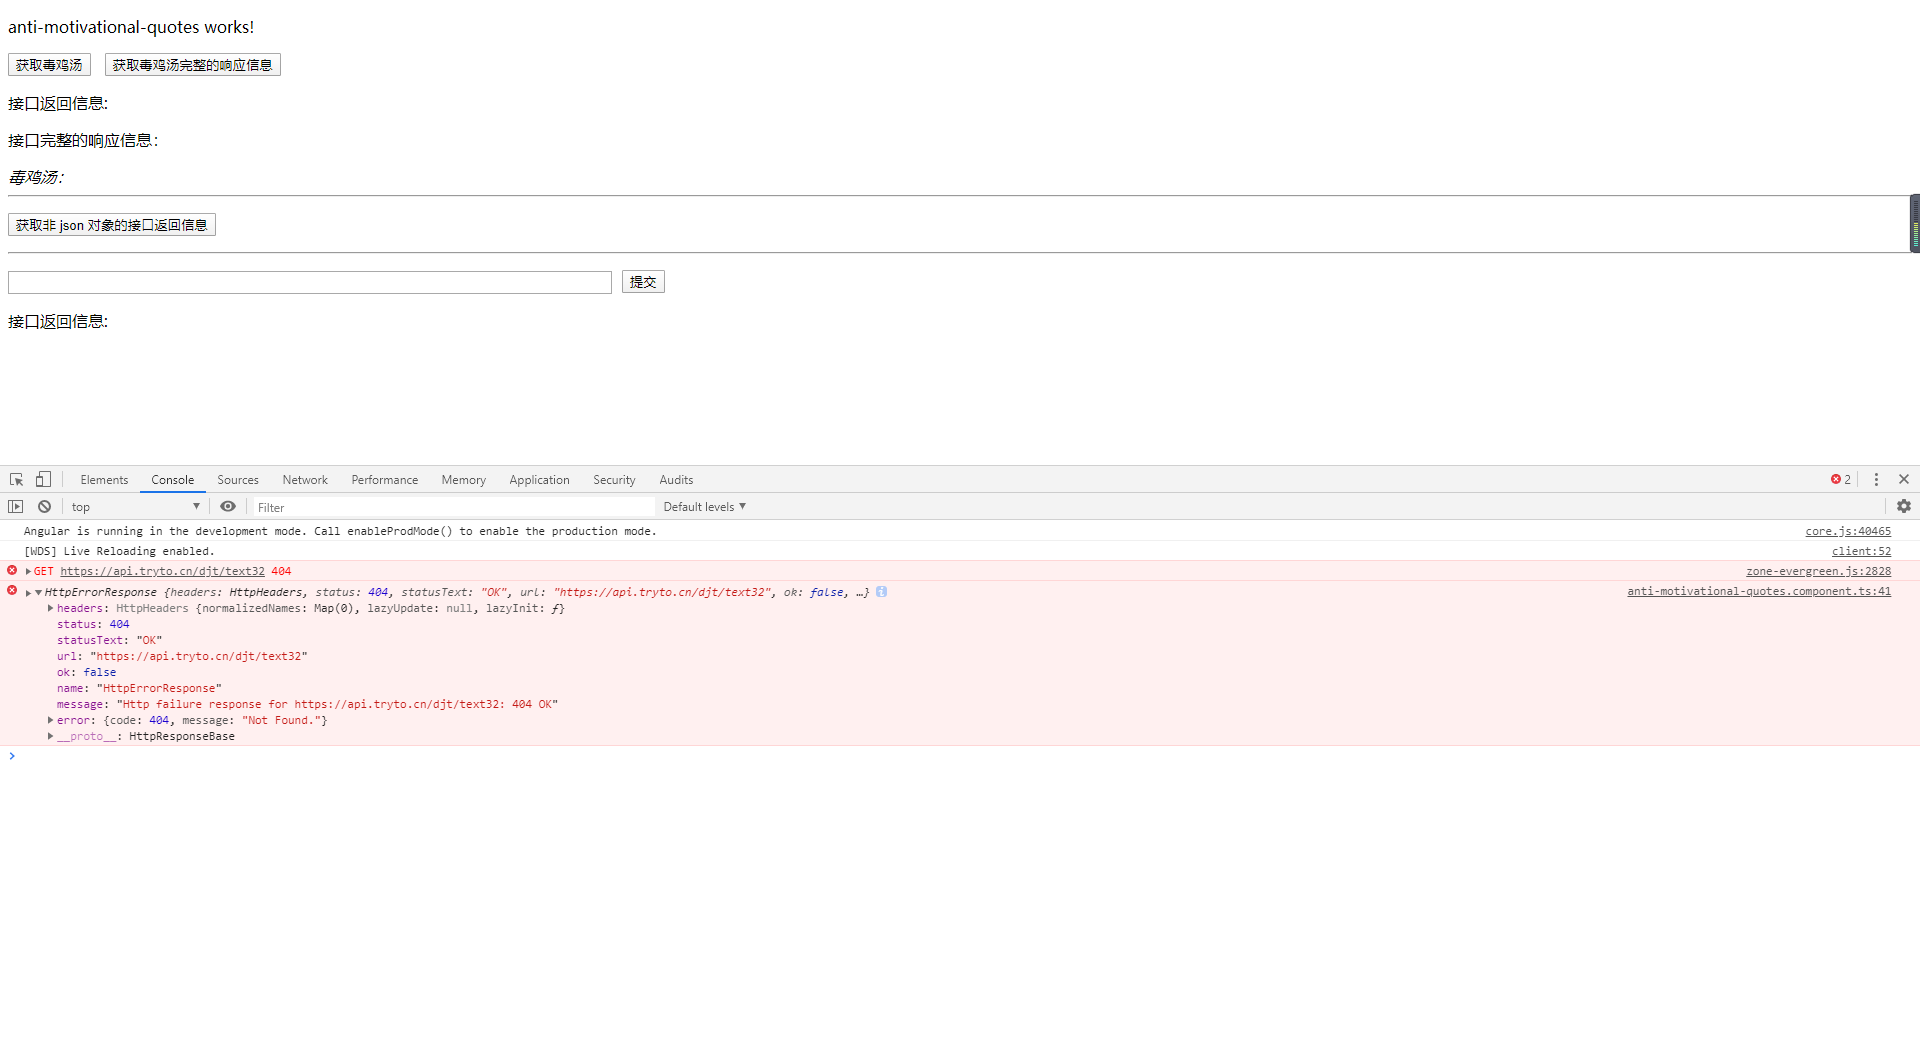
在处理错误信息的回调方法中,方法返回了一个 HttpErrorResponse 对象来描述错误信息
因为这里的错误更多是服务在与后端进行通信产生的错误,因此对于错误信息的捕获和处理更应该放到服务中进行,而在组件处仅显示错误提示
在服务中定义一个错误处理器,用来处理与后端请求中发生的错误
import { Injectable } from '@angular/core';
import { Observable, throwError } from 'rxjs';
import { catchError, retry } from 'rxjs/operators';
// 引入 HttpClient 类
import { HttpClient, HttpResponse, HttpHeaders, HttpErrorResponse } from '@angular/common/http';
@Injectable({
providedIn: 'root'
})
export class AntiMotivationalQuotesServicesService {
// 通过构造函数注入的方式依赖注入到使用的类中
constructor(private http: HttpClient) { }
/**
* 通过 get 请求获取毒鸡汤信息
*/
getAntiMotivationalQuotes(): Observable<GetQuotesResponseModel> {
const url = 'https://api.tryto.cn/djt/text32';
return this.http.get<GetQuotesResponseModel>(url)
.pipe(
catchError(this.handleError)
);
}
/**
* 错误信息捕获处理
* @param error 错误信息
*/
private handleError(error: HttpErrorResponse) {
if (error.error instanceof ErrorEvent) {
// 客户端本身引起的错误信息
console.error(`客户端错误:${error.error.message}`);
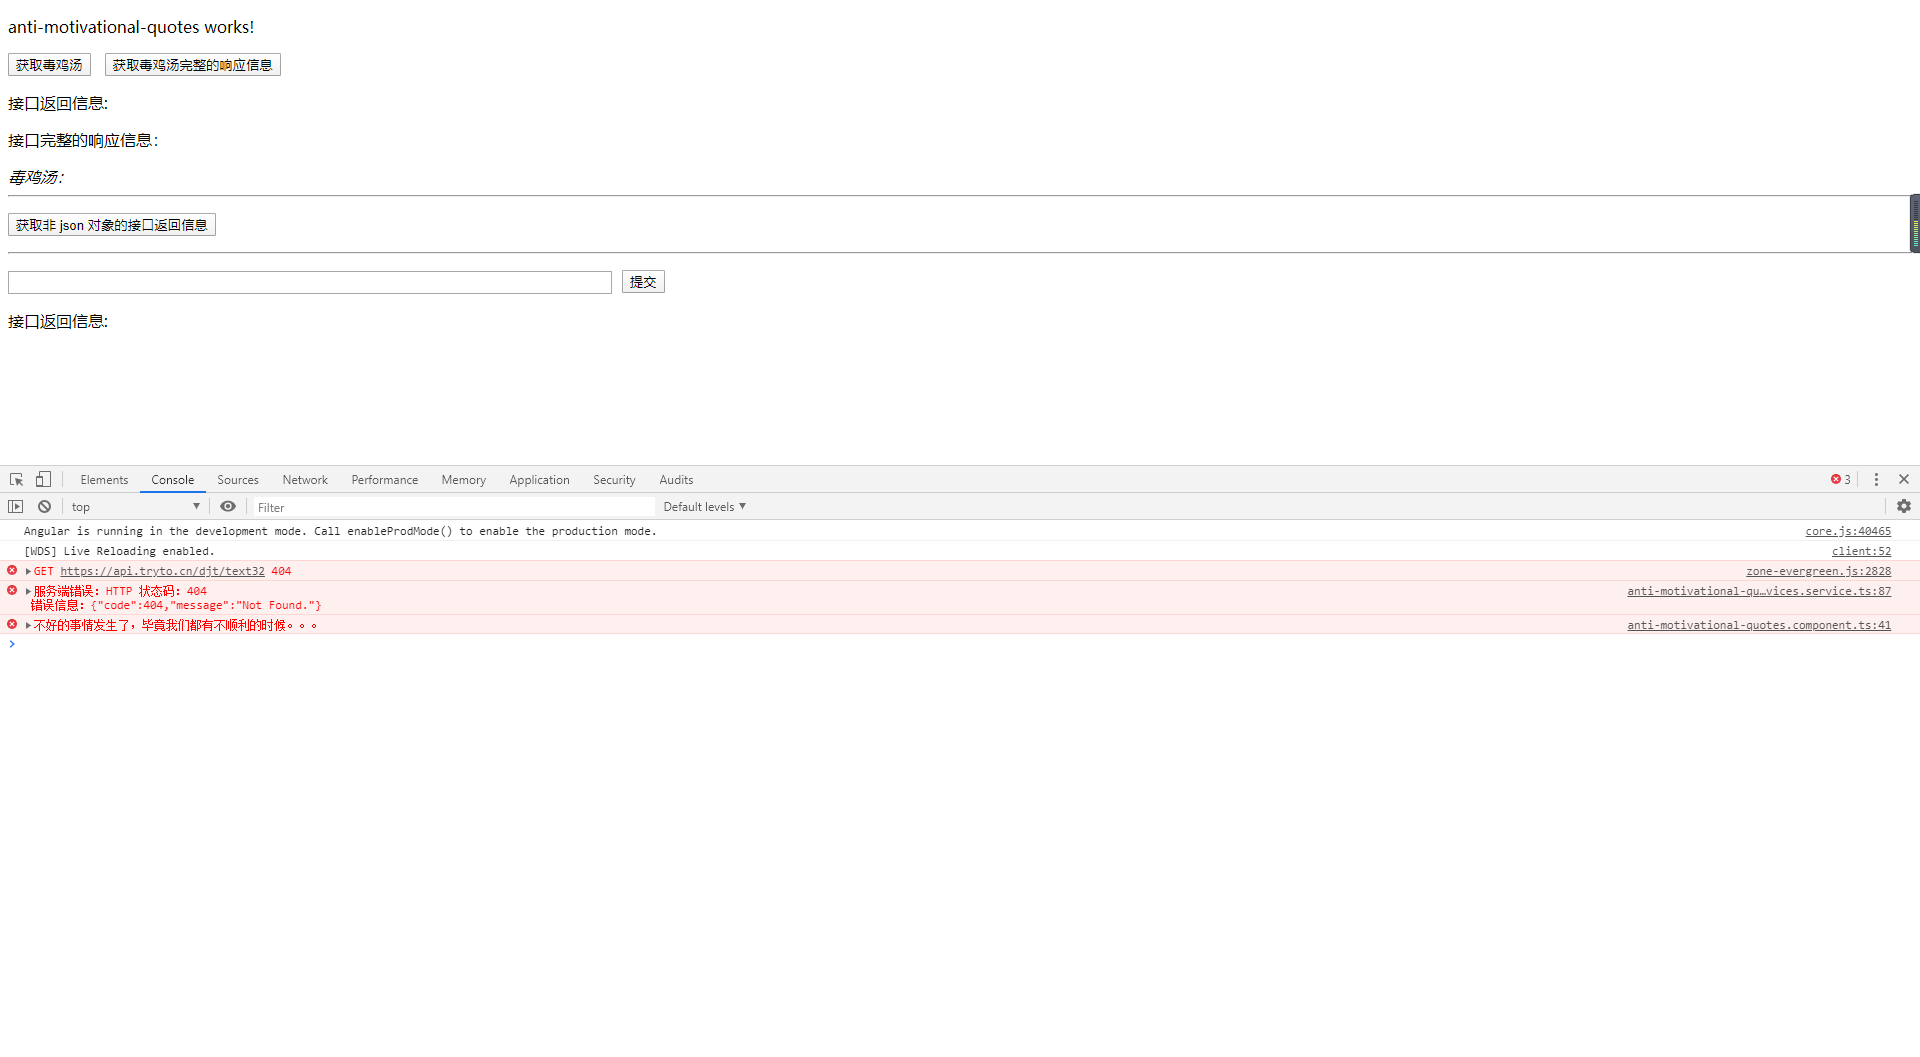
} else {
// 服务端返回的错误信息
console.error(`服务端错误:HTTP 状态码:${error.status}
错误信息:${JSON.stringify(error.error)}`);
}
// 反馈给用户的错误信息(用于组件中使用 error 回调时的错误提示)
return throwError('不好的事情发生了,毕竟我们都有不顺利的时候。。。');
}
}
当请求发生错误时,通过在 HttpClient 方法返回的 Observable 对象中使用 pipe 管道将错误传递给自定义的错误处理器,从而完成捕获错误信息的后续操作
4.2.2、请求重试
某些情况下存在因为特殊原因导致短时间的请求失败,这时可以在 pipe 管道中,当请求失败后,使用 retry 方法进行多次的请求重试,在进行了多次重试后还是无法进行数据通信后,则进行错误捕获
getAntiMotivationalQuotes(): Observable<GetQuotesResponseModel> {
    const url = 'https://api.tryto.cn/djt/text32';
    return this.http.get<GetQuotesResponseModel>(url)
      .pipe(
        retry(3), // 重试三次
        catchError(this.handleError) // 捕获错误信息
      );
}
4.3、请求和响应拦截
在向服务器发起请求时,一般是需要我们在请求头中添加上授权的 token 信息,与其当后端接口返回我们无权访问时再来处理,是不是可以在发起请求前去进行拦截判断,如果不包含 token 信息,则将允许访问的 token 信息添加到请求中
同样的,当已经定义好后端返回什么信息代表请求出错 or 直接根据后端返回的请求状态码判断请求出错时,完全可以通过对接口返回的响应进行拦截,直接拦截掉请求出错的情况,从而不需要在后续的业务逻辑代码中再进行判断请求是否成功
4.3.1、自定义拦截器
在 Angular 中可以新建一个继承于 HttpInterceptor 接口的拦截器类,通过实现 intercept 方法来对请求进行拦截处理
与 ASP.NET Core 中的中间件相似,我们可以在请求中添加多个的拦截器,构成一个拦截器链。当一个拦截器已经处理完成时,需要通过 next 对象将 HTTP 请求传递到下一个拦截器,否则,整个请求将会中断。如果当前的拦截器已经是整个拦截器链的最后一个,则会将请求发送到后端接口
import { HttpInterceptor, HttpRequest, HttpHandler, HttpEvent, HttpResponse } from '@angular/common/http';
import { Observable } from 'rxjs/internal/Observable';
import { Injectable } from '@angular/core';
import { tap, finalize } from 'rxjs/operators';

/**
 * 通过添加 Injectable 特性,表明可以通过依赖注入的方式进行创建
 */
@Injectable()
export class LoggingInterceptor implements HttpInterceptor {
  /**
   * 请求拦截
   * @param req http 请求
   * @param next 下一个拦截器
   */
  intercept(req: HttpRequest<any>, next: HttpHandler): Observable<HttpEvent<any>> {

    // 开始时间
    const started = Date.now();

    let msg: string;

    // 将 http 请求信息传递给下一个拦截器
    return next.handle(req)
      .pipe(
        tap(
          // 捕获当前请求是否成功 or 失败

          // 1、通过判断响应的类型是否为 HttpResponse 来判断请求是否成功
          event => msg = event instanceof HttpResponse ? '请求成功' : '请求失败',

          // 2、如果存在了 error 回调,则请求失败
          error => msg = '请求失败'
        ), finalize(() => {
          const elapsed = Date.now() - started;
          console.log(`请求方式:${req.method} 请求地址:${req.urlWithParams} 响应耗时:${elapsed} ms 请求结果:${msg}`);
        }));
  }
}
当定义好拦截器后,与其它的自定义服务一样,我们需要添加到根模块的 providers 中,因为可能会存在定义多个拦截器的情况,这里可以通过定义一个 typescript 文件用来导出我们需要添加的拦截器信息
因为会存在定义多个拦截器的情况,所以这里需要指定 multi 属性为 true
import { HTTP_INTERCEPTORS } from '@angular/common/http';

// 需要添加的拦截器
import { LoggingInterceptor } from './logging-interceptor';

// 返回的拦截器数组
export const HttpInterceptorProviders = [
  { provide: HTTP_INTERCEPTORS, useClass: LoggingInterceptor, multi: true }
];
由于拦截器具有将发送到服务端的 HTTP 请求进行监视、转化,以及拦截请求的响应信息的双重效果,因此当我们注册了多个拦截器时,在发送请求时会按照我们添加的顺序进行执行,而在接受到请求响应时,则是按照反过来的顺序进行执行
获取到导出的拦截器信息,就可以在根模块中去导入需要注册的拦截器
import { BrowserModule } from '@angular/platform-browser';
import { NgModule } from '@angular/core';
import { FormsModule } from '@angular/forms';

import { AppRoutingModule } from './app-routing.module';
import { AppComponent } from './app.component';

// 添加自定义拦截器
import { HttpInterceptorProviders } from './http-interceptors/http-interceptor-providers';

@NgModule({
  declarations: [
    AppComponent,
    AntiMotivationalQuotesComponent
  ],
  imports: [
    BrowserModule,
    AppRoutingModule,
    FormsModule,
    HttpClientModule // 添加到根应用模块中
  ],
  providers: [
    HttpInterceptorProviders
  ],
  bootstrap: [AppComponent]
})
export class AppModule { }
4.3.2、修改请求信息
由于一个请求可能会存在重试发起的情况,为了确保多次发起请求时的请求信息的不变性,对于 HttpRequest 和 HttpResponse 我们是不可以修改原始的对象属性值的
当我们需要对请求进行修改时,例如在请求的 header 中添加上 token 信息,此时我们需要先克隆一个原始的请求对象,在这个克隆后的请求上进行操作,最终将这个克隆后的请求传递给下一个拦截器
import { HttpInterceptor, HttpRequest, HttpHandler, HttpEvent, HttpResponse } from '@angular/common/http';
import { Observable } from 'rxjs/internal/Observable';
import { Injectable } from '@angular/core';
import { tap, finalize } from 'rxjs/operators';

/**
 * 通过添加 Injectable 特性,表明可以通过依赖注入的方式进行创建
 */
@Injectable()
export class LoggingInterceptor implements HttpInterceptor {
  /**
   * 请求拦截
   * @param req http 请求
   * @param next 下一个拦截器
   */
  intercept(req: HttpRequest<any>, next: HttpHandler): Observable<HttpEvent<any>> {

    // 开始时间
    const started = Date.now();

    let msg: string;

    // 打印原始的请求信息
    console.log(`原始的请求信息:${JSON.stringify(req.headers)}`);

    // 获取请求中的 token 信息
    const token = req.headers.get('Authorization') || '';

    // 克隆请求信息
    const authReq = req.clone({
      headers: token === '' ? req.headers.set('Authorization', '123456') : req.headers
    });

    // 打印修改后的请求信息
    console.log(`克隆后的请求信息:${JSON.stringify(authReq.headers)}`);

    // 将克隆后的 http 请求信息传递给下一个拦截器
    return next.handle(authReq)
      .pipe(
        tap(
          // 捕获当前请求是否成功 or 失败

          // 1、通过判断响应的类型是否为 HttpResponse 来判断请求是否成功
          event => msg = event instanceof HttpResponse ? '请求成功' : '请求失败',

          // 2、如果存在了 error 回调,则请求失败
          error => msg = '请求失败'
        ), finalize(() => {
          const elapsed = Date.now() - started;
          console.log(`请求方式:${req.method} 请求地址:${req.urlWithParams} 响应耗时:${elapsed} ms 请求结果:${msg}`);
        }));
  }
}