近期公司项目告一段落,闲来无事,看到山东中国移动客户端有个转盘动画挺酷的。于是试着实现一下,看似简单,可在coding时却发现不少坑,填坑的同时还顺便复习了一下高中数学知识([三角函数]),收获不小。
效果图:
![转盘旋转效果图][效果图]
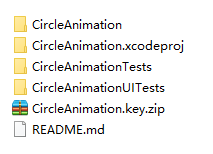
项目文件截图:

1、首先初始化6个UIImageView
######1)分析imgView的中心点位置![imgView的中心点位置][center.001.jpg]
Δx = _radius * sin(α);
Δy = _radius * cos(α);
所以,
imgView.center.x = centerX + _radius * sin(currentAngle);
imgView.center.y = centerY - _radius * cos(currentAngle);
2)代码
``` - (void)customUI { CGFloat centerX = CGRectGetWidth(self.frame) * 0.5f; CGFloat centerY = centerX; _centerPoint = CGPointMake(centerX, centerY);//中心点 _blueView = [[UIView alloc] initWithFrame:CGRectMake(0, 0, 100, 100)];//蓝色view _blueView.center = _centerPoint; _blueView.backgroundColor = [UIColor blueColor]; [self addSubview:_blueView]; UIView *redView = [[UIView alloc] initWithFrame:CGRectMake(0, 0, 50, 50)];//红色view redView.backgroundColor = [UIColor redColor]; [_blueView addSubview:redView];_deltaAngle = M_PI / 3.0f;//6个imgView的间隔角度
CGFloat currentAngle = 0;
CGFloat imgViewCenterX = 0;
CGFloat imgViewCenterY = 0;
CGFloat imgViewW = 80;
CGFloat imgViewH =imgViewW;
_radius = centerX - imgViewW * 0.5f;//imgView.center到self.center的距离
for (int i = 0; i < 6; i++) {
currentAngle = _deltaAngle * i;
imgViewCenterX = centerX + _radius * sin(currentAngle);
imgViewCenterY = centerY - _radius * cos(currentAngle);
UIImageView *imgView = [[UIImageView alloc] initWithFrame:CGRectMake(0, 0, imgViewW, imgViewH)];
imgView.tag = kTag + i;
imgView.center = CGPointMake(imgViewCenterX, imgViewCenterY);
imgView.image = [UIImage imageNamed:[NSString stringWithFormat:@"circle%d", i]];
[self addSubview:imgView];
}
}
</br>
###2、转起来
</p>
######1)计算任意点相对于原点(O)及x轴的夹角⍺
</p>
![A点相对于原点及x轴角度][02]

> 以点A为例:
> ![][03]
> `CGFloat currentPointRadius = sqrt(pow(currentPoint.y - _centerPoint.y, 2) + pow(currentPoint.x - _centerPoint.x, 2));`
>
> ![][04]
> 所以,⍺ = arccos((A.x - O.x) / OA),`CGFloat curentPointAngle = acos((currentPoint.x - _centerPoint.x) / currentPointRadius);` **!!!注意,此处有坑**


</p>
> **坑在哪?**cos(x)和sin(x)的周期是2π,所以必定在求arccos(x)时一个值对应两个角度,此时需要判断点是在哪个象限(`对于cos函数来说,要判断点在第一、二象限还是在第三、四象限,如果是sin函数,则应该判断点是第二、三象限还是在第一、四象限`)再进行计算。
>
> *下面是以cos函数分析:*
> 如图003,点C和点D,C在第二象限,D在第三象限,它们对应的值相同但对应的角度不同。
> 如果是C点,则`CGFloat curentPointAngle = acos((currentPoint.x - _centerPoint.x) / currentPointRadius);`
> 如果是D点,则`curentPointAngle = (π - curentPointAngle) + π = 2 * π - curentPointAngle;`
![003][003]

</p>

> **另外一个坑!!!**
> #####不要尝试用tan函数计算点相对于原点及x轴的夹角!
> ###不要尝试用tan函数计算点相对于原点及x轴的夹角!!
> #不要尝试用tan函数计算点相对于原点及x轴的夹角!!!
></p>
> *因为tan函数在`[0,2π]`区间有2个周期,用的话会有出现各种bug!*

######2)计算变化的角度 Δ
</p>
以1)方法计算当前点的角度`curentPointAngle`
上一个点的角度`lastAngle`
则变化角度`CGFloat angle = lastAngle - curentPointAngle;`
######3)改变6个imgView中心点位置
</p>
_lastImgViewAngle = fmod(_lastImgViewAngle + angle, 2 * M_PI);//对当前角度取模
CGFloat currentAngle = 0;
CGFloat imgViewCenterX = 0;
CGFloat imgViewCenterY = 0;
for (int i = 0; i < 6; i++) {
UIImageView *imgView = [self viewWithTag:kTag];
currentAngle = _deltaAngle * i + _lastImgViewAngle;
imgViewCenterX = _centerPoint.x + _radius * sin(currentAngle);
imgViewCenterY = _centerPoint.x - _radius * cos(currentAngle);
imgView = [self viewWithTag:kTag + i];
imgView.center = CGPointMake(imgViewCenterX, imgViewCenterY);
}
</p>
######4)旋转逻辑代码
</p>
- (void)touchesBegan:(NSSet<UITouch *> *)touches withEvent:(UIEvent *)event {
UITouch *touch = [touches anyObject];
CGPoint point = [touch locationInView:self];
//计算上一个点相对于x轴的角度
CGFloat lastPointRadius = sqrt(pow(point.y - _centerPoint.y, 2) + pow(point.x - _centerPoint.x, 2));
if (lastPointRadius == 0) {
return;
}
_lastPointAngle = acos((point.x - _centerPoint.x) / lastPointRadius);
if (point.y > _centerPoint.y) {
_lastPointAngle = 2 * M_PI - _lastPointAngle;
}
}
- (void)touchesMoved:(NSSet<UITouch *> *)touches withEvent:(UIEvent *)event {
UITouch *touch = [touches anyObject];
CGPoint currentPoint = [touch locationInView:self];
//1.计算当前点相对于x轴的角度
CGFloat currentPointRadius = sqrt(pow(currentPoint.y - _centerPoint.y, 2) + pow(currentPoint.x - _centerPoint.x, 2));
if (currentPointRadius == 0) {//当点在中心点时,被除数不能为0
return;
}
CGFloat curentPointAngle = acos((currentPoint.x - _centerPoint.x) / currentPointRadius);
if (currentPoint.y > _centerPoint.y) {
curentPointAngle = 2 * M_PI - curentPointAngle;
}
//2.变化的角度
CGFloat angle = _lastPointAngle - curentPointAngle;
_blueView.transform = CGAffineTransformRotate(_blueView.transform, angle);
_lastImgViewAngle = fmod(_lastImgViewAngle + angle, 2 * M_PI);//对当前角度取模
CGFloat currentAngle = 0;
CGFloat imgViewCenterX = 0;
CGFloat imgViewCenterY = 0;
for (int i = 0; i < 6; i++) {
UIImageView *imgView = [self viewWithTag:kTag];
currentAngle = _deltaAngle * i + _lastImgViewAngle;
imgViewCenterX = _centerPoint.x + _radius * sin(currentAngle);
imgViewCenterY = _centerPoint.x - _radius * cos(currentAngle);
imgView = [self viewWithTag:kTag + i];
imgView.center = CGPointMake(imgViewCenterX, imgViewCenterY);
}
_lastPointAngle = curentPointAngle;
}
</br>


- - -
最后,推荐一个同事[@shelin](http://www.jianshu.com/users/edad244257e2)分享的实用小工具,[iOS-Images-Extractor](https://github.com/devcxm/iOS-Images-Extractor.git),能快速获得iOS *.ipa包中的图片(包括Assets.car)。


[效果图]://upload-images.jianshu.io/upload_images/610137-84fa53199d8f99c3.gif?imageMogr2/auto-orient/strip
[center.001.jpg]://upload-images.jianshu.io/upload_images/610137-f186dc8d8acb7866.jpeg?imageMogr2/auto-orient/strip%7CimageView2/2/w/1240
[02]://upload-images.jianshu.io/upload_images/610137-97ec4578141eeda6.jpeg?imageMogr2/auto-orient/strip%7CimageView2/2/w/1240
[003]://upload-images.jianshu.io/upload_images/610137-53769d135250f5f0.jpeg?imageMogr2/auto-orient/strip%7CimageView2/2/w/1240
[03]://upload-images.jianshu.io/upload_images/610137-c9636b5bc43a20f7.latex?imageMogr2/auto-orient/strip
[04]://upload-images.jianshu.io/upload_images/610137-8710ff9591d56e3c.latex?imageMogr2/auto-orient/strip
[Demo]:https://github.com/JoanLeeo/CircleAnimation.git
[三角函数]:http://baike.baidu.com/link?url=GdonGbaM0lkRY8bZ4cm8JAcaU4AYZzqrCC9F6_EaqE2OiI63YOEy8fxvohTS22cP6_v2Eb9y8aYTExj38iTt2_iOS 转盘动画效果实现

> 代码地址如下:<br>http://www.demodashi.com/demo/11598.html


> 注:本文著作权归作者,由demo大师代发,拒绝转载,转载需要作者授权