Eclipse中配置maven
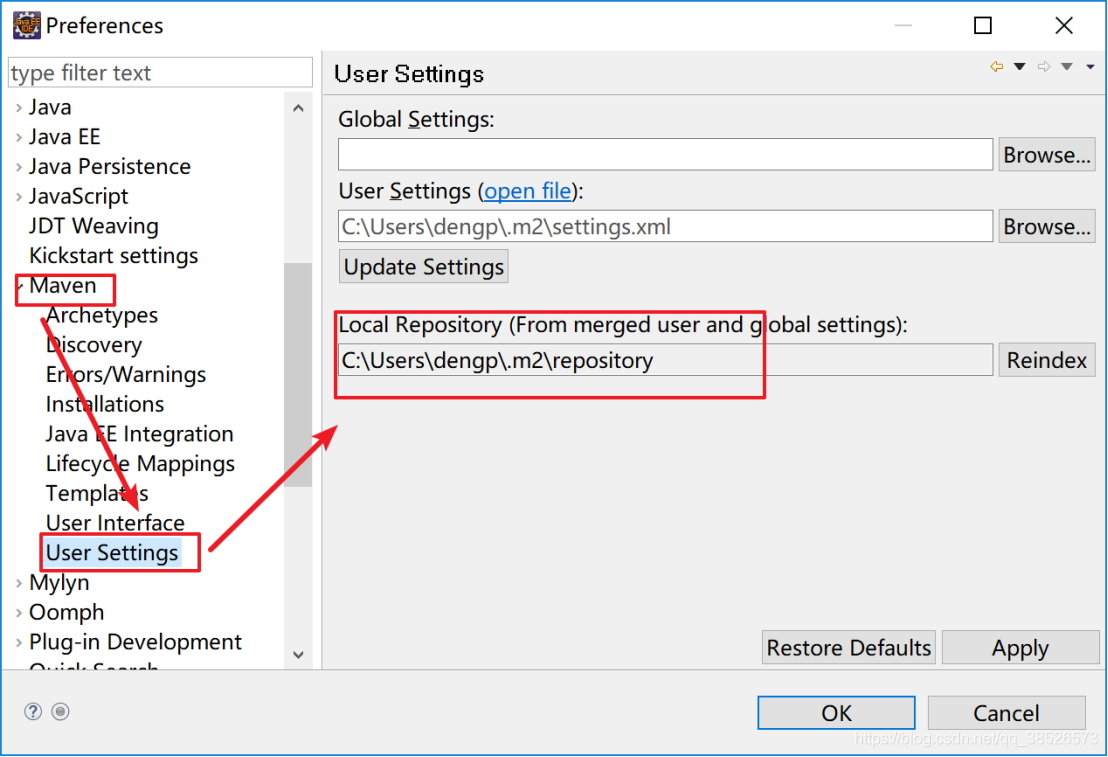
1.Eclipse中默认集成的有Maven
 可以使用默认的,本地仓库在当前用户下的.m2文件夹下。
2.配置我们自己安装的maven
2.1指定配置安装maven的路径


2.2重新指定setting.xml文件的位置

2.3setting.xml文件中添加代理服务器地址
中央仓库的地址在国外直接下载jar会很慢,所以我们需要通过代理的方式下载
<!-- 阿里代理镜像地址 -->
<mirror>
	<id>alimaven</id>
	<name>aliyun maven</name>
	<url>http://maven.aliyun.com/nexus/content/groups/public/</url>
	<mirrorOf>*</mirrorOf>
</mirror>

3.创建Maven项目
创建步骤:


 然后等待...
创建好的项目结构

解决报错
报错原因:
1.jdk版本问题
第一种解决方法是在pom.xml文件中添加如下代码
<project xmlns="http://maven.apache.org/POM/4.0.0" xmlns:xsi="http://www.w3.org/2001/XMLSchema-instance" xsi:schemaLocation="http://maven.apache.org/POM/4.0.0 http://maven.apache.org/xsd/maven-4.0.0.xsd">
  <modelVersion>4.0.0</modelVersion>
  <groupId>com.dpb</groupId>
  <artifactId>MavenDemo01</artifactId>
  <version>0.0.1-SNAPSHOT</version>
  <packaging>war</packaging>

  <build>
		<plugins>
			<!-- 设置编译环境 1.8 -->
			<plugin>
				<artifactId>maven-compiler-plugin</artifactId>
				<version>2.3.2</version>
				<configuration>
					<source>1.8</source>
					<target>1.8</target>
				</configuration>
			</plugin>
		</plugins>
	</build>
</project>
然后如下操作即可:
 但这种方式有个不太好的地方是每次创建项目都需要添加这个代码,第二种方式比较好解决。
第二种方式在setting.xml配置文件中添加设置
<profile>
	<id>jdk-1.8</id>
	 <activation>
		  <activeByDefault>true</activeByDefault>
		  <jdk>1.8</jdk>
	  </activation>
	<properties>
	<maven.compiler.source>1.8</maven.compiler.source>
	<maven.compiler.target>1.8</maven.compiler.target>
	<maven.compiler.compilerVersion>1.8</maven.compiler.compilerVersion>
	</properties>
</profile>
在profiles节点中添加注意
然后在eclipse中update一下就可以了
 在update下项目就可以了

2.缺少web.xml文件
 解决方法:
解决方法:
1.手动创建WEB-INFweb.xml文件
2.选中项目右键properties菜单
 右击maven项目,找到ProjectFacets 取消选中 Dynamic Web Module选项,点击应用,再选中Dyanmic Web Module会出现一个选项卡
 点击弹出的选项卡后
 输入src/main/webapp点击OK

这时在去查看我们的本地仓库会发现多了很多东西
 这是从中央仓库下载下来的jar包
让项目跑起来
1.添加个静态页面

2.通过maven将项目打成war包


将此war包部署到Tomcat中即可
Tomcat插件使用
打成war包手动部署这种方式在开发过程中不是很高效,这时我们可以在项目中集成Tomcat插件来快速部署运行
1.在pom.xml文件中添加
<project xmlns="http://maven.apache.org/POM/4.0.0" xmlns:xsi="http://www.w3.org/2001/XMLSchema-instance"
	xsi:schemaLocation="http://maven.apache.org/POM/4.0.0 http://maven.apache.org/xsd/maven-4.0.0.xsd">
	<modelVersion>4.0.0</modelVersion>
	<groupId>com.dpb</groupId>
	<artifactId>MavenDemo01</artifactId>
	<version>0.0.1-SNAPSHOT</version>
	<packaging>war</packaging>

	<dependencies>
		<!-- 因为是web项目所以需要servlet -->
		<!-- https://mvnrepository.com/artifact/javax.servlet/servlet-api -->
		<dependency>
		    <groupId>javax.servlet</groupId>
		    <artifactId>servlet-api</artifactId>
		    <version>2.5</version>
		    <scope>provided</scope>
		</dependency>
	</dependencies>

	<build>
		<plugins>
			<!-- tomcat插件 -->
			<plugin>
				<groupId>org.apache.tomcat.maven</groupId>
				<artifactId>tomcat7-maven-plugin</artifactId>
				<version>2.2</version>
				<configuration>
					<!-- 端口号 -->
					<port>8082</port>
					<!-- /表示访问路径 省略项目名 -->
					<path>/</path>
					<!-- 设置编码方式 -->
					<uriEncoding>utf-8</uriEncoding>
				</configuration>
			</plugin>
		</plugins>
	</build>
</project>

2.运行

 输入: tomcat7:run 然后运行
第一次要下载一些资源会比较慢。


上一篇:Maven教程1(介绍安装和配置)
下一篇:Maven教程3(依赖管理)