1. 新建 bd 文档以及ZYNQ处理器IP调用
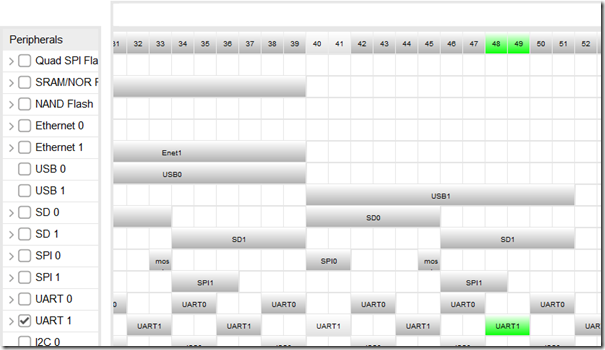
添加ZYNQ处理器IP。勾选串口1用于测试打印。
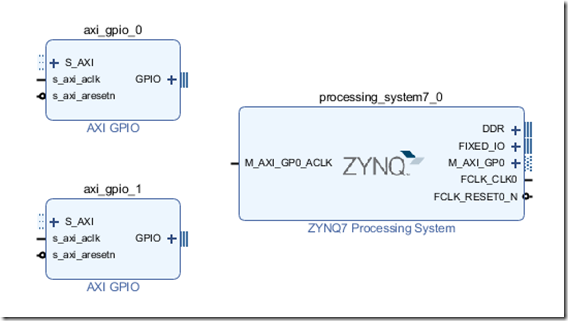
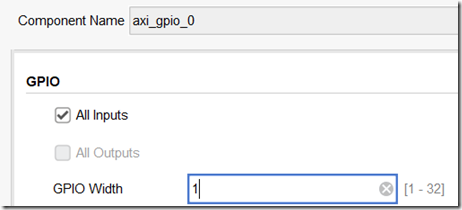
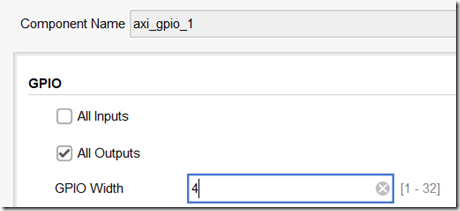
添加两个AXI_GPIO,其中axi_gpio_0用于输入,axi_gpio_1用于输出。
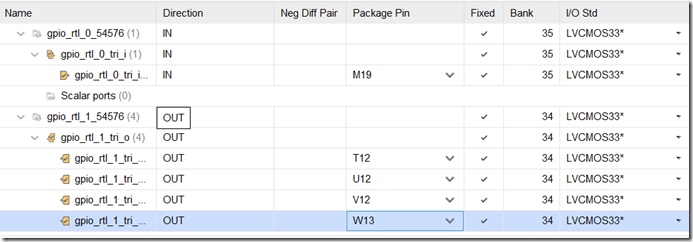
输入为1位,输出4位。
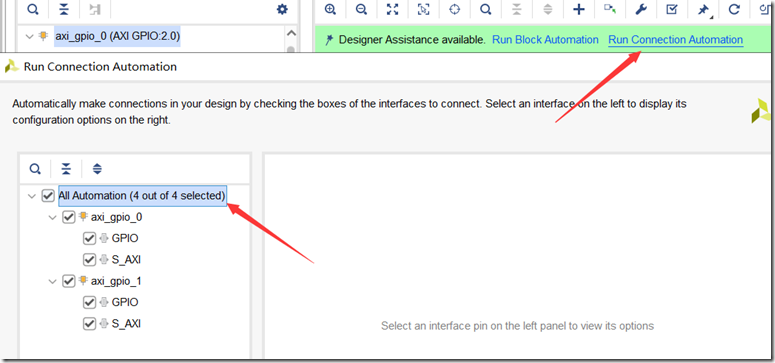
点击自动连接,勾选所有模块。
自动连接之后,系统自动生成了复位控制模块和AXI总线互联模块。
Run Block Automation。自动连接对外管脚。
Ctrl+S保存。
Generate Output Products。
Create HDL Wrapper。
Open Elaborated Design。
Generate Bitstream。
File→Export→Export Hardware(Include bitstream)。
2. SDK下的代码开发
File→Launch SDK。
File→New→Application Project。
工程名gpio_input_output,模板helloworld。
编辑helloworld.c
#include <stdio.h>
#include "platform.h"
#include "xparameters.h"
#include "xscugic.h"
#include "xil_exception.h"
#include "xgpio.h"
#include <unistd.h> // usleep()
#include <stdbool.h>  // bool

#define LED_DEVICE_ID          XPAR_AXI_GPIO_1_DEVICE_ID
#define KEY_DEVICE_ID          XPAR_AXI_GPIO_0_DEVICE_ID

XGpio LEDInst;
XGpio KEYInst;

u8 key_value_pre=0;
u8 key_value_now=0;
int main()
{
    init_platform();
    int status;
    status = XGpio_Initialize(&KEYInst, KEY_DEVICE_ID); // initial KEY
    if(status != XST_SUCCESS) return XST_FAILURE;
    status = XGpio_Initialize(&LEDInst, LED_DEVICE_ID);  // initial LED
    if(status != XST_SUCCESS)return XST_FAILURE;
    XGpio_SetDataDirection(&KEYInst, 1, 1); // set KEY IO direction as in
    XGpio_SetDataDirection(&LEDInst, 1, 0); // set LED IO direction as out
    XGpio_DiscreteWrite(&LEDInst, 1, 0x0);// at initial, all LED turn off
    printf(">>> Press PL KEY1 ~ KEY4 one by one, and check the PL LED1 ~ LED4
");
    while(1)
    {
        usleep(100000); // 0.1s sleep, to debounce, in common, the meta-state will sustain no more than 20ms
        key_value_pre=key_value_now;
        key_value_now= XGpio_DiscreteRead(&KEYInst, 1) & 0x0F;
        XGpio_DiscreteWrite(&LEDInst, 1, key_value_now);
        if(key_value_pre!=key_value_now)  printf("key state_changed!
");
    }

    cleanup_platform();
    return 0;
}
功能:按下按键,输入为低电平,输出低电平使LED熄灭。
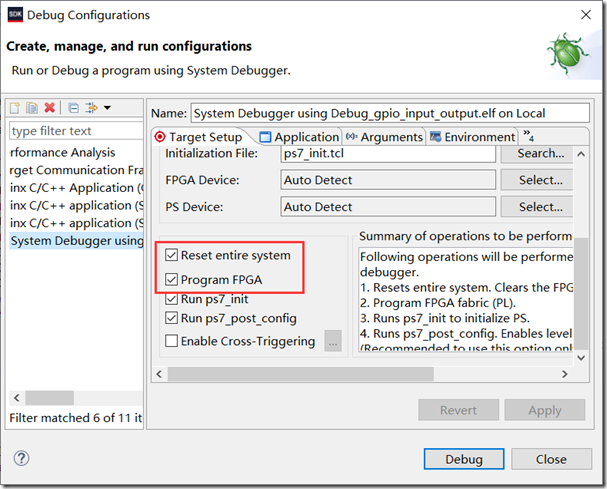
Debug Configurations
配置串口,开始Debug。
现象如下:

同时串口打印提示信息。
