代码地址如下:
http://www.demodashi.com/demo/11927.html
一、服务的注册与发现

关系调用说明:
- 服务生产者启动时,向服务注册中心注册自己提供的服务
- 服务消费者启动时,在服务注册中心订阅自己所需要的服务
- 注册中心返回服务提供者的地址信息个消费者
- 消费者从提供者中调用服务
二、Eureka简介
Eureka是Spring Cloud Netflix微服务套件中的一部分,可以与Springboot构建的微服务很容易的整合起来。
Eureka包含了服务器端和客户端组件。服务器端,也被称作是服务注册中心,用于提供服务的注册与发现。Eureka支持高可用的配置,当集群中有分片出现故障时,Eureka就会转入自动保护模式,它允许分片故障期间继续提供服务的发现和注册,当故障分片恢复正常时,集群中其他分片会把他们的状态再次同步回来。
客户端组件包含服务消费者与服务生产者。在应用程序运行时,Eureka客户端向注册中心注册自身提供的服务并周期性的发送心跳来更新它的服务租约。同时也可以从服务端查询当前注册的服务信息并把他们缓存到本地并周期性的刷新服务状态。
三、使用Eureka进行服务治理
1. 搭建服务注册中心
单独创建一个Springboot项目,并添加如下的依赖
<dependencies>
  <!--添加Eureka服务器端依赖-->
        <dependency>
            <groupId>org.springframework.cloud</groupId>
            <artifactId>spring-cloud-starter-eureka-server</artifactId>
        </dependency>
</dependencies>

 <dependencyManagement>
        <dependencies>
            <dependency>
                <groupId>org.springframework.cloud</groupId>
                <artifactId>spring-cloud-dependencies</artifactId>
                <version>Brixton.SR5</version>
                <type>pom</type>
                <scope>import</scope>
            </dependency>
        </dependencies>
    </dependencyManagement>
在Springboot项目中的main入口,添加@EnableEurekaServer注解,来开启服务注册中心
@EnableEurekaServer
@SpringBootApplication
public class EurekaServerApplication {

    public static void main(String[] args) {
        SpringApplication.run(EurekaServerApplication.class, args);
    }
}在默认情况下,服务注册中心也会把自己当做是一个服务,将自己注册进服务注册中心,所以我们可以通过配置来禁用他的客户端注册行为,在application.properties中添加如下配置:
server.port=3333

eureka.instance.hostname=localhost
#不要向注册中心注册自己
eureka.client.register-with-eureka=false
#禁止检索服务
eureka.client.fetch-registry=false
eureka.client.service-url.defaultZone=http://${eureka.instance.hostname}:${server.port}/eureka
启动应用,并访问http://localhost:3333/即可看到Eureka信息面板,如下:

从上图看到,在"Instances currently registered with Eureka"信息中,没有一个实例,说明目前还没有服务注册。
2. 注册服务
基于文章[微服务系列] 微服务构建框架--Spring Boot中构建的第一个Springboot项目(在附件中的springbootdemo.zip实例),来进行改造。首先在pom文件中添加Eureka客户端相关的依赖:
<dependencies>
        <!---->
        <dependency>
            <groupId>org.springframework.cloud</groupId>
            <artifactId>spring-cloud-starter-eureka</artifactId>
        </dependency>
</dependencies>

<dependencyManagement>
        <dependencies>
            <dependency>
                <groupId>org.springframework.cloud</groupId>
                <artifactId>spring-cloud-dependencies</artifactId>
                <version>Brixton.RS5</version>
                <type>pom</type>
                <scope>import</scope>
            </dependency>
        </dependencies>
</dependencyManagement>在之前的TestRestful方法中添加如下代码,将org.springframework.cloud.client.discovery.DiscoveryClient;对象注入,并且在日志中打印出与服务相关的一些信息。
@RestController
public class TestRestful {

    private final Logger logger=Logger.getLogger(getClass());

    @Autowired
    private DiscoveryClient client;

    @RequestMapping(value = "/hello",method = RequestMethod.GET)
    public String home(){
        ServiceInstance instance=client.getLocalServiceInstance();
        logger.info("serviceId"+instance.getServiceId()+"host:post="+instance.getHost()+":"+instance.getPort());
        return "hello spring";
    }
}在主类上添加@EnableEurekaClient注解以实现Eureka中的DiscoveryClient实现。
@EnableEurekaClient
@SpringBootApplication
public class SpringbootdemoApplication {

    public static void main(String[] args) {
        SpringApplication.run(SpringbootdemoApplication.class, args);
    }
}最后在配置文件application.yml中配置与服务相关的一些基本信息,如服务名、注册中心地址(即上一节中设置的注册中心地址http://localhost:3333/eureka)
#  设置服务名
spring:
  application:
    name: hello-service
#  设置注册中心地址
eureka:
  client:
    service-url:
      defaultZone: http://localhost:3333/eureka
3. 测试
- 启动注册中心服务
- 启动springbootdemo项目,可以看到如下的信息,说明此服务已经注册在了注册中心

同时访问http://localhost:3333/可以在Instances currently registered with Eureka中看到已经有一个服务注册了进来,并且名称为HELLO-SERVICE的服务

- 访问http://localhost:8088/hello可以在控制台中看到如下日志信息:

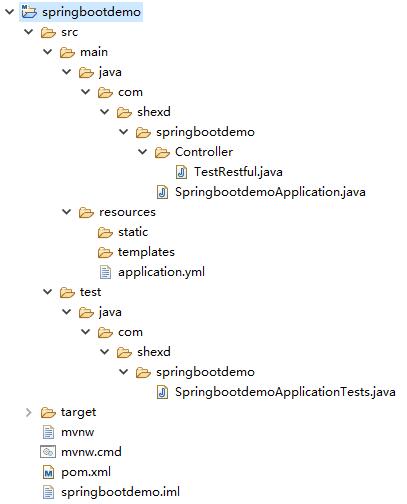
四、项目代码截图
 基于Eureka的服务治理
代码地址如下:
http://www.demodashi.com/demo/11927.html
注:本文著作权归作者,由demo大师代发,拒绝转载,转载需要作者授权