eclipse创建Maven web项目
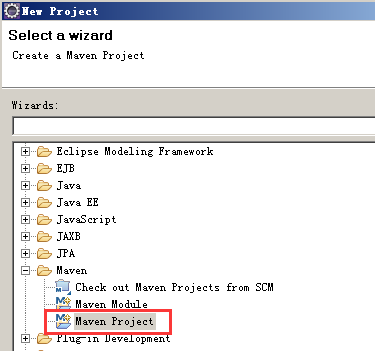
1、创建新项目
选择File -> New ->Project

选择New Project窗口中选择 Maven -> Maven Project,点击【next】:
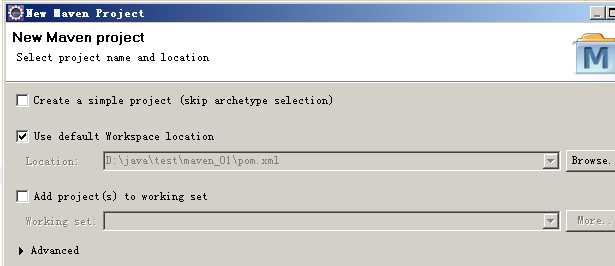
选择项目路径(此处也可以默认),然后next:
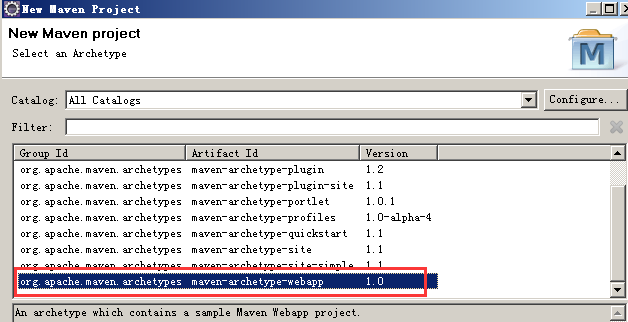
在Artifact Id一列中,选择maven-archetype-webapp,如下图所示,next:
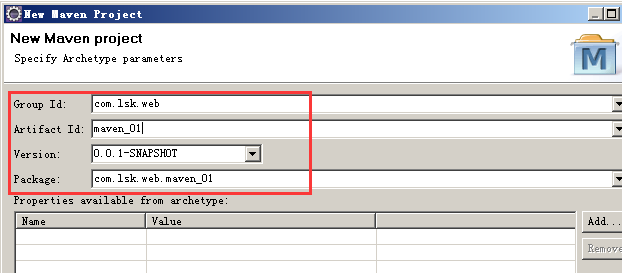
输入maven的坐标,finish:
2、设置server并解决错误
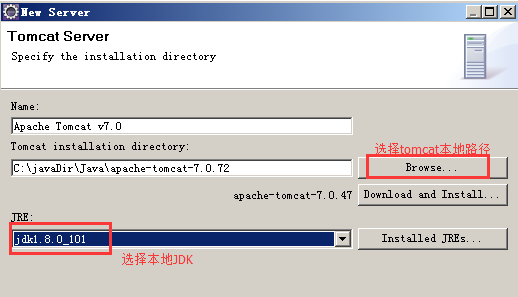
设置项目的server:

点击finish后,
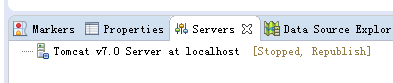
说明server创建成功.
这是,在Markers中可以看到错误信息:

把错误信息copy出来:
Description Resource Path Location Type
The superclass "javax.servlet.http.HttpServlet" was not found on the Java Build Path index.jsp /maven_01/src/main/webapp line 1 JSP Problem
这说明在Build Path中缺少执行服务器的包。
处理方式:

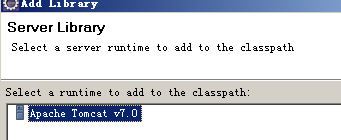
选择 add library下的 server runtime:
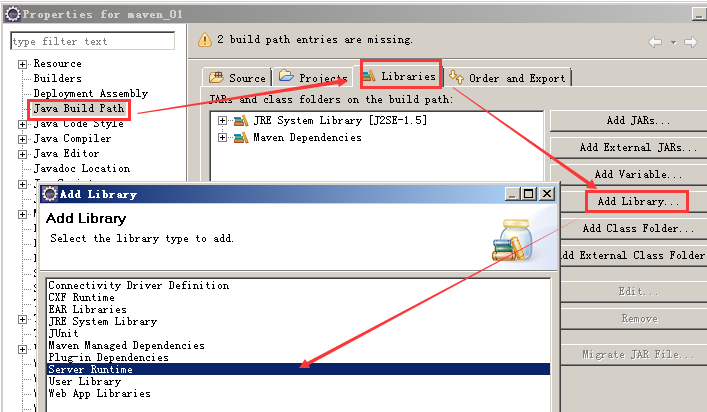
然后finish,错误就被解决了。然后运行server就可以运行啦!
3、更改pom.xml文件并发布项目
但是,我们是maven项目,可以直接构建到tomcat的webapps下直接部署:
接着:
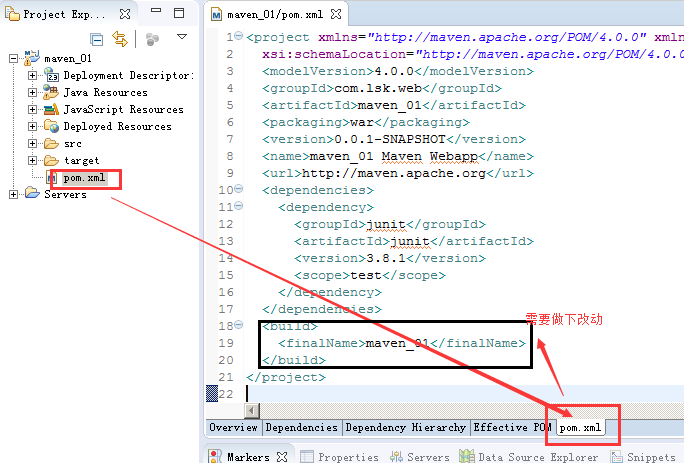
我们在<build></build>下的内容换成:
 <!-- 将Web项目自动部署到tomcat服务器的相关 配置信息-->
  <build>
      <!-- 将maven_01项目打包成maven_01.war自动部署到tomcat服务器的webapps目录下面 -->
    <finalName>maven_01</finalName>
    <plugins>
          <plugin>
              <groupId>org.codehaus.cargo</groupId>
              <artifactId>cargo-maven2-plugin</artifactId>
                <version>1.2.3</version>
                <configuration>
                    <container>
                          <!-- 指明使用的tomcat服务器版本 -->
                        <containerId>tomcat7x</containerId>
                        <!--指明tomcat服务器的安装目录 -->
                        <home>C:javaDirJavaapache-tomcat-7.0.72</home>
                    </container>
                    <configuration>
                        <type>existing</type>
                        <!--指明tomcat服务器的安装目录 -->
                        <home>C:javaDirJavaapache-tomcat-7.0.72</home>
                    </configuration>
                </configuration>
                <executions>
                  <execution>
                      <id>cargo-run</id>
                      <phase>install</phase>
                      <goals>
                          <goal>run</goal>
                      </goals>
                  </execution>
              </executions>
          </plugin>
      </plugins>
  </build>
注:上述路径信息、项目名称,以个人的为准。
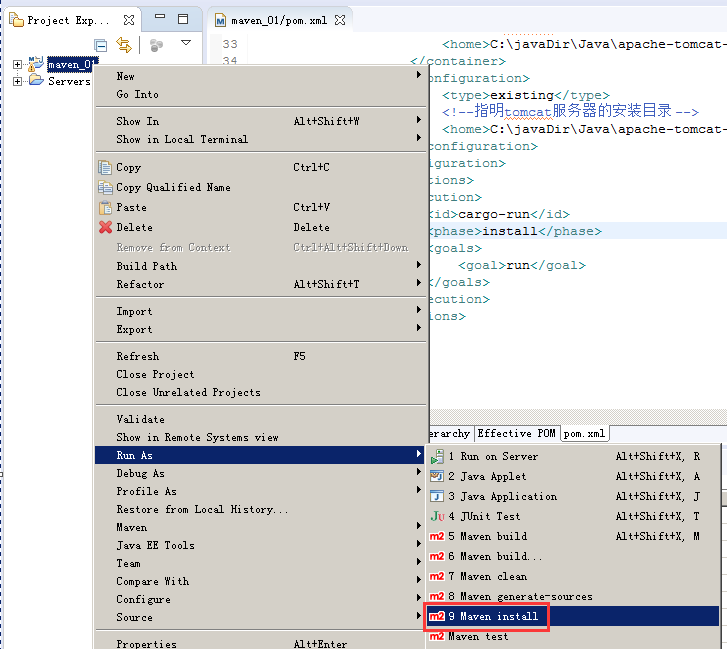
然后,在conslole中可以看到,下载一堆的包,最后:

在我们的tomcat安装目录下,会出现一个 "项目名.war"的文件:

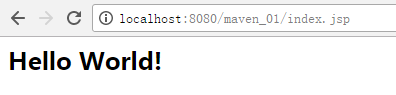
浏览器访问下;