第一:引入jar
由于项目是springboot的项目所以我这边简单的应用了springboot自带的socket jar
<dependency>
           <groupId>org.springframework.boot</groupId>
           <artifactId>spring-boot-starter-websocket</artifactId>
</dependency>
第二:Socket代码编写

import org.springframework.context.annotation.Bean;
import org.springframework.context.annotation.Configuration;
import org.springframework.web.socket.server.standard.ServerEndpointExporter;

/**
 * 开启WebSocket支持
 */
@Configuration
public class WebSocketConfig {

    /**
     *  注入对象ServerEndpointExporter,这个bean会自动注册使用了@ServerEndpoint注解声明的Websocket endpoint
     * @return
     */
    @Bean
    public ServerEndpointExporter serverEndpointExporter() {
        return new ServerEndpointExporter();
    }


}
import java.io.IOException;
import java.util.concurrent.CopyOnWriteArraySet;

import javax.websocket.OnClose;
import javax.websocket.OnError;
import javax.websocket.OnMessage;
import javax.websocket.OnOpen;
import javax.websocket.Session;
import javax.websocket.server.PathParam;
import javax.websocket.server.ServerEndpoint;

import org.springframework.stereotype.Component;

import lombok.extern.slf4j.Slf4j;
/**
 * 发送消息的类
 */
@Slf4j
@Component
@ServerEndpoint(value = "/websocket/{sid}")
public class WebSocketServer {

    //静态变量,用来记录当前在线连接数。应该把它设计成线程安全的。
    private static int onlineCount = 0;
    //concurrent包的线程安全Set,用来存放每个客户端对应的MyWebSocket对象。
    private static CopyOnWriteArraySet<WebSocketServer> webSocketSet = new CopyOnWriteArraySet<WebSocketServer>();


    //与某个客户端的连接会话,需要通过它来给客户端发送数据
    private Session session;

    //接收sid
    private String sid="";
    /**
     * 连接建立成功调用的方法*/
    @OnOpen
    public void onOpen(Session session,@PathParam("sid") String sid) {
        this.session = session;
        webSocketSet.add(this);     //加入set中
        addOnlineCount();           //在线数加1
        log.info("有新窗口开始监听:"+sid+",当前在线人数为" + getOnlineCount());
        this.sid=sid;
        try {
             sendMessage("连接成功");
        } catch (IOException e) {
            log.error("websocket IO异常");
        }
    }

    /**
     * 连接关闭调用的方法
     */
    @OnClose
    public void onClose() {
        webSocketSet.remove(this);  //从set中删除
        subOnlineCount();           //在线数减1
        log.info("有一连接关闭!当前在线人数为" + getOnlineCount());
    }

    /**
     * 收到客户端消息后调用的方法
     *
     * @param message 客户端发送过来的消息*/
    @OnMessage
    public void onMessage(String message, Session session) {
        log.info("收到来自窗口"+sid+"的信息:"+message);
        //群发消息
        for (WebSocketServer item : webSocketSet) {
            try {
                item.sendMessage(message);
            } catch (IOException e) {
                e.printStackTrace();
            }
        }
    }

    /**
     *
     * @param session
     * @param error
     */
    @OnError
    public void onError(Session session, Throwable error) {
        log.info("非正常关闭,发生错误!====>" + error.toString() + "当前在线人数为" + getOnlineCount());
    }
    /**
     * 实现服务器主动推送
     */
    public void sendMessage(String message) throws IOException {
        this.session.getBasicRemote().sendText(message);
    }


    /**
     * 群发自定义消息
     * */
    public static void sendInfo(String message,@PathParam("sid") String sid) throws IOException {
        log.info("推送消息到窗口"+sid+",推送内容:"+message);
        for (WebSocketServer item : webSocketSet) {
            try {
                //这里可以设定只推送给这个sid的,为null则全部推送
                if(sid==null) {
                    item.sendMessage(message);
                }else if(item.sid.equals(sid)){
                    item.sendMessage(message);
                }
            } catch (IOException e) {
                continue;
            }
        }
    }

    public static synchronized int getOnlineCount() {
        return onlineCount;
    }

    public static synchronized void addOnlineCount() {
        WebSocketServer.onlineCount++;
    }

    public static synchronized void subOnlineCount() {
        WebSocketServer.onlineCount--;
    }
}
发送消息调用
try {
    WebSocketServer.sendInfo("自定义需要推送的消息" ,"111");
} catch (IOException e) {
    e.printStackTrace();
}
上述代码在发送消息时,可以支持一条消息对应多个窗口
如果想要使用一个消息值推送到一个窗口,就使用一下springboot的管理
具体实现:
添加一个管理的类
import javax.websocket.server.ServerEndpointConfig;

import org.springframework.beans.BeansException;
import org.springframework.context.ApplicationContext;
import org.springframework.context.ApplicationContextAware;

public class MySpringConfigurator extends ServerEndpointConfig.Configurator implements ApplicationContextAware {
    private static volatile ApplicationContext context;

    @Override
    public void setApplicationContext(ApplicationContext applicationContext) throws BeansException {
        MySpringConfigurator.context=applicationContext;
    }

    @Override
    public <T> T getEndpointInstance(Class<T> clazz) throws InstantiationException {
        return context.getBean(clazz);
    }
}
import org.springframework.context.annotation.Bean;
import org.springframework.context.annotation.Configuration;
import org.springframework.web.socket.server.standard.ServerEndpointExporter;

/**
 * 开启WebSocket支持
 * @author zhengkai
 */
@Configuration
public class WebSocketConfig {

    /**
     *  注入对象ServerEndpointExporter,这个bean会自动注册使用了@ServerEndpoint注解声明的Websocket endpoint
     * @return
     */
    @Bean
    public ServerEndpointExporter serverEndpointExporter() {
        return new ServerEndpointExporter();
    }

    @Bean
    public MySpringConfigurator getSpringConfigurator(){
        return new MySpringConfigurator();
    }
}
加上这个对象多个窗口就只能一个窗口收到消息
第三步:前端配置
不带监听
var socket;
if(typeof(WebSocket) == "undefined") {
console.log("您的浏览器不支持WebSocket");
}else{
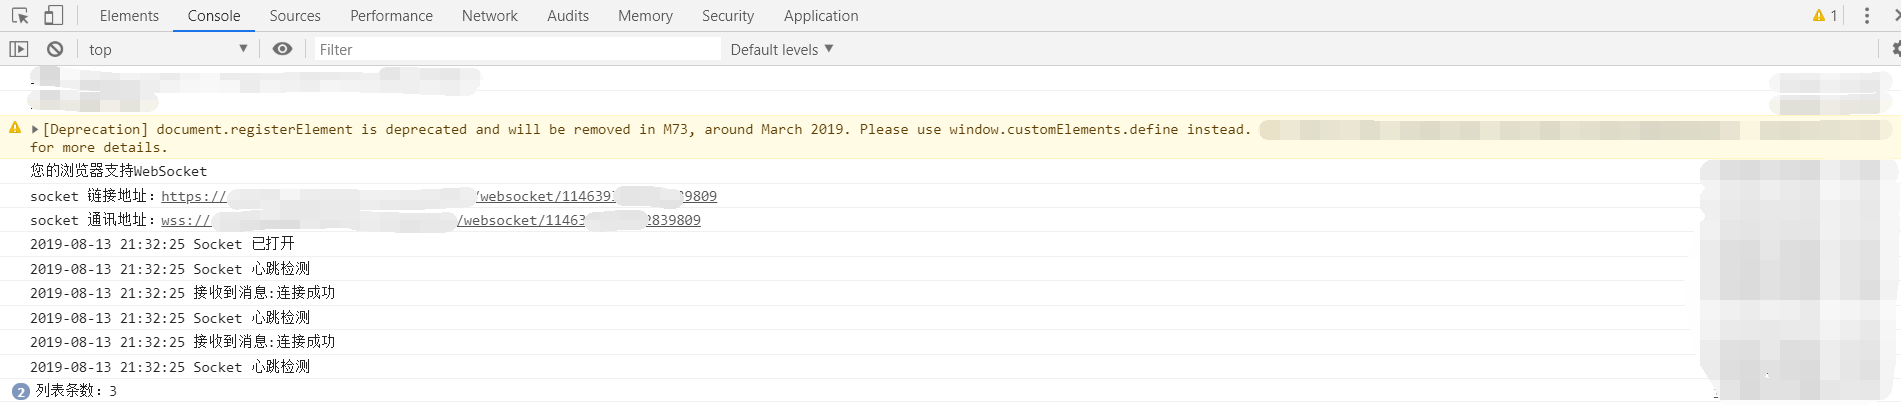
console.log("您的浏览器支持WebSocket");
//实现化WebSocket对象,指定要连接的服务器地址与端口 建立连接
//等同于socket = new WebSocket("ws://localhost:8083/checkcentersys/websocket/20");
var wsUrl = $("#url").val();
console.log("socket 链接地址:" + wsUrl);
if (wsUrl.indexOf("https") >= 0 ) {//如果是https webSocket 需要遵守wss协议所以这里判断如果是https socket
wsUrl = wsUrl.replace("https","wss");
}else{
wsUrl = wsUrl.replace("http","ws");
}
console.log("socket 通讯地址:" + wsUrl);
//创建链接
function createWebSocket() {
try {
ws = new WebSocket(wsUrl);
// 初始化链接
init();
} catch(e) {
console.log('catch'+e);
reconnect(wsUrl);
}
}
/**
* 初始化链接
*/
function init() {
ws.onclose = function () {
console.log(getNowTime() +" Socket已关闭");
reconnect(wsUrl);
};
ws.onerror = function() {
console.log(getNowTime() +' 发生异常了');
reconnect(wsUrl);
};
ws.onopen = function () {
console.log(getNowTime() +" Socket 已打开");
ws.send("连接成功");
//心跳检测重置
heartCheck.start();
};
ws.onmessage = function (event) {
console.log(getNowTime() +' 接收到消息:'+event.data);
heartCheck.start();
//拿到任何消息都说明当前连接是正常的
//实时添加消息
}
}
带心跳监听
var socket;
if(typeof(WebSocket) == "undefined") {
    console.log("您的浏览器不支持WebSocket");
}else{
    console.log("您的浏览器支持WebSocket");
    //实现化WebSocket对象,指定要连接的服务器地址与端口  建立连接
    //等同于socket = new WebSocket("ws://localhost:8083/checkcentersys/websocket/20");
    var wsUrl = $("#url").val();
    console.log("socket 链接地址:" + wsUrl);
    if (wsUrl.indexOf("https") >= 0 ) {//如果是https  webSocket 需要遵守wss协议所以这里判断如果是https socket
        wsUrl = wsUrl.replace("https","wss");
    }else{
        wsUrl = wsUrl.replace("http","ws");
    }
    console.log("socket 通讯地址:" + wsUrl);
    var lockReconnect = false;//避免重复连接
    var ws;
    var tt;
    //创建链接
    createWebSocket();
  //创建链接
    function createWebSocket() {
        try {
            ws = new WebSocket(wsUrl);
            // 初始化链接
            init();
        } catch(e) {
            console.log('catch'+e);
            reconnect(wsUrl);
        }
    }

    /**
     * 初始化链接
     */
    function init() {
        ws.onclose = function () {
            console.log(getNowTime() +" Socket已关闭");
            reconnect(wsUrl);
        };
        ws.onerror = function() {
            console.log(getNowTime() +' 发生异常了');
            reconnect(wsUrl);
        };
        ws.onopen = function () {
            console.log(getNowTime() +" Socket 已打开");
            ws.send("连接成功");
            //心跳检测重置
            heartCheck.start();
        };
        ws.onmessage = function (event) {
            console.log(getNowTime() +' 接收到消息:'+event.data);
            heartCheck.start();
            //拿到任何消息都说明当前连接是正常的
            //实时添加消息
        }
    }

    var lockReconnect = false;//避免重复连接
    //重试连接socket
    function reconnect(wsUrl) {
        if(lockReconnect) {
            return;
        };
        lockReconnect = true;
        //没连接上会一直重连,设置延迟避免请求过多
        tt && clearTimeout(tt);
        tt = setTimeout(function () {
            createWebSocket(wsUrl);
            lockReconnect = false;
        }, 180000);
    }
    //心跳检测
    var heartCheck = {
        timeout: 210000,
        timeoutObj: null,
        serverTimeoutObj: null,
        start: function(){
              console.log(getNowTime() +" Socket 心跳检测");
            var self = this;
            this.timeoutObj && clearTimeout(this.timeoutObj);
            this.serverTimeoutObj && clearTimeout(this.serverTimeoutObj);
            this.timeoutObj = setTimeout(function(){
                //这里发送一个心跳,后端收到后,返回一个心跳消息,
                //onmessage拿到返回的心跳就说明连接正常
                console.log(getNowTime() +' Socket 连接重试');
                ws.send("连接成功");
                self.serverTimeoutObj = setTimeout(function() {
                    console.log(ws);
                    ws.close();
                }, self.timeout);
            }, this.timeout)
        }
    }
}

/**
 * 获取系统当前时间
 * @returns
 */
function p(s) {
    return s < 10 ? '0' + s : s;
 }
function getNowTime() {
    var myDate = new Date();
    //获取当前年
    var year = myDate.getFullYear();
    //获取当前月
    var month = myDate.getMonth() + 1;
    //获取当前日
    var date = myDate.getDate();
    var h = myDate.getHours();       //获取当前小时数(0-23)
    var m = myDate.getMinutes();     //获取当前分钟数(0-59)
    var s = myDate.getSeconds();
    return year + '-' + p(month) + "-" + p(date) + " " + p(h) + ':' + p(m) + ":" + p(s);
}
第四:nginx配置
https的服务。socket通讯的时候一般情况我们部署的项目设置有超时时间,所以会导致socket连接会关闭,因此我这边使用前端做了心跳监控,定时发送消息给后端,避免我的socket连接断开,导致前端不能接收到手段推送的消息
具体配置如下:
    proxy_set_header Upgrade $http_upgrade;    #支持wss
        proxy_set_header Connection "upgrade";    #支持wss
    proxy_redirect off;
    proxy_connect_timeout      240;
    proxy_send_timeout         240;
第五:运行效果
有心跳监听,无心跳监听结果大家就自己试哈