ImgURL帮助文档【安装】:https://www.xiaoz.me/doc/doc-imgurl/install github:https://github.com/helloxz/imgurl 自2.x版本开始,ImgURL使用CodeIgniter框架开发,因此需要先配置伪静态,并确保环境满足以下要求。
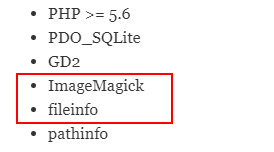
- PHP >= 5.6
- PDO_SQLite
- GD2
- ImageMagick
- fileinfo
- pathinfo
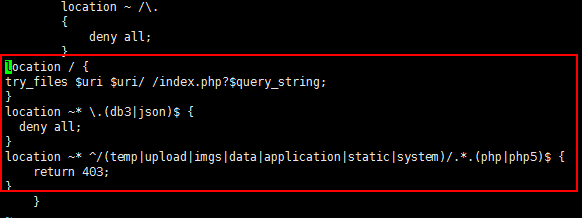
配置伪静态
Nginx
location / {
try_files $uri $uri/ /index.php?$query_string;
}
location ~* .(db3|json)$ {
  deny all;
}
location ~* ^/(temp|upload|imgs|data|application|static|system)/.*.(php|php5)$ {
    return 403;
}
环境配置安装:
环境:军哥lnmp一键搭建 安装时php版本选择5.6以上 安装完成后,查看php拓展:
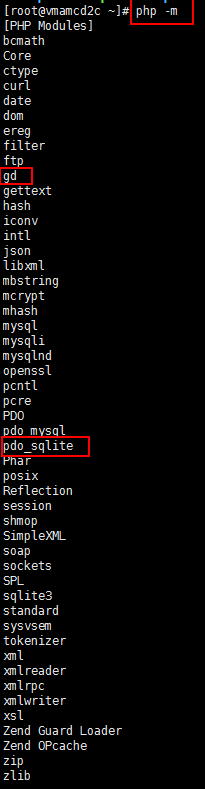
默认已经安装了gd2,pdo_sqlite,还有pathfilo,则我们只需安装下面这两项:
由于fileinfo在lnmp一键安装包中已经下载了,所以我们先安装fileinfo拓展。
fileinfo拓展安装
1、安装
cd lnmp1.6/src/php-7.1.30/ext/fileinfo
/usr/local/php/bin/phpize
./configure --with-php-config=/usr/local/php/bin/php-config
make && make install
安装完成后

2、在php.ini中添加此拓展,
vim /usr/local/php/etc/php.ini
#添加:
extension = fileinfo.so
重启php-fpm,
lnmp php-fpm restart

检查fileinfo拓展添加是否成功,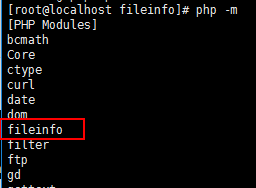
添加fileinfo拓展成功!
2、imagickr拓展安装
1、安装ImageMagick
wget http://www.imagemagick.org/download/ImageMagick.tar.gz
tar xvfz ImageMagick.tar.gz
cd ImageMagick-7.0.8-61/
./configure --prefix=/usr/local/imagemagick
make && make install
2、安装php imagick拓展
wget https://pecl.php.net/get/imagick-3.4.3RC3.tgz
tar zxvf imagick-3.4.3RC3.tgz
cd imagick-3.4.3RC3/
/usr/local/php/bin/phpize   # 和上面安装fileinfo拓展一样
#ImageMagick 6.8以上版本目录为/usr/local/include/ImageMagick-X,在configure之前先做下软连接
ln -s /usr/local/imagemagick/include/ImageMagick-7 /usr/local/imagemagick/include/ImageMagick
./configure --with-php-config=/usr/local/php/bin/php-config --with-imagick=/usr/local/imagemagick
make && make install
3、修改php配置文件
修改php.ini文件,添加extension=imagick.so 重启php-fpm
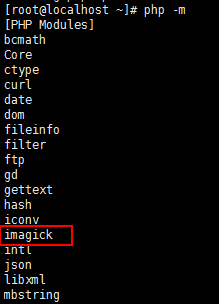
lnmp php-fpm restart检查imagick拓展添加是否成功,
imgurl图床安装
1、配置网站
imgurl.test是域名,要换成你自己的,注意”Enable PHP Pathinfo?“要先”y“。 然后网站配置好了,网站目录在/home/wwwroot/imgurl.test。 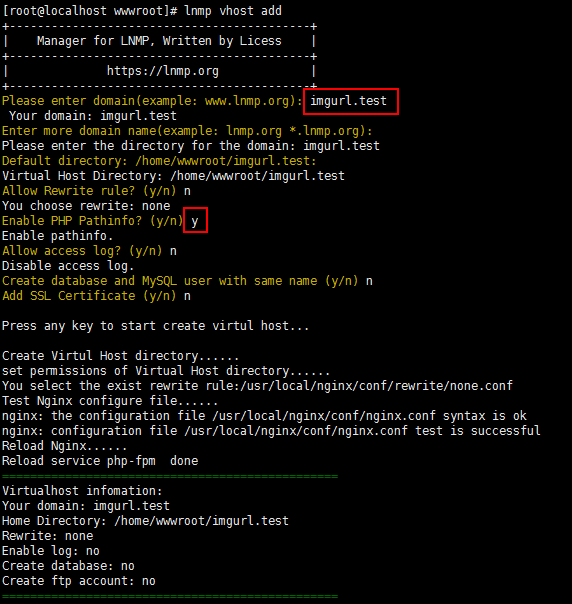
2、下载网站源码
wget https://github.com/helloxz/imgurl/archive/v2.3.tar.gz
tar zxvf v2.3.tar.gz
cd imgurl-2.3/

#拷贝网站源码到网站目录
cp -r * /home/wwwroot/imgurl.test/

#更改网站目录权限
chown -R www:www /home/wwwroot/imgurl.test/
出错报错,忽视即可
chown: changing ownership of ‘/home/wwwroot/photos.wilks.site/.user.ini’: Operation not permitted3、
3、配置rewrite规则
vim /usr/local/nginx/conf/vhost/imgurl.test.conf把上面的nginx的rewrite规则写入到最后,之后保存退出。
保存退出后,重启nginx,
lnmp nginx restart4、完成图床配置
打开浏览器,输入网址”http://imgurl.test",
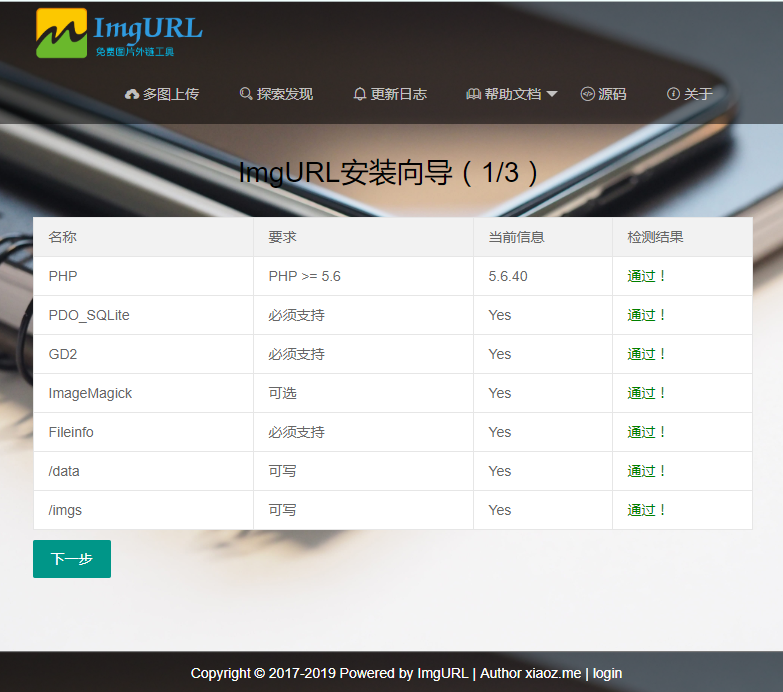
可以看到安装环境检测全部通过,然后点击下一步,
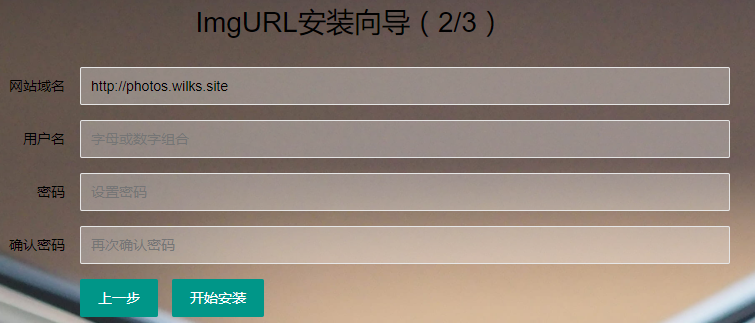
输入用户名、密码,点击开始安装,
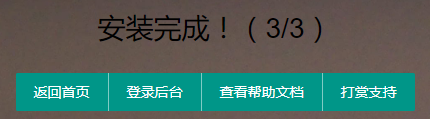
安装完成后,可以“返回首页”或者“登录后台”, 首页,

后台,
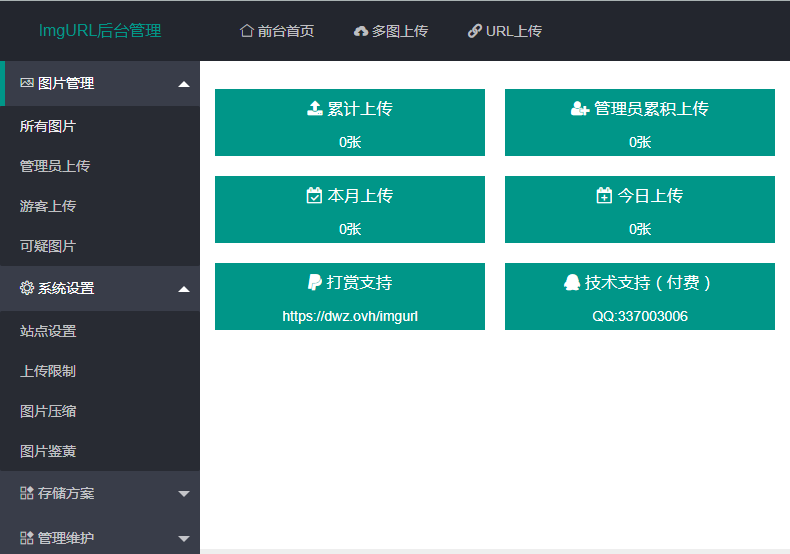
到此安装完成!