环境设定
base2 172.25.78.12 master
base3 172.25.78.13 slave
base4 172.25.78.14 slave
1.配置一主二从环境
在base2上
[root@base2 ~]# tar zxf redis-5.0.3.tar.gz
[root@base2 ~]# cd redis-5.0.3
[root@base2 ~]# yum install gcc -y
[root@base2 redis-5.0.3]# make && make install
[root@base2 redis-5.0.3]# which redis-cli
/usr/local/bin/redis-cli
[root@base2 redis-5.0.3]# cd utils/
[root@base2 utils]# ./install_server.sh
[root@base2 utils]# vim /etc/redis/6379.conf # 编辑配置文件
70 bind 0.0.0.0 # 监听本机所有端口
187 databases 16 # 默认数据库为16个
293 # masterauth <master-password> # 设定redis的认证,因为我们这是内网网段进行操作,所以此处不用设定
457 min-replicas-to-write 1
458 min-replicas-max-lag 10
[root@base2 utils]# systemctl restart redis_6379
[root@base2 utils]# netstat -antlp
[root@base2 redis]# redis-cli # 进入交互式界面,添加信息
在base3上
[root@base3 ~]# tar zxf redis-5.0.3.tar.gz
[root@base3 ~]# cd redis-5.0.3
[root@base3 redis-5.0.3]# yum install gcc -y
[root@base3 redis-5.0.3]# make && make install
[root@base3 redis-5.0.3]# cd utils/
[root@base3 utils]# ./install_server.sh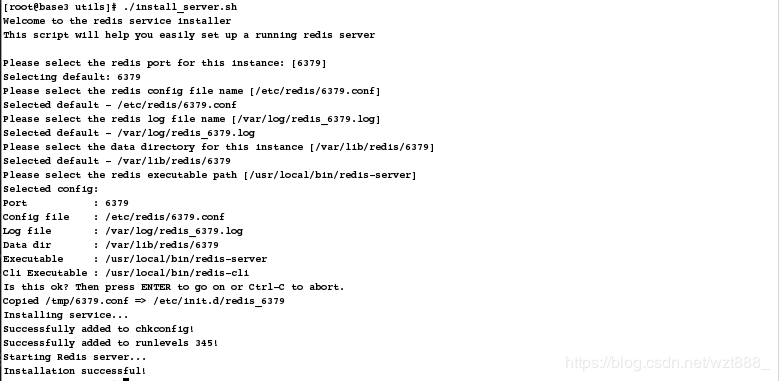
[root@base3 utils]# netstat -antlp
[root@base3 utils]# vim /etc/redis/6379.conf
70 bind 0.0.0.0
288 slaveof 172.25.78.12 6379 # 指定master
[root@base3 utils]# systemctl restart redis_6379
[root@base3 utils]# redis-cli # 同步成功
127.0.0.1:6379> set name xixi # 我还发现redis的一个好处,slave端默认只读
在base4上
[root@base4 ~]# tar zxf redis-5.0.3.tar.gz
[root@base4 ~]# cd redis-5.0.3
[root@base4 redis-5.0.3]# yum install gcc -y
[root@base4 redis-5.0.3]# make && make install
[root@base4 redis-5.0.3]# cd utils/
[root@base4 utils]# ./install_server.sh

[root@base4 utils]# vim /etc/redis/6379.conf
70 bind 0.0.0.0
288 slaveof 172.25.78.12 6379
[root@base4 utils]# systemctl restart redis_6379
[root@base4 utils]# redis-cli # 同步成功
2.开始配置自主故障切换
# 在master上
[root@base2 redis]# pwd
/etc/redis
[root@base2 redis]# cd
[root@base2 ~]# cd redis-5.0.3
[root@base2 redis-5.0.3]# cp sentinel.conf /etc/redis/
[root@base2 redis-5.0.3]# cd /etc/redis/
[root@base2 redis]# ls
6379.conf sentinel.conf
[root@base2 redis]# vim sentinel.conf
16 protected-mode no # 去掉保护模式
84 sentinel monitor mymaster 172.25.78.12 6379 2 # 指定要监控的master,2表示将这个主服务器判断为失效至少需要 2 个 Sentinel 同意
113 sentinel down-after-milliseconds mymaster 10000 # Sentinel 认为服务器已经断线所需的毫秒数即服务多长时间开始下线
121 sentinel parallel-syncs mymaster 1 # 在执行故障转移时,最多可以有多少个从服务器同时对新的主服务器进行同步, 这个数字越小, 完成故障转移所需的时间就越长
146 sentinel failover-timeout mymaster 180000 # 三分钟之内还没有完成故障切换,表示超时
注:改完这个文件之后千万不能重启
[root@base2 redis]# scp sentinel.conf base3:/etc/redis/
[root@base2 redis]# scp sentinel.conf base4:/etc/redis/
# 在三个服务上都进行监控
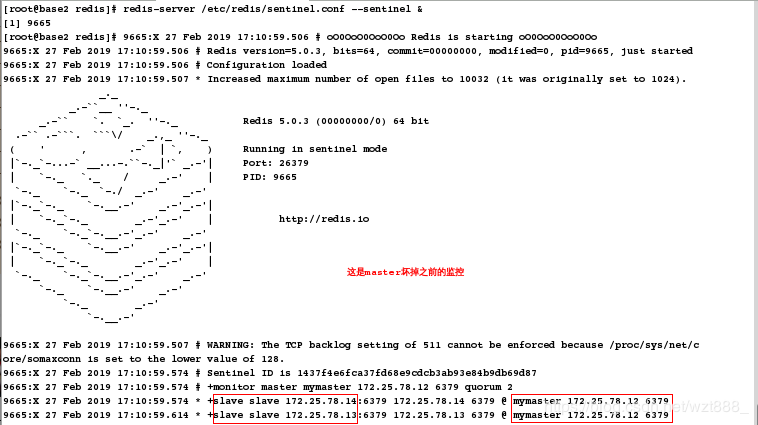
[root@base2 redis]# redis-server /etc/redis/sentinel.conf --sentinel &
[root@base3 redis]# redis-server /etc/redis/sentinel.conf --sentinel &
[root@base4 redis]# redis-server /etc/redis/sentinel.conf --sentinel &
# 模拟master坏掉
[root@base2 redis]# redis-cli
127.0.0.1:6379> info replication # 先查看信息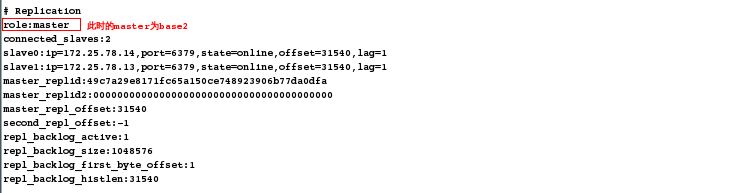
[root@base2 redis]# systemctl stop redis_6379 # 现在模拟坏掉
# 查看监控
这是master坏掉之前的监控
这是master坏掉之后的监控


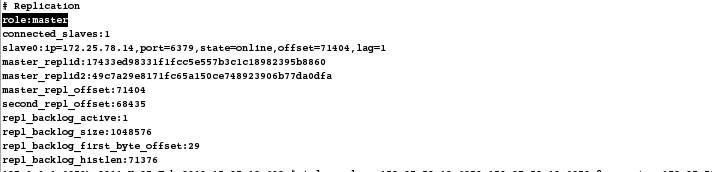
# 在其余两台上查看信息,发现master已经切换
在base3上
在base4上

# 在base2上
[root@base2 ~]# vim /etc/redis/6379.conf # 修改自己的状态为slave
286 slaveof 172.25.78.14 6379 # 改为现在master的ip
[root@base2 ~]# systemctl start redis_6379