上一章节我们用多实例做的主从同步,这一章我们将其分开来做读写分离
1.什么是MySQL的读写分离?
一个存储服务器需要有读去数据的功能和写入数据的功能,这样的话给一台服务器增加了不少的压力,我们做完主从同步之后,就可以在这个架构上做读写分离,主库进行写数据,从库进行读取数据,直接降低了一个服务器工作的压力。
2.实现主从同步
- 准备两台服务器进行主从同步的搭建
-
两台服务器都要进行安装mysql5.7的二进制包,并且将其启动,这里就直接演示master的安装过程服务器
IP地址
备注
Master(主库)
192.168.2.15
Centos7+mysql5.7
slave (从库)
192.168.2.16
Centos7+mysql5.7
-
链接:https://pan.baidu.com/s/1a7T2c7XrtZ3A_Knd18V6kQ
提取码:84aj - 解压安装包,并将其内容移动在/usr/src/下
-
[root@master ~]# tar xf mysql-5.7.22-linux-glibc2.12-x86_64.tar.gz
[root@master ~]# mv mysql-5.7.22-linux-glibc2.12-x86_64 /usr/src/
- 创建软连接
-
[root@master ~]# ln -s /usr/src/mysql-5.7.22-linux-glibc2.12-x86_64/ /usr/local/mysql
- 将环境变量添加进/etc/profile中,使其命令在全局能够使用
-
[root@master ~]# echo "export PATH=$PATH:/usr/local/mysql/bin" >> /etc/profile
- 启动文件,使得mysql运行起来(二进制的包不需要编译安装,只需要将其运行就ok)
-
[root@master ~]# . /etc/profile
- MySQL初始化(指定用户和指定目录)----这里有初始登录数据库的密码
-
[root@master ~]# mysqld --user=mysql --initialize --datadir=/usr/local/mysql/data 2020-11-18T07:01:54.445133Z 0 [Warning] TIMESTAMP with implicit DEFAULT value is deprecated. Please use --explicit_defaults_for_timestamp server option (see documentation for more details). 2020-11-18T07:01:54.758487Z 0 [Warning] InnoDB: New log files created, LSN=45790 2020-11-18T07:01:55.214684Z 0 [Warning] InnoDB: Creating foreign key constraint system tables. 2020-11-18T07:01:55.418150Z 0 [Warning] No existing UUID has been found, so we assume that this is the first time that this server has been started. Generating a new UUID: f175800e-296b-11eb-a757-000c291f3b22. 2020-11-18T07:01:55.419898Z 0 [Warning] Gtid table is not ready to be used. Table 'mysql.gtid_executed' cannot be opened. 2020-11-18T07:01:55.422751Z 1 [Note] A temporary password is generated for root@localhost: ,sy*?9YF2zak - 查看一下初始化完成后的MySQL文件有哪些
-
[root@master ~]# cd /usr/local/mysql/
[root@master mysql]# ls
bin  COPYING  data  docs  include  lib  man  README  share  support-files
[root@master mysql]# cd support-files/
[root@master support-files]# ls
magic  mysqld_multi.server  mysql-log-rotate  mysql.server
- mysql.server服务端工具,主要作用就是为了方便启动和关闭mysql服务,这个脚本中调用mysqld_safe来启动mysqld
-
[root@master support-files]# cp mysql.server /etc/init.d/mysqld
- 编辑mysql主配置文件
-
[root@master mysql]# vim /etc/my.cnf
[root@master mysql]# cat /etc/my.cnf
[client]
port = 3306
socket = /tmp/mysql.sock


[mysqld]
server-id = 1
port = 3306
basedir = /usr/local/mysql
datadir= /usr/local/mysql/data
- 重启数据库
-
[root@master mysql]# /etc/init.d/mysqld start
Starting MySQL.Logging to '/usr/local/mysql/data/master.err'.
 SUCCESS!
- 进入数据库修改密码(MYSQL 5.7的密码在初始化数据库最后会直接随机一个登录密码)
- 主库数据库配置成功,从库也需要同样的配置,这里就不多说了。
- 下一步我们就需要准备master的日志文件路径
-
[root@master ~]# vim /etc/my.cnf
log-bin = /usr/local/mysql/data/bin-log
- 重新启动一下mysql
-
[root@master mysql]# /etc/init.d/mysqld restart
 ERROR! MySQL server PID file could not be found!
Starting MySQL... SUCCESS!
- 因为从库在请求连接的信息中会带上用户名,密码,IP等进行操作,所以主库需要给用户先授权
-
mysql> grant replication slave on *.* to 'repl'@'192.168.2.16' identified by '123123';
Query OK, 0 rows affected, 1 warning (0.01 sec)
- 重新启动一下从库
-
[root@slave mysql]# /etc/init.d/network restart
Restarting network (via systemctl):                        [  确定  ]
[root@slave mysql]# /etc/init.d/mysqld restart
Shutting down MySQL... SUCCESS!
Starting MySQL...... SUCCESS!
-
从库需要告诉主库自己从哪里要获得信息
mysql> show master status;
+----------------+----------+--------------+------------------+-------------------+
| File           | Position | Binlog_Do_DB | Binlog_Ignore_DB | Executed_Gtid_Set |
+----------------+----------+--------------+------------------+-------------------+
| bin-log.000001 |      448 |              |                  |                   |
+----------------+----------+--------------+------------------+-------------------+
1 row in set (0.01 sec)
- 然后从库中进行设置并且重新启动从库
-
mysql>change master to master_host='192.168.2.13',master_user='repl',master_password='123123',master_log_file='bin-log.000001',master_log_pos=448;
Query OK, 0 rows affected, 2 warnings (1.73 sec)

mysql> start slave;
Query OK, 0 rows affected (0.00 sec)

mysql> show slave statusG;
*************************** 1. row ***************************
               Slave_IO_State: Connecting to master
                  Master_Host: 192.168.2.15
                  Master_User: repl
                  Master_Port: 3306
                Connect_Retry: 60
              Master_Log_File: bin-log.000001
          Read_Master_Log_Pos: 448
               Relay_Log_File: slave-relay-bin.000001
                Relay_Log_Pos: 4
        Relay_Master_Log_File: bin-log.000001
             Slave_IO_Running: Connecting
            Slave_SQL_Running: Yes
              Replicate_Do_DB:
          Replicate_Ignore_DB:
           Replicate_Do_Table:
       Replicate_Ignore_Table:
      Replicate_Wild_Do_Table:
  Replicate_Wild_Ignore_Table:
                   Last_Errno: 0
                   Last_Error:
                 Skip_Counter: 0
          Exec_Master_Log_Pos: 448
              Relay_Log_Space: 154
              Until_Condition: None
               Until_Log_File:
                Until_Log_Pos: 0
           Master_SSL_Allowed: No
           Master_SSL_CA_File:
           Master_SSL_CA_Path:
              Master_SSL_Cert:
            Master_SSL_Cipher:
               Master_SSL_Key:
        Seconds_Behind_Master: NULL
Master_SSL_Verify_Server_Cert: No
                Last_IO_Errno: 2003
                Last_IO_Error: error connecting to master 'repl@192.168.2.13:3306' - retry-time: 60  retries: 1
               Last_SQL_Errno: 0
               Last_SQL_Error:
  Replicate_Ignore_Server_Ids:
             Master_Server_Id: 0
                  Master_UUID:
             Master_Info_File: /usr/local/mysql/data/master.info
                    SQL_Delay: 0
          SQL_Remaining_Delay: NULL
      Slave_SQL_Running_State: Slave has read all relay log; waiting for more updates
           Master_Retry_Count: 86400
                  Master_Bind:
      Last_IO_Error_Timestamp: 201119 03:01:06
     Last_SQL_Error_Timestamp:
               Master_SSL_Crl:
           Master_SSL_Crlpath:
           Retrieved_Gtid_Set:
            Executed_Gtid_Set:
                Auto_Position: 0
         Replicate_Rewrite_DB:
                 Channel_Name:
           Master_TLS_Version:
1 row in set (0.00 sec)
看到状态中
             Slave_IO_Running: Connecting
            Slave_SQL_Running: Yes
因该有两个yes,但是现在有一个连接,原因和主库无法建立连接
原因排查:
- 主库的防火墙没有关
- 端口问题
- 网络波动
- 配置文件有问题
关闭主库的防火墙:重新连接
mysql> change master to master_host='192.168.2.15',master_user='repl',master_password='123123',master_log_file='bin-log.000003',master_log_pos=154;
4.	mysql> show slave statusG;
5.	*************************** 1. row ***************************
6.	               Slave_IO_State: Waiting for master to send event
7.	                  Master_Host: 192.168.2.15
8.	                  Master_User: repl
9.	                  Master_Port: 3306
10.	                Connect_Retry: 60
11.	              Master_Log_File: bin-log.000003
12.	          Read_Master_Log_Pos: 154
13.	               Relay_Log_File: slave-relay-bin.000002
14.	                Relay_Log_Pos: 318
15.	        Relay_Master_Log_File: bin-log.000003
16.	             Slave_IO_Running: Yes
17.	            Slave_SQL_Running: Yes
18.	              Replicate_Do_DB:
19.	          Replicate_Ignore_DB:
20.	           Replicate_Do_Table:
21.	       Replicate_Ignore_Table:
22.	      Replicate_Wild_Do_Table:
23.	  Replicate_Wild_Ignore_Table:
24.	                   Last_Errno: 0
25.	                   Last_Error:
26.	                 Skip_Counter: 0
27.	          Exec_Master_Log_Pos: 154
28.	              Relay_Log_Space: 525
29.	              Until_Condition: None
30.	               Until_Log_File:
31.	                Until_Log_Pos: 0
32.	           Master_SSL_Allowed: No
33.	           Master_SSL_CA_File:
34.	           Master_SSL_CA_Path:
35.	              Master_SSL_Cert:
36.	            Master_SSL_Cipher:
37.	               Master_SSL_Key:
38.	        Seconds_Behind_Master: 0
39.	Master_SSL_Verify_Server_Cert: No
40.	                Last_IO_Errno: 0
41.	                Last_IO_Error:
42.	               Last_SQL_Errno: 0
43.	               Last_SQL_Error:
44.	  Replicate_Ignore_Server_Ids:
45.	             Master_Server_Id: 1
46.	                  Master_UUID: f175800e-296b-11eb-a757-000c291f3b22
47.	             Master_Info_File: /usr/local/mysql/data/master.info
48.	                    SQL_Delay: 0
49.	          SQL_Remaining_Delay: NULL
50.	      Slave_SQL_Running_State: Slave has read all relay log; waiting for more updates
51.	           Master_Retry_Count: 86400
52.	                  Master_Bind:
53.	      Last_IO_Error_Timestamp:
54.	     Last_SQL_Error_Timestamp:
55.	               Master_SSL_Crl:
56.	           Master_SSL_Crlpath:
57.	           Retrieved_Gtid_Set:
58.	            Executed_Gtid_Set:
59.	                Auto_Position: 0
60.	         Replicate_Rewrite_DB:
61.	                 Channel_Name:
62.	           Master_TLS_Version:
63.	1 row in set (0.00 sec)
64.
65.	ERROR:
66.	No query specified
-
测试是否成功主从同步
-
在主库上创建一个数据库

- 在从库中查看信息是否能更新信息
主从同步搭建完成
3.完成主从读写分离常见的代理服务器
MySQL-proxy
Atlas
360团队基于mysql proxy 把lua用C改写。原有版本是支持分表, 目前已经放出了分库分表版本。
cobar
阿里巴巴B2B开发的关系型分布式系统,管理将近3000个MySQL实例。 在阿里经受住了考验,后面由于作者的走开的原因cobar没有人维护 了,阿里也开发了tddl替代cobar。
Amebo
Mycat
社区爱好者在阿里cobar基础上进行二次开发,解决了cobar当时存 在的一些问题,并且加入了许多新的功能在其中。目前MyCAT社区活 跃度很高,目前已经有一些公司在使用MyCAT。总体来说支持度比 较高,也会一直维护下去,
ProxySQL
ProxySQL是一个基于C++开发的高性能轻量级产品,是一款强大的mysql的中间件,他可以实现多种方式的读写分离。
4.现在我们用Mycat完成主从的读写分离
这里我们需要在加一台服务器
|
mycat |
eth0:192.168.1.14/24 |
CentOS7.6 |
mycat |
中间件 |
- 先在mycat上进行安装Java的环境
-
链接:https://pan.baidu.com/s/1qzN6m3-aKR4NUelH_QxYNg
提取码:1skw
复制这段内容后打开百度网盘手机App,操作更方便哦--来自百度网盘超级会员V1的分享 -
[root@mycat tools]# rz

 waiting to receive.**B0100000023be50

[root@mycat tools]# tar xf jdk-8u60-linux-x64.tar.gz

[root@mycat tools]# mv jdk1.8.0_60/ /usr/local/java8
- 配置Java环境
-
[root@mycat tools]# vim /etc/profile.d/java.sh

[root@mycat tools]# cat /etc/profile.d/java.sh

export JAVA_HOME=/usr/local/java8

export CLASSPATH=$JAVA_HOME/lib/

export PATH=$PATH:$JAVA_HOME/bin
- 查看环境是否搭建成功
-
[root@mycat tools]# java -version

java version "1.8.0_60"

Java(TM) SE Runtime Environment (build 1.8.0_60-b27)

Java HotSpot(TM) 64-Bit Server VM (build 25.60-b23, mixed mode)
- 安装Mycat
链接:https://pan.baidu.com/s/1_cGNmEDAhv3Xv-9Zj5bduQ
提取码:ffbk
-
[root@mycat tools]# tar xf Mycat-server-1.6-RELEASE-20161028204710-linux.tar.gz

[root@mycat tools]# mv mycat/ /usr/local/
- 创建用户及授权
-
[root@mycat tools]# useradd -M -s /sbin/nologin mycat

[root@mycat tools]# chown -R mycat:mycat /usr/local/mycat/
- 添加mycat到环境
-
[root@mycat tools]# vim /etc/profile.d/mycat.sh

[root@mycat tools]# cat /etc/profile.d/mycat.sh


export MYCAT_HOME=/usr/local/mycat

export PATH=$PATH:$MYCAT_HOME/bin
-
运行mycat
-
[root@mycat tools]# source /etc/profile.d/mycat.sh
-
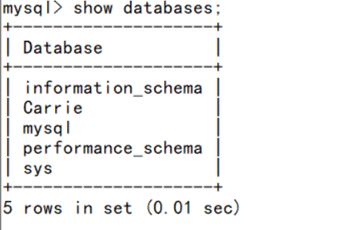
查看一下主库的数据库,将Carrie数据库设为连接库
-
[root@master ~]# mysql -uroot -p123123 -P3306 -e 'show databases;'

mysql: [Warning] Using a password on the command line interface can be insecure.

+--------------------+

| Database           |

+--------------------+

| information_schema |

| Carrie             |

| mysql              |

| performance_schema |

| sys                |

+--------------------+
- 修改schema.xml,它提供一个库里所有表的权限(将所有关于表格的都删除)
-
5 注释:<!--schema name="TESTDB" checkSQLschema="false" sqlMaxLimit="1    00"-->

6 插入:<schema name="HEADSHOW" checkSQLschema='flase' dataNode='dn1'></schem    a>
- 将数据库改为Carrie
-
9<dataNode name="dn1" dataHost="localhost1" database="Carrie" / >
- 设置主库写从库读
-
 16         <dataHost name="localhost1" maxCon="1000" minCon="10" balance=    "0"

 17    writeType="0" dbType="mysql" dbDriver="native"    slaveThreshold="100">
 18                 <heartbeat>select user()</heartbeat>

 19                 <!-- can have multi write hosts -->
 20                 <writeHost host="192.168.2.15" url="192.168.2.15:3306"     user="root"

 21                                    password="123123">

 22                         <!-- can have multi read hosts -->

 23                         <readHost host="192.168.2.16" url="192.168.2.16:3306" user="root" password="123123" />

 24                 </writeHost> 25                 <writeHost host="192.168.2.15" url="192.168.2.20:3306"     user="root"

 26                                    password="123123" />
- 修改server.xml
-
[root@mycat conf]# vim server.xml

17   <property name="serverPort">3310</property>

 18   <property name="managerPort">9066</property>

 19   <property name="maxStringLiteralLength">65535</property>

 20   <property name="sequnceHandlerType">0</property>

 21   <property name="backSocketNoDelay">1</property>

 22   <property name="frontSocketNoDelay">1</property>

 23   <property name="processorExecutor">16</property>


88         <user name="root">

 89                 <property name="password">123123</property>

 90                 <property name="schemas">HEADSHOW</property>

 91


103         <user name="mycat">

104                 <property name="password">123123</property>

105                 <property name="schemas">HEADSHOW</property>

106                 <property name="readOnly">true</property>

107         </user>
- 主库给用户授权
-
[root@master ~]# mysql -uroot -p123123


mysql> grant all on *.* to 'root'@'192.168.2.14' identified by '123123';

Query OK, 0 rows affected, 1 warning (0.01 sec)

检查从库是否有信息被更改

mysql> select user,host from mysql.user;

+---------------+--------------+

| user          | host         |

+---------------+--------------+

| root          | 192.168.2.14 |

| mysql.session | localhost    |

| mysql.sys     | localhost    |

| root          | localhost    |

+---------------+--------------+

4 rows in set (0.00 sec)
- 启动mycat
-
[root@mycat conf]# mycat start

Starting Mycat-server...

[root@mycat conf]# netstat -antpu|grep java;

tcp        0      0 127.0.0.1:32000         0.0.0.0:*               LISTEN      19537/java

tcp6       0      0 :::9066                 :::*                    LISTEN      19537/java

tcp6       0      0 :::3310                 :::*                    LISTEN      19537/java

tcp6       0      0 :::40430                :::*                    LISTEN      19537/java

tcp6       0      0 :::41212                :::*                    LISTEN      19537/java

tcp6       0      0 :::1984                 :::*                    LISTEN      19537/java

tcp6       0      0 127.0.0.1:31000         127.0.0.1:32000         ESTABL


[root@mycat conf]#  yum install -y mariadb
- 测试mycat数据库的两个端口能否使用
-
[root@mycat conf]# mysql -uroot -p123123 -h 127.0.0.1 -P9066

Welcome to the MariaDB monitor.  Commands end with ; or g.

Your MySQL connection id is 1

Server version: 5.6.29-mycat-1.6-RELEASE-20161028204710 MyCat Server (monitor)


Copyright (c) 2000, 2018, Oracle, MariaDB Corporation Ab and others.


Type 'help;' or 'h' for help. Type 'c' to clear the current input statement.


MySQL [(none)]> show databases;

+----------+

| DATABASE |

+----------+

| HEADSHOW |

+----------+

1 row in set (0.00 sec)


MySQL [(none)]> exit

Bye

[root@mycat conf]# mysql -uroot -p123123 -h 127.0.0.1 -P3310

Welcome to the MariaDB monitor.  Commands end with ; or g.

Your MySQL connection id is 2

Server version: 5.6.29-mycat-1.6-RELEASE-20161028204710 MyCat Server (OpenCloundDB)


Copyright (c) 2000, 2018, Oracle, MariaDB Corporation Ab and others.


Type 'help;' or 'h' for help. Type 'c' to clear the current input statement.


MySQL [(none)]> show databases;

+----------+

| DATABASE |

+----------+

| HEADSHOW |

+----------+

1 row in set (0.00 sec)


MySQL [(none)]> use HEADSHOW;

Database changed

MySQL [HEADSHOW]>
- 用mycat测试主库能否写入,先在mycat建立表
-
MySQL [(none)]> use HEADSHOW; Database changed MySQL [HEADSHOW]> create table test_table(name varchar(20),id int(3)); Query OK, 0 rows affected (0.80 sec) MySQL [HEADSHOW]> insert into test_table values('name',3); Query OK, 1 row affected (0.15 sec) - 在去主库中查找
-
mysql> use Carrie;

Reading table information for completion of table and column names

You can turn off this feature to get a quicker startup with -A


Database changed

mysql> show tables;

+------------------+

| Tables_in_Carrie |

+------------------+

| test_table       |

+------------------+

1 row in set (0.00 sec)


同样从库也进行了数据更新

mysql> show databases;

+--------------------+

| Database           |

+--------------------+

| information_schema |

| Carrie             |

| mysql              |

| performance_schema |

| sys                |

+--------------------+

5 rows in set (0.00 sec)


mysql> use Carrie;

Database changed

mysql> select * from  test_table;

+------+------+

| name | id   |

+------+------+

| name |    3 |

+------+------+

1 row in set (0.00 sec)
- 测试读写分离,将从库的IO线程关闭
-
mysql> stop slave io_thread;

Query OK, 0 rows affected (0.00 sec)
- 在主库中更新信息
-
MySQL [HEADSHOW]> update test_table set id=4;

Query OK, 1 row affected (0.00 sec)

Rows matched: 1  Changed: 1  Warnings: 0
- Mycat因该读到从库却直接读到主库
-
MySQL [HEADSHOW]> select * from test_table;
+------+------+
| name | id   |
+------+------+
| name |    4 |
+------+------+
1 row in set (0.00 sec)
这个时候需要我们进行修改文件
-
[root@mycat conf]# vim schema.xml balance="1"
重新启动mycat [root@mycat conf]# mycat stop Stopping Mycat-server... Stopped Mycat-server. [root@mycat conf]# mycat start Starting Mycat-server... - Mycat上直接读到从库信息,测试成功
-
MySQL [HEADSHOW]> select * from test_table;
+------+------+
| name | id   |
+------+------+
| name |    3 |
+------+------+
1 row in set (0.00 sec)
至此主从分离搭建成功