跨页面传值自动刷新
从Form1往Form2中实现跨页面传值:
一般用于修改数据
public static int bs=0;
public Form1()
{
InitializeComponent();
}
private void Form1_Load(object sender, EventArgs e)
{
TestDataContext context = new TestDataContext();
dataGridView1.DataSource = context.Info;
}
private void button1_Click(object sender, EventArgs e)
{
string code = dataGridView1.SelectedRows[0].Cells[0].Value.ToString();
Form2 f = new Form2(code);
f.Show();
}
private void timer1_Tick(object sender, EventArgs e)
{
if (bs != 0)
{
TestDataContext context = new TestDataContext();
dataGridView1.DataSource = context.Info;
bs = 0;
}
}
}
}
Form2的代码:
public partial class Form2 : Form
{
private string Code;
public Form2()
{
InitializeComponent();
}
public Form2(string code)
{
InitializeComponent();
Code = code;
}
private void Form2_Load(object sender, EventArgs e)
{
TestDataContext context = new TestDataContext();
Info data = context.Info.Where(p=>p.Code==Code).First();
label1.Text = data.Name;
dateTimePicker1.Value = data.Birthday.Value;
}
private void button1_Click(object sender, EventArgs e)
{
TestDataContext context = new TestDataContext();
Info data = context.Info.Where(p => p.Code == Code).First();
data.Birthday = dateTimePicker1.Value;
context.SubmitChanges();
Form1.bs = 1;
this.Close();
}
}
}
操作文本与文件夹
winform文件操作命名空间为using system.IQ;
1、建立个文本对象并写入信息:
(1)造一个流对象 FileStream f=new FileStream(@"d: est.txt",FileMode.Open); Open打开
(2)取出要写入的内容 string s=name.Text;
(3)生成二进制数组 byte[]wj=Encoding.Default.GetBytes(s);
(4)写入 f.Write(wj,0,wj.Length);
(5)关闭流 f.Close();
2、读出文本对象里面的内容:
(1)造一个流对象 Append是追加,create是创建会覆盖,open打开(读取)
FileStream fs=new FileSteam(@"d: est.txt",FileMode.Open);
(2)造一个二进制数组 byte[]wj=new byte[fs.Length];
(3)读取内容 fs.read(wj,0,Length);
(4)将二进制数组中的内容转换为字符串 name.Text=Encoding.Defaule.Getstring(wj);
(5)关闭流 fs.Close();
也可以操作其他文件,改后缀名
3、文件及文件夹操作
创建文件
(1)造一个类 FileIofo f=new FileInfo(@"d:aa.txt");
(2)创建文件 FileStream fs=f.Create();
(3)关闭连接 fs.Close();
删除文件
(1)造一个类 FileInfo f=new FileInfo(@"d:aa.doc");
(2)删除 f.Delete();
复制文件
(1)造一个类 FileInfo f=new FileInfo(@"d: est.doc");
(2)复制 f.CoptTo(@"e:aa.doc",true); 第三个参数为是否覆盖
移动文件 f.MoveTo(@"d:aa.doc"); 相当于给文件改了个名字
判断文件是否存在 MessageBox.show(f.Exists.ToString());
获取文件名 MessageBox.Show(f.FullName);
获取创建文件的时间 MessageBox.Show(f.CreationTime.ToString("yyyy年mm月dd日 hh: mm: ss"));
修改创建时间 f.CreationTime=DateTime.now.AddDays(10) 括号代表10天之前创建的
4、文件夹操作:
(1)创建文件夹目录 DirectoryInfo dy=new DirectoryInfo(@"d:xyz");
(2)创建 dy.Create();
删除目录 dy.Delete();
移动目录 dy.MoveTo(@"e:ccc")
判断目录是否存在 MessageBox.Show(dy.Exists.Tostring());
获得目录的全名 MessageBox.Show(dy.FullName.ToString());
获取子文件 DirectoryInfo dy=new DirectoryInfo(@"d:xyz");
FileInfo[] f=dy.GetFiles(); string s="";
for(int i=0;i<f.Length;i++)
{ s=s+f[i].Name+"|"; }
richTextBox1.Text=s;
获取子目录
(1)造一个文件夹信息类 DirectoryInfo dy=new DirectoryInfo(@"d:图片");
(2)获取子目录 DirectoryInfo [] d=dy.GetDirectories();
string s=""; for(int i=0;i<d.Length;i++) { s=s+d[i].Name+"||"; }
richTextBox1.Text=s;
例:
做一个打开文件与保存文件
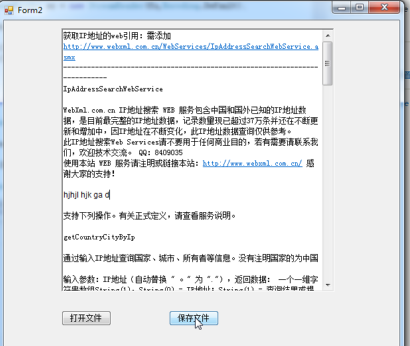
后台代码:
using System;
using System.Collections.Generic;
using System.ComponentModel;
using System.Data;
using System.Drawing;
using System.Linq;
using System.Text;
using System.Threading.Tasks;
using System.Windows.Forms;
using System.IO;

namespace WindowsFormsApplication1
{
    public partial class Form2 : Form
    {
        public Form2()
        {
            InitializeComponent();
        }

        private void button1_Click(object sender, EventArgs e)
        {
            OpenFileDialog of = new OpenFileDialog();
            //点击打开按钮的事件
            if (of.ShowDialog() == DialogResult.OK)
            {
                FileStream fs = new FileStream(of.FileName, FileMode.Open);

                StreamReader sr = new StreamReader(fs,Encoding.Default);

                richTextBox1.Text = sr.ReadToEnd();

                sr.Close();
                fs.Close();
            }
        }
private void button2_Click(object sender, EventArgs e)
        {
            SaveFileDialog sf = new SaveFileDialog();

            sf.Filter = "文本文档(*.txt)|*.txt";
            //点击保存事件
            if (sf.ShowDialog() == DialogResult.OK)
            {
                FileStream fs =  (FileStream)sf.OpenFile();

                StreamWriter sw = new StreamWriter(fs,Encoding.Default);

                sw.Write(richTextBox1.Text);

                sw.Close();
                fs.Close();
            }
        }