gitlab安装和配置和访问
我这里使用的是centos 7 64bit,我试过centos 6也是可以的!
1. 安装依赖软件
    yum -y install policycoreutils openssh-server openssh-clients postfix
2.设置postfix开机自启,并启动,postfix支持gitlab发信功能
    systemctl enable postfix && systemctl start postfix
3.下载gitlab安装包,然后安装
    centos 6系统的下载地址:https://mirrors.tuna.tsinghua.edu.cn/gitlab-ce/yum/el6
    centos 7系统的下载地址:https://mirrors.tuna.tsinghua.edu.cn/gitlab-ce/yum/el7
    我的是centos7,所以我在https://mirrors.tuna.tsinghua.edu.cn/gitlab-ce/yum/el7中找了个gitlab8.0.0版本,建议下载一个比较新的版本,我这里选了一个比较旧的版本仅仅是实验
    下载rpm包并安装:
    wget https://mirrors.tuna.tsinghua.edu.cn/gitlab-ce/yum/el7/gitlab-ce-8.0.0-ce.0.el7.x86_64.rpm
    rpm -i gitlab-ce-8.0.0-ce.0.el7.x86_64.rpm
4.修改gitlab配置文件:
vim  /etc/gitlab/gitlab.rb
    external_url 'http://www.test.com' #这里面必须是域名。不然gitlab-ctl start会有问题,此域名随便写,访问的时候可以绑host。退出并保存
    gitlab_rails['backup_path'] = '/data/gitlab/backups'   #备份目录
    ps:注意这里设置的端口不能被占用,默认是8080端口,如果8080已经使用,请自定义其它端口,并在防火墙设置开放相对应得端口
    git_data_dirs({ "default" => { "path" => "/data/git-data", 'gitaly_address' => 'unix:/var/opt/gitlab/gitaly/gitaly.socket' } }) #path 后面是修改git仓库目录路径
   配置例子:
    external_url 'http://git.prosysoft.com'
gitlab_rails['backup_path'] = "/home/backup/gitlab"
git_data_dirs({ "default" => { "path" => "/home/gitlab/git-data", 'gitaly_address' => 'unix:/var/opt/gitlab/gitaly/gitaly.socket' } })
nginx['listen_port'] = 81
4.1内核忧化
vim /etc/sysctl.conf
========================
net.ipv4.ip_forward = 0
net.ipv4.conf.default.rp_filter = 1
net.ipv4.conf.default.accept_source_route = 0
kernel.sysrq = 0
kernel.core_uses_pid = 1
net.ipv4.tcp_syncookies = 1
kernel.msgmnb = 65536
kernel.msgmax = 65536
kernel.shmmax = 68719476736
kernel.shmall = 4294967296
==========================
sysctl -p

5.重置并启动GitLab
    执行:
    gitlab-ctl reconfigure   #修改配置文件要执行这个才生效

    gitlab-ctl restart
6.访问 GitLab页面
    如果没有域名,直接输入服务器ip和指定端口进行访问
    初始账户: root 密码: 5iveL!fe
    第一次登录修改密码
命令行更改用户密码
#也可以命令行修改root密码
    # gitlab-rails console production
    Loading production environment (Rails 4.1.11)
    irb(main):001:0> user = User.where(id:1).first //id为1的是超级管理员
    irb(main):002:0>user.password = '1q2w3e4r' //密码必须至少8个字符
    irb(main):003:0>user.save! // 如没有问题 返回true

#修改其它用户
    sudo gitlab-rails console production
    > user=User.where(name:"hanxiaohui").first
    > user.password = 'Han1huI840610'
    > user.save!
    > quit
gitlab日常管理
nginx 安装路径
     /var/opt/gitlab/nginx
默认仓库地址(未自定义过):
    /var/opt/gitlab/git-data/
默认的配置文件(更改仓库地址 repos_path 会有问题):
    /opt/gitlab/embedded/service/gitlab-rails/config/gitlab.yml
查看版本信息:
    cat /opt/gitlab/embedded/service/gitlab-rails/VERSION
动态跟踪gitlab 日志:
    gitlab-ctl tail
更改nginx端口
/var/opt/gitlab/nginx/conf/gitlab-http.conf #更改server listen
gitlab日常备份和迁移
使用Gitlab一键安装包安装Gitlab非常简单, 同样的备份恢复与迁移也非常简单.

使用一条命令即可创建完整的Gitlab备份:
    gitlab-rake gitlab:backup:create

    使用以上命令会在/var/opt/gitlab/backups目录下创建一个名称类似为1468394531_gitlab_backup.tar的压缩包, 这个压缩包就是Gitlab整个的完整部分, 其中开头的1468394531是备份创建的日期.

    Gitlab 修改备份文件默认目录:

    在初次安装完gitlab 后,可以通过修改/etc/gitlab/gitlab.rb来修改默认存放备份文件的目录.修改为你想存放备份的目录即可, 修改完成之后使用gitlab-ctl reconfigure命令重载配置文件即可(同时,支持远程备份,将备份文件备份到远程服务器上,并设定权限).:

    gitlab_rails['backup_path'] = '/data/gitlab/backups'

Gitlab 自动备份

    可以通过crontab使用备份命令实现自动备份:
    crontab -e
    0 2 * * * /opt/gitlab/bin/gitlab-rake gitlab:backup:create

Gitlab 恢复

    同样, Gitlab的从备份恢复也非常简单:

    # 停止相关数据连接服务
    gitlab-ctl stop unicorn
    gitlab-ctl stop sidekiq

    # 从1468394531编号备份中恢复
    gitlab-rake gitlab:backup:restore BACKUP=1468394531

    # 启动Gitlab
    sudo gitlab-ctl start

Gitlab迁移

    迁移如同备份与恢复的步骤一样, 只需要将老服务器/var/opt/gitlab/backups目录下的备份文件拷贝到新服务器上的/var/opt/gitlab/backups即可(如果你没修改过默认备份目录的话).
但是需要注意的是新服务器上的Gitlab的版本必须与创建备份时的Gitlab版本号相同. 比如新服务器安装的是最新的7.60版本的Gitlab, 那么迁移之前, 最好将老服务器的Gitlab 升级为7.60在进行备份
客户端http clone
git clone http://abc:1q2w3e4r@192.168.66.155:81/test/aaa.git #abc为帐号名,1q2w3e4r密码
客户端git sshkey clone
ssh-keygen #回车3次
cd /root/.ssh
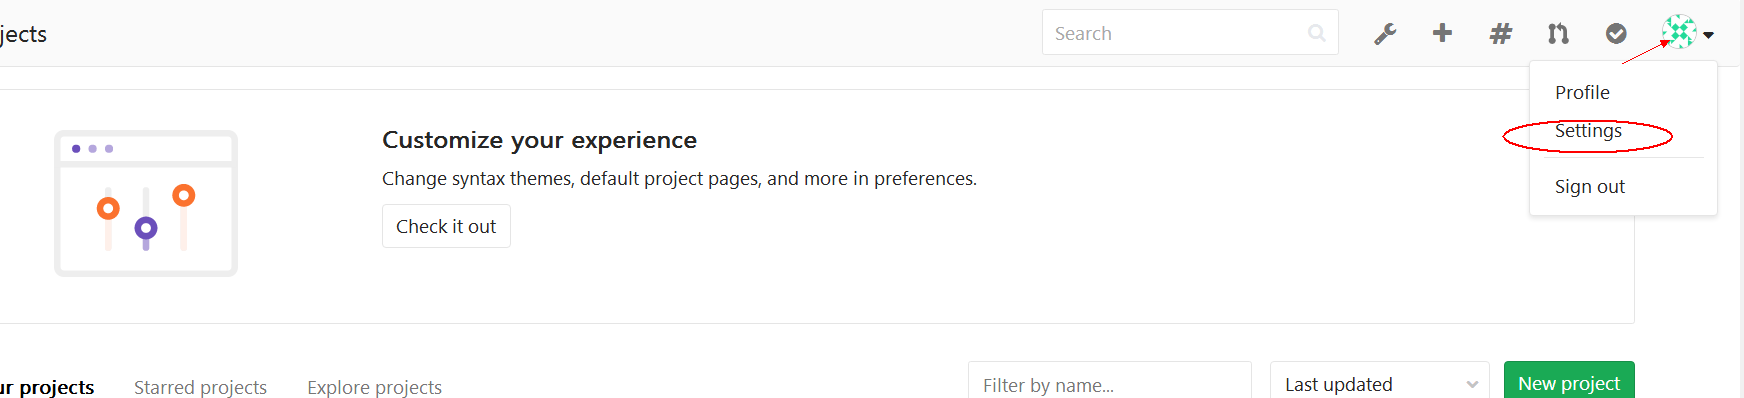
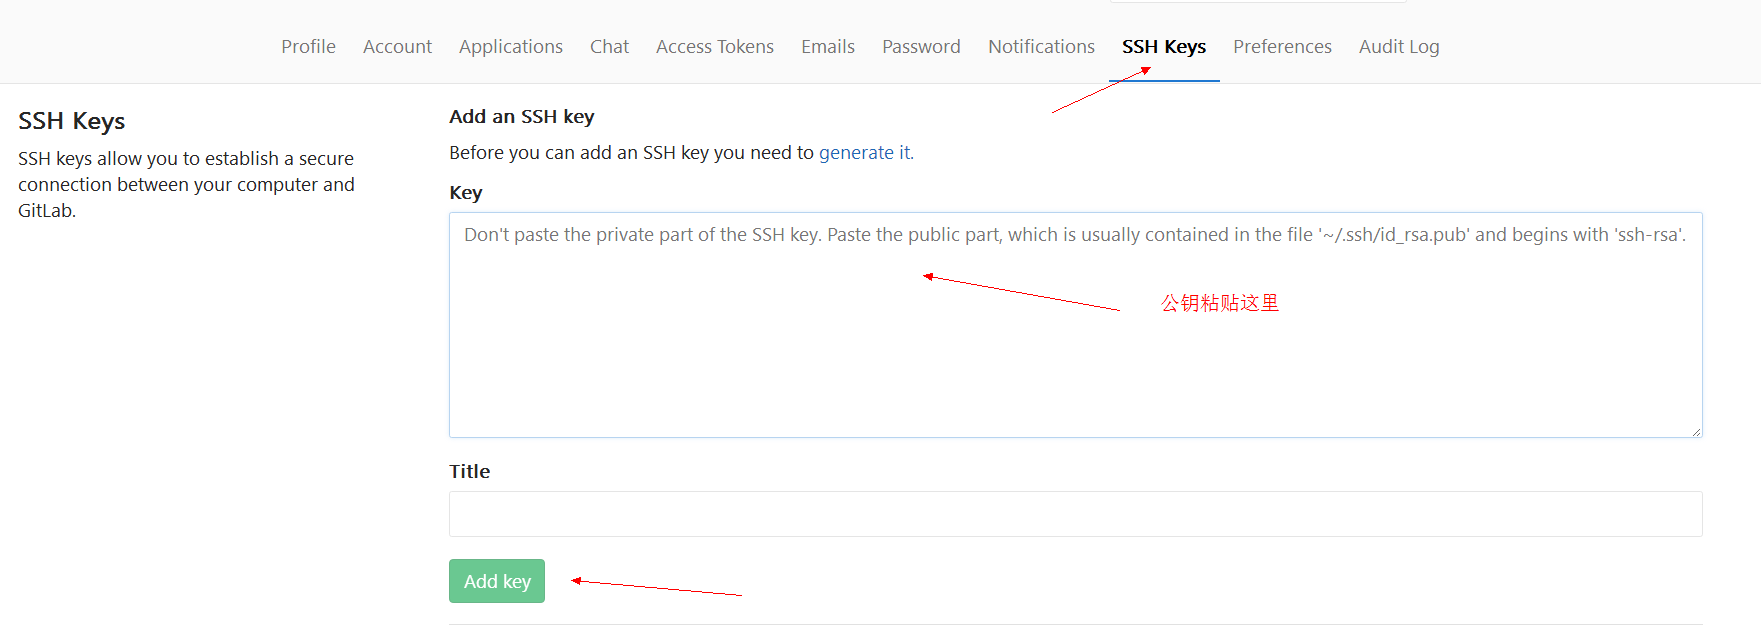
cat id_rsa.pub #把输出内容加入到gitlab控制台 sshkey。看以下载图
(1)
(2)
vim /root/.ssh/config #host gitlab访问地址, port gitlab服务器ssh端口号
======================
Host git.prosysoft.cn
Port 22225
Host git.prosysoft.com
Port 22225
======================
克隆
git clone git@xxxxxxx:test/test.git
================
gitlab提交代码刷新
#客户端
[root@node-214 /opt/nginx/webhooks 14:52:47&&5]#cat pccb.php
<?php
exec("cd /opt/nginx/html/pccb;/usr/bin/git pull");
?>
#服务端,提交代码触发访问客户端的Php文件来更新代码
[root@office hooks]# pwd
/home/gitlab/git-data/repositories/acooly/acooly-showcase.git/hooks
[root@office hooks]# cat post-receive
#!/bin/bash
curl http://192.168.55.214:81/pccbgroup.php
curl http://192.168.55.214:81/pccb.php
curl http://192.168.55.214:81/prosysoft.php
curl http://192.168.55.214:81/iosUtils.php
curl http://192.168.55.215:81/1119e.php
curl http://192.168.55.215:81/fineryding.php
curl http://192.168.55.215:81/gfintech.php
curl http://192.168.55.215:81/tools.php
curl http://192.168.55.215:81/other.php
gitlab升级
https://www.cnblogs.com/straycats/p/7707359.html 升级
2.1 关闭部分gitlab服务

gitlab-ctl stop unicorn
gitlab-ctl stop sidekiq
gitlab-ctl stop nginx


2.2 升级

rpm -Uvh gitlab-ce-10.0.4-ce.0.el7.x86_64.rpm


2.3 重新配置gitlab

gitlab-ctl reconfigure


2.4 重启gitlab

gitlab-ctl restart