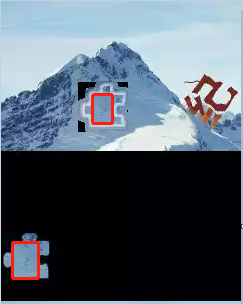
最近做缺口图登录验证码破解,需要识别到缺口图片的位置,图片如下:
使用 OpenCVSharp 来识别。
准备工作如下:
1.下载OpenCV 4.x,解压并配置好环境变量
2.Nuget 导入 OpenCvSharp4 相关包
using OpenCvSharp;
using (Mat refMat = new Mat("Data/Image/2.png"))//大图
  using (Mat tplMat = new Mat("Data/Image/1.png"))//小图
            using (Mat res = new Mat(refMat.Rows - tplMat.Rows + 1, refMat.Cols - tplMat.Cols + 1, MatType.CV_32FC1))
            {
                //Convert input images to gray
                Mat gref = refMat.CvtColor(ColorConversionCodes.BGR2GRAY);
                Mat gtpl = tplMat.CvtColor(ColorConversionCodes.BGR2GRAY);

                Cv2.MatchTemplate(gref, gtpl, res, TemplateMatchModes.CCoeffNormed);
                Cv2.Threshold(res, res, 0.8, 1.0, ThresholdTypes.Tozero);
                while (true)
                {
                    double minval, maxval, threshold = 0.8;
                    Point minloc, maxloc;
                    Cv2.MinMaxLoc(res, out minval, out maxval, out minloc, out maxloc);

                    if (maxval >= threshold)
                    {
                        //Setup the rectangle to draw
                        Rect r = new Rect(new Point(maxloc.X, maxloc.Y), new Size(tplMat.Width, tplMat.Height));
                        Console.WriteLine(maxloc.X);
                        //Draw a rectangle of the matching area
                        Cv2.Rectangle(refMat, r, Scalar.LimeGreen, 2);

                        //Fill in the res Mat so you don't find the same area again in the MinMaxLoc
                        Rect outRect;
                        Cv2.FloodFill(res, maxloc, new Scalar(0), out outRect, new Scalar(0.1), new Scalar(1.0));
                    }
                    else
                        break;
                }


                Cv2.ImShow("Matches", refMat);

                Cv2.WaitKey();
            }
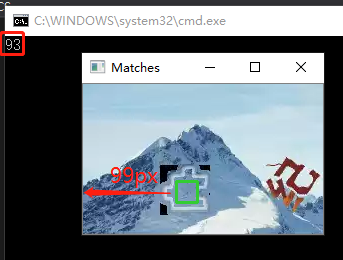
结果如下: