JSR-107、Spring缓存抽象、整合Redis
缓存应该是每一个系统都应该考虑的功能,加速系统的访问以及提升系统的性能。比如:经常访问的高频数据(商场首页的商品信息),还有一些临时性的数据(手机发送过来的验证码3分钟内有效)放到缓存中,可以加快访问速度,节省耗源。
一、JSR-107缓存的规范(用的少)
5个核心接口:CachingProvider, CacheManager, Cache, Entry 和 Expiry。
二、Spring自带的缓存抽象(一般常用)
Spring缓存抽象保留了org.springframework.cache.Cache 和org.springframework.cache.CacheManager两个接口来统一不同的缓存技术; 并支持使用JCache(JSR-107)注解来简化我们开发;
1、CacheManager:缓存管理器,管理各种缓存(Cache)组件
2、Cache:缓存接口,接口下Spring提供了各种xxxCache的实现,定义缓存操作。实现有:RedisCache、EhCacheCache、ConcurrentMapCache等
3、开启基于注解的缓存:@EnableCaching;
在service层标注缓存注解:@Cacheable:数据缓存,常使用在查询方法上
@CacheEvict:清空缓存,常使用在删除方法上
@CachePut:更新缓存,常用于更新方法上
keyGenerator:缓存数据时key生成策略
serialize:缓存数据时value序列化策略
4、原理:application.yml文件中 debug=true,可在控制台查看所有自动配置类是否被启用
(1)自动配置类;CacheAutoConfiguration
(2)缓存的配置类
* org.springframework.boot.autoconfigure.cache.GenericCacheConfiguration
* org.springframework.boot.autoconfigure.cache.JCacheCacheConfiguration
* org.springframework.boot.autoconfigure.cache.EhCacheCacheConfiguration
* org.springframework.boot.autoconfigure.cache.HazelcastCacheConfiguration
* org.springframework.boot.autoconfigure.cache.InfinispanCacheConfiguration
* org.springframework.boot.autoconfigure.cache.CouchbaseCacheConfiguration
* org.springframework.boot.autoconfigure.cache.RedisCacheConfiguration
* org.springframework.boot.autoconfigure.cache.CaffeineCacheConfiguration
* org.springframework.boot.autoconfigure.cache.GuavaCacheConfiguration
* org.springframework.boot.autoconfigure.cache.SimpleCacheConfiguration【默认】
* org.springframework.boot.autoconfigure.cache.NoOpCacheConfiguration
(3)哪个配置类默认生效:SimpleCacheConfiguration;
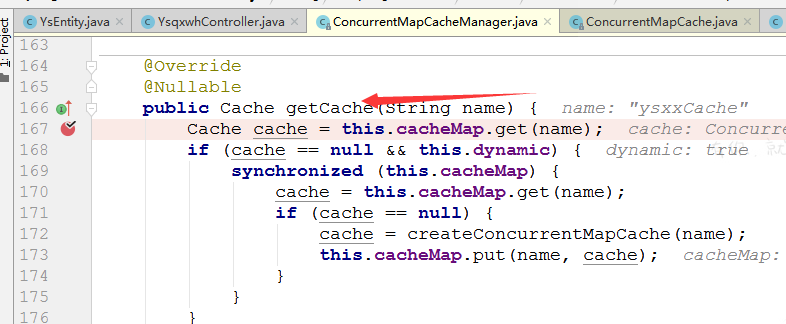
(4)给容器中注册了一个CacheManager:ConcurrentMapCacheManager,来获取和创建ConcurrentMapCache类型的缓存组件;他的作用将数据保存在ConcurrentMap中;

5、运行流程:
@Cacheable:
(1)方法运行之前,先去查询Cache(缓存组件),按照cacheNames指定的名字获取;
(CacheManager先获取相应的缓存),第一次获取缓存如果没有Cache组件会自动创建。
(2)去Cache中查找缓存的内容,使用一个key,默认就是方法的参数;
key是按照某种策略生成的;默认是使用keyGenerator生成的,默认使用SimpleKeyGenerator生成key;
SimpleKeyGenerator生成key的默认策略;
如果没有参数;key=new SimpleKey();
如果有一个参数:key=参数的值
如果有多个参数:key=new SimpleKey(params);
(3)没有查到缓存就调用目标方法;
(4)将目标方法返回的结果,放进缓存中
总结:@Cacheable标注的方法执行之前先来检查缓存中有没有这个数据,默认按照参数的值作为key去查询缓存,
如果没有就运行方法并将结果放入缓存;以后再来调用就可以直接使用缓存中的数据;
6、核心:
(1)使用CacheManager【ConcurrentMapCacheManager】按照名字得到Cache【ConcurrentMapCache】组件
(2)key使用keyGenerator生成的,默认是SimpleKeyGenerator
7、@Cacheable几个属性值:
cacheNames/value:指定缓存组件的名字;将方法的返回结果放在哪个缓存中,是数组的方式,可以指定多个缓存;
如@Cacheable(value = {"emp"})
key/keyGenerator:缓存数据使用的key,有多种写法;key/keyGenerator:二选一使用;
(1)key:@Cacheable(value = {"emp"},key="#id"),可省略默认是使用方法参数的值key=2
@Cacheable(value = {"emp"},key="#root.methodName+'['+#id+']'"),key=getEmp[2]
(2)keyGenerator:key的生成器;可以自己指定key的生成器的组件id
@Cacheable(value = {"emp"},keyGenerator = "myKeyGenerator")
使用keyGenerator时需自定义缓存配置@Configuration,创建myKeyGenerator,
@Configuration
public class MyCacheConfig {

    @Bean("myKeyGenerator")
    public KeyGenerator keyGenerator(){
        return new KeyGenerator(){

            @Override
            public Object generate(Object target, Method method, Object... params) {
                return method.getName()+"["+ Arrays.asList(params).toString()+"]";
            }
        };
    }
}
condition:指定符合条件的情况下才缓存;
@Cacheable(value = {"emp"},condition = "#a0>1"):第一个参数值>1的时候才进行缓存
unless:否定缓存;当unless指定的条件为true,方法的返回值就不会被缓存;
@Cacheable(value = {"emp"},unless = "#result == null"):获取到结果为空,则不缓存
unless = "#a0==2": 如果第一个参数值是2,结果不缓存;
sync:是否使用异步模式,默认是false同步;若为true,那么unless就不支持了。
8、 @CachePut:既调用方法,又更新缓存数据;同步更新缓存
修改了数据库的某个数据,同时更新缓存;
运行时机:
(1)先调用目标方法
(2)将目标方法的结果缓存起来
* 测试步骤:
(1)查询1号员工;查到的结果会放在缓存中;
key:1 value:lastName:张三
(2)以后查询还是之前的结果
(3)更新1号员工;【lastName:zhangsan;gender:0】
将方法的返回值也放进缓存了;
key:传入的employee对象 值:返回的employee对象;
(4)查询1号员工?
应该是更新后的员工;
key = "#employee.id":使用传入的参数的员工id;
key = "#result.id":使用返回后的id
@Cacheable的key是不能用#result,因为先查缓存,才有结果
为什么是没更新前的?【1号员工没有在缓存中更新】
@CachePut(/*value = "emp",*/key = "#result.id")
    public Employee updateEmp(Employee employee){
        System.out.println("updateEmp:"+employee);
        employeeMapper.updateEmp(employee);
        return employee;
    }
9、@CacheEvict:缓存清除
* key:指定要清除的数据
* allEntries = true:指定清除这个缓存中所有的数据
* beforeInvocation = false:缓存的清除是否在方法之前执行
* 默认代表缓存清除操作是在方法执行之后执行;如果出现异常缓存就不会清除
*
* beforeInvocation = true:
* 代表清除缓存操作是在方法运行之前执行,无论方法是否出现异常,缓存都清除
@CacheEvict(value="emp",beforeInvocation = true/*key = "#id",*/)
    public void deleteEmp(Integer id){
        System.out.println("deleteEmp:"+id);
        //employeeMapper.deleteEmpById(id);
        int i = 10/0;
    }
10、@CacheConfig(cacheNames="emp") //抽取缓存的公共配置,其他地方可以不用写了
11、@Caching 定义复杂的缓存规则
执行该方法之后,会放入缓存,通过id或email查询就不会查询数据库
    @Caching(
         cacheable = {
             @Cacheable(/*value="emp",*/key = "#lastName")
         },
         put = {
             @CachePut(/*value="emp",*/key = "#result.id"),
             @CachePut(/*value="emp",*/key = "#result.email")
         }
    )
    public Employee getEmpByLastName(String lastName){
        return employeeMapper.getEmpByLastName(lastName);
    }
三、Spring整合Redis(分布式缓存)
Redis 是一个开源(BSD许可)的,内存中的数据结构存储系统,它可以用作数据库、缓存和消息中间件。
1、安装redis:使用docker;
docker pull hub.c.163.com/library/redis:latest(下载最新版的redis)
docker run -d --name=myredis -p 6379:6379 image_id(端口配置启动)
docker start image_id (端口已经配置过,启动)
docker ps(查看redis启动)
2、引入redis的starter
<dependency>
  <groupId>org.springframework.boot</groupId>
  <artifactId>spring-boot-starter-data-redis</artifactId>
</dependency>
3、配置redis
spring.redis.host=192.168.2.105
4、测试缓存
引入redis缓存后,RedisAutoConfiguration即Redis自动配置会起作用
@Autowired
StringRedisTemplate stringRedisTemplate; //操作k-v都是字符串的
@Autowired
RedisTemplate redisTemplate; //k-v都是对象的
原理:CacheManager===Cache 缓存组件来实际给缓存中存取数据
1)、引入redis的starter,容器中保存的是 RedisCacheManager;
2)、RedisCacheManager 帮我们创建 RedisCache 来作为缓存组件;RedisCache通过操作redis缓存数据的
3)、默认保存数据 k-v 都是Object;利用序列化保存;如何保存为json
1、引入了redis的starter,cacheManager变为 RedisCacheManager;
2、默认创建的 RedisCacheManager 操作redis的时候使用的是 RedisTemplate<Object, Object>
3、RedisTemplate<Object, Object> 是 默认使用jdk的序列化机制,序列化后的数据保存到redis中(序列化获取数据时不会有问题)
//redisTemplate.opsForValue().set("emp-01",empById);
    public QueryCondition ypDataList(QueryCondition condition) {

        QueryCondition pageResult = (QueryCondition) redisTemplate.opsForValue().get("yp_"+condition.getYpmc());
        if(pageResult==null){
            //根据条件查询 count记录数目
            Integer count = ypDataDao.ypDataCount(condition);
            //如果有记录 才去查询分页数据 没有相关记录数目 没必要去查分页数据
            if(count>0){
                //数据设置到pageResult,返回给前端
                pageResult.setTotalRows(count);
                pageResult.setCurrentPage(condition.getCurrentPage());
                pageResult.setPageSize(condition.getPageSize());
                //查联表
                List<YpEntity> jysjkList = ypDataDao.ypDataList(condition);
                pageResult.setItems(jysjkList);
            }
       //若为空,再添加到redis缓存中
            redisTemplate.opsForValue().set("yp_"+condition.getYpmc(),pageResult);
        }
        return pageResult;
    }
如果需要将数据以json的方式保存("message": "java.util.LinkedHashMap cannot be cast to com.hxsd.base.pojo.Label",
此时需要同时多个文件进行配置)
//(1)自己将对象转为json
//(2)redisTemplate默认的序列化规则;改变默认的序列化规则;如下配置RedisConfig
@Configuration
public class MyRedisConfig {
    @Bean
    public RedisTemplate<Object, Label> labelRedisTemplate(
            RedisConnectionFactory redisConnectionFactory) throws UnknownHostException {

        RedisTemplate<Object, Label> redisTemplate = new RedisTemplate<>();
        redisTemplate.setConnectionFactory(redisConnectionFactory);
        //对其进行序列化
        Jackson2JsonRedisSerializer<Label> ser = new Jackson2JsonRedisSerializer<Label>(Label.class);
        redisTemplate.setDefaultSerializer(ser);
        return redisTemplate;
    }
}
4)、自定义CacheManager;// 使用缓存管理器得到缓存,进行api调用
@Qualifier("deptCacheManager")
@Autowired
RedisCacheManager deptCacheManager;
// 使用缓存管理器得到缓存,进行api调用
    public Department getDeptById(Integer id){
        System.out.println("查询部门"+id);
        Department department = departmentMapper.getDeptById(id);

        //获取某个缓存
        Cache dept = deptCacheManager.getCache("dept");
        dept.put("dept:1",department);

        return department;
    }