本文很大程度的参考了知乎大大的文章:
<使用 python3+OpenCV+TensorFlow 做手势识別>
原文链接:https://zhuanlan.zhihu.com/p/56699632
说明:
由于原文章是一年前的内容,有些内容已经不适用,存在比较多坑点,在此重新做下注解和补充;
该文章觉得非常适合初学小白入门,用来练手实践,体验人工“智障”的乐趣;
所以在此花了几天时间特意整理了内容,希望能给看博客的你,种又白嫖了的快感~
一、环境配置
1、Anaconda3 下载
Windows 用户,强烈建议使用 Anaconda3 的Python 虚拟环境来安装tensorflow;
出问题或者啥不顺心或突然暴躁的,完完全全可以直接干掉环境重新再来;谁还不是个宝宝呢~(`へ´*)ノ~
官网:https://www.anaconda.com/distribution/
Anaconda3 都支持3.7 了,直接安装最新版本,下载 Python 3.7 version;

2、Anaconda3
建议安装在D盘,D:Anaconda3 下,下面就可以开启 CTRL+C 、CTRL+V无脑模式;
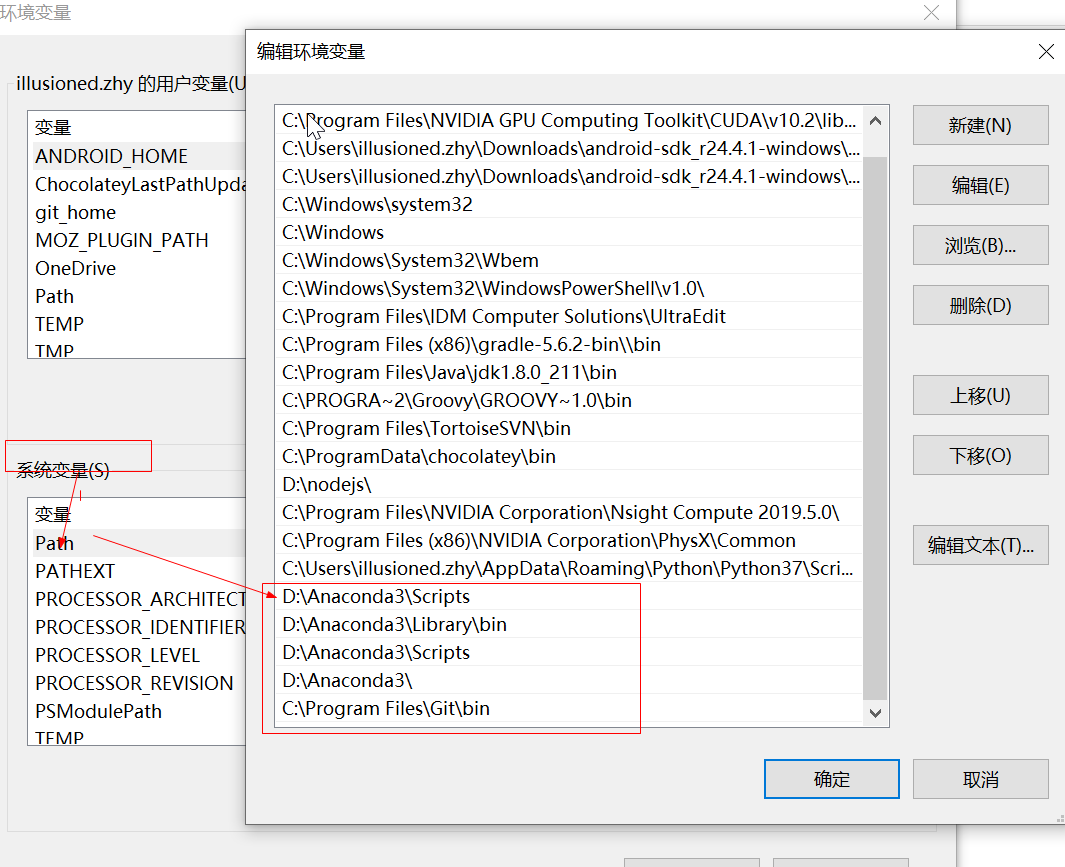
3、环境变量配置;例如:安装在D盘目录下;
D:Anaconda3Scripts
D:Anaconda3Libraryin
D:Anaconda3Scripts
D:Anaconda3
4、 win+R 打开cmd,检查安装结果;
① 检测anaconda环境是否安装成功:conda --version
② 检测目前安装了哪些环境变量:conda info --envs
③ 查看当前有哪些可以使用的tensorflow版本:conda search --full --name tensorflow、
④ 查看tensorflow包信息及依赖关系:conda info tensorflow
如图demo:

二、tensorflow安装与模块导入
1、安装Git
官网下载安装:https://gitforwindows.org/
默认安装,安装完成后配置环境变量;
2、下载模块 (注:此处要与对应发tensorflow 版本一致,此次demo主要以tensorflow1.12.0版本演示)
git clone -b r1.12.0 https://github.com/tensorflow/models.git D:/tensorflow/models
---大概600Mb 左右,漫长的等待……
##注意,使用其他tensorflow 版本的同学,记得下载的模块版本分支要与tensorflow版本一致;否则会出现很多奇奇怪怪的问题;
##例如:代码v1、v2 啥1.x 和2.x 不兼容问题,concat函数啥啥啥写法不兼容问题;
3、Python虚拟环境的搭建
进入windows命令模式,创建TensorFlow env环境;
由于该教程演示是用tensorflow1.12 做的,在此,直接把虚拟环境名称命名为tensorflow1.12
安装python3.6: conda create --name tensorflow1.12 python=3.6
删除python3.6: conda remove --name tensorflow1.12 --all
激活tensorflow1.12环境: activate tensorflow1.12
退出tensorflow1.12环境: deactivate
4、安装tensorflow与opencv包
① tensorflow包的安装
1)激活tensflow的tfenv环境:
activate tensorflow1.12
2)安装tensorflow1.12 :
pip install --upgrade --ignore-installed tensorflow==1.12.0
3)验证功能正常:python 进入代码环境
import tensorflow as tf
hello = tf.constant('hello,tf')
sess = tf.Session()
print(sess.run(hello))
常见报错问题总结:

A、tensorflow import 失败报错问题
温馨提示:如果你的conda和tensorflow环境都是安装成功的,但是一用测试代码进行跑的时候就出问题了,那么注意,这个原因你由于你在安装tensorflow的时候,是直接在cmd下,而不是在你用conda激活的一个环境,所以导致,tensorflow并没有直接嵌入到conda环境,所以,就导致无法导入模块的一个错误;
解决方法:
(1)只需要在activate tensorflow1.12
(2)然后再使用 pip install --upgrade --ignore-installed tensorflow==1.12.0命令安装就可以了

B、FutureWarning: Passing (type, 1)  报错问题
使用TensorFlow时报错FutureWarning: Passing (type, 1) or '1type' as a synonym of type is deprecated; in a future version of numpy.......
报错原因:numpy1-17-0版本过高,使用numpy-1.16-0版本即可
解决方法:重新安装numpy-1.16-0
pip install numpy==1.16.0

C、 CPU 指令集报错问题
使用TensorFlow模块时,弹出错误Your CPU supports instructions that this TensorFlow binary was not compiled to use: AVX AVX2
有两种解决办法:
1.忽略这个警告,不看它!
import os
os.environ["TF_CPP_MIN_LOG_LEVEL"]='1' # 这是默认的显示等级,显示所有信息
os.environ["TF_CPP_MIN_LOG_LEVEL"]='2' # 只显示 warning 和 Error
os.environ["TF_CPP_MIN_LOG_LEVEL"]='3' # 只显示 Error
我们用第二个就可以了。

2.彻底解决,换成支持cpu用AVX2编译的TensorFlow版本。
首先,卸载原来版本的TensorFlow
EG:pip install tensorflow-1.6.0-cp36-cp36m-win_amd64.whl
参考:https://github.com/fo40225/tensorflow-windows-wheel
5、模块安装
首先把需要使用的模块安装好
python -m pip install opencv-python
python -m pip install Cython
python -m pip install contextlib2
python -m pip install pillow
python -m pip install lxml
python -m pip install jupyter
python -m pip install matplotlib
6、tensorflow object detection API 框架搭建
① protoc 下载
链接:https://pan.baidu.com/s/19xzP6_x5Ru5y_qra3wtakA
提取码:nf6n
② 使用protoc生成python文件
然后win+R→cmd→
C:>cd /d D:	ensorflowmodels
esearch

D:	ensorflowmodels
esearch>D:/tensorflow/protoc-3.4.0-win32/bin/protoc object_detection/protos/*.proto --python_out=.
③ API测试准备
找到python的安装路径,我的虚拟环境路径:D:Anaconda3envs ensorflow1.12Libsite-packages;
在该文件夹下新建一个txt文件,打开该txt文件,输入以下三条路径
D:	ensorflowmodels
esearch
D:	ensorflowmodels
esearchslim
D:	ensorflowmodels
esearchobject_detection
将该文件命名为tensorflow_model.pth储存即可。
④ API测试
回到cmd,输入
cd  /d  D:	ensorflowmodels
esearch

python object_detection/builders/model_builder_test.py
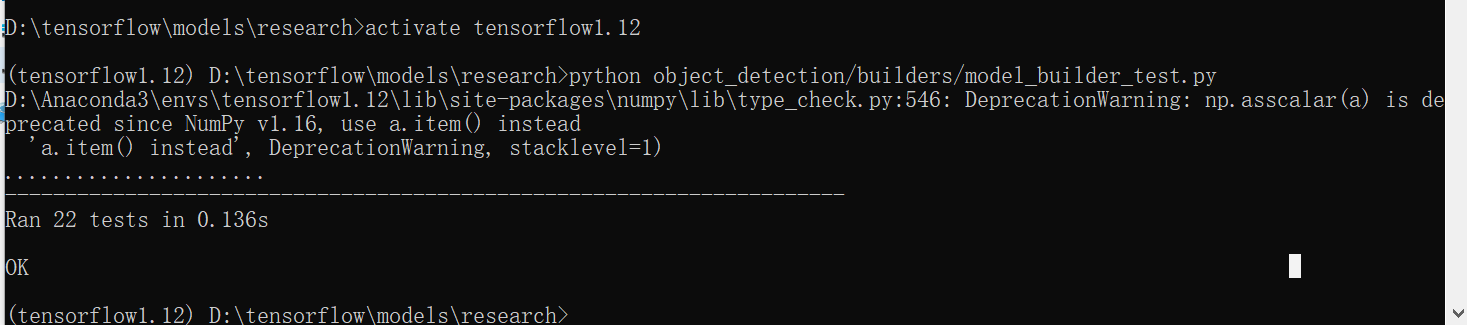
##得到ok,测试成功!此时tensorflow object detection API 框架搭建完成。
三、手势数据的收集与标注
1、数据收集
① 提前工作
在D盘tensorflow目录下,创建一个文件夹,命名为hand_data;在hand_data里创建一个文件夹,命名为VOC2012(注意:该名称必须为VOC2012);在VOC2012文件夹下创建3个文件夹,分别命名为Annotations,ImageSets,JPEGImages(注意:该名称必须为Annotations,ImageSets,JPEGImages); 在ImageSets文件夹内创建Main文件夹。
回到cmd,输入
md  d:	ensorflowhand_dataVOC2012Annotations
md  d:	ensorflowhand_dataVOC2012ImageSets
md  d:	ensorflowhand_dataVOC2012JPEGImagesMain
② 使用摄像头+opencv收集数据
以下代码设定的为每5帧保存一次,可以修改,保存地址为VOC2012文件夹下的JPEGImages文件夹内,每种手势收集1000张图片最佳。
import cv2 as cv
import numpy as np

capture = cv.VideoCapture(0)
index = 1
while True:
    ret, frame = capture.read()
    if ret is True:
        cv.imshow("frame", frame)
        index += 1
        if index % 5 == 0:
            cv.imwrite("D:/tensorflow/hand_data/VOC2012/JPEGImages/" + str(index) + ".jpg", frame)
        c = cv.waitKey(50)
        if c == 27: # 退出命令键盘 Esc
            break
    else:
        break

cv.destroyAllWindows()
首先删除不清晰的图片,因为收集到的图片的序号不是按照顺序排的,因此需要排好序再标注。在JPEGImages文件夹内新建一个txt文件,把以下代码copy进去,命名为.bat文件,保存好,再运行一下,图片名就会按照顺序排列好了。
@echo off
set a=0
setlocal EnableDelayedExpansion
dir /b .*.jpg | find /c /v "" >> .	mp.txt
set /p c=<.	mp.txt
del /a /f /q .	mp.txt

for %%i in (*.jpg) do (
set /a a+=1
if !a! gtr %c% (goto aa)
echo !a!
echo %%i
ren "%%i" "!a!.jpg"
)
:aa
pause
2、数据标注
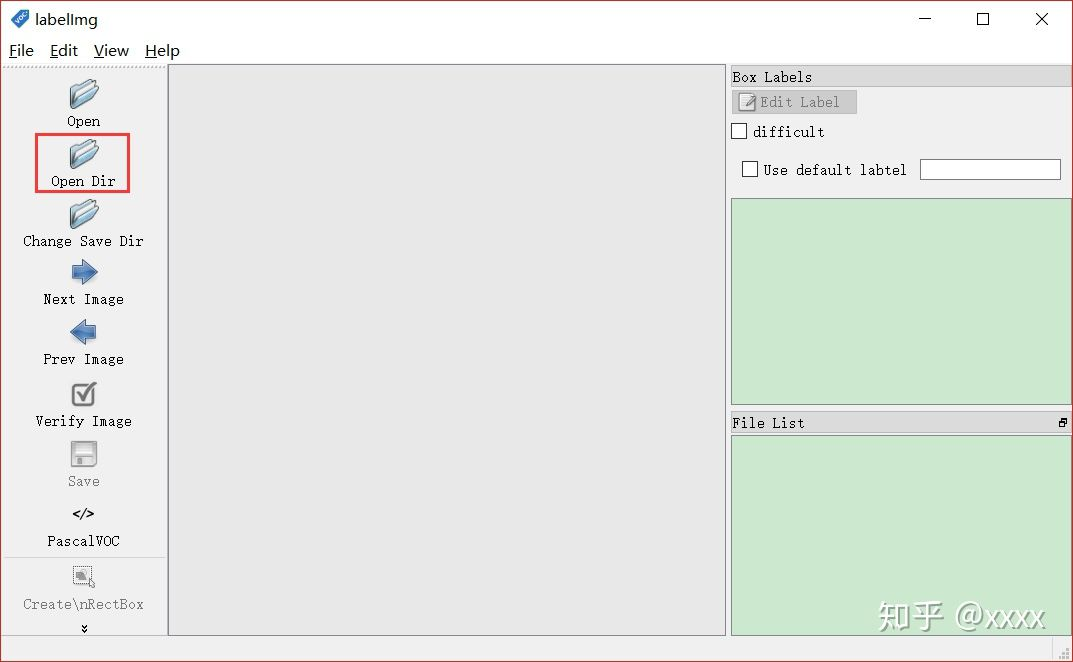
① labelImg下载
百度云盘链接:https://pan.baidu.com/s/1Ros4T5c-m401urzt_NdVNw 提取码:xdiz
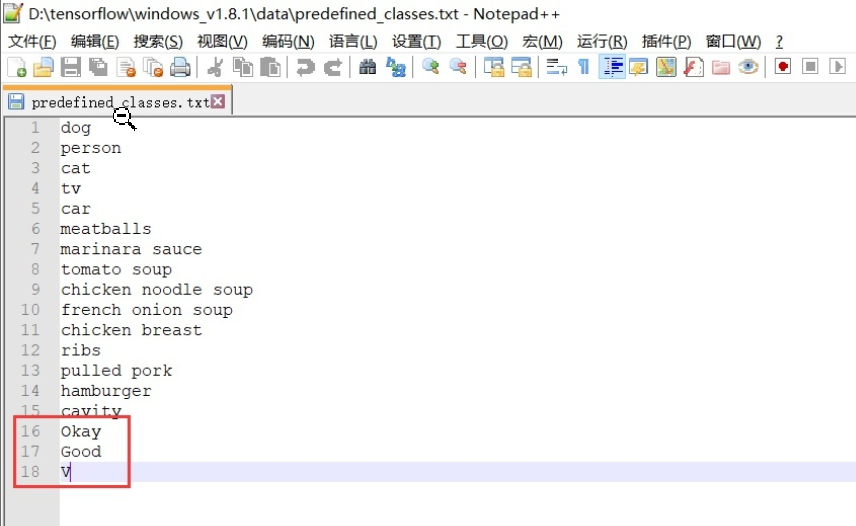
② 添加标签
下载解压完成后打开
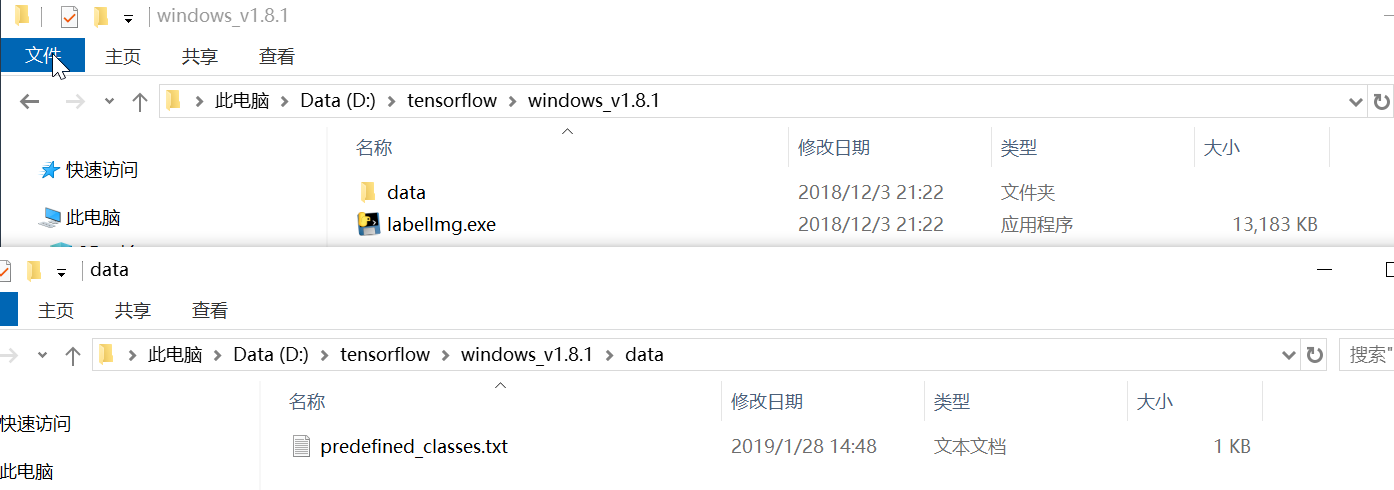
本文对三个手势进行标注,在该txt文件中添加了三个标签

把储存照片的JPEGImages文件夹路径设置好:
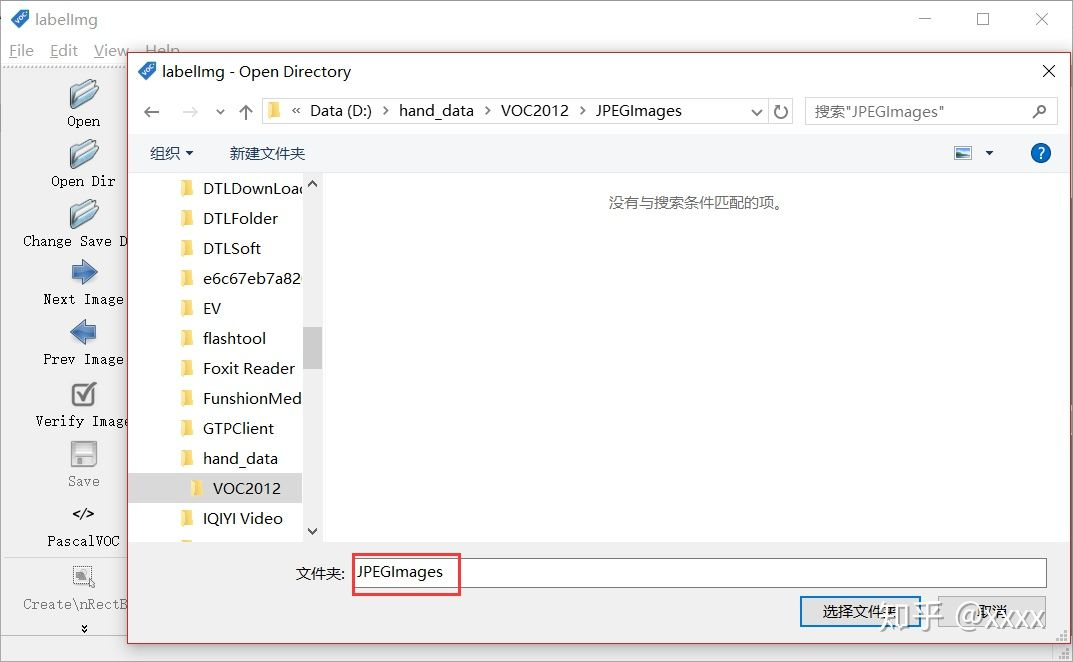
路径都设置好以后,再按下W即可对图片标注。
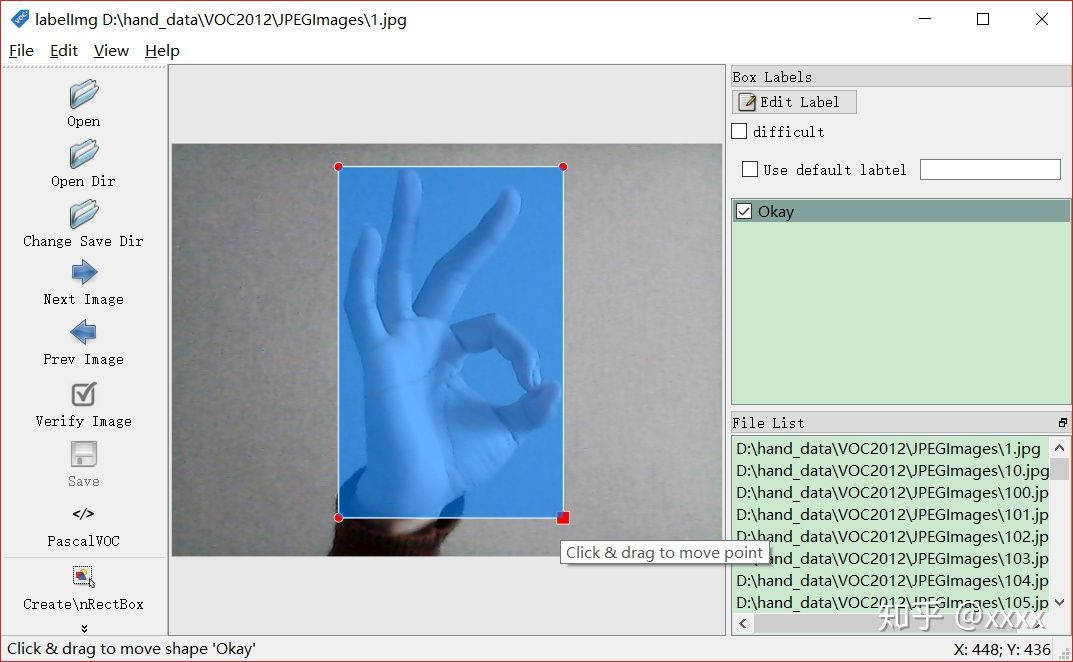
标注好位置后,点击save进行保存。(快捷方式为两次空格键)(也可以按一次空格键,全部标注完以后,检查时再按一次空格键方便检查,会有绿色和白色的背景色提醒,白色为最终确认的颜色)
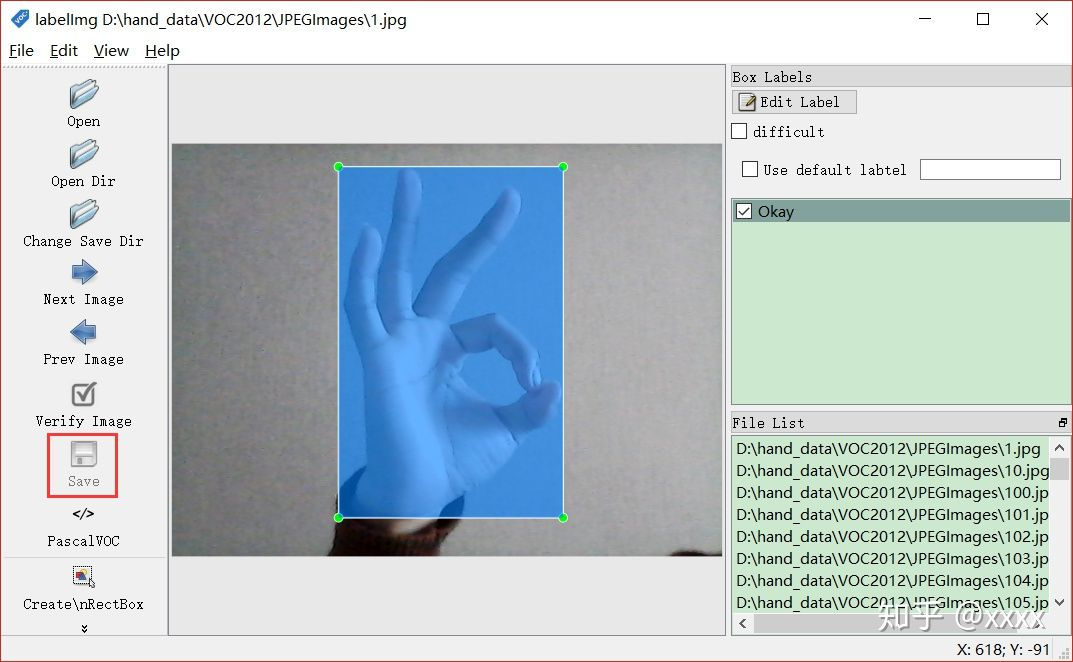
然后点击Next Image 对下一张图片进行数据标注。(快捷方式为D)
想返回上一张查看的话,可以点击Prev Image。(快捷方式为A)
重复上述工作至全部标注完成即可。数据标注工作枯燥无味,如果一次未能全部标注完,关闭后下一次可以继续标注。
③ xml文件的修改
之前标注好的数据会保存在.xml文件中,但是格式并不完全正确。下面红色方框内的内容必须要改成如下形式即可。

上千个.xml文件,手动改是不可能手动改的。用下面的python代码可以遍历全部文件进行更改,并且在Main文件夹内保存对应的txt文件。
import cv2 as cv
import os
from xml.dom import minidom
import xml.etree.ElementTree as ET

root_dir = "D:/tensorflow/hand_data/VOC2012/JPEGImages/"

def xml_modification():
    ann_dir = "D:/tensorflow/hand_data/VOC2012/Annotations/"
    files = os.listdir(ann_dir)
    for xml_file in files:
        if os.path.isfile(os.path.join(ann_dir, xml_file)):
            xml_path = os.path.join(ann_dir, xml_file)
            tree = ET.parse(xml_path)
            root = tree.getroot()

            # changing a field text
            for elem in root.iter('folder'):
                elem.text = 'voc2012'

            for elem in root.iter('name'):
                name = elem.text
                elem.text = name.replace(" ", "")

            tree.write(xml_path)
            print("processed xml : %s" % (xml_path))

def generate_classes_text():
    print("start to generate classes text...")
    ann_dir = "D:/tensorflow/hand_data/VOC2012/Annotations/"

    okay_train = open("D:/tensorflow/hand_data/VOC2012/ImageSets/Main/Okay_train.txt", 'w')
    okay_val = open("D:/tensorflow/hand_data/VOC2012/ImageSets/Main/Okay_val.txt", 'w')

    good_train = open("D:/tensorflow/hand_data/VOC2012/ImageSets/Main/Good_train.txt", 'w')
    good_val = open("D:/tensorflow/hand_data/VOC2012/ImageSets/Main/Good_val.txt", 'w')

    v_train = open("D:/tensorflow/hand_data/VOC2012/ImageSets/Main/V_train.txt", 'w')
    v_val = open("D:/tensorflow/hand_data/VOC2012/ImageSets/Main/V_val.txt", 'w')

    files = os.listdir(ann_dir)
    for xml_file in files:
        if os.path.isfile(os.path.join(ann_dir, xml_file)):
            xml_path = os.path.join(ann_dir, xml_file)
            tree = ET.parse(xml_path)
            root = tree.getroot()
            for elem in root.iter('filename'):
                filename = elem.text
            for elem in root.iter('name'):
                name = elem.text

            if name == "Okay":
                okay_train.write(filename.replace(".jpg", " ") + str(1) + "
")
                okay_val.write(filename.replace(".jpg", " ") + str(1) + "
")

                good_train.write(filename.replace(".jpg", " ") + str(-1) + "
")
                good_val.write(filename.replace(".jpg", " ") + str(-1) + "
")

                v_train.write(filename.replace(".jpg", " ") + str(-1) + "
")
                v_val.write(filename.replace(".jpg", " ") + str(-1) + "
")
            if name == "V":
                okay_train.write(filename.replace(".jpg", " ") + str(-1) + "
")
                okay_val.write(filename.replace(".jpg", " ") + str(-1) + "
")

                good_train.write(filename.replace(".jpg", " ") + str(-1) + "
")
                good_val.write(filename.replace(".jpg", " ") + str(-1) + "
")

                v_train.write(filename.replace(".jpg", " ") + str(1) + "
")
                v_val.write(filename.replace(".jpg", " ") + str(1) + "
")

            if name == "Good":
                okay_train.write(filename.replace(".jpg", " ") + str(-1) + "
")
                okay_val.write(filename.replace(".jpg", " ") + str(-1) + "
")

                good_train.write(filename.replace(".jpg", " ") + str(1) + "
")
                good_val.write(filename.replace(".jpg", " ") + str(1) + "
")

                v_train.write(filename.replace(".jpg", " ") + str(-1) + "
")
                v_val.write(filename.replace(".jpg", " ") + str(-1) + "
")

    okay_train.close()
    okay_val.close()
    v_train.close()
    v_val.close()
    good_train.close()
    good_val.close()


xml_modification()
#generate_classes_text()
成功运行上面python代码后,得到以下txt文件。

对得到的txt文件进行说明:第一列为图片的名称,第二列为图片的结果,-1代表不是,1代表是。

至此,VOC2012数据集制作完成。
④ tf.record数据的生成
在tensorflow文件夹下新建一个文件夹,命名为hand_set,在hand_set文件夹下新建三个文件夹,分别命名为data,export,model。
md  d:	ensorflowhand_setdata
md  d:	ensorflowhand_setexport
md  d:	ensorflowhand_setmodel

在model文件夹下新建eval和train文件夹。
md  d:	ensorflowhand_setmodeleval
md  d:	ensorflowhand_setmodel	rain
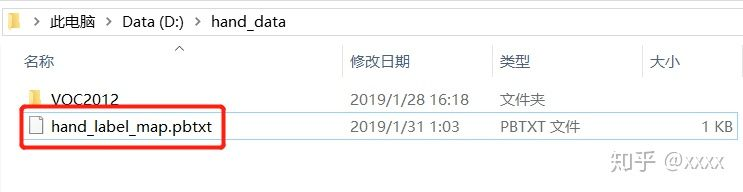
在hand_data文件夹里新建一个txt文件,命名为hand_label_map.pbtxt,
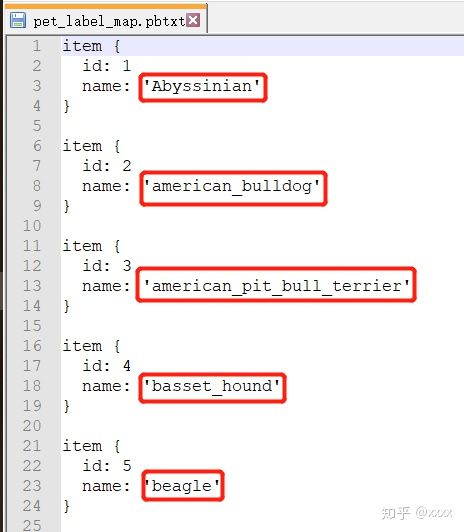
在D: ensorflowmodels esearchobject_detectiondata中找打一个叫pet_label_map.pbtxt的文件打开,
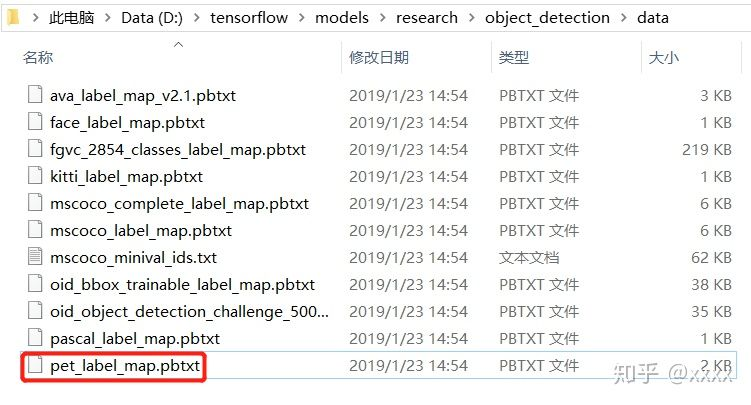
复制全部内容后,粘贴到hand_label_map.pbtxt中,并把name: ' ' 内的内容修改为需要修改的内容,
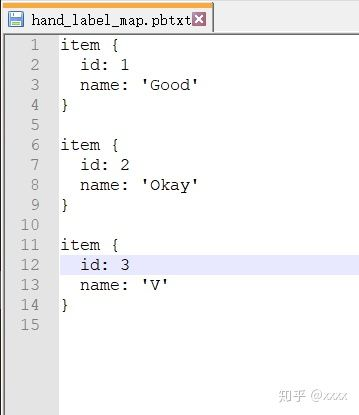
保存好,.pbtxt文件制作完成。
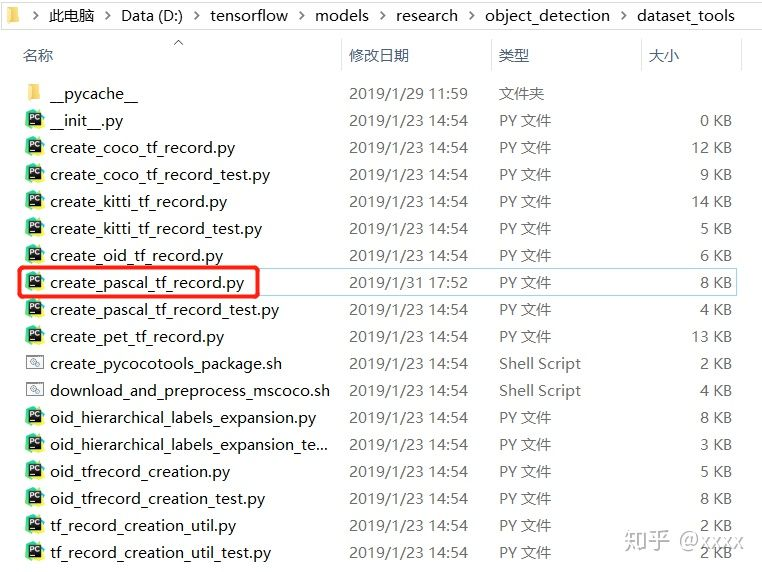
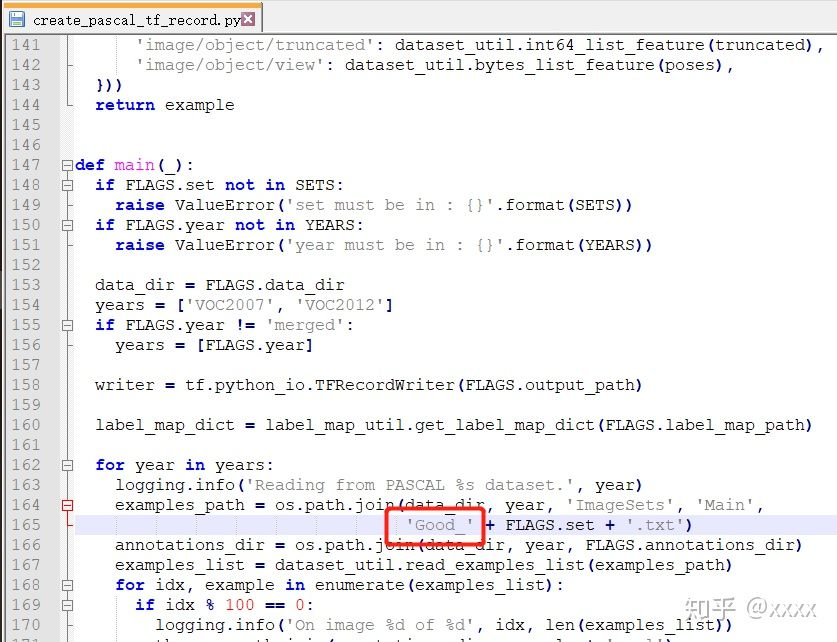
在D: ensorflowmodels esearchobject_detectiondataset_tools中找到create_pascal_tf_record.py文件并打开,在165行更改成如下形式,和D: ensorflowhand_dataVOC2012ImageSetsMain中的一个txt文件保持一致即可。
接下来,win+R→cmd→
C:>cd /d D:	ensorflowmodels
esearch

D:	ensorflowmodels
esearch>python object_detection/dataset_tools/create_pascal_tf_record.py --label_map_path=D:/tensorflow/hand_data/hand_label_map.pbtxt --data_dir=D:	ensorflowhand_data --year=VOC2012 --set=train --output_path=D:	ensorflowhand_setdatapascal_train.record
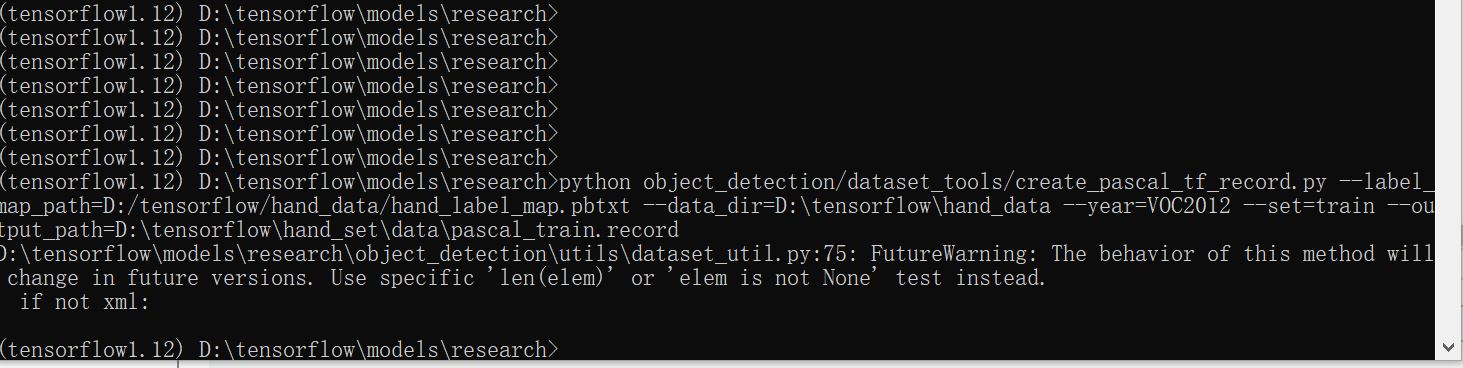
注意:期间可能会遇到个报错 TypeError:can’t pickle dict_values objects.
解决办法:https://blog.csdn.net/sy20173081277/article/details/84311730
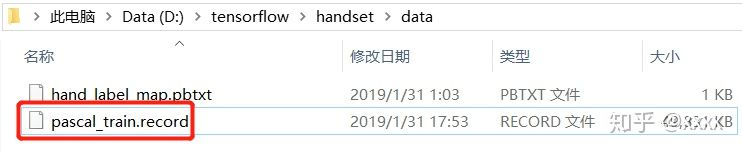
运行生成record文件,并把之前做好的hand_label_map.pbtxt文件一并放到该文件夹下。
⑤ 预训练模型的选择
打开https://github.com/tensorflow/models/tree/master/research/object_detection
找到model zoo,在这里面有各种各样的模型。
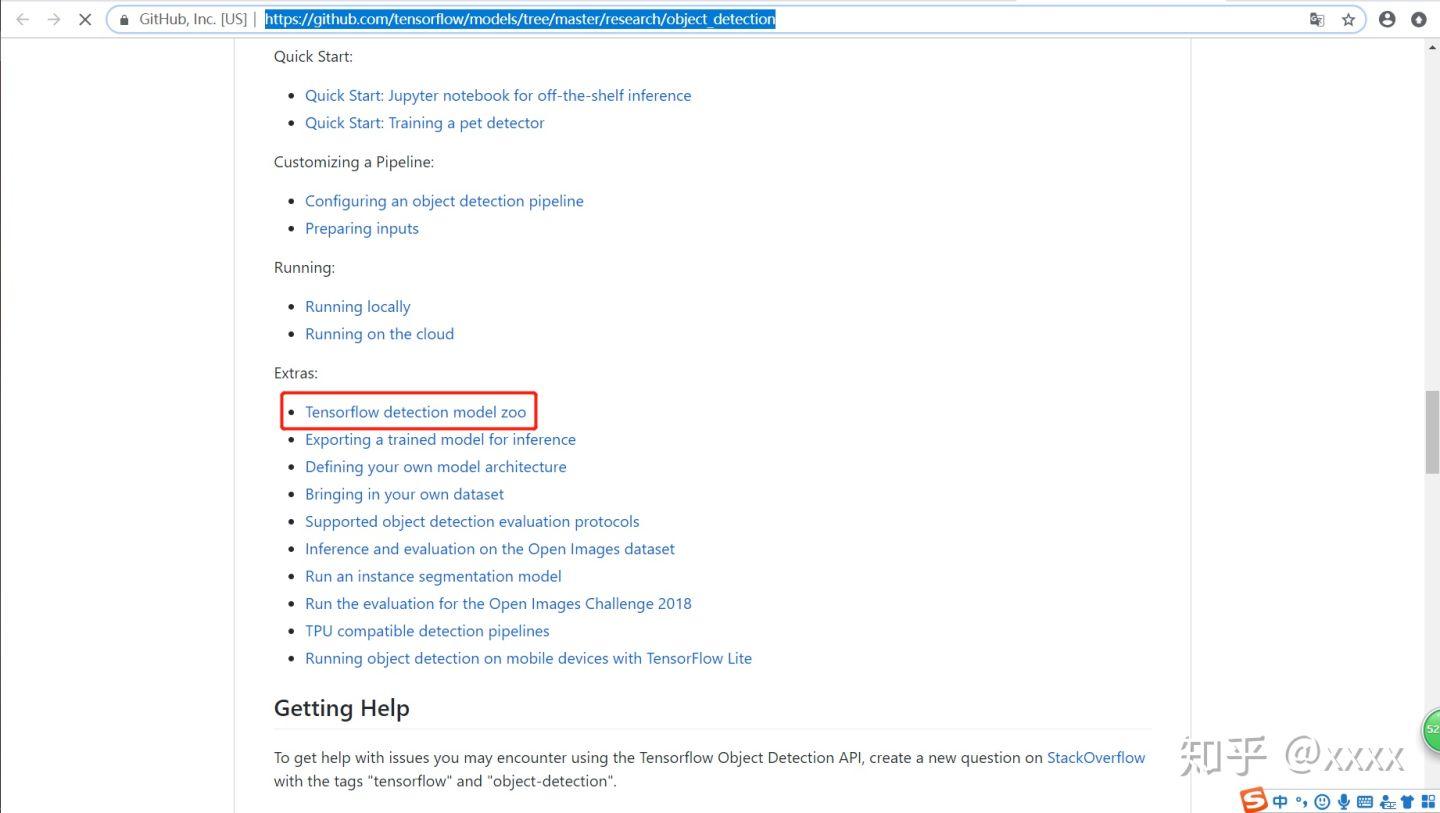
我们选择下面这个模型,从Speed中可以看到模型的速度。有兴趣的也可以尝试其他的模型。点击下载到D: ensorflow。

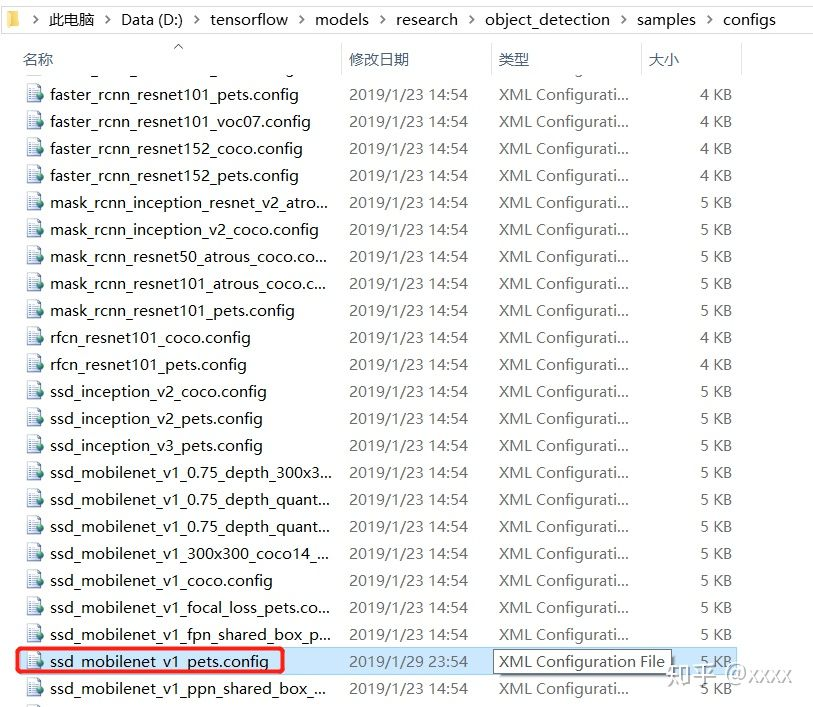
config文件的配置
在D: ensorflowmodels
esearchobject_detectionsamplesconfigs中找到ssd_mobilenet_v1_pets.config文件。复制粘贴到D: ensorflowhandsetmodel中。
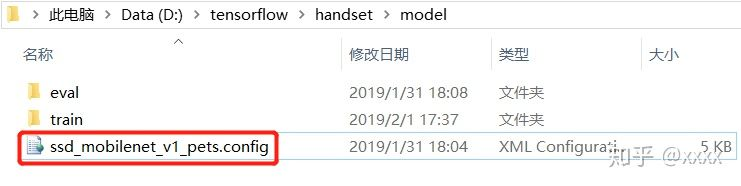
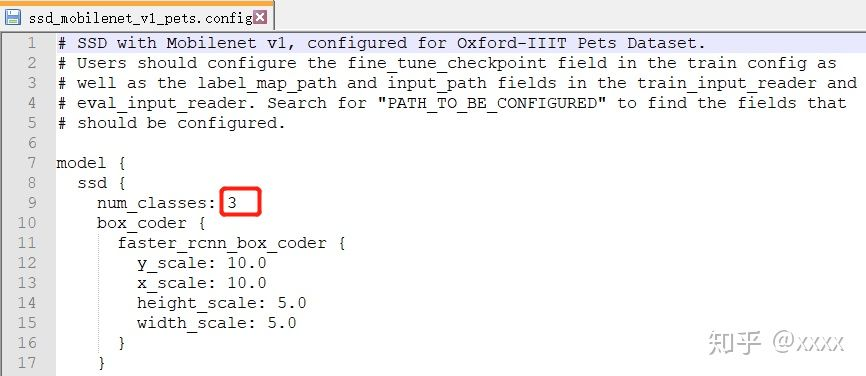
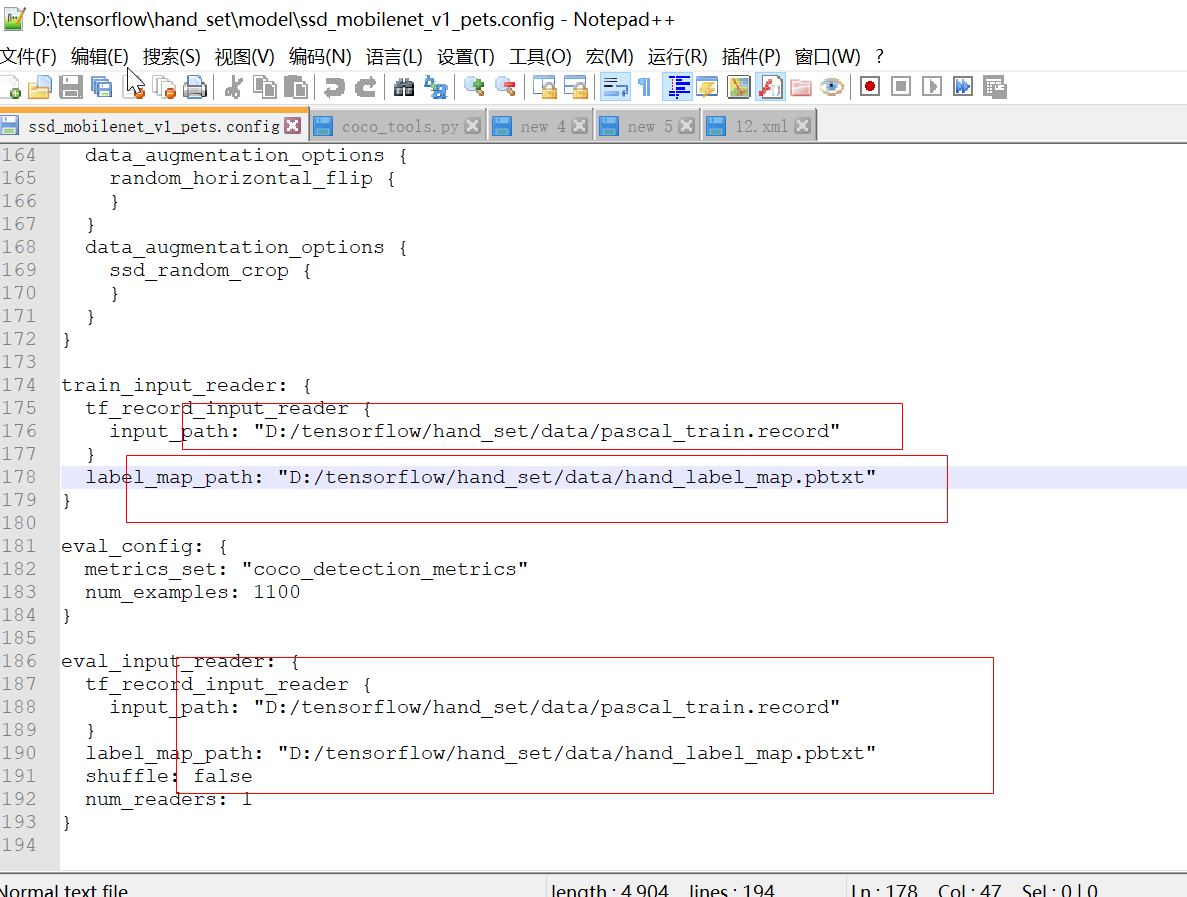
打开ssd_mobilenet_v1_pets.config,把第9行的数字修改为需要分类的类别数
路径修改(注意反斜杠和斜杆的问题):
fine_tune_checkpoint 后的路径改为 ssd_mobilenet_v1_pets.config 的路径;
train_input_reader下的 input_path 后的路径改为 pascal_train.record 的路径,label_map_path后的路径改为 hand_label_map.pbtxt 的路径;
eval_input_reader下的路径同上。
模型训练
首先在cmd中执行下面的命令
pip install git+https://github.com/philferriere/cocoapi.git#subdirectory=PythonAPI
##注:该命令时间稍长,建议等待;自己下载git文件,编译会出现vc2014 等待系列依赖问题;我之前就是在这里栽了,各种恶心抓狂的开端;
然后在cmd中执行
C:>cd /d D:	ensorflowmodels
esearch

D:	ensorflowmodels
esearch>python object_detection/model_main.py --pipeline_config_path=D:/tensorflow/hand_set/model/ssd_mobilenet_v1_pets.config --model_dir=D:	ensorflowhand_setmodel	rain --num_train_steps=200 --num_eval_steps=5 --alsologtostderr
即可开始训练,因为tensorflow是CPU版本的,所以训练时间比较长。至少五到六个小时;
⑥ 训练过程查看
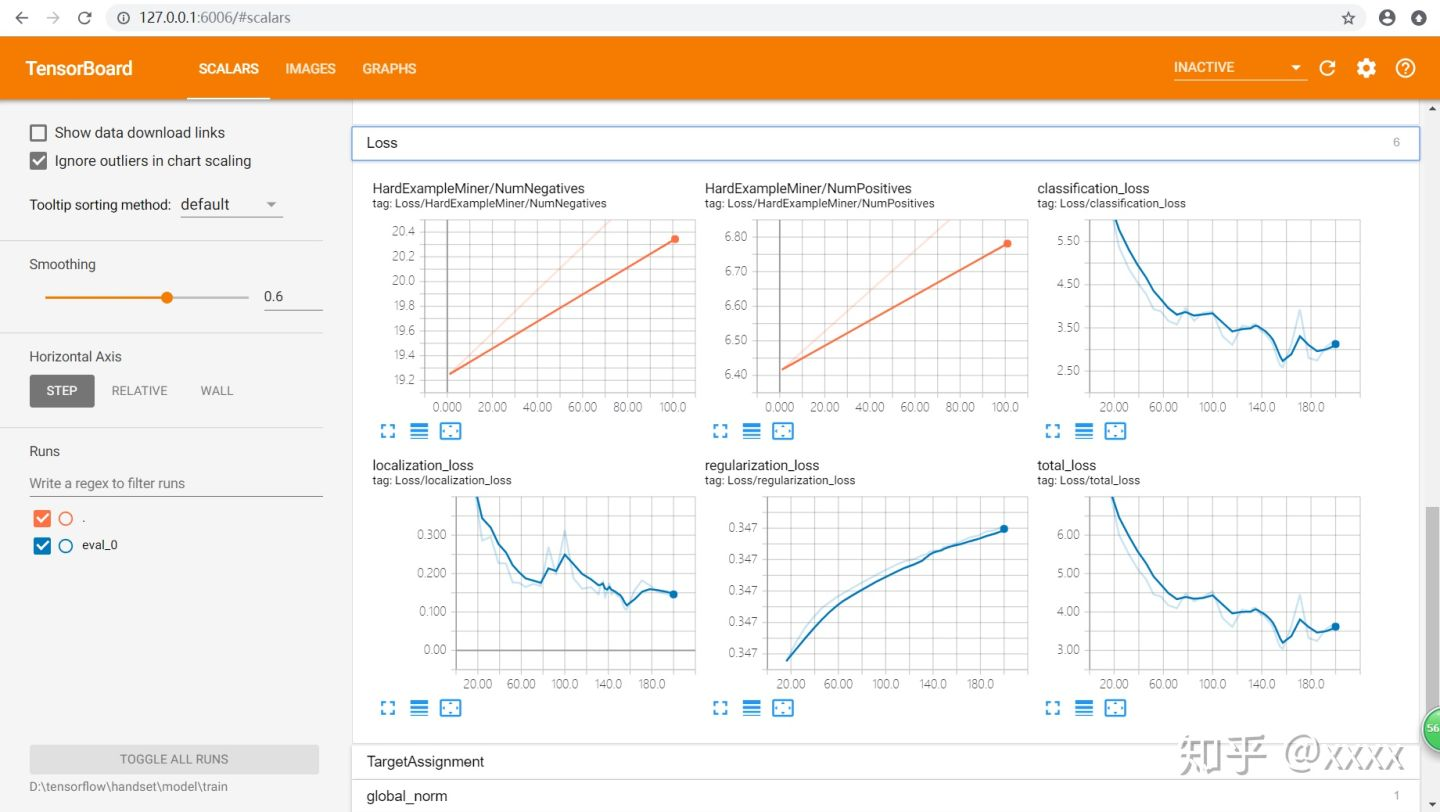
C:>cd
C:>tensorboard --logdir=D:	ensorflowhandsetmodel	rain --host=127.0.0.1
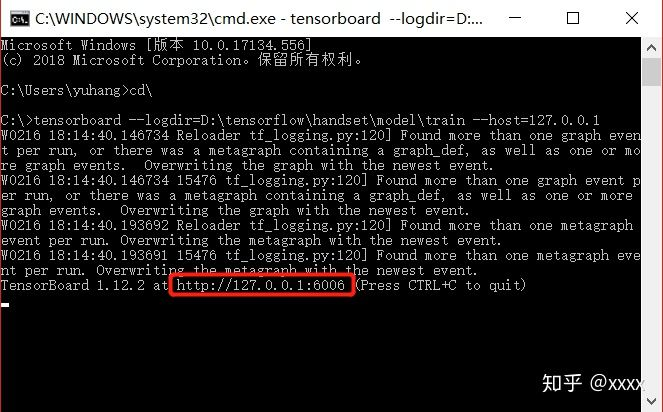
得到http://127.0.0.1:6006,在浏览器中打开,即可看到过程参数,识别图像等,都可以自己尝试点击看看。
⑦ 数据模型导出
在cmd中输入
C:>cd /d D:	ensorflowmodels
esearch

D:	ensorflowmodels
esearch>python object_detection/export_inference_graph.py --input_type=image_tensor --pipeline_config_path=D:	ensorflowhand_setmodelssd_mobilenet_v1_pets.config --trained_checkpoint_prefix=D:	ensorflowhand_setmodel	rainmodel.ckpt-200 --output_directory=D:	ensorflowhand_setexport
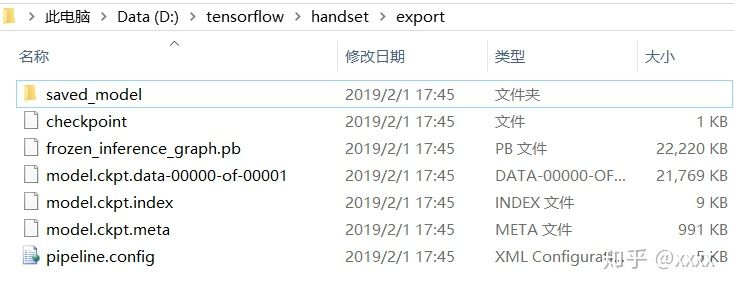
即可导出数据,在D: ensorflowhandsetexport中可以看到导出的模型。
⑧ 实时手势识别
# -*- coding: utf-8 -*-
"""
Created on Mon Mar 16 09:23:06 2020

@author: illusioned.zhy
"""

import os
import sys
import tarfile

import cv2 as cv
import numpy as np
import tensorflow as tf

from utils import label_map_util
from utils import visualization_utils as vis_util


# Path to frozen detection graph. This is the actual model that is used for the object detection.
PATH_TO_FROZEN_GRAPH = 'D:/tensorflow/hand_set/export/frozen_inference_graph.pb'

# List of the strings that is used to add correct label for each box.
PATH_TO_LABELS = os.path.join('D:/tensorflow/hand_set/data', 'hand_label_map.pbtxt')

NUM_CLASSES = 3
detection_graph = tf.Graph()
capture = cv.VideoCapture(0)
with detection_graph.as_default():
    od_graph_def = tf.GraphDef()
    with tf.gfile.GFile(PATH_TO_FROZEN_GRAPH, 'rb') as fid:
        serialized_graph = fid.read()
        od_graph_def.ParseFromString(serialized_graph)
        tf.import_graph_def(od_graph_def, name='')

label_map = label_map_util.load_labelmap(PATH_TO_LABELS)
categorys = label_map_util.convert_label_map_to_categories(label_map, max_num_classes=NUM_CLASSES, use_display_name=True)
category_index = label_map_util.create_category_index(categorys)


with detection_graph.as_default():
    with tf.Session(graph=detection_graph) as sess:
        while  True:
            ret, image = capture.read()
            if ret is True:
                image_np_expanded = np.expand_dims(image, axis=0)
                image_tensor = detection_graph.get_tensor_by_name('image_tensor:0')
                boxes = detection_graph.get_tensor_by_name('detection_boxes:0')
                scores = detection_graph.get_tensor_by_name('detection_scores:0')
                classes = detection_graph.get_tensor_by_name('detection_classes:0')
                num_detections = detection_graph.get_tensor_by_name('num_detections:0')

                (boxes,scores,classes,num_detections)=sess.run([boxes, scores, classes, num_detections],
                                                                feed_dict={image_tensor: image_np_expanded})
                vis_util.visualize_boxes_and_labels_on_image_array(
                    image,
                    np.squeeze(boxes),
                    np.squeeze(classes).astype(np.int32),
                    np.squeeze(scores),
                    category_index,
                    min_score_thresh=0.5, #置信度,默认为0.5
                    use_normalized_coordinates=True,
                    line_thickness=4
                )
                c = cv.waitKey(5)
                if c == 27:  # ESC
                    break
                cv.imshow("Hand Gesture Demo", image)
            else:
                break
        cv.waitKey(0)
        cv.destoryAllWindows()
注意要把路径写对。
大功告成!
后面描述不清楚的地方,可以参考回原文 https://zhuanlan.zhihu.com/p/56699632
最后,附一张用20张图片标注生成的图片:

2020 疫情期间,带着口罩上班;=_=!! 明明是V,这准确度和人工"智障"!!!自己把自己笑死~~~