@
之前说了前端框架的演进,那就开干吧!开干之前我们初始化vue项目后,我们需要配置些什么让我们的coding之路更高效呢?本文就来总结一下vscode的常用配置!
下载插件
- vetur
Vetur支持.vue文件的语法高亮显示,除了支持template模板以外,还支持大多数主流的前端开发脚本和插件,比如Sass和TypeScrip
- eslint
- 审查代码是否符合编码规范和统一的代码风格;
- 审查代码是否存在语法错误
npm install eslint --save-dev
注意:这里之所以安装了对应的依赖还安装插件是因为后面我们的配置需要插件来协助,不然是无法识别的!
setting.json配置
快捷键:crtl+shift+p搜索setting.json 带有default那个就是了
{
    "window.zoomLevel": 1,
    "terminal.integrated.rendererType": "dom",
    // 打开代码自动提示
    "editor.suggest.snippetsPreventQuickSuggestions": false,
    // 文件格式
    "emmet.syntaxProfiles": {
        "vue-html": "html",
        "vue": "html"
    },
    // tab 自动补全标签
    "emmet.triggerExpansionOnTab": true,
    "emmet.includeLanguages": {
        "vue-html": "html",
        "vue": "html"
    },
    // 代码缩进修改成4个空格 如果同时设置了eslint缩进会和其冲突(如果你不要eslint 可以放开下面三个配置)
    // "editor.tabSize": 4,
    // "editor.formatOnType": true, // 代码格式化 同eslint冲突
    // "editor.formatOnSave": true, // 代码保存时自动格式化 同eslint冲突

    // 不檢查縮進,保存后統一按設置項來設置
    "editor.detectIndentation": false,
    // 控制 Markdown 预览中使用的字号(以像素为单位)。
    "markdown.preview.fontSize": 13,
    // 控制终端的字号(以像素为单位)。
    "terminal.integrated.fontSize": 12,
    // 切换文件时自动保存
    "files.autoSave": "onFocusChange",
    // 文件保存时自动去除多余的空格
    "files.trimTrailingWhitespace": true,
    // 终端选中即复制
    "terminal.integrated.copyOnSelection": true,
    // 換行
    "editor.wordWrap": "on",
    "editor.fontSize": 13,
    // 設置行高
    "editor.lineHeight": 20,
    // "eslint.autoFixOnSave": true,
    // "eslint.validate": [
    //     "javascript",
    //     "javascriptreact",
    //     "html",
    //     {
    //         "language": "vue",
    //         "autoFix": true
    //     }
    // ],
    "eslint.options": {
        "plugins": [
            "html"
        ]
    },
    "vetur.validation.template": true,
    "vetur.format.defaultFormatter.html": "js-beautify-html",
    "vetur.format.defaultFormatterOptions": {
        "js-beautify-html": {
            // 属性强制折行对齐
            "wrap_attributes": "force-aligned",
        }
    },
    //空格
    "javascript.format.insertSpaceBeforeFunctionParenthesis": true,
    "editor.codeActionsOnSave": {
        "source.fixAll.eslint": true
    },
}
.eslintrc.js配置
// https://eslint.org/docs/user-guide/configuring

module.exports = {
    //此项是用来告诉eslint找当前配置文件不能往父级查找
    root: true,
    //此项是用来指定eslint解析器的,解析器必须符合规则,babel-eslint解析器是对babel解析器的包装使其与ESLint解析
    parser: "babel-eslint",
    //此项是用来指定javaScript语言类型和风格,sourceType用来指定js导入的方式,默认是script,此处设置为module,指某块导入方式
    parserOptions: {
        // 设置 script(默认) 或 module,如果代码是在ECMASCRIPT中的模块
        sourceType: "module",
        "ecmaVersion": 6,
        "ecmaFeatures": {
            "jsx": true
        }
    },

    // 此项指定环境的全局变量,下面的配置指定为浏览器环境
    env: {
        "browser": true,
        "node": true,
        "commonjs": true,
        "es6": true,
        "amd": true
    },
    // https://github.com/standard/standard/blob/master/docs/RULES-en.md
    // 此项是用来配置标准的js风格,就是说写代码的时候要规范的写,如果你使用vs-code我觉得应该可以避免出错
    extends: "vue",
    // 此项是用来提供插件的,插件名称省略了eslint-plugin-,下面这个配置是用来规范html的
    plugins: [
        "html",
        "flow-vars",
        "react"
    ],
    /*
    下面这些rules是用来设置从插件来的规范代码的规则,使用必须去掉前缀eslint-plugin-
    主要有如下的设置规则,可以设置字符串也可以设置数字,两者效果一致
    "off" -> 0 关闭规则
    "warn" -> 1 开启警告规则
    "error" -> 2 开启错误规则
    */
    rules: {
        "indent": ["warn", 4], // 缩进4个空格
        "consistent-return": 0, // return 后面是否允许省略
        "quotes": 0, // 强制一致使用反引号,双引号或单引号
        "prefer-const": 0, // 如果一个变量从不重新分配,使用const声明更好
        "space-before-function-paren": 0, // 函数定义时括号前面要不要有空格
        // "space-before-function-paren": ["error", { // 函数括号前端需要一个空格
        //     "anonymous": "always",
        //     "named": "always",
        //     "asyncArrow": "ignore"
        // }],
        "camelcase": 0,//强制驼峰法命名
        "semi": ["error", "always"], // 语句后面添加的分号
        "no-unneeded-ternary": 0, // 当存在更简单的选择时不允许三元运算符
        "no-return-assign": 0, //
        "object-curly-spacing": 0, // 在大括号内强制执行一致的间距
        "padded-blocks": 'off', // 要求或不允许块内的填充
        "arrow-parens": 0, // 它也将有助于找到箭头函数(=>),这些函数可能被错误地包含在一个条件中,如果这样的比较>=是有意的。
        "generator-star-spacing": 0, // 围绕*生成器函数(generator-star-spacing)强制执行间距
        "no-debugger": process.env.NODE_ENV === "production" ? 2 : 0,
        // "semi-spacing": ["error", {"before": false, "after": false}], // 分号前后不准有空格
        "no-trailing-spaces": ["error", { "skipBlankLines": true }], // 允许在空行上结尾空白
        "no-multiple-empty-lines": ["error", {
            "max": 2, // "max"(默认2:)强制连续空行的最大数量
            "maxEOF": 2, // "maxEOF" 在文件末尾强制执行最大数量的连续空行
            "maxBOF": 2 // "maxBOF" 在文件的开头强制执行最大数量的连续空行
        }],
        "eslint.validate": [
            //开启对.vue文件中错误的检查
            "javascript",
            "javascriptreact",
            {
                "language": "html",
                "autoFix": true
            },
            {
                "language": "vue",
                "autoFix": true
            }
        ]
    }
};
.editorconfig配置
# EditorConfig文件使用INI格式。斜杠(/)作为路径分隔符,#或者;作为注释。路径支持通配符:
# 表明是最顶层的配置文件,发现设为true时,才会停止查找.editorconfig文件
root = true

# * 匹配除/之外的任意字符
# **    匹配任意字符串
# ? 匹配任意单个字符
# [name]    匹配name字符
# [!name]   不匹配name字符
# [s1,s2,s3]    匹配给定的字符串
# [num1..num2]  匹配num1到mun2直接的整数
[*]
# 文件的charset。有以下几种类型:latin1, utf-8, utf-8-bom, utf-16be, utf-16le
charset = utf-8
# 缩进使用 tab 或者 space
indent_style = space
# 缩进为 space 时,缩进的字符数
indent_size = 4
# 换行符的类型。lf, cr, crlf三种
end_of_line = lf
# 是否将行尾空格自动删除
trim_trailing_whitespace = true
# 是否使文件以一个空白行结尾
insert_final_newline = true
.eslintignore配置
一般默认的,我们无需修改
build/*.js
config/*.js
node_modules/*.js
static/*/*.js
src/vendor/plugins/*.js
js修改
一般,我们需要编译时就校验而不是webpack打包时再校验,可以注释掉webpack.dev.conf.js中的此段js
const createLintingRule = () => (
    {
        // test: /.(js|vue)$/,
        // loader: 'eslint-loader',
        // enforce: 'pre',
        // include: [resolve('src'), resolve('test')],
        // options: {
        //   formatter: require('eslint-friendly-formatter'),
        //   emitWarning: !config.dev.showEslintErrorsInOverlay
        // }
    }
);
而我们如果需要禁用eslint只需要在config下的index.js中将useEslint: true,改为false即可!
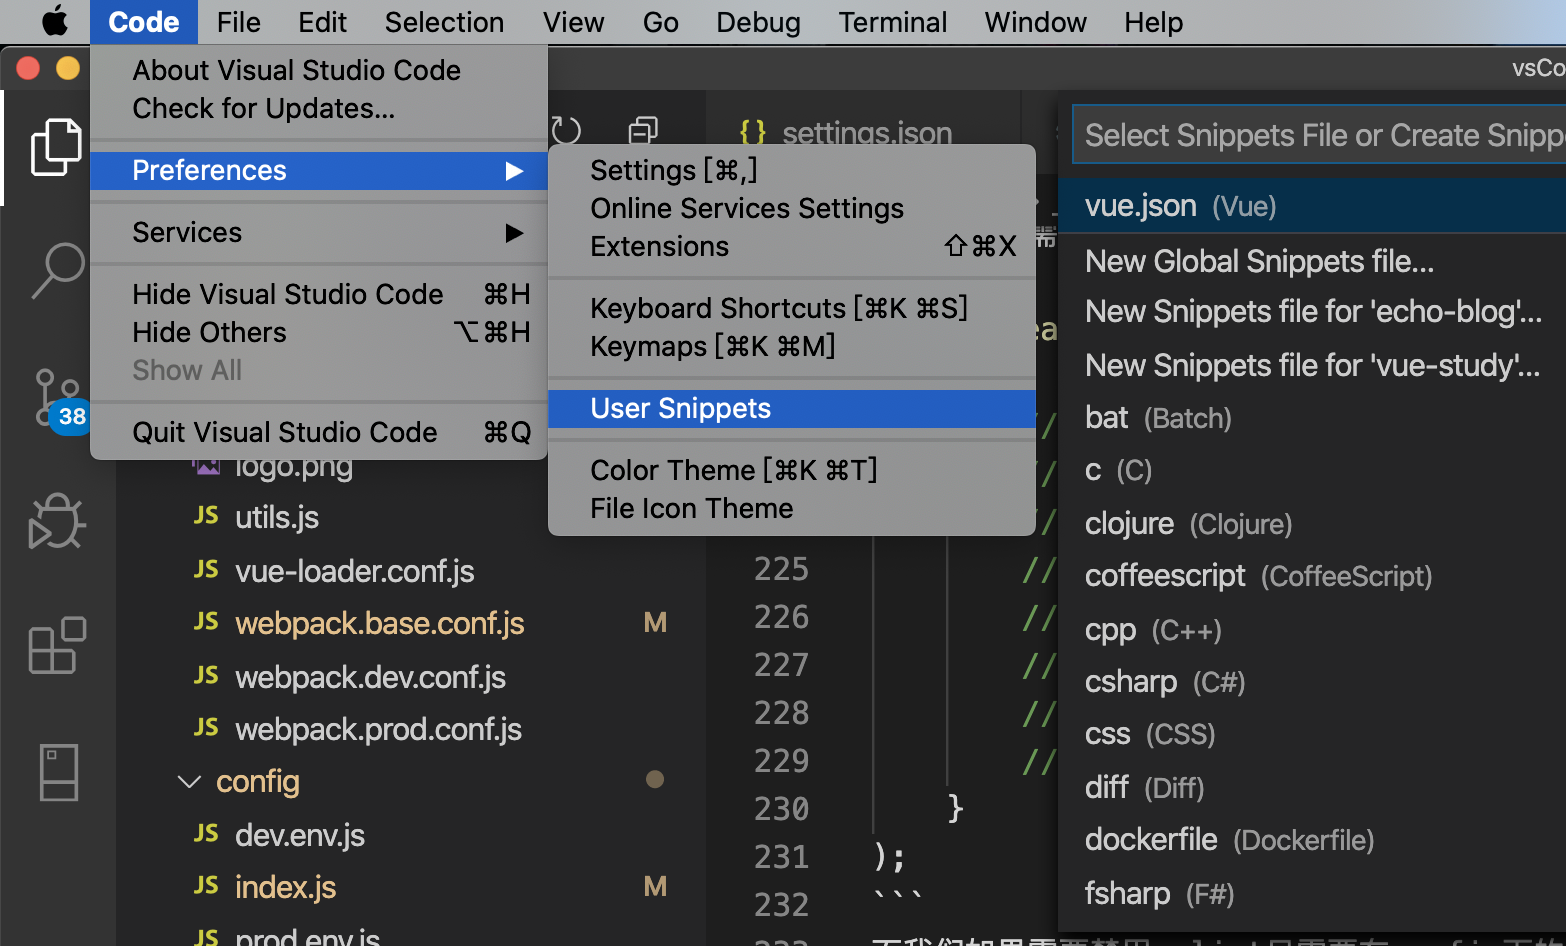
配置vue 模版
操作如下图:
{
    "Create vue template": {
        "prefix": "vue",
        "body": [
            "<template>",
            "  <div class="container">
",
            "  </div>",
            "</template>
",
            "<script>",
            "export default {",
            "  name: 'c',",
            "  data () {",
            "    return {
",
            "    }",
            "  },",
            "  props: {},",
            "  components: {},",
            "  watch: {},",
            "  computed: {},",
            "  created () {},",
            "  mounted () {},",
            "  methods: {}",
            "}",
            "</script>
",
            "<style scoped lang="scss">
",
            "</style>",
            "$2"
        ],
        "description": "Create vue template"
    }
}
那么我们只需要新建一个.vue类型的页面,然后输入vue就可以根据提示便生成了一个空的页面模版如下:
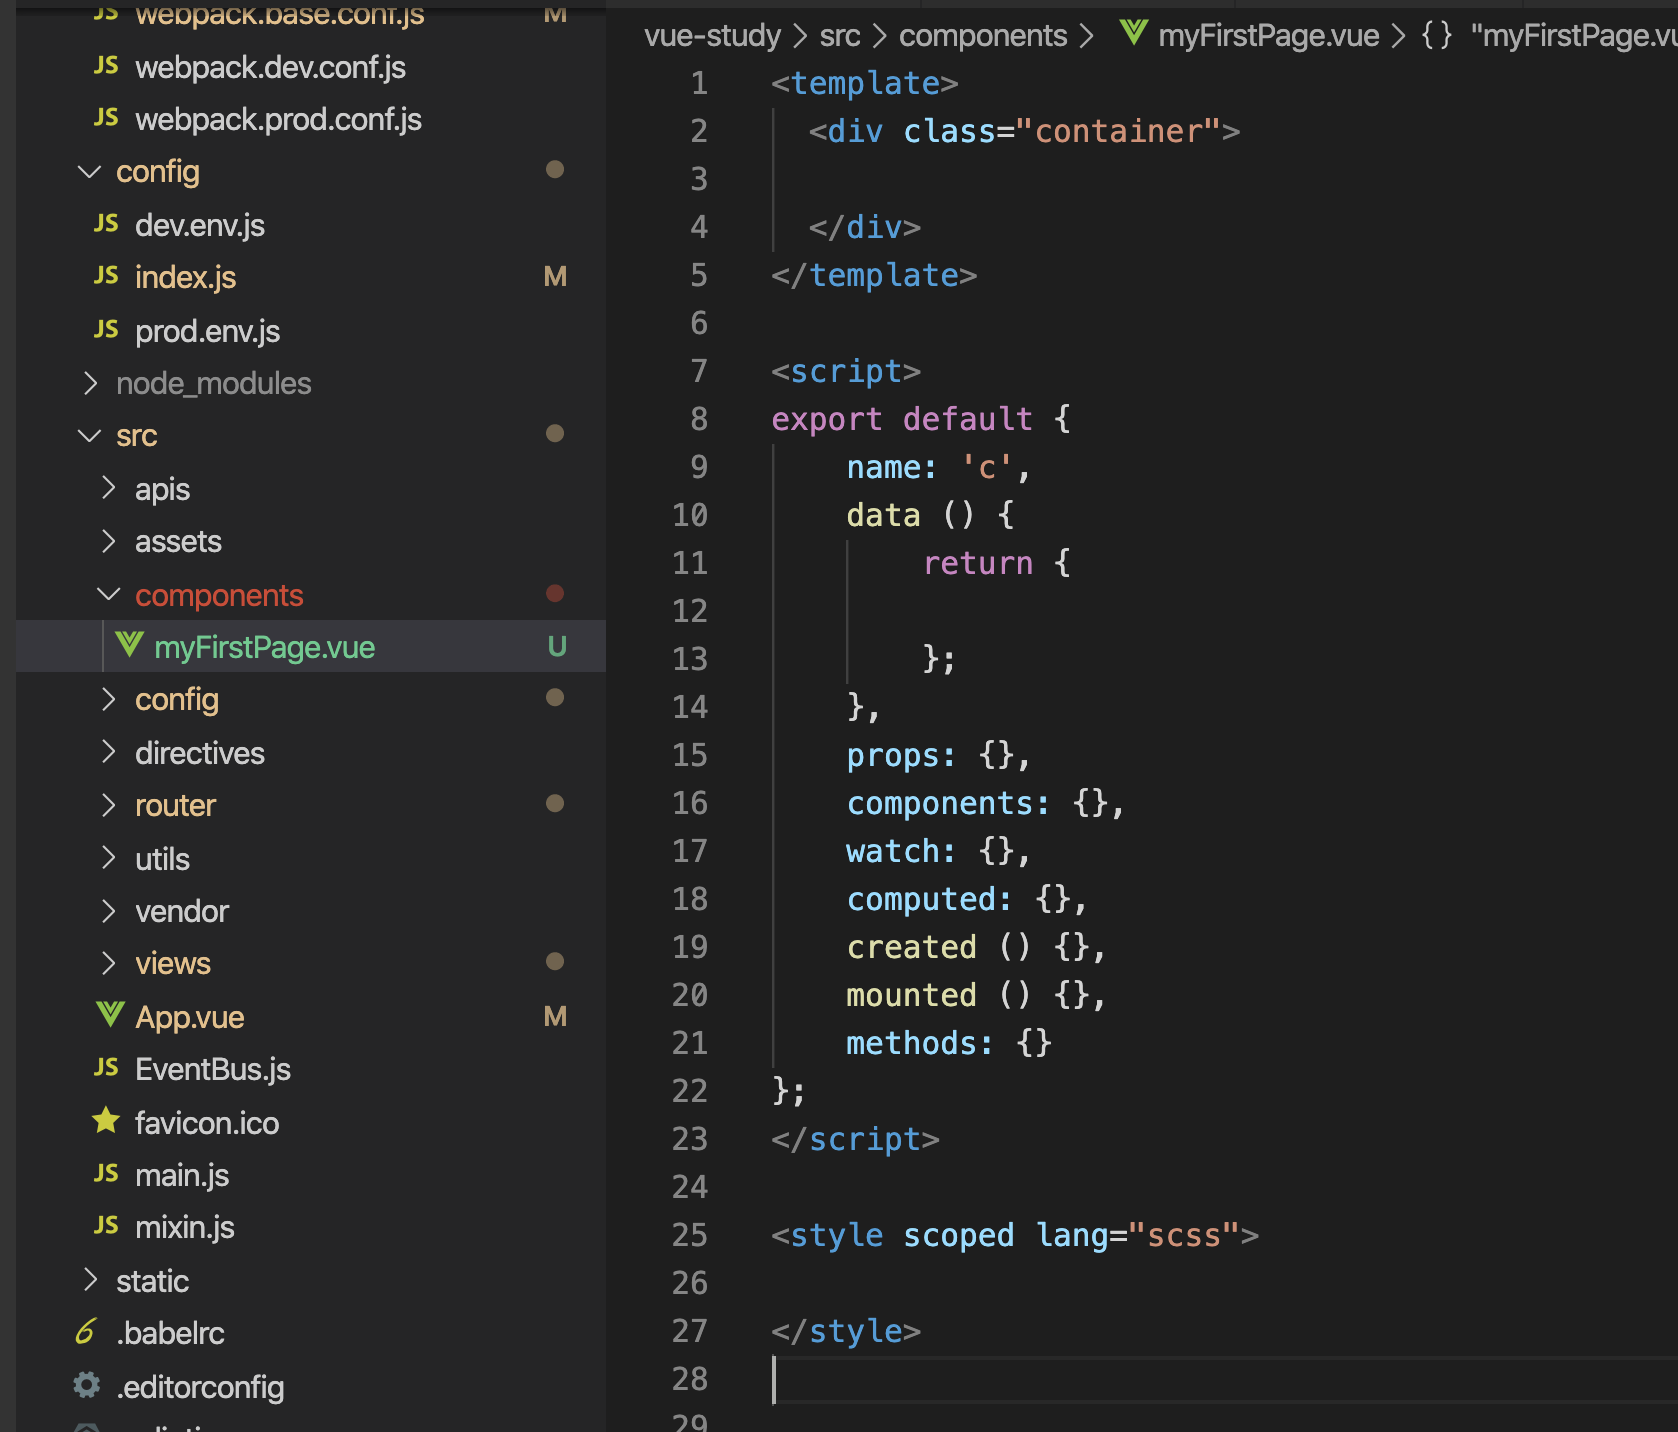
注:这里我们配置模版,尽量按vue的生命周期,从前向后配置!引入的组件和定义的数据还是放在script标签内的最上层,这样一进入页面整个数据层的结构便一目了然!
小结:工欲善其事,必先利其器!后面将继续总结es6语法,vue数据双向绑定,父子组件通信,函数异步调用,bus、store、路由等配置及用法。奥力给,前端代码也撸起来吧!