【RHEL8】—FTPserver;【Centos7】—FTPclient
!!!测试环境我们首关闭防火墙和selinux(FTPserver和FTPclient都需要)
[root@localhost ~]# systemctl stop firewalld
[root@localhost ~]# systemctl disable firewalld
[root@localhost ~]# sed -i 's/SELINUX=enforcing/SELINUX=disabled/g' /etc/selinux/config
[root@localhost ~]# reboot
一、部署FTP服务端
1、查看服务端IP信息
[root@FTPserver ~]# ip addr
1: lo: <LOOPBACK,UP,LOWER_UP> mtu 65536 qdisc noqueue state UNKNOWN group default qlen 1000
    link/loopback 00:00:00:00:00:00 brd 00:00:00:00:00:00
    inet 127.0.0.1/8 scope host lo
       valid_lft forever preferred_lft forever
    inet6 ::1/128 scope host
       valid_lft forever preferred_lft forever
2: eth0: <BROADCAST,MULTICAST,UP,LOWER_UP> mtu 1500 qdisc mq state UP group default qlen 1000
    link/ether 00:0c:29:fa:c0:f0 brd ff:ff:ff:ff:ff:ff
    inet 192.168.121.10/24 brd 192.168.121.255 scope global noprefixroute eth0
       valid_lft forever preferred_lft forever
    inet6 fe80::a101:bf00:d10e:9788/64 scope link noprefixroute
       valid_lft forever preferred_lft forever
2、安装vsftpd服务
 //首先查看是否安装vsftpd服务
[root@FTPserver ~]# rpm -qa | grep vsftpd

 //安装vsftpd服务
[root@FTPserver ~]# dnf install -y vsftpd
..........
Running transaction
  Preparing        :                                            1/1
  Installing       : vsftpd-3.0.3-28.el8.x86_64                 1/1
  Running scriptlet: vsftpd-3.0.3-28.el8.x86_64                 1/1
  Verifying        : vsftpd-3.0.3-28.el8.x86_64                 1/1
Installed products updated.
Installed:
  vsftpd-3.0.3-28.el8.x86_64
Complete!
3、启动vsftpd服务
[root@FTPserver ~]# systemctl start vsftpd
[root@FTPserver ~]# systemctl enable vsftpd
Created symlink /etc/systemd/system/multi-user.target.wants/vsftpd.service → /usr/lib/systemd/system/vsftpd.service.

 //查看服务的状态
[root@FTPserver ~]# systemctl status vsftpd
● vsftpd.service - Vsftpd ftp daemon
   Loaded: loaded (/usr/lib/systemd/system/vsftpd.service; enabled; vendor preset: disabled)
   Active: active (running) since Sat 2020-08-22 19:10:05 CST; 1min 29s ago
 Main PID: 14675 (vsftpd)
    Tasks: 1 (limit: 11340)
   Memory: 544.0K
   CGroup: /system.slice/vsftpd.service
           └─14675 /usr/sbin/vsftpd /etc/vsftpd/vsftpd.conf

Aug 22 19:10:05 FTPserver systemd[1]: Starting Vsftpd ftp daemon...
Aug 22 19:10:05 FTPserver systemd[1]: Started Vsftpd ftp daemon.
4、查看服务端口
[root@FTPserver ~]# ss -antlp
State           Recv-Q           Send-Q                      Local Address:Port                     Peer Address:Port
LISTEN          0                128                               0.0.0.0:22                            0.0.0.0:*              users:(("sshd",pid=1020,fd=4))
LISTEN          0                32                                      *:21                                  *:*              users:(("vsftpd",pid=14675,fd=3))
LISTEN          0                128                                  [::]:22                               [::]:*              users:(("sshd",pid=1020,fd=6))
5、创建可共享目录
[root@FTPserver ~]# cd /var/ftp/
[root@FTPserver ftp]# mkdir ftpdir
[root@FTPserver ftp]# chmod 777 ftpdir/
[root@FTPserver ftp]# ll
total 0
drwxrwxrwx 2 root root 19 Aug 22 20:17 ftpdir
drwxr-xr-x 2 root root  6 Aug 13  2018 pub
6、修改/etc/vsftpd/vsftpd.conf 配置文件
[root@FTPserver ~]# vim /etc/vsftpd/vsftpd.conf
...........
anonymous_enable=YES           //将NO改为YES,允许匿名用户访问
local_enable=YES               //允许本地用户登陆
write_enable=YES              //允许登陆用户有写权限
local_umask=022               //设置为本地用户上传文件的umask值为0022
anon_upload_enable=YES            //取消该句的注释(取消前面的#);允许匿名用户上传权限
anon_mkdir_write_enable=YES       //取消注释;允许匿名用户写入文件权限
anon_other_write_enable=YES        //添加这行;
xferlog_enable=YES
ftpd_banner=Welcome to blah FTP service.       //取消注释;连接成功提示信息
...............
7、重启vsftpd服务
[root@FTPserver ~]# systemctl restart vsftpd

 //查看一下服务端口
[root@FTPserver ~]# ss -antlp
State           Recv-Q           Send-Q                      Local Address:Port                     Peer Address:Port
LISTEN          0                128                               0.0.0.0:22                            0.0.0.0:*              users:(("sshd",pid=1020,fd=4))
LISTEN          0                32                                      *:21                                  *:*              users:(("vsftpd",pid=14779,fd=3))
LISTEN          0                128                                  [::]:22                               [::]:*              users:(("sshd",pid=1020,fd=6))
到这匿名访问的服务端的配置完成!
三、客户端的配置
1、测试客户端是否能与服务端互通
[root@FTPclient ~]# ping -c 3 192.168.121.10
PING 192.168.121.10 (192.168.121.10) 56(84) bytes of data.
64 bytes from 192.168.121.10: icmp_seq=1 ttl=64 time=0.658 ms
64 bytes from 192.168.121.10: icmp_seq=2 ttl=64 time=0.413 ms
64 bytes from 192.168.121.10: icmp_seq=3 ttl=64 time=0.382 ms

--- 192.168.121.10 ping statistics ---
3 packets transmitted, 3 received, 0% packet loss, time 2000ms
rtt min/avg/max/mdev = 0.382/0.484/0.658/0.124 ms
2、客户端安装ftp(客户端工具)
 //查看是否安装ftp客户端工具
[root@FTPclient ~]# rpm -qa | grep ftp

 //安装ftp客户端工具
[root@FTPclient ~]# yum install -y ftp
...........
Downloading packages:
Running transaction check
Running transaction test
Transaction test succeeded
Running transaction
  正在安装    : ftp-0.17-67.el7.x86_64                   1/1
  验证中      : ftp-0.17-67.el7.x86_64                   1/1
已安装:
  ftp.x86_64 0:0.17-67.el7
完毕!
3、客户端连接服务端
[root@FTPclient ~]# ftp 192.168.121.10
Connected to 192.168.121.10 (192.168.121.10).
220 Welcome to blah FTP service.
Name (192.168.121.10:root): ftp       //匿名用户输入ftp;密码都可为空
331 Please specify the password.
Password:       //直接回车(密码为空)
230 Login successful.
Remote system type is UNIX.
Using binary mode to transfer files.
ftp>
4、客户端上传共享目录文件
 //创建可上传的文件
[root@FTPclient ~]# echo "Im so cool" > /root/uptxt

 //匿名登陆,上穿文件
[root@FTPclient ~]# ftp 192.168.121.10
Connected to 192.168.121.10 (192.168.121.10).
220 Welcome to blah FTP service.
Name (192.168.121.10:root): ftp
331 Please specify the password.
Password:
230 Login successful.
Remote system type is UNIX.
Using binary mode to transfer files.
ftp> ls
227 Entering Passive Mode (192,168,121,10,185,130).
150 Here comes the directory listing.
drwxrwxrwx    2 0        0               6 Aug 22 12:16 ftpdir
drwxr-xr-x    2 0        0               6 Aug 12  2018 pub
226 Directory send OK.
ftp> put uptxt ftpdir/uptxt
local: uptxt remote: ftpdir/uptxt
227 Entering Passive Mode (192,168,121,10,134,199).
150 Ok to send data.
226 Transfer complete.
11 bytes sent in 0.000135 secs (81.48 Kbytes/sec)
ftp>
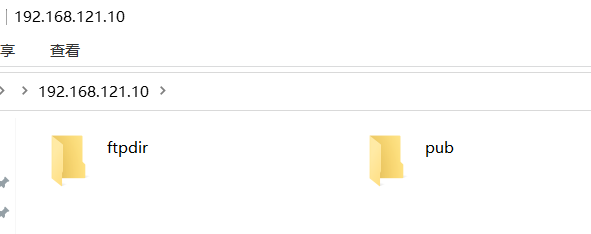
四、windows资源管理器访问ftp服务器