Button 组件
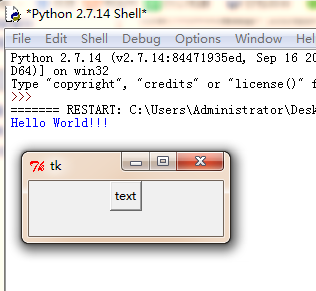
一个简单的Button按钮,代码:
 1 #!/usr/bin/python
 2 # -*- coding:utf-8 -*-
 3
 4 from Tkinter import *
 5 root = Tk()
 6 def print_hello():
 7     print 'Hello World!!!'
 8
 9 Button(root, text = 'text', command = print_hello ).pack()
10
11
12 root.mainloop()
运行结果:
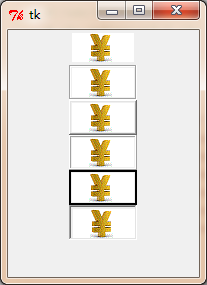
2. Button 的 relief 属性
relief 用于显示Button的不同显示效果
relief属性包括:flat , groove, raised, ridge,solid, sunken .显示效果如图

#!/usr/bin/python
# -*- coding:utf-8 -*-

from Tkinter import *
root = Tk()
def print_hello():
    print 'Hello world'
Button(root, text = 'text1', command = print_hello, relief = FLAT ).pack()
Button(root, text = 'text2', command = print_hello, relief = GROOVE).pack()
Button(root, text = 'text3', command = print_hello, relief = RAISED ).pack()
Button(root, text = 'text4', command = print_hello, relief = RIDGE ).pack()
Button(root, text = 'text5', command = print_hello, relief = SOLID ).pack()
Button(root, text = 'text6', command = print_hello, relief = SUNKEN ).pack()

root.mainloop()
3. Button 同样可以使用Image 插入图片:
 1 #!/usr/bin/python
 2 # -*- coding:utf-8 -*-
 3
 4 from Tkinter import *
 5 root = Tk()
 6 def print_hello():
 7     print 'Hello world'
 8
 9 photo = PhotoImage(file = 'C:\Users\Administrator\Desktop\timg.gif')
10 Button(root, text = 'text1', command = print_hello, image = photo, relief = FLAT ).pack()
11 Button(root, text = 'text2', command = print_hello, image = photo, relief = GROOVE).pack()
12 Button(root, text = 'text3', command = print_hello, image = photo, relief = RAISED ).pack()
13 Button(root, text = 'text4', command = print_hello, image = photo, relief = RIDGE ).pack()
14 Button(root, text = 'text5', command = print_hello, image = photo, relief = SOLID ).pack()
15 Button(root, text = 'text6', command = print_hello, image = photo, relief = SUNKEN ).pack()
16
17 root.mainloop()
4. Button 使用 image 也可以配合 compound 使用

 1 #!/usr/bin/python
 2 # -*- coding:utf-8 -*-
 3
 4 from Tkinter import *
 5 root = Tk()
 6 def print_hello():
 7     print 'Hello world'
 8
 9 photo = PhotoImage(file = 'C:\Users\Administrator\Desktop\timg.gif')
10 Button(root, text = 'text1', command = print_hello, image = photo, compound = 'center', relief = FLAT ).pack()
11 Button(root, text = 'text2', command = print_hello, image = photo, compound = 'top', relief = GROOVE).pack()
12 Button(root, text = 'text3', command = print_hello, image = photo, compound = 'bottom', relief = RAISED ).pack()
13 Button(root, text = 'text4', command = print_hello, image = photo, compound = 'left', relief = RIDGE ).pack()
14 Button(root, text = 'text5', command = print_hello, image = photo, compound = 'right', relief = SOLID ).pack()
15 Button(root, text = 'text6', command = print_hello, image = photo, relief = SUNKEN ).pack()
16
17 root.mainloop()
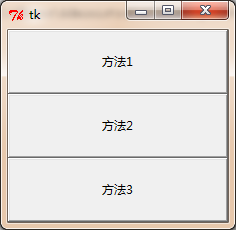
5. 设置Button 的长度与高度
width 宽度
height 高度
共有三种方法 :
1.创建Button对象时,指定宽度与高度
2.使用属性width和height来指定宽度与高度
3.使用configure方法来指定宽度与高度
 1 #!/usr/bin/python
 2 # -*- coding:utf-8 -*-
 3
 4 from  Tkinter import *
 5 root =Tk()
 6 b1 = Button(root, text = '方法1', width = 30, height = 3).pack()
 7
 8 b2 = Button(root, text = '方法2')
 9 b2['width'] = 30
10 b2['height'] = 3
11 b2.pack()
12
13 b3 = Button(root,text = '方法3')
14 b3.configure(width = 30, height = 3)
15 b3.pack()
16
17
18
19 root.mainloop()
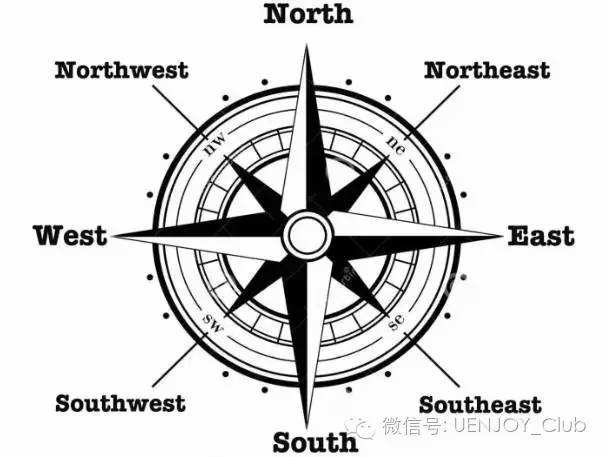
6. anchor 设置文本在控件上面的位置
使用的值为:n(north),s(south),w(west),e(east)和ne,nw,se,sw,就是地图上的标识位置了
实例代码 :
 1 #!/usr/bin/python
 2 # -*- coding:utf-8 -*-
 3
 4 from Tkinter import *
 5 root = Tk()
 6
 7 for a in ['n','w','e','s','ne','nw','se','sw']:
 8     Button(root,text = 'anchor',
 9            anchor = a,
10            width = 30,
11            height = 3).pack()
12
13
14
15 root.mainloop()

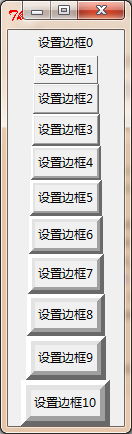
7. 设置按钮边框 用bd属性
bd值为 0 -10的时候 各边框图示:
 1 #!/usr/bin/python
 2 # -*- coding:utf-8 -*-
 3
 4 from Tkinter import *
 5 root = Tk()
 6 def print_hello():
 7     print 'Hello world'
 8 for a in range(11):
 9     Button(root,text = '设置边框%s' %a , command = print_hello ,bd = a).pack()
10
11
12 root.mainloop()
效果如图:
8 设置 按钮状态 state
有 3 个值
normal/active/disabled

 1 #!/usr/bin/python
 2 # -*- coding:utf-8 -*-
 3
 4 from Tkinter import *
 5 root = Tk()
 6 def print_hello():
 7     print 'Hello world'
 8 for a in ['normal', 'active', 'disabled']:
 9
10     Button(root,text = '设置状态%s'%a ,command = print_hello , state = a ).pack()
11
12
13 root.mainloop()