之前环境安装已经介绍过了,下面直接跑个Demo。
1、添加Maven依赖
<dependency>
<groupId>org.springframework.amqp</groupId>
<artifactId>spring-rabbit</artifactId>
<version>1.4.6.RELEASE</version>
</dependency>
<dependency>
<groupId>com.rabbitmq</groupId>
<artifactId>amqp-client</artifactId>
<version>2.2.0</version>
</dependency>
2、发送类:
 package com.jimmy.demo.test;

import java.io.IOException;
import com.rabbitmq.client.Channel;
import com.rabbitmq.client.Connection;
import com.rabbitmq.client.ConnectionFactory;
public class Send {
    private final static String QUEUE_NAME = "hello";

    public static void main(String[] args) throws IOException {
        ConnectionFactory factory = new ConnectionFactory();
        factory.setHost("localhost");
        Connection connection = factory.newConnection();
        Channel channel = connection.createChannel();

        channel.queueDeclare(QUEUE_NAME, false, false, false, null);
        String message = "Hello World!";
        channel.basicPublish("", QUEUE_NAME, null, message.getBytes());
        System.out.println(" [x] Sent '" + message + "'");

        channel.close();
        connection.close();
    }
}
接收类:
package com.jimmy.demo.test;
import com.rabbitmq.client.Channel;
import com.rabbitmq.client.Connection;
import com.rabbitmq.client.ConnectionFactory;
import com.rabbitmq.client.QueueingConsumer;

public class Reqv {
    private final static String QUEUE_NAME = "hello";

    public static void main(String[] argv) throws Exception {

        ConnectionFactory factory = new ConnectionFactory();
        factory.setHost("localhost");
        Connection connection = factory.newConnection();
        Channel channel = connection.createChannel();

        channel.queueDeclare(QUEUE_NAME, false, false, false, null);
        System.out.println(" [*] Waiting for messages. To exit press CTRL+C");

        QueueingConsumer consumer = new QueueingConsumer(channel);
        channel.basicConsume(QUEUE_NAME, true, consumer);

        while (true) {
            QueueingConsumer.Delivery delivery = consumer.nextDelivery();
            String message = new String(delivery.getBody());
            System.out.println(" [x] Received '" + message + "'");
        }
    }
}
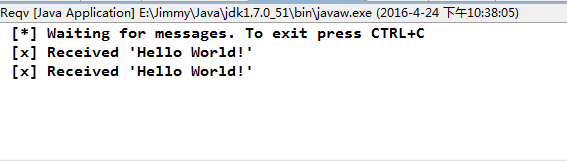
测试先运行Reqv,再运行Send两次,看到如下消费者能够接受到2条消息了
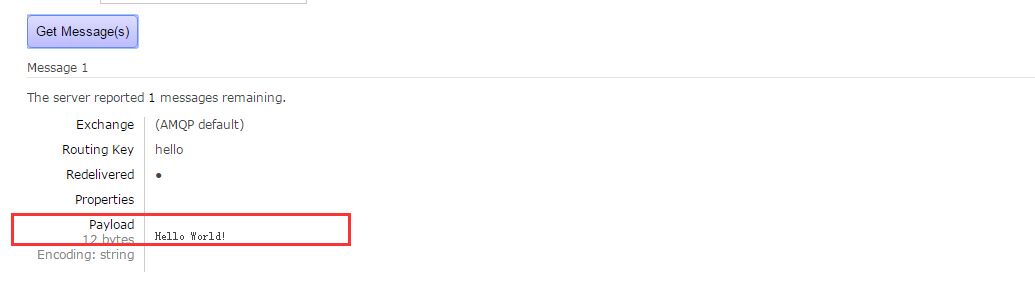
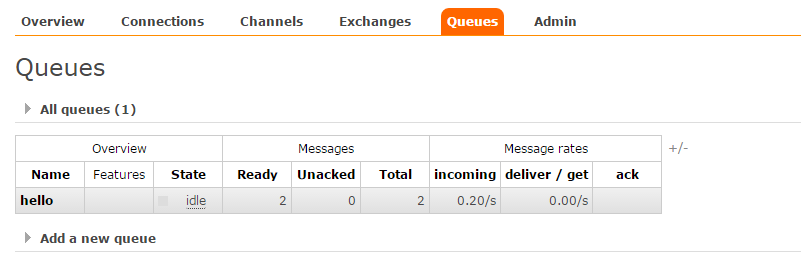
这次我们关掉Receive,再次运行Send,然后点击管理网页上的Queue。
点击hello进去,并点击Get Message,可以看到Hello World消息的确已经传送到RabbitMQ的服务器端了