vue中使用 $emit(eventName) 触发事件,使用 $on(eventName) 监听事件
$emit(eventName) 触发当前实例上的事件,附加参数都会传给监听器回调。
$on(eventName) 监听当前实例上的自定义事件。事件可以由 vm.$emit 触发。回调函数会接收所有传入事件触发函数的额外参数。
下面通过几个实例来演示一下怎么使用
实例1 本页面单个事件
<template>
<section>
<h1>left</h1>
<el-button type="primary" @click="isClick">点击</el-button>
</section>
</template>
<script>
export default {
methods: {
isClick() {
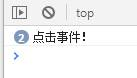
this.$emit('isLeft', '点击事件!');
}
},
mounted() {
this.$on('isLeft', (val) => {
console.log(val);
});
}
}
</script>
以上代码,是通过按钮的点击事件,然后this.$emit传递事件,然后this.$on捕获本页面的事件
实例2 本页面多个事件
<template>
  <section>
    <h1>left</h1>
    <el-button type="primary" @click="isClick">点击</el-button>
    <el-button type="primary" @click="isClickOther">点击</el-button>
  </section>
</template>

<script>
  export default {
    methods: {
      isClick() {
        this.$emit('isLeft', '点击事件!');
      },
      isClickOther() {
        this.$emit('isRight', ['点击1', '点击2']);
      }
    },
    mounted() {
      this.$on('isLeft', (val) => {
        console.log(val);
      });
      this.$on('isRight', (...val) => {
        console.log(val);
      });
      this.$on(['isLeft', 'isRight'], () => {
        console.log(666);
      });
    }
  }
</script>
以上例子,是本页面的两个点击事件,可以同时监听两个事件,也可以同时传多个参数
实例3 非父子组件传值(通过bus传值)
子组件1
<template>
  <section>
    <h1>left</h1>
    <el-button type="primary" @click="isClick">点击</el-button>
  </section>
</template>

<script>
  import eventBus from '~/utils/eventBus';
  export default {
    methods: {
      isClick() {
        eventBus.$emit('isLeft', '点击事件!');
      }
    }
  }
</script>
子组件2
<template>
  <section>
    <h1>right</h1>
    {{ name }}
  </section>
</template>

<script>
  import eventBus from '~/utils/eventBus';
  export default {
    data() {
      return {
        name: 'right默认值'
      };
    },
    mounted() {
      eventBus.$on('isLeft', (info) => {
        this.name = info ;
      });
    }
  }
</script>
父组件
<template>
  <section>
    <el-row>
      <el-col :span="12">
        <left/>
      </el-col>
      <el-col :span="12">
        <right />
      </el-col>
    </el-row>
  </section>
</template>

<script>
  import left from '~/components/left'
  import right from '~/components/right'
  export default {
    components: {
      left,
      right
    }
  }
</script>
以上例子就是 left组件传值给bus,然后right组件监听bus的isLest事件,当left组件触发事件的时候,right组件就会触发方法,替换页面的值
总结
1.使用$emit传递事件
2.使用$on监听事件
3.可以本页面使用,也可以父子组件使用,也可以非关联组件使用
嗯,就酱~~