一、导入导出数据库数据
导出现有数据库数据:
- mysqldump -u用户名 -p密码 数据库名称 >导出文件路径 # 结构+数据
- mysqldump -u用户名 -p密码 -d 数据库名称 >导出文件路径 # 结构
导入现有数据库数据:
- mysqldump -uroot -p密码 数据库名称 < 文件路径
二、习题经验
1. avg 获取平均值
2. 连表方式 直接连表、left join 、通过临时表连表


 1 select student_id,avg(num) from score group by student_id HAVING avg(num)>60
 2
 3 SELECT score.student_id,student.sname,AVG(num) from score
 4 left join student on score.student_id = student.sid
 5 GROUP BY student_id
 6 select * from score,student where score.student_id = student.sid GROUP BY score.student_id
 7
 8 SELECT
 9     T.student_id,
10     T.a,
11     student.sname
12 FROM
13     (
14         SELECT
15             student_id,
16             avg(num) AS a
17         FROM
18             score
19         GROUP BY
20             student_id
21         HAVING
22             avg(num) > 60
23     ) AS T
24 LEFT JOIN student ON T.student_id = student.sid
3. 计算一列的行数 count(1)
4. distinct 列名 ——用来去重的,自动把重复的去掉。不光有 group by 。
5. 关于存在的问题 可以用 in 、not in 来解决。
6. case when .... then ... else... end 相当于 if .... else。
7. 使用通配符时候 要用 like 进行匹配 例如: select * from .... where xxx like '张%' ;
8. 统计某个数目时,可以考虑分组后进行 count 计数。
9. 可以直接 left join 多张表 例如: select * from xxx left join xxx on aa=bb left join ....
10. 按照某种顺序排序 例如:order by xxx ASC/DESC
三、Python 操作 Mysql
3.1 pip 模块
pip3 install pymysql
python2 默认无 pip 命令
python3 默认自带 pip 命令 python3 -m pip install --upgrade pip 升级 pip
3.2 pymysql
专门用来操作 Mysql 的 python 模块,MySQLdb 不支持 py3
使用操作:
 1 #!/usr/bin/env python
 2 # -*- coding:utf-8 -*-
 3 import pymysql
 4
 5 # 创建连接
 6 conn = pymysql.connect(host='127.0.0.1', port=3306, user='root', passwd='123', db='t1')
 7 # 创建游标
 8 cursor = conn.cursor()
 9
10 # 执行SQL,并返回收影响行数
11 effect_row = cursor.execute("update hosts set host = '1.1.1.2'")
12
13 # 执行SQL,并返回受影响行数
14 #effect_row = cursor.execute("update hosts set host = '1.1.1.2' where nid > %s", (1,))
15
16 # 执行SQL,并返回受影响行数
17 #effect_row = cursor.executemany("insert into hosts(host,color_id)values(%s,%s)", [("1.1.1.11",1),("1.1.1.11",2)])
18
19
20 # 提交,不然无法保存新建或者修改的数据
21 conn.commit()
22
23 # 关闭游标
24 cursor.close()
25 # 关闭连接
26 conn.close()
3.3 pymysql 之增删改查
实例1:使用 pymysql 添加一行数据
 1 #author:"LFD"
 2 #date: 2018/7/7
 3 # !/usr/bin/env python
 4 # -*- coding:utf-8 -*-
 5 import pymysql
 6
 7 # 创建连接
 8 conn = pymysql.connect(host='127.0.0.1', port=3306, user='root', passwd='123', db='sqlexample',charset='utf8')
 9 # 创建游标
10 cursor = conn.cursor()
11
12 # SQL 语句
13
14 cursor.execute('insert into class(caption) VALUES ("全栈二班")')
15
16 # 提交,不然无法保存新建或者修改的数据
17 conn.commit()
18 # 关闭游标
19 cursor.close()
20 # 关闭连接
21 conn.close()
实例2:使用 pymysql 完成字符串拼接 SQL 语句 禁止操作,不要用这种操作。容易导致 SQL 注入。
 1 import pymysql
 2
 3 # 创建连接
 4 conn = pymysql.connect(host='127.0.0.1', port=3306, user='root', passwd='123', db='sqlexample',charset='utf8')
 5 # 创建游标
 6 cursor = conn.cursor()
 7
 8 # SQL 语句
 9 inp = input('请输入班级:')
10 sql = 'insert into class(caption) VALUES ("%s")'
11 sql = sql %(inp,)
12 r = cursor.execute(sql)
13 print(r)    # 执行 SQL 受影响的行数
14
15 # 提交,不然无法保存新建或者修改的数据
16 conn.commit()
17 # 关闭游标
18 cursor.close()
19 # 关闭连接
20 conn.close()
实例3:使用 insert 语句传递单组数据的 SQL 语句 首选,最好使用这种方式。
 1 import pymysql
 2
 3 # 创建连接
 4 conn = pymysql.connect(host='127.0.0.1', port=3306, user='root', passwd='123', db='sqlexample',charset='utf8')
 5 # 创建游标
 6 cursor = conn.cursor()
 7
 8 # SQL 语句
 9 inp = input('请输入班级:')
10 r = cursor.execute('insert into class(caption) VALUES (%s)',inp)
11 print(r)    # 执行 SQL 受影响的行数
12
13 # 提交,不然无法保存新建或者修改的数据
14 conn.commit()
15 # 关闭游标
16 cursor.close()
17 # 关闭连接
18 conn.close()
实例4:使用 insert 语句传进去多个数据,注意元组的使用。
 1 import pymysql
 2
 3 # 创建连接
 4 conn = pymysql.connect(host='127.0.0.1', port=3306, user='root', passwd='123', db='sqlexample',charset='utf8')
 5 # 创建游标
 6 cursor = conn.cursor()
 7
 8 # SQL 语句
 9 # inp = input('请输入学生信息:')
10 r = cursor.execute('insert into student(gender,class_id,sname) VALUES (%s,%s,%s)',('男',7,'刘飞铎'))
11 print(r)    # 执行 SQL 受影响的行数
12
13 # 提交,不然无法保存新建或者修改的数据
14 conn.commit()
15 # 关闭游标
16 cursor.close()
17 # 关闭连接
18 conn.close()
实例5:使用 insert 语句传进去多个多组数据。excutemany('insert into .......',L) L 是可迭代变量。
 1 import pymysql
 2
 3 # 创建连接
 4 conn = pymysql.connect(host='127.0.0.1', port=3306, user='root', passwd='123', db='sqlexample',charset='utf8')
 5 # 创建游标
 6 cursor = conn.cursor()
 7
 8 # SQL 语句
 9 # inp = input('请输入学生信息:')
10 l = (
11 ('男',7,'刘飞铎'),
12 ('女',7,'高小连'),
13 ('女',7,'高玉芬'),
14 )
15 r = cursor.executemany('insert into student(gender,class_id,sname) VALUES (%s,%s,%s)',l)
16 print(r)    # 执行 SQL 受影响的行数
17
18 # 提交,不然无法保存新建或者修改的数据
19 conn.commit()
20 # 关闭游标
21 cursor.close()
22 # 关闭连接
23 conn.close()
实例6:使用 update 更新数据
 1 import pymysql
 2
 3 # 创建连接
 4 conn = pymysql.connect(host='127.0.0.1', port=3306, user='root', passwd='123', db='sqlexample',charset='utf8')
 5 # 创建游标
 6 cursor = conn.cursor()
 7
 8 # SQL 语句
 9 # inp = input('请输入学生信息:')
10 r = cursor.execute('update student set sname=%s where sid =%s',('小可爱',1))
11 print(r)    # 执行 SQL 受影响的行数
12
13 # 提交,不然无法保存新建或者修改的数据
14 conn.commit()
15 # 关闭游标
16 cursor.close()
17 # 关闭连接
18 conn.close()
实例7:查询,使用查询的时候不需要使用 commit()
常用的方法:fetchall,fetchone。
 1 import pymysql
 2
 3 # 创建连接
 4 conn = pymysql.connect(host='127.0.0.1', port=3306, user='root', passwd='123', db='sqlexample',charset='utf8')
 5 # 创建游标
 6 cursor = conn.cursor()
 7
 8 # SQL 语句
 9 # inp = input('请输入学生信息:')
10
11 r = cursor.execute('select * from student')
12 print(r)    # 执行 SQL 受影响的行数
13 result = cursor.fetchmany(3) # 拿出数据使用的命令
14 print(result,end='
')
15
16 # 提交,不然无法保存新建或者修改的数据
17 #conn.commit()
18 # 关闭游标
19 cursor.close()
20 # 关闭连接
21 conn.close()
3.4 fetch 数据类型
关于默认获取的数据是元祖类型,如果想要或者字典类型的数据,即:
 1 #!/usr/bin/env python
 2 # -*- coding:utf-8 -*-
 3 import pymysql
 4
 5 conn = pymysql.connect(host='127.0.0.1', port=3306, user='root', passwd='123', db='t1')
 6
 7 # 游标设置为字典类型
 8 cursor = conn.cursor(cursor=pymysql.cursors.DictCursor)
 9 r = cursor.execute("call p1()")
10
11 result = cursor.fetchone()
12
13 conn.commit()
14 cursor.close()
15 conn.close()
3.5 获取自增 id cursor.lastrowid
 1 #!/usr/bin/env python
 2 # -*- coding:utf-8 -*-
 3 import pymysql
 4
 5 conn = pymysql.connect(host='127.0.0.1', port=3306, user='root', passwd='123', db='t1')
 6 cursor = conn.cursor()
 7 cursor.executemany("insert into hosts(host,color_id)values(%s,%s)", [("1.1.1.11",1),("1.1.1.11",2)])
 8 conn.commit()
 9 cursor.close()
10 conn.close()
11
12 # 获取最新自增ID
13 new_id = cursor.lastrowid
14 print(new_id)
注意:如果插入多条数据的话,那么拿到的数据将是最后一条数据的 nid
四、实战操作
4.1 动态导入模块
1 module = 'src.commons'
2 func_name = 'add'
3
4 import importlib    # 动态导入模块
5
6 m = importlib.import_module(module)
7 #print(m)    #<module 'src.commons' from 'D:\Python\newwork\2018\7\test1\src\commons.py'>
8 func = getattr(m,func_name)
9 func()
4.2 写配置文件
数据库连接写入配置文件: 用户名 密码 数据库 端口 编码
4.3 数据库中的每一张表在 Python 程序中要创建一个类(小项目的时候,表不多)
例如:
 1 class UserInfoRepository:
 2     def get_all(self):
 3         sql = 'select * from userinfo'
 4         return fetchall()
 5
 6     def get_one_by_user_pwd(self,username,password):
 7         sql = "select * from userinfo where username = %s and password = %s"
 8         cursor.excute(sql,username,password)
 9         return cursor.fetchone()
10
11     def add(self):
12         sql = "insert into userinfo(....) VALUES(....)"
13         conn.commit()
统一对这张表进行操作的都放在该类当中,有几张表有几个类。
连表操作时秉承一个原则:LEFT JOIN 谁在前面,就放在哪张表中。
五、进阶 MySQL
5.1 视图
概念:视图是一个虚拟表(非真实存在),其本质是【根据SQL语句获取动态的数据集,并为其命名】,用户使用时只需使用【名
称】即可获取结果集,并可以将其当作表来使用。
5.1.1 创建视图
1 --格式:CREATE VIEW 视图名称 AS  SQL语句
2 CREATE VIEW v1 AS
3 SELET nid,
4     name
5 FROM
6     A
7 WHERE
8     nid > 4
5.1.2 删除视图
1 --格式:DROP VIEW 视图名称
2
3 DROP VIEW v1
5.1.3 修改视图
 1 -- 格式:ALTER VIEW 视图名称 AS SQL语句
 2
 3 ALTER VIEW v1 AS
 4 SELET A.nid,
 5     B. NAME
 6 FROM
 7     A
 8 LEFT JOIN B ON A.id = B.nid
 9 LEFT JOIN C ON A.id = C.nid
10 WHERE
11     A.id > 2
12 AND C.nid < 5
5.1.4 使用视图
1 select * from v1
视图是一个虚拟表,对主表的修改会影响到视图表。
六、存储过程
存储过程是一个SQL语句集合,当主动去调用存储过程时,其中内部的SQL语句会按照逻辑执行。存储过程 存储在 MySQL 的服务端。
6.1 创建存储过程
 1 -- 创建存储过程
 2
 3 delimiter //
 4 create procedure p1()
 5 BEGIN
 6     select * from t1;
 7 END//
 8 delimiter ;
 9
10
11
12 -- 执行存储过程
13
14 call p1()
delimiter // 就修改了 mysql 的终止符为 // ,写完一条语句之后不再是 ; 终止,而是 // 对语句进行终止了。
6.2 删除存储过程
DROP TRIGGER tri_after_insert_tb1;
6.3 存储过程添加参数
对于存储过程,可以接收参数,其参数有三类:
-
- in 仅用于传入参数用
- out 仅用于返回值用
- inout 既可以传入又可以当作返回值
创建含有参数的存储过程
 1 -- 创建存储过程
 2 delimiter \
 3 create procedure p1(
 4     in i1 int,
 5     in i2 int,
 6     inout i3 int,
 7     out r1 int
 8 )
 9 BEGIN
10     DECLARE temp1 int;
11     DECLARE temp2 int default 0;
12
13     set temp1 = 1;
14
15     set r1 = i1 + i2 + temp1 + temp2;
16
17     set i3 = i3 + 100;
18
19 end\
20 delimiter ;
21
22 -- 执行存储过程
23 set @t1 =4;
24 set @t2 = 0;
25 CALL p1 (1, 2 ,@t1, @t2);
26 SELECT @t1,@t2;
存储过程可以添加参数,可以拿到返回值。
6.4 执行存储过程
6.4.1 通过 MySQL 终端运行
 1 -- 无参数
 2 call proc_name()
 3
 4 -- 有参数,全in
 5 call proc_name(1,2)
 6
 7 -- 有参数,有in,out,inout
 8 set @t1=0;
 9 set @t2=3;
10 call proc_name(1,2,@t1,@t2)
6.4.2 通过 PyMySQL 运行
 1 #!/usr/bin/env python
 2 # -*- coding:utf-8 -*-
 3 import pymysql
 4
 5 conn = pymysql.connect(host='127.0.0.1', port=3306, user='root', passwd='123', db='t1')
 6 cursor = conn.cursor(cursor=pymysql.cursors.DictCursor)
 7 # 执行存储过程
 8 cursor.callproc('p1', args=(1, 22, 3, 4))
 9 # 获取执行完存储的参数
10 cursor.execute("select @_p1_0,@_p1_1,@_p1_2,@_p1_3")
11 result = cursor.fetchall()
12
13 conn.commit()
14 cursor.close()
15 conn.close()
16
17
18 print(result)
6.5 存储过程的实例
在 pymysql 中操作。
 1 #author:"LFD"
 2 #date: 2018/7/16
 3 import pymysql
 4
 5 conn = pymysql.connect(host='127.0.0.1', port=3306, user='root', passwd='123', db='sqlexample')
 6 cursor = conn.cursor(cursor=pymysql.cursors.DictCursor)
 7 # 执行存储过程,获取存储过程的结果集,将返回值设置给了 @_存储过程名_序号 =
 8 cursor.callproc('p5', args=(1, 22, 3, 4))
 9 result1 = cursor.fetchall()
10 print(result1)
11 # 获取执行完存储的参数
12 cursor.execute("select @_p5_0,@_p5_1,@_p5_2,@_p5_3")
13 result2 = cursor.fetchall()
14
15 conn.commit()   #保险起见,加了一个 commit 以便于有其他的操作。
16 cursor.close()
17 conn.close()
18
19
20 print(result2)
6.6 存储过程中的 if .. else ..
 1 delimiter \
 2 CREATE PROCEDURE proc_if ()
 3 BEGIN
 4
 5     declare i int default 0;
 6     if i = 1 THEN
 7         SELECT 1;
 8     ELSEIF i = 2 THEN
 9         SELECT 2;
10     ELSE
11         SELECT 7;
12     END IF;
13
14 END\
15 delimiter ;
6.7 存储过程中循环语句
 1 delimiter \
 2 CREATE PROCEDURE proc_while ()
 3 BEGIN
 4
 5     DECLARE num INT ;
 6     SET num = 0 ;
 7     WHILE num < 10 DO
 8         SELECT
 9             num ;
10         SET num = num + 1 ;
11     END WHILE ;
12
13 END\
14 delimiter ;
 1 delimiter \
 2 CREATE PROCEDURE proc_repeat ()
 3 BEGIN
 4
 5     DECLARE i INT ;
 6     SET i = 0 ;
 7     repeat
 8         select i;
 9         set i = i + 1;
10         until i >= 5
11     end repeat;
12
13 END\
14 delimiter ;
 1 BEGIN
 2
 3     declare i int default 0;
 4     loop_label: loop
 5
 6         set i=i+1;
 7         if i<8 then
 8             iterate loop_label;
 9         end if;
10         if i>=10 then
11             leave loop_label;
12         end if;
13         select i;
14     end loop loop_label;
15
16 END
6.8 动态执行 SQL 语句
 1 delimiter \
 2 DROP PROCEDURE IF EXISTS proc_sql \
 3 CREATE PROCEDURE proc_sql ()
 4 BEGIN
 5     declare p1 int;
 6     set p1 = 11;
 7     set @p1 = p1;
 8
 9     PREPARE prod FROM 'select * from tb2 where nid > ?';
10     EXECUTE prod USING @p1;
11     DEALLOCATE prepare prod;
12
13 END\
14 delimiter ;
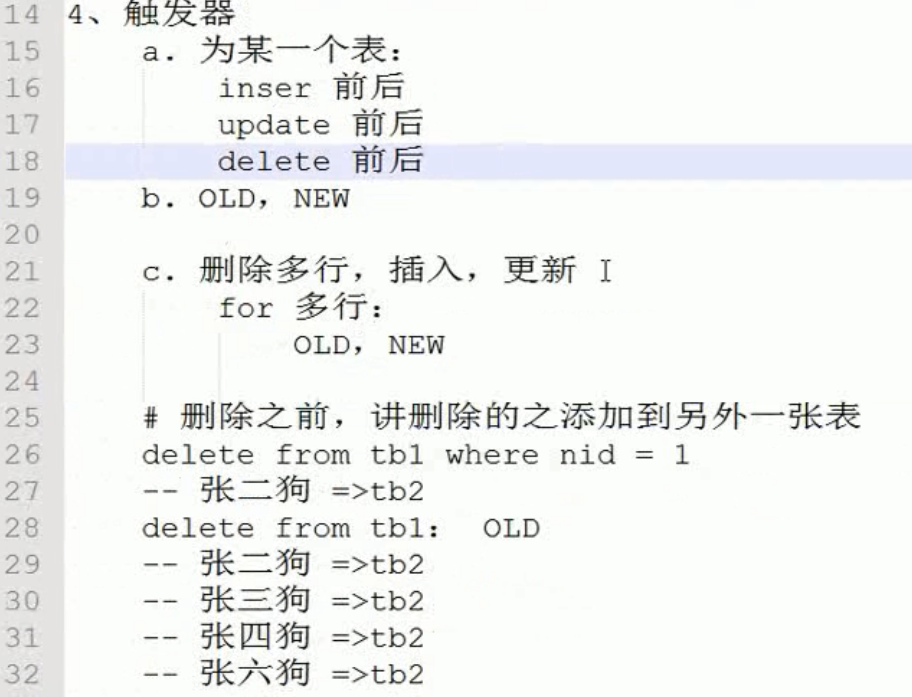
七、触发器
7.1 创建基本语句(tb1 是事例表名称)
 1 # 插入前
 2 CREATE TRIGGER tri_before_insert_tb1 BEFORE INSERT ON tb1 FOR EACH ROW
 3 BEGIN
 4     ...
 5 END
 6
 7 # 插入后
 8 CREATE TRIGGER tri_after_insert_tb1 AFTER INSERT ON tb1 FOR EACH ROW
 9 BEGIN
10     ...
11 END
12
13 # 删除前
14 CREATE TRIGGER tri_before_delete_tb1 BEFORE DELETE ON tb1 FOR EACH ROW
15 BEGIN
16     ...
17 END
18
19 # 删除后
20 CREATE TRIGGER tri_after_delete_tb1 AFTER DELETE ON tb1 FOR EACH ROW
21 BEGIN
22     ...
23 END
24
25 # 更新前
26 CREATE TRIGGER tri_before_update_tb1 BEFORE UPDATE ON tb1 FOR EACH ROW
27 BEGIN
28     ...
29 END
30
31 # 更新后
32 CREATE TRIGGER tri_after_update_tb1 AFTER UPDATE ON tb1 FOR EACH ROW
33 BEGIN
34     ...
35 END
特别的:NEW表示即将插入的数据行,OLD表示即将删除的数据行。
7.2 删除触发器
DROP TRIGGER tri_after_insert_tb1;
7.3 使用触发器
触发器的使用建立在对于表的【增/删/改】操作被动引发的。
八、事务
事务用于将某些操作的多个SQL作为原子性操作,一旦有某一个出现错误,即可回滚到原来的状态,从而保证数据库数据完整性。
 1 delimiter \
 2 create PROCEDURE p1(
 3     OUT p_return_code tinyint
 4 )
 5 BEGIN
 6   DECLARE exit handler for sqlexception
 7   BEGIN
 8     -- ERROR
 9     set p_return_code = 1;
10     rollback;
11   END;
12
13   DECLARE exit handler for sqlwarning
14   BEGIN
15     -- WARNING
16     set p_return_code = 2;
17     rollback;
18   END;
19
20   START TRANSACTION;
21     DELETE from tb1;
22     insert into tb2(name)values('seven');
23   COMMIT;
24
25   -- SUCCESS
26   set p_return_code = 0;
27
28   END\
29 delimiter ;
rollback 就是回滚
九、总结