官网:http://activemq.apache.org/
下载windows版本
进入解压后的主文件下的bin下的win64目录,启动activemq.bat文件
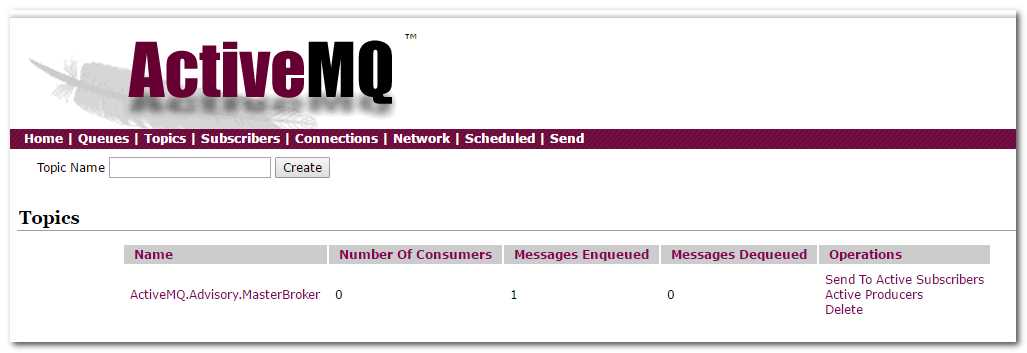
访问:http://localhost:8161/ 用户名和密码 都是 admin
ActiveMQ 使用的是标准生产者和消费者模型
有两种数据结构 Queue、Topic
1、 Queue 队列 ,生产者生产了一个消息,只能由一个消费者进行消费
2、 Topic 话题,生产者生产了一个消息,可以由多个消费者进行消费
使用Java程序操作activeMQ
引入maven坐标
    <!-- 消息队列 MQ -->
        <dependency>
            <groupId>org.apache.activemq</groupId>
            <artifactId>activemq-all</artifactId>
            <version>${activemq.version}</version>
        </dependency>
编写生产者代码
public class ActiveMqProducer {
    @Test
    public void testActive() throws Exception{
        //连接工厂,使用默认的用户名,密码

        ConnectionFactory connectionFactory = new ActiveMQConnectionFactory();
        //获取一个连接
        Connection connection = connectionFactory.createConnection();

        //建立会话
        Session session = connection.createSession(true,Session.AUTO_ACKNOWLEDGE );

        //创建队列或者话题对象
        Queue queue = session.createQueue("HelloWorld");

        //创建生产者或者消费者对象
        MessageProducer producer = session.createProducer(queue);

        for (int i = 0; i < 10; i++) {
            //发送消息
            producer.send(session.createTextMessage("你好,MQ"+i));
        }
        //提交事物
        session.commit();
    }
}
使用默认tcp连接activeMQ端口61616可以看到

编写MQ消费者代码
public class ActiveMqConsumer {
    @Test
    public void testActive() throws Exception{
        //连接工厂,使用默认的用户名,密码

        ConnectionFactory connectionFactory = new ActiveMQConnectionFactory();
        //获取一个连接
        Connection connection = connectionFactory.createConnection();

        //开启连接
        connection.start();

        //建立会话,是否使用事物,如果使用则要提交
        Session session = connection.createSession(false,Session.AUTO_ACKNOWLEDGE );

        //创建队列或者话题对象
        Queue queue = session.createQueue("HelloWorld");

        //创建生产者或者消费者对象
        MessageConsumer consumer = session.createConsumer(queue);

        while(true){
            TextMessage message = (TextMessage) consumer.receive(1000);
            if(message != null) {
                System.out.println(message.getText());
            }else {
                break;
            }
        }
    }
}
再次查看发现已经被消费

使用监听器,监听消息的内容,进行消费
public class ActiveMqConsumerListener {
    @Test
    public void testActive() throws Exception{
        //连接工厂,使用默认的用户名,密码

        ConnectionFactory connectionFactory = new ActiveMQConnectionFactory();
        //获取一个连接
        Connection connection = connectionFactory.createConnection();
        connection.start();
        //建立会话
        Session session = connection.createSession(false,Session.AUTO_ACKNOWLEDGE );

        //创建队列或者话题对象
        Queue queue = session.createQueue("HelloWorld");

        //创建生产者或者消费者对象
        MessageConsumer consumer = session.createConsumer(queue);

        //设置监听器
        consumer.setMessageListener(new MessageListener() {

            public void onMessage(Message message) {
                TextMessage textMessage = (TextMessage) message;
                try {
                    System.out.println(textMessage.getText());
                } catch (Exception e) {
                    e.printStackTrace();
                }
            }
        });
        while(true){}
    }
}
spring整合ActiveMQ
引入maven坐标
    <!-- 消息队列 MQ -->
        <dependency>
            <groupId>org.apache.activemq</groupId>
            <artifactId>activemq-all</artifactId>
            <version>${activemq.version}</version>
        </dependency>
        <!--spring整合activeMQJAR-->
                <dependency>
            <groupId>org.springframework</groupId>
            <artifactId>spring-jms</artifactId>
            <version>${spring.version}</version>
        </dependency>
引入spring整合activeMQ文件
    <!-- 引入mq配置 -->
    <import resource="applicationContext-mq.xml"/>
编写spring整合active核心配置
<?xml version="1.0" encoding="UTF-8"?>
<beans xmlns="http://www.springframework.org/schema/beans"
    xmlns:xsi="http://www.w3.org/2001/XMLSchema-instance" xmlns:aop="http://www.springframework.org/schema/aop"
    xmlns:context="http://www.springframework.org/schema/context"
    xmlns:jdbc="http://www.springframework.org/schema/jdbc" xmlns:tx="http://www.springframework.org/schema/tx"
    xmlns:jpa="http://www.springframework.org/schema/data/jpa" xmlns:task="http://www.springframework.org/schema/task"
    xmlns:jms="http://www.springframework.org/schema/jms"
    xsi:schemaLocation="
        http://www.springframework.org/schema/beans http://www.springframework.org/schema/beans/spring-beans-4.1.xsd
        http://www.springframework.org/schema/aop http://www.springframework.org/schema/aop/spring-aop-4.1.xsd
        http://www.springframework.org/schema/context http://www.springframework.org/schema/context/spring-context-4.1.xsd
        http://www.springframework.org/schema/jdbc http://www.springframework.org/schema/jdbc/spring-jdbc-4.1.xsd
        http://www.springframework.org/schema/tx http://www.springframework.org/schema/tx/spring-tx-4.1.xsd
        http://www.springframework.org/schema/data/jpa
        http://www.springframework.org/schema/data/jpa/spring-jpa.xsd
        http://www.springframework.org/schema/jms
        http://www.springframework.org/schema/jms/spring-jms.xsd">

    <!-- ActiveMQ 连接工厂 -->
    <!-- 真正可以产生Connection的ConnectionFactory,由对应的 JMS服务厂商提供-->
    <!-- 如果连接网络:tcp://ip:61616;未连接网络:tcp://localhost:61616 以及用户名,密码-->
    <!-- <amq:connectionFactory id="amqConnectionFactory"
        brokerURL="tcp://localhost:61616" userName="admin" password="admin"  /> -->
<!-- 扫描包 -->
<context:component-scan base-package="com.learn.activemq" />
    <bean  id="amqConnectionFactory" class="org.apache.activemq.ActiveMQConnectionFactory">
        <property name="brokerURL" value="tcp://localhost:61616"/>
        <property name="userName" value="admin"/>
        <property name="password" value="admin"/>
    </bean>

    <!-- Spring Caching连接工厂 -->
    <!-- Spring用于管理真正的ConnectionFactory的ConnectionFactory -->
    <bean id="mqConnectionFactory" class="org.springframework.jms.connection.CachingConnectionFactory">
        <!-- 目标ConnectionFactory对应真实的可以产生JMS Connection的ConnectionFactory -->
        <property name="targetConnectionFactory" ref="amqConnectionFactory"></property>
        <!-- 同上,同理 -->
        <!-- <constructor-arg ref="amqConnectionFactory" /> -->
        <!-- Session缓存数量 -->
        <property name="sessionCacheSize" value="100" />
    </bean>

     <!-- Spring JmsTemplate 的消息生产者 start-->

    <!-- 定义JmsTemplate的Queue类型 -->
    <bean id="jmsQueueTemplate" class="org.springframework.jms.core.JmsTemplate">
        <!-- 这个connectionFactory对应的是我们定义的Spring提供的那个ConnectionFactory对象 -->
        <constructor-arg ref="mqConnectionFactory" />
        <!-- 非pub/sub模型(发布/订阅),即队列模式 -->
        <property name="pubSubDomain" value="false" />
    </bean>

    <!-- 定义JmsTemplate的Topic类型 -->
    <bean id="jmsTopicTemplate" class="org.springframework.jms.core.JmsTemplate">
         <!-- 这个connectionFactory对应的是我们定义的Spring提供的那个ConnectionFactory对象 -->
        <constructor-arg ref="mqConnectionFactory" />
        <!-- pub/sub模型(发布/订阅) -->
        <property name="pubSubDomain" value="true" />
    </bean>

    <!--Spring JmsTemplate 的消息生产者 end-->

</beans>
query生产者
@Service
public class QueueSender {
    // 注入jmsTemplate
    @Autowired
    @Qualifier("jmsQueueTemplate")
    private JmsTemplate jmsTemplate;

    public void send(String queueName, final String message) {
        jmsTemplate.send(queueName, new MessageCreator() {
            public Message createMessage(Session session) throws JMSException {
                return session.createTextMessage(message);
            }
        });
    }
}
topic生产者
@Service
public class TopicSender {
    // 注入jmsTemplate
    @Autowired
    @Qualifier("jmsTopicTemplate")
    private JmsTemplate jmsTemplate;

    public void send(String topicName, final String message) {
        jmsTemplate.send(topicName, new MessageCreator() {

            public Message createMessage(Session session) throws JMSException {
                return session.createTextMessage(message);
            }
        });
    }

}
query消费者1和消费者2
@Service
public class QueueConsumer1 implements MessageListener {
    public void onMessage(Message message) {
        TextMessage textMessage = (TextMessage) message;
        try {
            System.out
                    .println("消费者QueueConsumer1获取消息:" + textMessage.getText());
        } catch (JMSException e) {
            e.printStackTrace();
        }
    }
}
@Service
public class QueueConsumer2 implements MessageListener {
    public void onMessage(Message message) {
        TextMessage textMessage = (TextMessage) message;
        try {
            System.out
                    .println("消费者QueueConsumer2获取消息:" + textMessage.getText());
        } catch (JMSException e) {
            e.printStackTrace();
        }
    }
}
topic消费者1和消费者2
@Service
public class TopicConsumer1 implements MessageListener {

    public void onMessage(Message message) {
        TextMessage textMessage = (TextMessage) message;
        try {
            System.out
                    .println("消费者TopicConsumer1获取消息:" + textMessage.getText());
        } catch (JMSException e) {
            e.printStackTrace();
        }
    }

}
@Service
public class TopicConsumer2 implements MessageListener {

    public void onMessage(Message message) {
        TextMessage textMessage = (TextMessage) message;
        try {
            System.out
                    .println("消费者TopicConsumer2获取消息:" + textMessage.getText());
        } catch (JMSException e) {
            e.printStackTrace();
        }
    }

}
配置 listener 监听器,在 applicationContext-mq-consumer.xml
<!-- 定义Queue监听器 -->
    <jms:listener-container destination-type="queue" container-type="default"
        connection-factory="connectionFactory" acknowledge="auto">
        <!-- 默认注册bean名称,应该是类名首字母小写  -->
        <jms:listener destination="spring_queue" ref="queueConsumer1"/>
        <jms:listener destination="spring_queue" ref="queueConsumer2"/>
    </jms:listener-container>

    <!-- 定义Topic监听器 -->
    <jms:listener-container destination-type="topic" container-type="default"
        connection-factory="connectionFactory" acknowledge="auto">
        <jms:listener destination="spring_topic" ref="topicConsumer1"/>
        <jms:listener destination="spring_topic" ref="topicConsumer2"/>
    </jms:listener-container>
生产者测试代码
@RunWith(SpringJUnit4ClassRunner.class)
@ContextConfiguration(locations = "classpath:applicationContext-mq.xml")
public class ProducerTest {
    @Autowired
    private QueueSender queueSender;

    @Autowired
    private TopicSender topicSender;

    @Test
    public void testSendMessage() {
        queueSender.send("spring_queue", "queue");
        topicSender.send("spring_topic", "topic");
    }
}
消费者测试代码
@RunWith(SpringJUnit4ClassRunner.class)
@ContextConfiguration(locations = "classpath:applicationContext-mq-consumer.xml")
public class ConsumerTest {

    @Test
    public void testConsumerMessage() {
        while (true) {
            // junit退出,防止进程死掉
        }
    }
}