1.环境准备就不说怎么弄了,自行下载VS2017版本以上就行了,这里建议下载VS2019使用,如果下载下来后没有对应版本的SDK。
可自行到 传送门 微软官方的SDK下载需要的版本进行安装。
2.打开编译器新建项目,选择ASP.NET Core Web应用程序,点击下一步
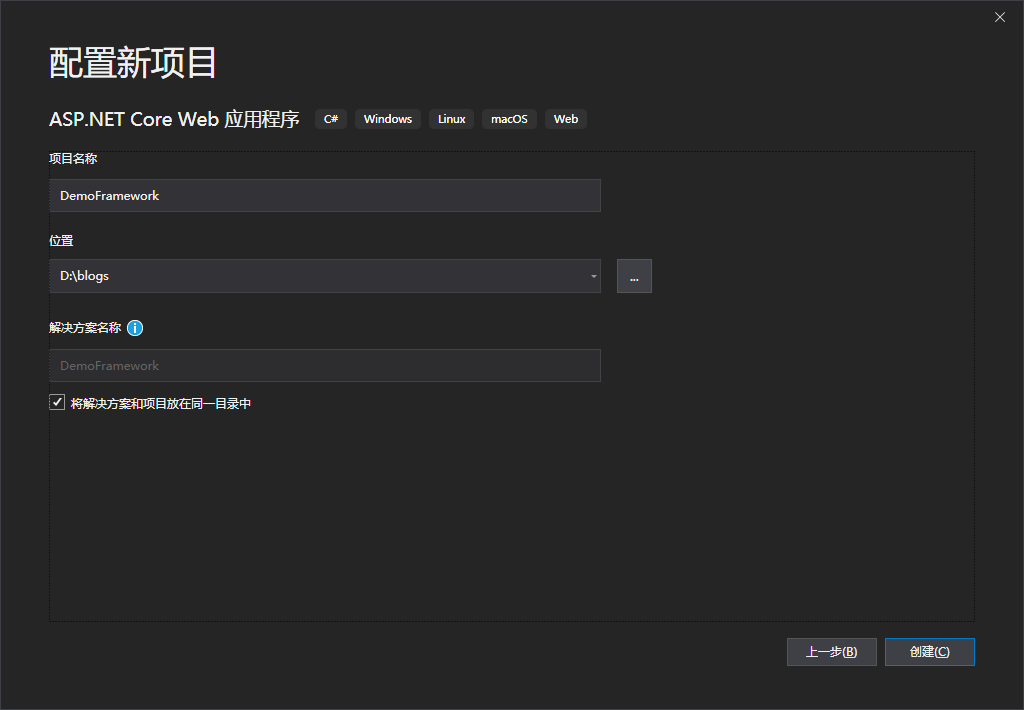
输入项目名称后,点击创建。
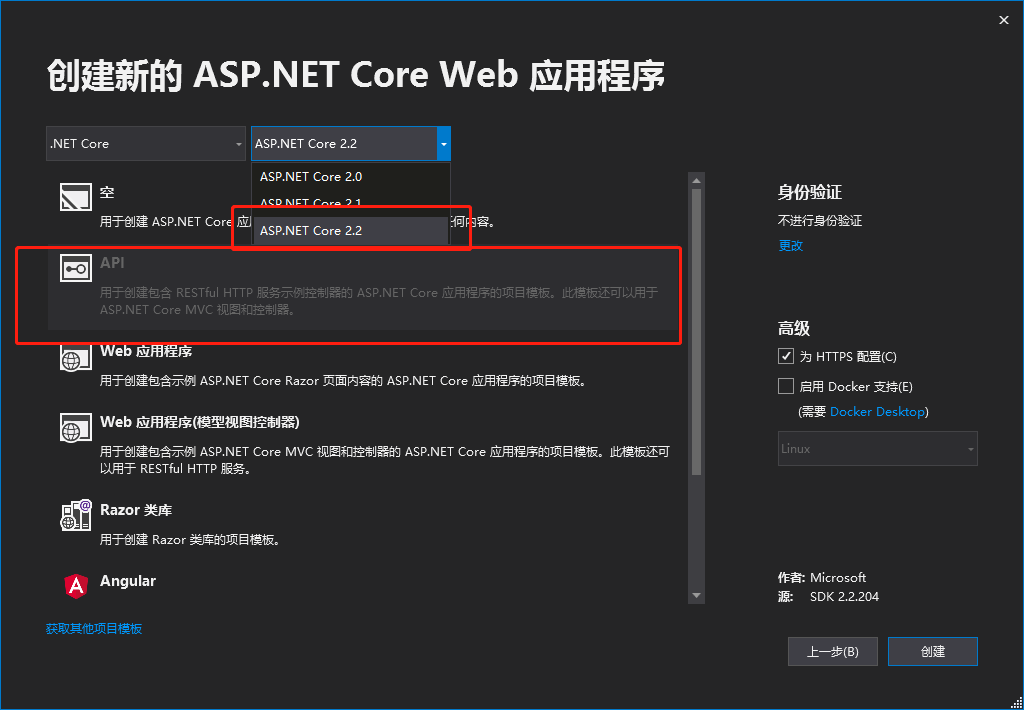
这里选择使用core 2.2 选择API,点创建,到这里就把一个空的webapi项目创建完成了,接下来我们需要创建一个基本的项目目录。这里就我目前接触的项目和自己的理解分的层级结构。
在项目解决方案上右键-添加-新建项目- 找到core的类库然后选择创建。最终的项目目录结构如下:
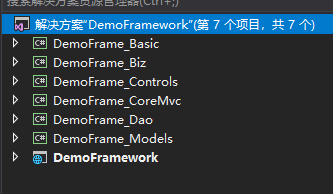 项目目录结构说明:
- Baisc主要存放一些通用方法以及底层常用操作的类(如日志、缓存等),或接口、扩展方法等。
- Biz主要是MVC结构中的业务处理层。
- Controls是我们项目的控制器层,所有与前端交互的接口都应放在该类库中,每一模块对应一个controller。
- CoreMvc主要存放过滤器、与前端交互模型、基类控制器、中间件的类库
- Dao层主要用于与数据库交互,将数据返回给业务层处理
- Modes存放自定义模型与数据库模型。
- 启动程序,主要的一些配置都在该类库中的Startup中进行配置
项目骨架弄完了之后,得考虑如何与数据库和前端进行交互。 数据库交互采用EF Core Code First的方式进行,步骤如下
在Dao层添加相关依赖:Microsoft.EntityFrameworkCore.SqlServer,Microsoft.EntityFrameworkCore.Tools。 csproj文件如下
 <ItemGroup>
     <PackageReference Include="Microsoft.EntityFrameworkCore.SqlServer" Version="2.2.6" />
     <PackageReference Include="Microsoft.EntityFrameworkCore.Tools" Version="2.2.6">
       <PrivateAssets>all</PrivateAssets>
       <IncludeAssets>runtime; build; native; contentfiles; analyzers; buildtransitive</IncludeAssets>
     </PackageReference>
   </ItemGroup>
- 在models层中添加一个demo模型:
using System.ComponentModel;
using System.ComponentModel.DataAnnotations;
using System.ComponentModel.DataAnnotations.Schema;

namespace DemoFrame_Models.Entitys
{
    [Table(name: "Demo_Model")]
    public class DemoModel
    {
        [Key]
        [DatabaseGenerated(DatabaseGeneratedOption.None)]//不自动增长   使用IdWorker生成
        public long Id { get; set; }

        /// <summary>
        /// 用户真实姓名
        /// </summary>
        public string CustomerName { get; set; }

        /// <summary>
        /// 证件类型:1 身份证,2 军官证,3 护照
        /// </summary>
        [DefaultValue(1)]
        public int IdentityCardType { get; set; }
    }
}
- 添加数据库上下文:
using DemoFrame_Models.Entitys;
using Microsoft.EntityFrameworkCore;

namespace DemoFrame_Dao
{
    /// <summary>
    /// 数据库上下文
    /// </summary>
    public class DemoDbContext : DbContext
    {
        public DemoDbContext(DbContextOptions<DemoDbContext> options)
     : base(options)
        { }

        public DbSet<DemoModel> Blogs { get; set; }
    }
}
- 在Startup添加如下代码:在ConfigureServices中添加
services.AddDbContext<DemoDbContext>(options => options.UseSqlServer("Server=.;Database=EFDemo;uid=sa;pwd=123456;"));
在 Configure 方法中加上
try
            {
                if (env.IsDevelopment())
                {
                    using (var serviceScope = app.ApplicationServices.GetRequiredService<IServiceScopeFactory>()
                        .CreateScope())
                    {
                        var database = serviceScope.ServiceProvider.GetService<DemoDbContext>().Database;
                        database.EnsureDeleted();//每次删除库重建
                        database.EnsureCreated();//这里是为后面的解耦做铺垫
                    }
                }
            }
            catch (Exception ex)
            {
                //LogHelper.Logger.Error(ex, "Failed to migrate or seed database");
            }
- 测试一下,在启动类库中Controllers文件夹有个valuesController类,将前面的内容替换成如下代码:
private readonly DemoDbContext _context;

        public ValuesController(DemoDbContext context)
        {
            _context = context;
        }
        // GET api/values
        [HttpGet]
        public ActionResult<IEnumerable<string>> Get()
        {
            _context.DemoModel.Add(new DemoModel()
            {
                Id = 1,
                CustomerName = "levy",
                IdentityCardType = 1,
            });
            var res =  _context.SaveChanges();
            return new string[] { "value1", res +"" };
        }

        // GET api/values/5
        [HttpGet("{id}")]
        public ActionResult<DemoModel> Get(long id)
        {

            return _context.DemoModel.Find(id); ;
        }
程序启动会自动运行到api/values接口上,插入数据。因为在启动配置文件launchSettings.json中"launchUrl": "api/values"
- 接下来我们再跑https://localhost:44304/api/values/1,就能得到刚刚插入的数据了。
在下一篇中将介绍如何通过autofac实现EF Core code first无需写dataset也可生成表,只用添加实体类就行。
有需要源码的可通过此 GitHub 链接拉取 觉得还可以的给个 start 哦,谢谢!