-----2019-08-09补更新-----
hash模式与history模式
hash模式:在浏览器中符号“#”,#以及#后面的字符称之为hash,用window.location.hash读取;
特点:hash虽然在URL中,但不被包括在HTTP请求中;用来指导浏览器动作,对服务端安全无用,hash不会重加载页面。
hash 模式下,仅 hash 符号之前的内容会被包含在请求中,如 http://www.xxx.com,因此对于后端来说,即使没有做到对路由的全覆盖,也不会返回 404 错误。
history模式:history采用HTML5的新特性;且提供了两个新方法:pushState(),replaceState()可以对浏览器历史记录栈进行修改,以及popState事件的监听到状态变更。
history 模式下,前端的 URL 必须和实际向后端发起请求的 URL 一致,如 http://www.xxx.com/items/id。后端如果缺少对 /items/id 的路由处理,将返回 404 错误。
Vue-Router 官网里如此描述:“不过这种模式要玩好,还需要后台配置支持……所以呢,你要在服务端增加一个覆盖所有情况的候选资源:如果 URL 匹配不到任何静态资源,则应该返回同一个 index.html 页面,这个页面就是你 app 依赖的页面。”
1.直接在js中引入vue-router的cdn,并且不使用vue-cli、单文件组件等的方式,即最简单的路由实现,但是功能似乎大部分都齐了,
比较简单,所以直接上代码,已经测试过能够正常运行~
<!DOCTYPE html>
<html lang="en">
<head>
    <meta charset="UTF-8">
    <meta name="viewport" content="width=device-width, initial-scale=1.0">
    <meta http-equiv="X-UA-Compatible" content="ie=edge">
    <title>Document</title>
    <script src="https://unpkg.com/vue/dist/vue.js"></script>
    <script src="https://unpkg.com/vue-router/dist/vue-router.js"></script>
</head>
<body>
    <div id="app">
        <h1>Hello !</h1>
        <p>
          <!-- 使用 router-link 组件来导航. -->
          <!-- 通过传入 `to` 属性指定链接. -->
          <!-- <router-link> 默认会被渲染成一个 `<a>` 标签 -->
          <router-link to="/hash1">切换至com1</router-link>
          <router-link to="/hash2">切换至com2</router-link>
        </p>
        <!-- 路由出口 -->
        <!-- 路由匹配到的组件将渲染在这里 -->
        <router-view></router-view>
        <!-- router-link上的其他属性: -->
        <!-- 设置 replace 属性的话,当点击时,会调用 router.replace() 而不是 router.push(),导航后不会留下 history 记录。 -->
        <!-- <router-link :to="{ path: '/abc'}" replace></router-link> -->
        <!-- 有时候想要 <router-link> 渲染成某种标签,例如 <li>。 于是我们使用 tag prop 类指定何种标签,同样它还是会监听点击,触发导航。 -->
        <!-- <router-link to="/foo" tag="li">foo</router-link> -->
        <!-- active-class 设置 链接激活时使用的 CSS  -->
        <!-- event 声明可以用来触发导航的事件。可以是一个字符串或是一个包含字符串的数组。 -->
    </div>
</body>
<script>
    // 1. 定义(路由)组件。
    const com1 = { template: '<div>路由1</div>' }
    const com2 = { template: '<div>路由2</div>' }

    // 2. 定义路由
    // 每个路由应该映射一个组件。 其中"component" 可以是 通过 Vue.extend()
    //  创建的组件构造器, 或者,只是一个组件配置对象.
    const routes = [
    { path: '/hash1', component: com1 },
    { path: '/hash2', component: com2 }
    ]

    // 3. 创建 router 实例,然后传 `routes` 配置
    const router = new VueRouter({
    routes // (缩写)相当于 routes: routes
    })

    // 4. 创建和挂载根实例。
    // 要通过 router 配置参数注入路由,从而让整个应用都有路由功能
    const app = new Vue({
    router
    }).$mount('#app');//el是自动挂载,mount是手动挂载(延时)

</script>
</html>
2.使用vue-cli构建:
Vue init webpack <demoname>,然后注意在router项中选yes。
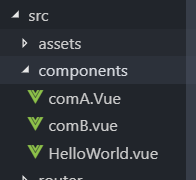
在src/router/index.js中进行路由的配置,在components文件夹下存储路由出口的组件
在app.vue中设定router-link、router-view(用法在上面提到了)
在main.js中全局注册组件以及挂载实例
这个例子中只有三个路由出口,helloworld、comA以及comB
index.js
import Vue from 'vue'
//引入router
import Router from 'vue-router'
//加载路由的出口,即组件
import HelloWorld from '../components/HelloWorld'
import comA from '../components/comA.vue'
import comB from '../components/comB.vue'
import hw from '../components/HelloWorld.vue'

Vue.use(Router)
//也可以在上面配置路由然后导出routes
export default new Router({
  routes: [
    {
      path:'/',
      name:'hw',
      component:hw
    },
    {
      path:'/hash1',
      name:'comA',
      component:comA
    },
    {
      path:'/hash2',
      name:'comB',
      component:comB
    }
  ]
})
注意routes中路由对象的component属性不能是字符串格式哦
main.js:
// The Vue build version to load with the `import` command
// (runtime-only or standalone) has been set in webpack.base.conf with an alias.
import Vue from 'vue'
import App from './App'
import router from './router'
import comA from './components/comA'
import comB from './components/comB'
import hw from './components/HelloWorld'
//全局注册组件
Vue.component('comA',comA);
Vue.component('comB',comB);
Vue.component('hw',hw);

Vue.config.productionTip = false

/* eslint-disable no-new */
new Vue({
  el: '#app',
  router,
  components: { App },
  template: '<App/>'
})
App.Vue:
<template>
  <div id="app">
    <img src="./assets/logo.png">
    <div class="container">
      <ul>
        <li v-for="(com) in coms" :key="com.routerName">
          <router-link :to="{ name:com.routerName }">
            To {{ com.routerName }}
          </router-link>
        </li>
      </ul>
    </div>
    <div class="output">
      <router-view></router-view>
    </div>
  </div>
</template>

<script>

import helloWorld from './components/HelloWorld'
import comA from './components/comA'
import comB from './components/comB'
import hw from './components/HelloWorld'
export default {
  name: 'App',
  data(){
    return {
      coms:[{
      routerName:'comA',
      name:'comA'
    },
    {
      routerName:'comB',
      name:'comB'
    },{
      routerName:'hw',
      name:'hw'
    }]
    }
  },
  components:{
    comA,
    comB
  }
}
</script>

<style>
#app {
  font-family: 'Avenir', Helvetica, Arial, sans-serif;
  -webkit-font-smoothing: antialiased;
  -moz-osx-font-smoothing: grayscale;
  text-align: center;
  color: #2c3e50;
  margin-top: 60px;
}
</style>
在默认采用的hash模式下,vue-router的工作流程是当渲染出来的<a>(或者使用tag属性更改的其他标签)被点击时,根据其to属性决定前往的组件,同时将path属性添加到url后(多个#)
如果明天面试没过就回来把嵌套路由啊啥的给写了
----果然没过,栽在了正则表达式上,先补一下正则----