一、概述
HTML是英文Hyper Text Mark-up Language(超文本标记语言)的缩写,它是一种制作万维网页面标准语言(标记)。相当于定义统一的一套规则,大家都来遵守它,这样就可以让浏览器根据标记语言的规则去解释它。
浏览器负责将标签翻译成用户"看得懂"的格式,呈现用户
(例:djangomoan模版引擎)

HTML文档
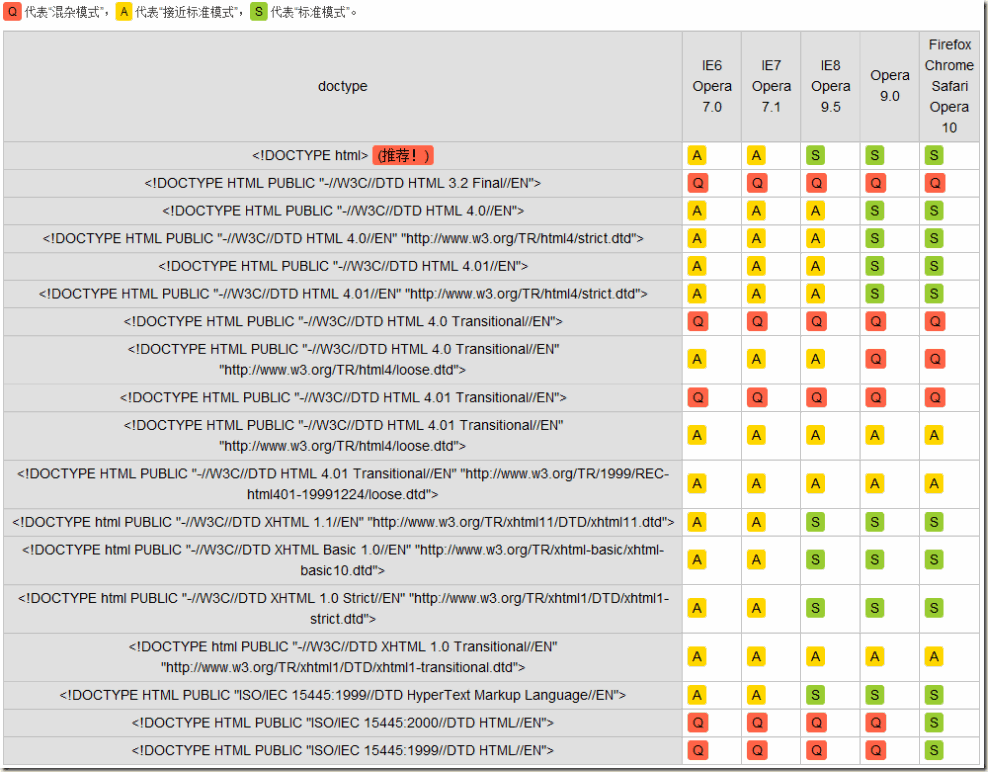
Doctype告诉浏览器使用什么样的html或xhtml规范来解析html文档
有和无的区别
- BackCompat:标准兼容模式未开启(或叫怪异模式[Quirks mode]、混杂模式)
- CSS1Compat:标准兼容模式已开启(或叫严格模式[Standards mode/Strict mode])
这个属性会被浏览器识别并使用,但是如果你的页面没有DOCTYPE的声明,那么compatMode默认就是BackCompat,这也就是恶魔的开始 -- 浏览器按照自己的方式解析渲染页面,那么,在不同的浏览器就会显示不同的样式。如果你的页面添加了那么,那么就等同于开启了标准模式,那么浏览器就得老老实实的按照W3C的标准解析渲染页面,这样一来,你的页面在所有的浏览器里显示的就都是一个样子了。
有,用什么?
Doctype告诉浏览器使用什么样的html或xhtml规范来解析html文档, dtd文件则包含了标记、attributes 、properties、约束规则。
更多
python web server 1(python 3.5):
#!/use/bin/env python
# -*- coding:utf-8 -*-

import socket

def handle_request(client):
    buf = client.recv(1024)
    client.send(b'HTTP/1.1 200 OK

')
    client.send(b'python web server')

def main():
    sock = socket.socket(socket.AF_INET, socket.SOCK_STREAM)        # TCP IPv4
    sock.bind(('localhost', 80))
    sock.listen(5)          # 同时接收5个

    while True:
        connection, address = sock.accept()
        handle_request(connection)
        connection.close()

if __name__ == '__main__':
    main()
浏览测试:

web server2:
#!/use/bin/env python
# -*- coding:utf-8 -*-

import socket

def handle_request(client):
    buf = client.recv(1024)
    client.send(b'HTTP/1.1 200 OK

')
    client.send(b"<h1 style='color:red'>python web server</h1>")

def main():
    sock = socket.socket(socket.AF_INET, socket.SOCK_STREAM)        # TCP IPv4
    sock.bind(('localhost', 80))
    sock.listen(5)          # 同时接收5个

    while True:
        connection, address = sock.accept()
        handle_request(connection)
        connection.close()

if __name__ == '__main__':
    main()
浏览效果:

web server3:
目录结构

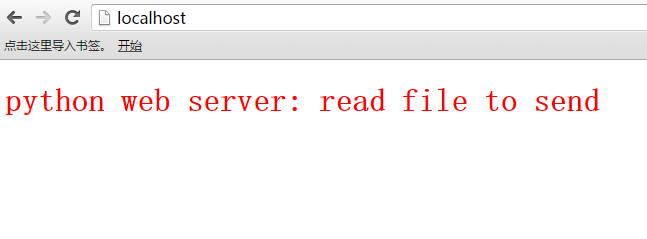
#!/use/bin/env python
# -*- coding:utf-8 -*-

# web_server3

import socket

def handle_request(client):
    buf = client.recv(1024)
    client.send(b'HTTP/1.1 200 OK

')
    # 读取文件
    fp = open('template.html', 'rb')
    data = fp.read()
    fp.close()
    # 发送文件内容
    client.send(data)

def main():
    sock = socket.socket(socket.AF_INET, socket.SOCK_STREAM)        # TCP IPv4
    sock.bind(('localhost', 80))
    sock.listen(5)          # 同时接收5个

    while True:
        connection, address = sock.accept()
        handle_request(connection)
        connection.close()

if __name__ == '__main__':
    main()
template.html
<!DOCTYPE html>
<head>
    <meta charset="UTF-8">
    <title>python web server test</title>
</head>
<body>
<h1 style='color:red'>python web server: read file to send</h1>
</body>
</html>
浏览效果:
二、HTML文档
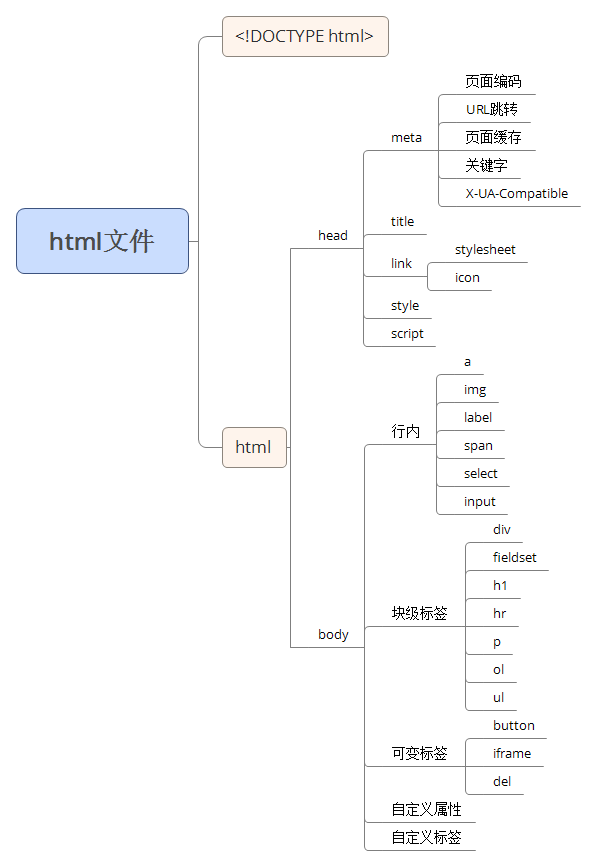
2.1 meta
<head></head>标签内
提供相关有关页面的信息,如:页面编码、刷新、跳转、针对搜索引擎和更新频度的描述及关键字
2.1.1 页面编码
<meta charset="UTF-8"> 或
<meta http-equiv="content-type" content="text/html;charset=UTF-8">
2.1.2 刷新和跳转
<!--  每2秒刷新一次 -->
<meta http-equiv="refresh" content="2">
<!--  自动刷新并跳转 -->
<meta http-equiv="refresh" content="2; url=http://www.etiantian.org">
2.1.3 关键词
<meta name="Keywords" content="网上购物,网上商城,手机,笔记本,电脑,MP3,CD,VCD,DV,相机,数码,配件,手表,存储卡,京东">
2.1.4 描述
<meta name="description" content="京东JD.COM-专业的综合网上购物商城,销售家电、数码通讯、电脑、家居百货、服装服饰、母婴、图书、食品等数万个品牌优质商品.便捷、诚信的服务,为您提供愉悦的网上购物体验!">
2.1.5 X-UA-Compatible
微软的IE6是通过XP、Win2003等操作系统发布出来的,作为占统治地位的桌面操作系统,也使得IE占据了统治地位。许多网站开发的时候就按照IE的标准去开发,而IE6自身的标准也是微软公司内部定义的。到了IE7出来的时候,采用了微软公司内部标准以及部分W3C的标准,这个时候许多网站升级到IE7的时候就比较痛苦,很多代码必须调整后才能够正常运行。而到了微软的IE8这个版本,基本上把微软内部自己定义的标准抛弃了,由于基于对标准彻底的变化了,使得原先在早期IE版本上能够正常访问的网站,在IE中无法正常访问,会出现排版错乱、文字重叠、显示不全等各种兼容性问题。
与任何早期浏览器版本相比,Internet Explorer 8对行业标准提供了更加紧密的支持。因此,针对旧版本的浏览器设计的站点可能不会按预期显示。为了帮助减轻改版问题,IE8引入了文档兼容性的概念,从而允许您指定站点所支持的IE版本。文档兼容性在IE中添加了新的模式:这些模式将告诉浏览器如何解释和呈现网站。如果您的站点在IE8中无法正常显示,则可以更新该站点以支持最新的WEB标准(首先方式),也可以强制IE8按照旧版浏览器方式来显示内容。通过使用meta元素将X-UA-Compatible标头添加到网页中,可以实现这一点。
当IE不遇到未包含X-UA-Compatible标头的网站时,它将使用指令来确定如何显示该网页。如果该指令丢失或未指定基于标准的文档类型,则IE8将IE5模式(Quirks模式)显示该网页
<meta http-equiv="x-ua-compatible" content="IE=EmulateIE7">
<meta http-equiv="x-ua-compatible" content="IE=edge"> <!-- 最新模式 -->
例子:
<!DOCTYPE html>
<html lang="en">
<head>
    <meta charset="UTF-8">
    <!--  每2秒刷新一次 -->
    <meta http-equiv="refresh" content="2">
    <!--  自动刷新并跳转 -->
    <meta http-equiv="refresh" content="2; url=http://www.etiantian.org">
    <meta name="Keywords" content="网上购物,网上商城,手机,笔记本,电脑,MP3,CD,VCD,DV,相机,数码,配件,手表,存储卡,京东">
    <meta name="description" content="京东JD.COM-专业的综合网上购物商城,销售家电、数码通讯、电脑、家居百货、服装服饰、母婴、图书、食品等数万个品牌优质商品.便捷、诚信的服务,为您提供愉悦的网上购物体验!">
    <meta name="description" content="description ....">
    <meta name="Keywords" content="keywords ...">

    <meta http-equiv="x-ua-compatible" content="IE=EmulateIE7">

    <meta http-equiv="x-ua-compatible" content="IE=edge">

    <meta http-equiv="X-UA-Compatible" content="IE=11; IE=10; IE=9; IE=8; IE=7; IE=EDGE">

    <!--ico-->
    <link rel="icon" href="//www.jd.com/favicon.ico" mce_href="//www.jd.com/favicon.ico" type="image/x-icon">

    <title>say hi</title>

    <!--其他内容-->
    <!--1 css文件-->
    <!--2 css代码块-->
    <!--3 js文件-->
    <!--4 js代码块-->

</head>
day day up
<body>

</body>
</html>
2.2 title
设置页面显示的标题
<!DOCTYPE html>
<html lang="en">
<head>
    <meta charset="UTF-8">
    <title>p2</title>
</head>
<body>
<p>p2 ...</p>
</body>
</html>
2.3 Link
< link rel="stylesheet" type="text/css" href="css/common.css" >
<link rel="icon" href="./img/favicon.ico">
<img title="头条" src="1.jpg">
2.3 css文件
css是英文Cascading Style Sheets的缩写,称为层叠样式表,用于对页面进行美化。
存在方式有三种:元素内联、页面嵌入和外部引入,比较三种方式的优缺点。
语法:style = 'key1:value1;key2:value2;'
- 在标签中使用 style='xx:xxx;'
- 在页面中嵌入 < style type="text/css"> </style > 块
- 引入外部css文件
必要性:美工会对页面的色彩搭配和图片的美化负责,开发人员则必须知道是如何实现的。
标签选择器
div{ }
<div > </div>
class选择器
.bd{ }
<div class='bd'> </div>
id选择器
#idselect{ }
<div id='idselect' > </div>
关联选择器
#idselect p{ }
<div id='idselect' > <p> </p> </div>
组合选择器
input,div,p{ }
属性选择器
input[type='text']{ 100px; height:200px; }
<!DOCTYPE html>
<html lang="en">
<head>
    <meta charset="UTF-8">
    <title>Title</title>

    <!--rel ==> relationship-->
    <!--stylesheet样式表-->
    <!--href代表hyperlink reference连接参考.-->
    <link rel="stylesheet" href="commons.css">
    <style>
        .cc {
            color: red;
            font-size:19px;
        }

        .ccc {
            color: green;
            font-size:19px;
        }

        a{
            color: #f0a238;
        }

        input[type="text"]{
            font-family: 华文彩云;
            font-size:18px;
        }

        #uu{
            color: #0000cc;
        }


    </style>
</head>
<body>
    <!--div ==> division-->
    <div id="123" style="color:red; font-size:18px;">css</div>
    <div style="color:red; font-size:18px;">css</div>
    <div style="color:red; font-size:18px;">css</div>
    <br>
    <div class="bb">BB</div>
    <div class="cc">head css</div>
    <div class="cc">head css</div>
    <div class="cc">head css</div>

    <!--样式优先级:标签中的css最优先-->
    <!--head css及link文件样式则按顺序-->
    <div class="cc ccc">css优先级:<br>
        样式优先级:标签中的css最优先<br>
        head css及link文件样式则按顺序<br>
    </div>
    <br>
    <form>
        input text css:<input type="text">
        <input type="submit">
    </form>

    <br>
    <div>
        <a href="http://www.baidu.com">标签样式选择器baidu</a>
    </div>

    <div>
        <p id="uu">#ID ID样式选择器</p>

    </div>


</body>
</html>
<!DOCTYPE html>
<html lang="en">
<head>
    <meta charset="UTF-8">
    <title>Title</title>

    <!--rel ==> relationship-->
    <!--stylesheet样式表-->
    <!--href代表hyperlink reference连接参考.-->
    <link rel="stylesheet" href="commons.css">
    <style>
        /*
        .cc {
            color: red;
            font-size:19px;
        }

        .ccc {
            color: green;
            font-size:19px;
        }

        a{
            color: #f0a238;
        }

        input[type="text"]{
            font-family: 华文彩云;
            font-size:18px;
        }

        #uu{
            color: #0000cc;
        }
        /*


        /*层级选择器*/
        /*.c3 a div .c4{*/
            /*color: green;*/
        /*}*/
        /*div可省去,变成这样:*/
        .c3 a .c4{
            color: #0d8ddb;
        }

        .cc3 #i8 div .c4{
            color: #0000cc;
        }

    </style>
</head>
<body>
<div class="c3">
        <a>
            <div>
                <span class="c4">CSS层级选择器</span>
            </div>
        </a>
    </div>
    <span class="c4"></span>

    <div class="cc3">
        <a id="i8">
            <div>
                <span class="c4">CSS层级选择器</span>
            </div>
        </a>
    </div>
    <span></span>


</body>
</html>
笔记:
###################
寻找标签

class选择器
    class
    .c1{color:red;}
    <div class="c1">...</div>
    <div class=""c1>...</div>

标签选择器
    a{
        color:red;
    }
    html中所有的a标签都应用a样式
    div{}
    span, select{}

    input[type="text"]      ==>应用到所有input中type="text"的样式


ID选择器
    #uu{
        color: red;
        font-size:19px;
    }

    <div id="uu">#ID</div>

层级选择器
    .c3 a div .c4{
        color: green;
    }
    div可省去,变成这样:
    .c3 a .c4{
        color: green;
    }

    .cc3 #i8 div .c4{
        color: green;
    }

    <div class="c3">
        <a>
            <div>
                <span class="c4">CSS层级选择器</span>
            </div>
        </a>
    </div>
    <span class="c4"></span>

    <div class="cc3">
        <a id="i8">
            <div>
                <span class="c4">CSS层级选择器</span>
            </div>
        </a>
    </div>
    <span></span>


组合选择器
    a{}
    p{}

    a, p, div .c5{

    }

选择器:
,表示或
空格 表示下一级


##############
应用样式
width
height
background
border
display

display
    none;     ==>不显示
    block;    ==>把行级标签以块级标签显示
    inline;   ==>把块级标签以行级标签显示

cursor 光标样式

position
    fixed       固定的,脱离原文档,相对于浏览器窗口位置
    absolute    绝对的,单独使用只生产一次固定位置效果
    relative    相对的,单独本身不产生什么效果,一般relative与absolute结合使用

opacity
filter:(opacity:xx)

z-index     值越大越显示在最外层


margin     美 [ˈmɑ:rdʒən] 边距属性;  空白处; 外边距,可以为负数,相当于移动自己

padding    美 [ˈpædɪŋ] 填充;  内边距;  间隙,>=0,填充自己
###################
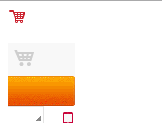
background
background-color
background-image
background-repeat(no-repeat;repeat-x;repeat-y)
background-position
<!DOCTYPE html>
<html lang="en">
<head>
    <meta charset="UTF-8">
    <title>Title</title>
    <style>
        .car{
            top: 9px;
            left: 18px;
            width: 18px;
            height: 16px;
            background: url(http://misc.360buyimg.com/jdf/1.0.0/unit/globalImages/1.0.0/jd2015img.png) 0 -58px no-repeat;
        }

        .c2{
            height: 80px;
            background-image: url("img/5.png");
            background-repeat: no-repeat;
            /*相当于打了个孔,下面的移动下面的图片,x负数向左移,y负数向上移*/
            background-position: -105px -112px;
        }

    </style>

</head>
<body>
    <div class="car"></div>
    <br>
    <div class="c2"></div>
</body>
</html>
<!DOCTYPE html>
<html lang="en">
<head>
    <meta charset="UTF-8">
    <title>Title</title>

    <style>
        .b1{
            height: 1000px;
            background-image: url("http://www.autohome.com.cn/images/error/bg.png");
            /*background-repeat: no-repeat;*/
            background-repeat: repeat-x;
            /*background-repeat: repeat-y;*/
        }

    </style>

</head>
<body>
    <div class="b1"></div>
</body>
</html>

border
<!DOCTYPE html>
<html lang="en">
<head>
    <meta charset="UTF-8">
    <title>Title</title>
    <style>
        .bb{
            height: 100px;
            border: dashed 3px red;
        }
        .cc{
            height: 100px;
            border-top: ridge 3px darkorange;
            border-right: double 3px slateblue;
            border-bottom: dotted 3px slateblue;
            border-left: groove 3px #0f0f0f;
        }

    </style>
</head>
<body>

<div class="bb"></div>
<br>
<br>
<br>
<div class="cc"></div>

</body>
</html>

margin padding
<!DOCTYPE html>
<html lang="en">
<head>
    <meta charset="UTF-8">
    <title>Title</title>
</head>
<body>
<br><br><br>
<div style="height: 100px; border: 1px solid red">
    <!--margin: 顺时针top right bottom left-->
    <!--margin边距,自身大小不变,移动自身-->
    <!--注:它的外部需要有边框或高度-->
    <!--margin: 20px 表示 上右下左都移动20px-->
    <!--margin: 10px 20px 10px 20px 表示上、右、下左分别移动10px 20px 10px 20px-->
    <!--margin: 10px 20px 表示上下填充10它 右左移动20px-->
    <div style="height: 70px; background: green; margin-top: 20px;"></div>
</div>

<br><br><br>

<div style="height: 100px; border: 1px solid red">
    <!--padding: 顺时针top right bottom left-->
    <!--padding内边距,改变自身大小,相当于拉伸自身进行填充-->
    <!--注:它的外部需要有边框或高度-->
    <!--padding: 20px 表示 上右下左都填充20px-->
    <!--padding: 10px 20px 10px 20px 表示上、右、下左分别填充10px 20px 10px 20px-->
    <!--padding: 10px 20px 表示上下填充10它 右左填充20px-->
    <div style="height: 70px; background: green; padding-top: 30px;"></div>
</div>

</body>
</html>

display
display:none
display:block
<!DOCTYPE html>
<html lang="en">
<head>
    <meta charset="UTF-8">
    <title>Title</title>
    <style>
        .dd{
            background: #5146ff;
            display: none;
        }.ee{
            background: #5146ff;
            display: block;
        }.ff{
            background: #5146ff;
            display: inline;
        }

    </style>

</head>
<body>

    <p class="dd">display1</p>
    <a class="ee">display2</a>
    <p class="ff">display3</p>
    <p>display4</p>

</body>
</html>

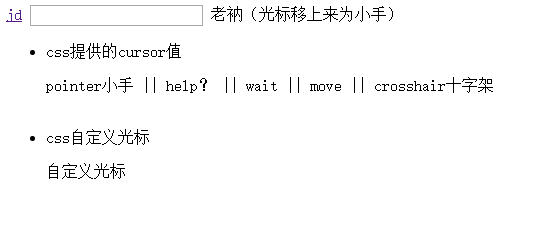
cursor
<!DOCTYPE html>
<html lang="en">
<head>
    <meta charset="UTF-8">
    <title>Title</title>
</head>
<body>

<a href="http://jd.com">jd</a>
<input type="text">
<span style="cursor: pointer">老衲(光标移上来为小手)</span>

<ul>
    <li>css提供的cursor值</li>
    <p>
        <span style="cursor:pointer;">pointer小手</span>
        ||
        <span style="cursor:help;">help?</span>
        ||
        <span style="cursor:wait;">wait</span>
        ||
        <span style="cursor:move;">move</span>
        ||
        <span style="cursor:crosshair;">crosshair十字架</span>


    </p>
    <br>
    <li>css自定义光标</li>
    <p>
        <span style='cursor: url("img/cousor1.gif"), auto;'>自定义光标</span>
    </p>
</ul>

</body>
</html>
浮动
<!DOCTYPE html>
<html lang="en">
<head>
    <meta charset="UTF-8">
    <title>Title</title>
</head>
<body>
<!--<div style=" 60%;">-->
<div>
    <div style="background-color: red; float: left;  20%;">111</div>
    <div style="background-color: green; float: left;  50%;">222</div>
    <div style="background-color: fuchsia; float: right;  10%;">333</div>

</div>


</body>
</html>

<!DOCTYPE html>
<html lang="en">
<head>
    <meta charset="UTF-8">
    <title>Title</title>
</head>
<body>

<div style="background-color: tomato">

    <div style="background-color: red; float: left;  20%;">111</div>
    <div style="background-color: green; float: left;  50%;">222</div>
    <div style="background-color: fuchsia; float: right;  10%;">333</div>
    <!--当标签内的标签都为float时,这时该标签就相当于没有东西在其里面填充,跟空标签类似,不会显示,可用 clear:both显示,把飘浮的标签都拉回来了-->
    <div style="clear: both"></div>
</div>


</body>
</html>

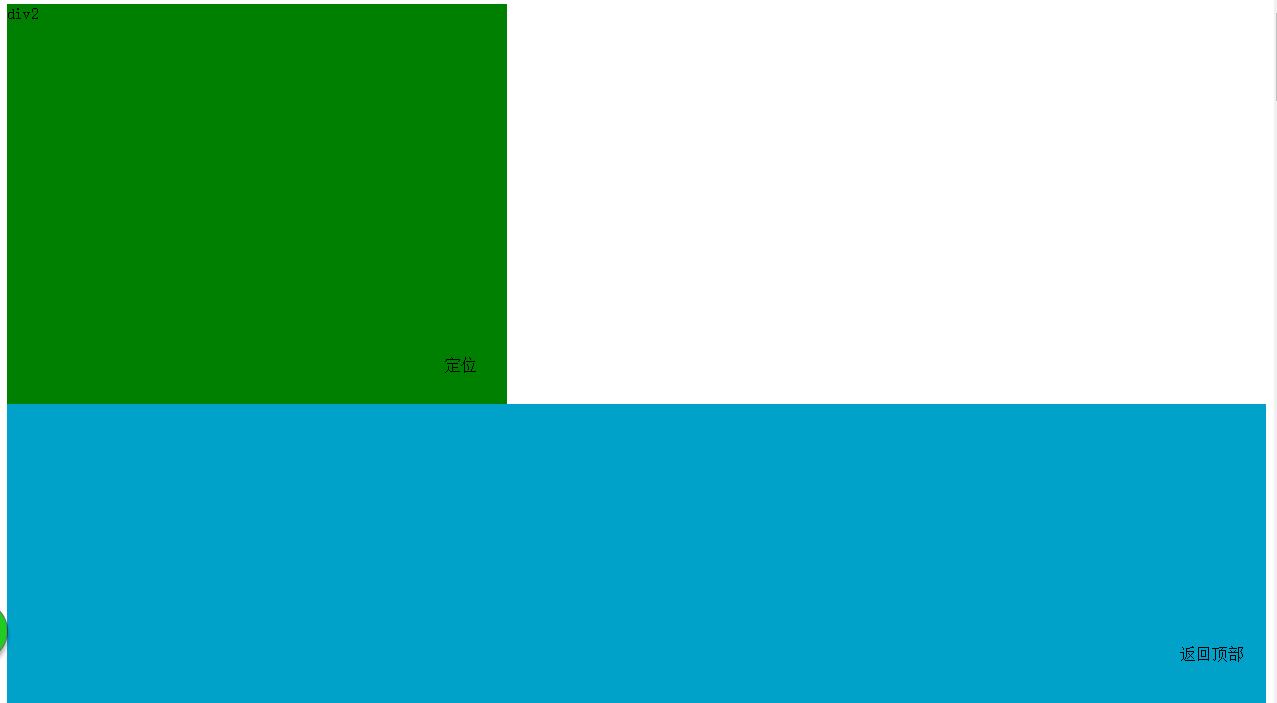
position
http://www.cnblogs.com/canuseethat/archive/2010/09/16/1827804.html
<!DOCTYPE html>
<html lang="en">
<head>
    <meta charset="UTF-8">
    <title>Title</title>
</head>
<body>

<div style="position: relative; background-color: green;  500px; height: 400px;">div2
    <div style="position: absolute; bottom: 30px; right: 30px;">定位</div>
</div>

<div style="height: 5000px; background-color: #00a2ca">
</div>

<div style="position: fixed; bottom: 40px; right: 30px;">返回顶部</div>
<!--<div style="position: absolute; bottom: 40px; right: 30px;">返回顶部</div>-->


</body>
</html>
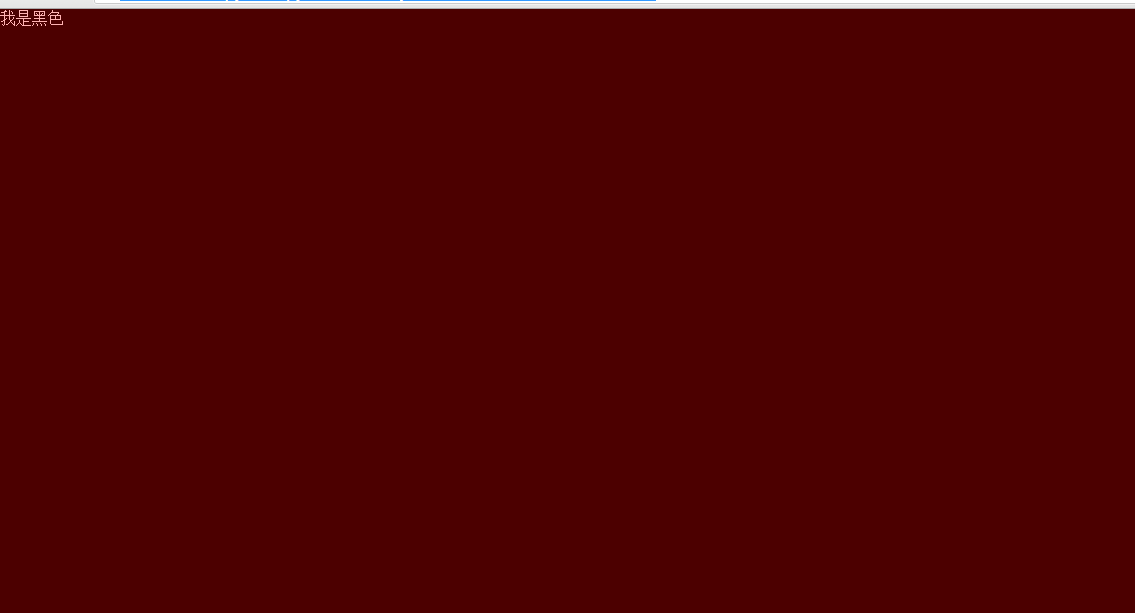
透明度
opacity: x; /*x值为0-1*/
filter:alpha(opacity=40); 针对IE8及更早的版本的IE
<!DOCTYPE html>
<html lang="en">
<head>
    <meta charset="UTF-8">
    <title>Title</title>
</head>
<body>
<br>
<br>
<br>

<!--opacity值 0 - 1,可以是小数-->
<!--针对IE不及更早的版本使用 filter: alpha(opacity=19); 取值范围0-100-->
<!--opacity:美 [oʊˈpæsəti] 不透明性;  费解;  难懂;  模糊-->
<div style="height: 100px; background-color: black; opacity: 0.19;">

</div>

<br>
<br>

<div>
    <img src="img/fengjing.jpg" style="opacity: 0.5;">
</div>
<br><br><br>
</body>
</html>

<!DOCTYPE html>
<html lang="en">
<head>
    <meta charset="UTF-8">
    <title>Title</title>
</head>
<body>

<!--z-index值越大越显示在最外层-->
<div style="z-index: 10; position: fixed; top: 0; right: 0; bottom: 0; left: 0; background-color: black"; ><span style="color: white">我是黑色</span></div>
<div style="z-index: 20; opacity: 0.3; position: fixed; top: 0; right: 0; bottom: 0; left: 0; background-color: red";></div>


</body>
</html>
2.4 css代码块
2.5 sj文件
2.6 js代码块
3 常用标签
标签一般分为两种:块级标签 和 行内(内联)标签,块级占一行起,内联内容多少占多少,可用chrome 控制台的放大镜点击看出区别
a, span, select 等块级标签
div, h1, p 等行内标签
网页特殊符号HTML代码大全
http://www.cnblogs.com/web-d/archive/2010/04/16/1713298.html
3.1 p 和 br
p 表示段落,默认段落之间是有间隔的
br 换行
3.2 a标签
<a target="_blank" href="http://home.jd.com/">我的京东</a>
3.2.1 target属性 _blank 表示在新窗口打开页面
3.2.2 锚
<!DOCTYPE html> <html lang="en"> <head> <meta charset="UTF-8"> <title>py web server</title> </head> <h1>符号</h1> < > & <div style=" 200px; border: 1px solid red; word-break: break-all"> <p>aaaaaaaaaaaaaaaaaaaaaaaaaaaaaaaaaaaaaaaaaaaaaaaaaaaaaaa<br>aaaaaaaaaaaaaaaaaaaaaaaaaaaaaaaaaaaa</p> <p>222222222222222222222222222222222222222222222222222222222222222222222222222222222222222222222222</p> </div> <a target="_blank" href="http://www.baidu.com">baidu</a> <a target="_blank" href="p2.html">p2</a> <a href="#tt">看第二章</a> <div style="height:2000px;background-color: red">第一章</div> <!--锚--> <div id="tt" style="height:2000px;background-color: green">第二章</div> </body> </html>
3.3 img h标签
<img src="01.jpg" title="jd tu" style="600px; height:600px">
<h1>hhhhhhhhhhhh1</h1>
<h2>hhhhhhhhhhhh2</h2>
<h3>hhhhhhhhhhhh3</h3>
<h4>hhhhhhhhhhhh4</h4>
<h5>hhhhhhhhhhhh5</h5>
<h6>hhhhhhhhhhhh6</h6>
3.4 select、label
<!--多选一-->
<select>
    <option>北京</option>
    <option>上海</option>
    <option>广州</option>
</select>

<!--多选一并设置选项值-->
<select>
    <option value="1">选项A</option>
    <option value="2">选项B</option>
    <option value="3" selected="selected">选项C</option>
</select>

<!--显示多少个-->
<select size="2">
    <option>北京</option>
    <option>上海</option>
    <option>广州</option>
</select>

<!--多选-->
<select multiple="multiple">
    <option>北京</option>
    <option>上海</option>
    <option>广州</option>
    <option>深圳</option>
    <option>东莞</option>
    <option>山东</option>
</select>

<!--分组标签-->
<select name="city">
    <optgroup label="广东省">
        <option value=11>广州</option>
        <option value=12>深圳</option>
        <option value=13>惠州</option>
        <option value=14>从化</option>
    </optgroup>
    <optgroup label="山西省">
        <option value=21>太原</option>
        <option value=22>平遥</option>
    </optgroup>
</select>
3.5 input系列
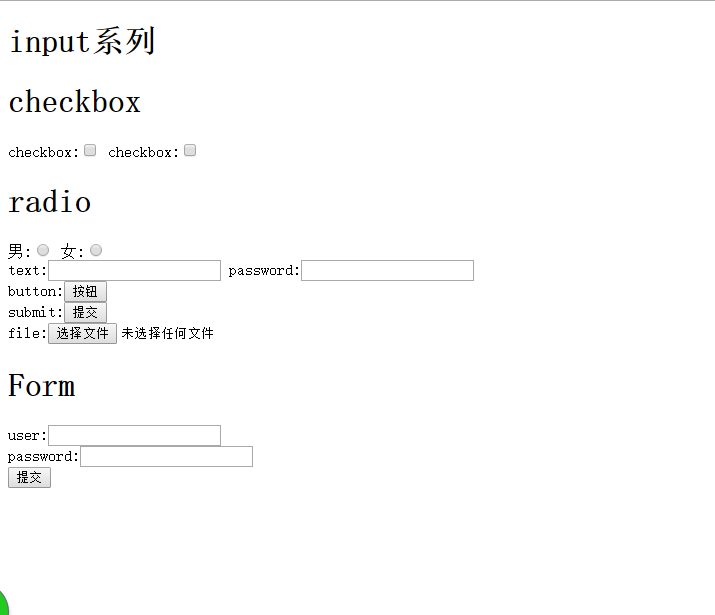
<!DOCTYPE html>
<html lang="en">
<head>
    <meta charset="UTF-8">
    <title>Title</title>
</head>
<body>
<h1>input系列</h1>
<!--复选框-->
<h1>checkbox</h1>

<lable><input name="fruit" type="checkbox" value=1>桃子</lable>
<lable><input name="fruit" type="checkbox" value=2>苹果</lable>
<lable><input name="fruit" type="checkbox" value=3>香蕉</lable>
<lable><input name="fruit" type="checkbox" value=4>李子</lable>
<!--单选框 name值要相同-->
<h1>radio</h1>
男:<input name="xingbie" type="radio">
女:<input name="xingbie" type="radio">

<br>
text:<input type="text">
password:<input type="password">

<br>

<!--submit在form表单中是提交数据作用,其他情况下button submit是一样的-->
button:<input type="button" value="按钮">
<br>
submit:<input type="submit" value="提交">

<br>

<!--选择文件-->
file:<input type="file">

<h1>Form</h1>

<form action="http://127.0.0.1:8000/django_form/" method="post">

    <div> user:<input name="user" type="text">
        <br>
        password:<input name="passwd" type="password">
        <br>

        <!--<input type="button" value="提交button">-->

        <input type="submit" value="提交">

    </div>

</form>

</body>

</html>
<!DOCTYPE html>
<html lang="en">
<head>
    <meta charset="UTF-8">
    <title>Title</title>
</head>
<body>

<h1>上传文件</h1>
<!--上传文件form 需要指定 enctype="multipart/form-data" method="post"-->
<form action="http://127.0.0.1:8000/django_form/" enctype="multipart/form-data" method="post">
    <input type="file">
    <input type="submit" value="上传">
</form>

</body>
</html>
3.6 django设置
3.6.1 创建django项目
3.6.2 在项目根目录下
3.6.3 python manage.py startapp app01
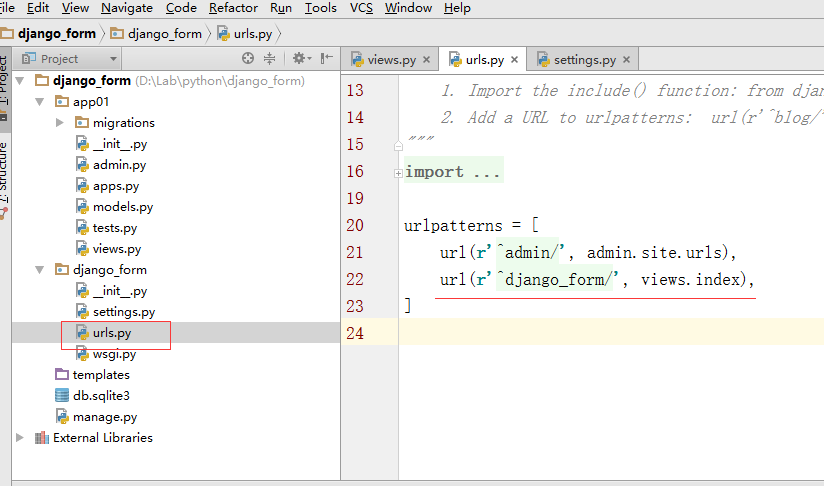
3.6.4 url(r'^django_form/', views.index)
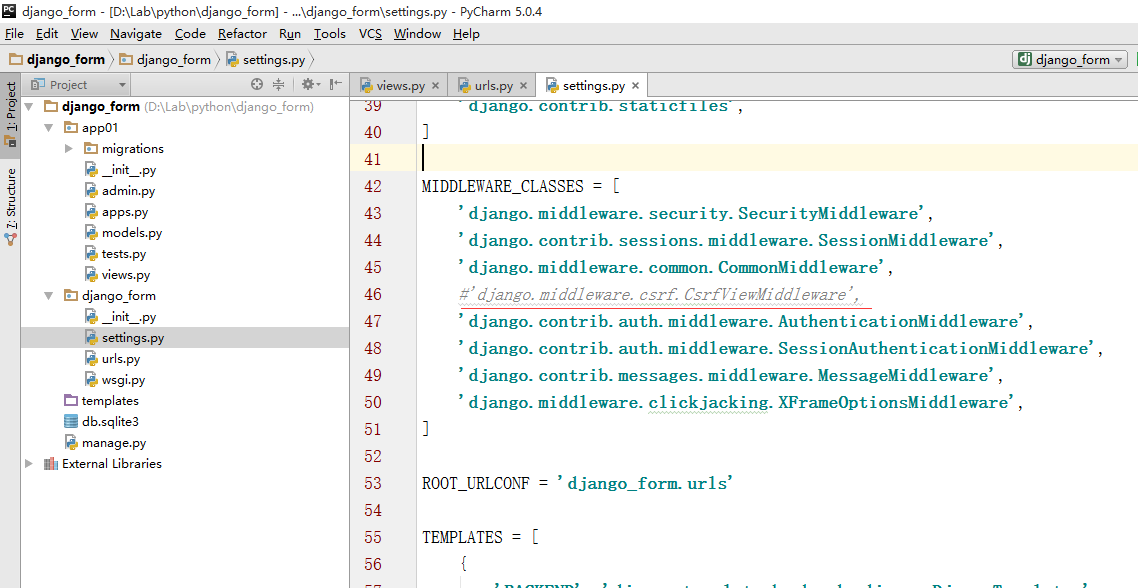
3.6.5 上传文件注释 csrf,解决上传文件报错
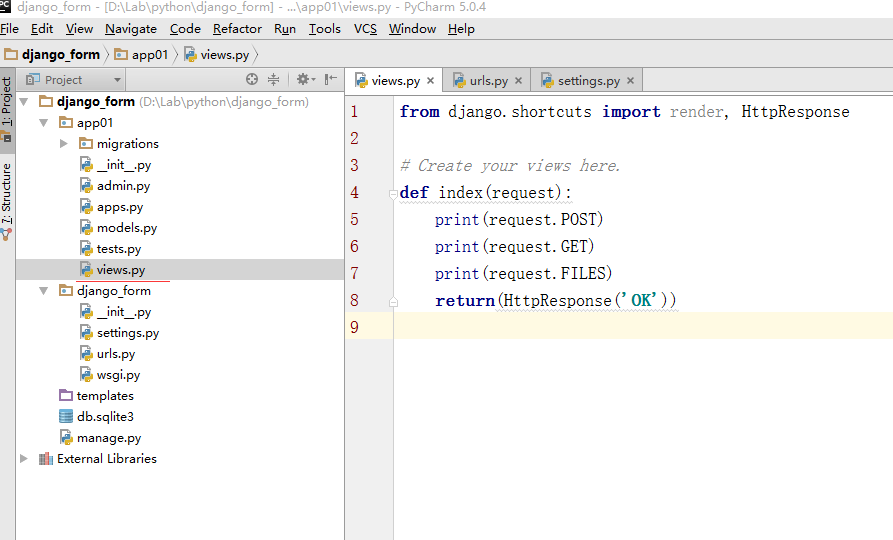
3.6.6 app01/views.py 添加如下函数
3.6.7 启动 django

3.7 文本域
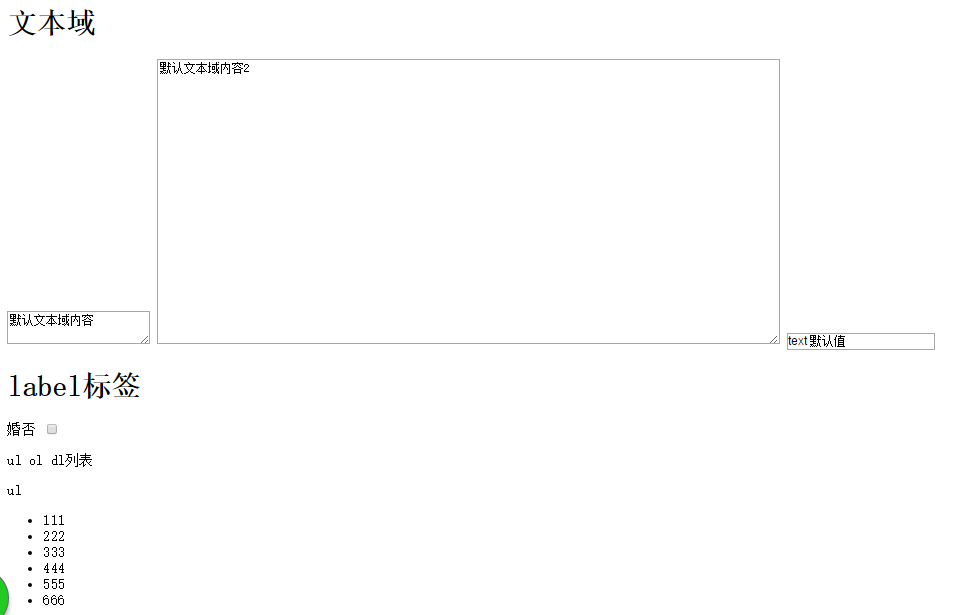

<!DOCTYPE html>
<html lang="en">
<head>
    <meta charset="UTF-8">
    <title>Title</title>
</head>
<body>
<h1>文本域</h1>
<textarea name="wenzhan">默认文本域内容</textarea>
<textarea name="wenzhani2" rows="20" cols="100">默认文本域内容2</textarea>

<input type="text" value="text 默认值">

<h1>label标签</h1>
<!--点击婚否时就是操作选项框-->
<!--for 与 id的绑定-->
<label for="cb1">婚否</label>
<input id="cb1" type="checkbox">


<p>ul ol dl列表</p>

<!--无序列表-->
<p>ul</p>
<ul>
    <li>111</li>
    <li>222</li>
    <li>333</li>
    <li>444</li>
    <li>555</li>
    <li>666</li>
</ul>

<!--有序列表-->
<p>ol</p>
<ol>
    <li>baidu</li>
    <li>tengxun</li>
    <li>aliyun</li>
</ol>

<!--定义列表-->
<p>dl</p>
<dl>
    <dt>标题1</dt>
    <dd>内容1.1</dd>
    <dd>内容1.2</dd>
    <dd>内容1.3</dd>
    <dt>标题2</dt>
    <dd>内容2.1</dd>
    <dd>内容2.2</dd>
    <dd>内容2.3</dd>
</dl>

<h1>table</h1>
<table border="1">
    <!--表头-->
    <thead>
        <tr>
            <th>第1列</th>
            <th>第2列</th>
            <th>第3列</th>
        </tr>
    </thead>
    <tbody>
        <tr>
            <td>h1.1</td>
            <td>h1.2</td>
            <td>h1.3</td>
        </tr>
        <tr>
            <td>h2.1</td>
            <td>h2.2</td>
            <td>h2.3</td>
        </tr>
        <tr>
            <td>h3.1</td>
            <td>h3.2</td>
            <td>h3.3</td>
        </tr>
    </tbody>

</table>


<table border="1">
    <!--表头-->
    <thead>
        <tr>
            <th>第1列</th>
            <th>第2列</th>
            <th>第3列</th>
        </tr>
    </thead>
    <tbody>
        <tr>
            <td colspan="2">h1.1,h1.2</td>
            <!--<td>h1.2</td>-->
            <td>h1.3</td>
        </tr>
        <tr>
            <td>h2.1</td>
            <td>h2.2</td>
            <td rowspan="2">h2.3, h3.3</td>
        </tr>
        <tr>
            <td>h3.1</td>
            <td>h3.2</td>
            <!--<td>h3.3</td>-->
        </tr>
    </tbody>

</table>

<h1>fieldset</h1>
<fieldset>
    <legend>登录</legend>
    <p>user:</p>
    <p>passwd:</p>
</fieldset>


</body>
</html>
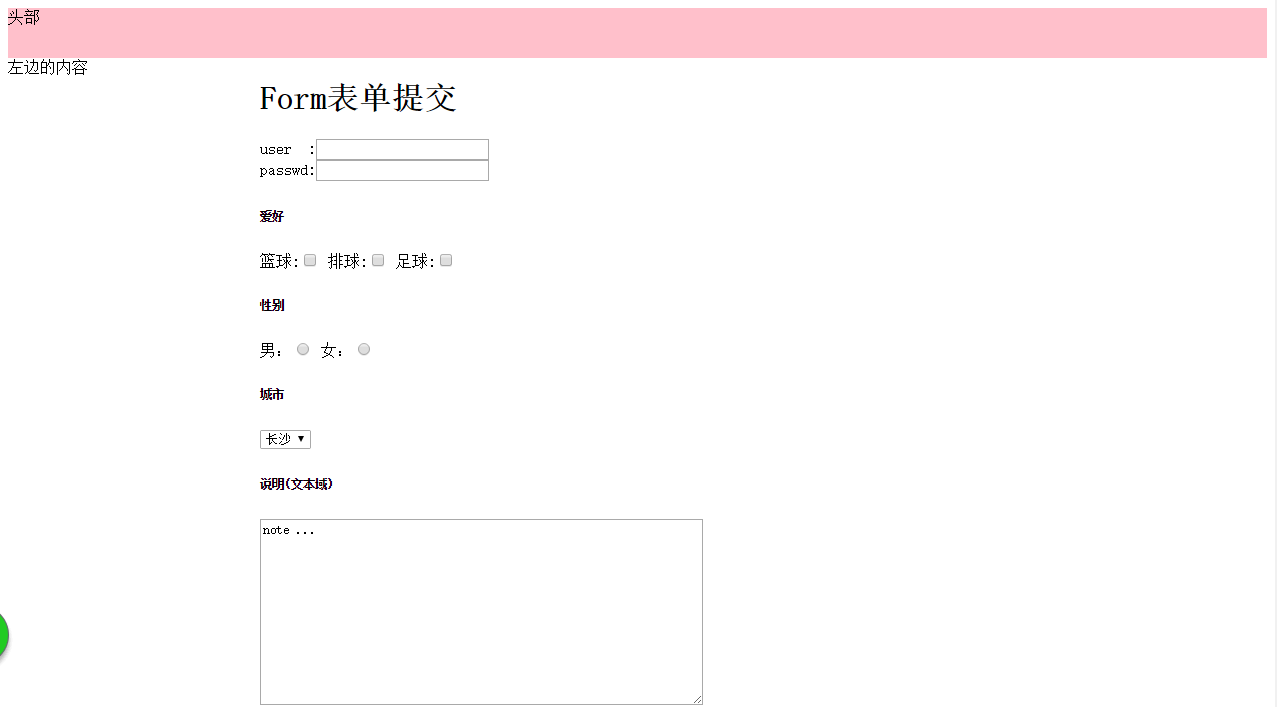
对以上整理统合页面
<!DOCTYPE html> <html lang="en"> <head> <meta charset="UTF-8"> <title>综合</title> </head> <body> <div style="height: 50px;background-color: pink;">头部 </div> <div style="background-color: #0b0b0b"> <div style="20%; height: 500px; float: left;">左边的内容</div> <div style="80%; height: 500px; float: left;"> <h1>Form表单提交</h1> <form action="http://127.0.0.1:8000/django_form/" enctype="multipart/form-data" method="post"> <div> user :<input type="text" name="user"><br> passwd:<input type="password" name="pwd"> </div> <div> <h6>爱好</h6> 篮球:<input name="favor" type="checkbox" value="1"> 排球:<input name="favor" type="checkbox" value="2"> 足球:<input name="favor" type="checkbox" value="3"> </div> <div> <h6>性别</h6> <label for="m">男:</label><input type="radio" id="m" name="gender" value="0"> <label for="f">女:</label><input type="radio" id="f" name="gender" value="1"> </div> <div> <h6>城市</h6> <select name="city"> <option value="hz">杭州</option> <option value="cs" selected="selected">长沙</option> <option value="cq">重庆</option> </select> </div> <div> <h6>说明(文本域)</h6> <textarea name="note" rows="12" cols="60">note ...</textarea> </div> <div> <h6>文件</h6> <input type="file" name="file_name"> </div> <p><input type="submit" value="提交"></p> </form> </div> </div> </body> </html>

css选择器
class选择器
.c1{}
<div class="c1">
标签选择器
a{} ## 所有a标签
div
span
select
input[type="text"]
ID选择器
#bb{}
<div id="bb"></div>
层级选择器
.c3 a div span{}
<div class="c3">
    <a>
        <div>
            <span></span>
        </div>
    </a>
</div>
组合选择器
ee, ff{}