ansible批量管理服务工具
ansible批量管理服务工具
批量管理服务器的工具
无须部署agent,通过ssh进行管理流行的自动化运维工具:https://github.con/ansible/ansible
三种批量管理工具
ansible (so easy) 500以下服务器saltstack (比较复杂) 1000到4万服务器puppet (超级复杂) 只有很老企业在用
jkenkins简介
可视化运维(主要用在可视化部署)持续构建,可以和git,svn结合(存放开发代码的仓库)可结合ssh实现可视化运维可结合ansible实现可视化运维
Ansible服务器简单的综合安全管理策略
#禁止非root用户查看Ansible管理服务器端/etc/hosts文件[root@ansible ~]# ll /etc/hosts-rw-r--r--. 1 root root 180 9月 9 00:38 /etc/hosts[root@ansible ~]# chmod 600 /etc/hosts#禁止非root用户查看Ansible的主机清单配置文件[root@ansible ~]# ll /etc/ansible/hosts-rw-r--r-- 1 root root 87 9月 9 21:59 /etc/ansible/hosts[root@ansible ~]# chmod 600 /etc/ansible/hosts
ansible查看帮助
/usr/local/python/bin/ansible-doc -l(查看总帮助)/usr/local/python/bin/ansible-doc -s shell(查看shell模块的帮助)/usr/local/python/bin/ansible-doc -s raw
安装ansible流程
如果Centos7版本
需要安装yum -y install net-toolsvim
关闭防火墙:systemctl stop firewalld 关闭防火墙开机启动:systemctl disable fierwalld
关闭selinux
7.5yum安装ansible
7.5yum仓库全可以用,本地的需要自己手动打开
yum -y install epel-release
yum -y install ansible (自动安装sshpass软件包)
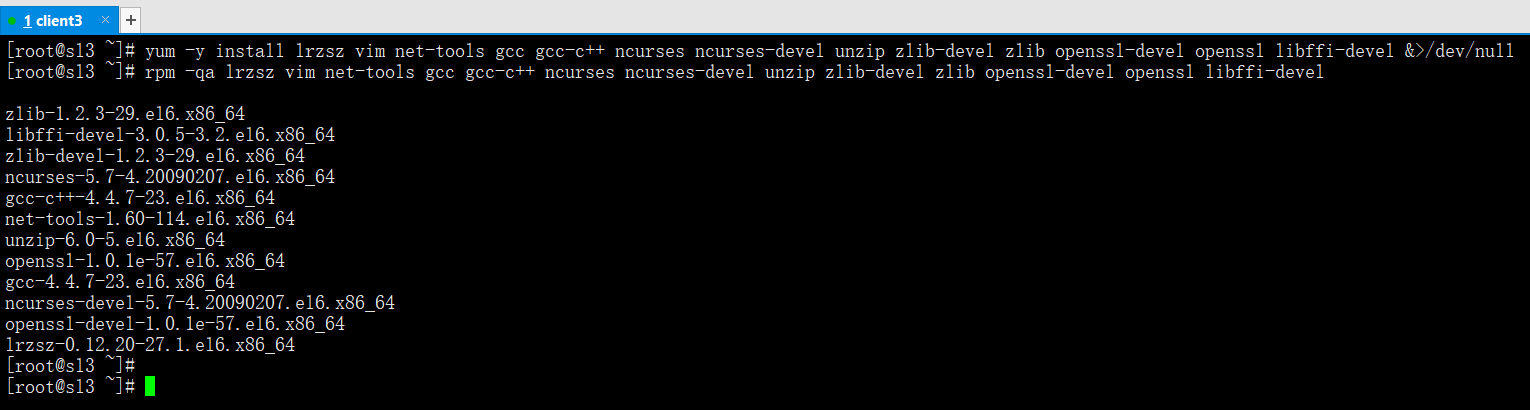
安装支持包
yum -y install lrzsz vim net-tools gcc gcc-c++ ncurses ncurses-devel unzip zlib-devel zlib openssl-devel openssl libffi-devel
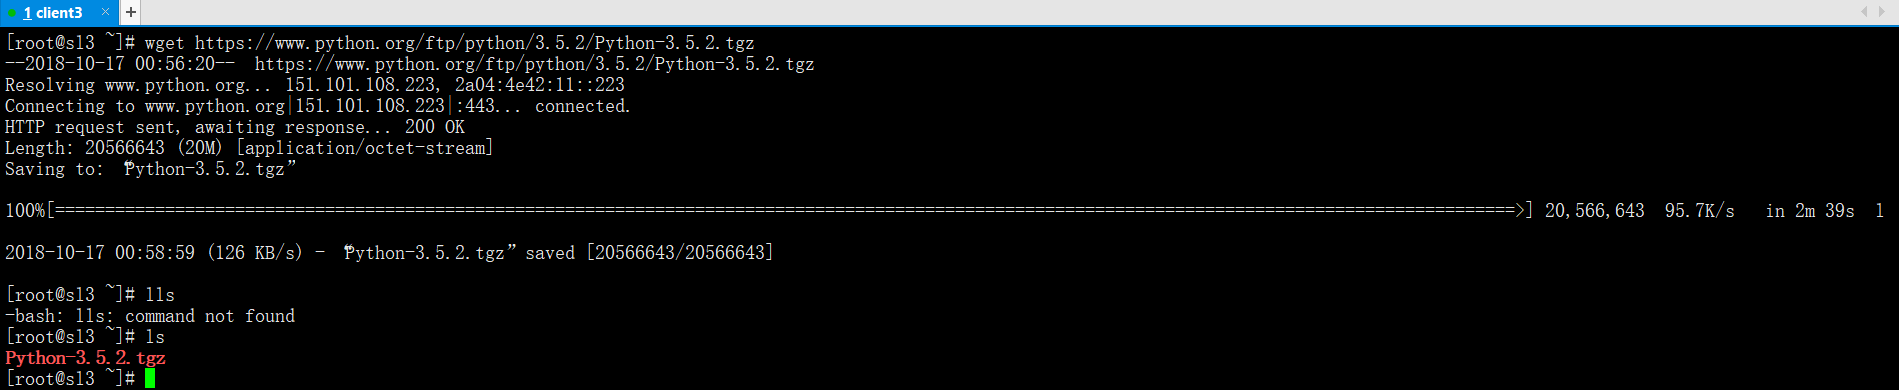
下载python源码包
链接:https://pan.baidu.com/s/1nE0v2fN6dq4FHfhSTbBnsg
提取码:ud04需要云yum
wget https://www.python.org/ftp/python/3.5.2/Python-3.5.2.tgz
源码编译Python3.5
tar xf Python-3.5.2.tgz -C /usr/src
cd /usr/src/Python-3.5.2
./configure --prefix=/usr/local/python
make && make install
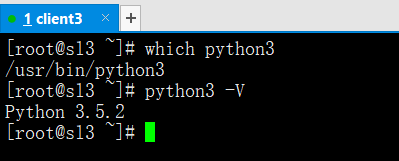
ln -s /usr/local/python/bin/python3 /usr/bin/python3(制作软链接)
which python3(查看命令是否存在)
python3 -V(查询python版本)
静心等待ansible安装完毕后
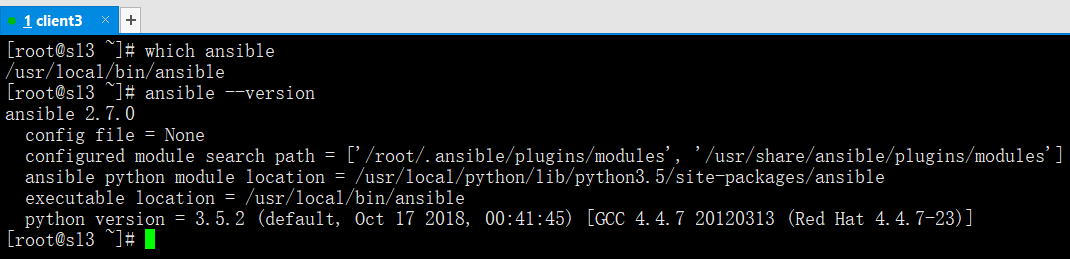
ln -s /usr/local/python/bin/ansible /usr/local/bin(制作软链接)
which ansible(查看命令是否存在)
ansible --version(查看ansible版本)
ansible的简单配置
通过pip安装的ansible是没有配置文件的
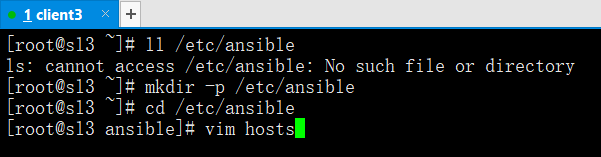
mkdir -p /etc/ansible(默认没有,需要手动创建)
vim /etc/ansible/hosts(默认没有,需要手动创建)
ansible命令使用格式
ansible -i 主机或主机组 -m 指定模块 -a 命令 (-i指定配置文件,不写就默认路径下/etc/ansible/hosts,-m指定模块,-a发布命令)
command模块发布命令使用格式
(对方需要有python包,发布命令)
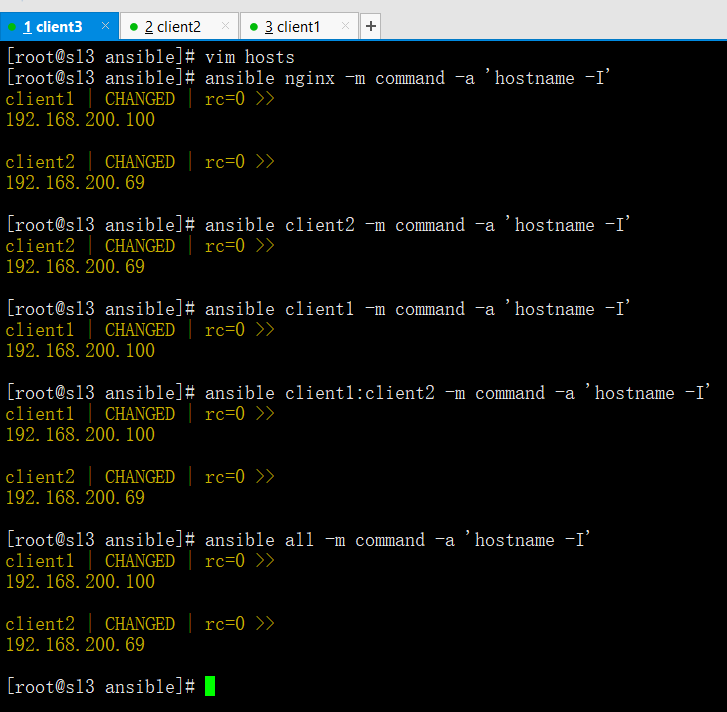
ansible nginx -m command -a 'hostname -I'
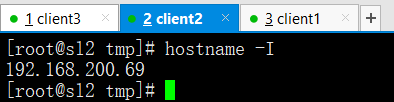
(分发模块内容格式,nginx是模块名,-a是条件,-m command是调用ansible里面的模块发布命令用)ansible client2 -m command -a 'hostname -I'
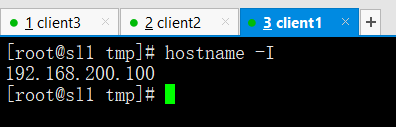
(分发单个主机格式,client2是主机名,-a是条件,-m command是调用ansible里面的模块发布命令用)ansible client1 -m command -a 'hostname -I'
(分发单个主机格式,client1是主机名,-a是条件,-m command是调用ansible里面的模块发布命令用)ansible client1:client2 -m command -a 'hostname -I'
(分发多个主机格式,client1:client2是主机名,-a是条件,-m command是调用ansible里面的模块发布命令用)ansible all -m command -a 'hostname -I'
(all是分发所有主机格式,-a是条件,-m command是调用ansible里面的模块发布命令用)

ping模块发布命令使用格式
(对方需要有python包)
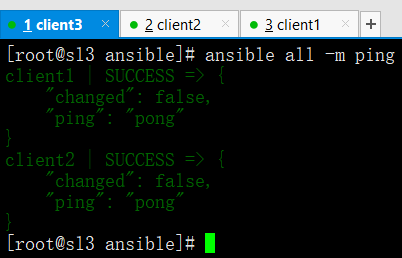
ping模块检查服务器是否连接正常,ping模块不需要-a指定参数
ansible all -m ping (ansible的ping模块格式)
shell模块发布命令使用格式
(对方需要有python包)
shell模块支持管道符格式
ansible all -m shell -a 'echo test | grep t'shell模块支持重定向格式
ansible all -m shell -a "echo bb >> /tmp/testansible"shell模块支持awk格式
ansible all -m shell -a "cat /etc/passwd | awk -F":" '{print $1}'" (如果遇到特殊符号需要加入转义)


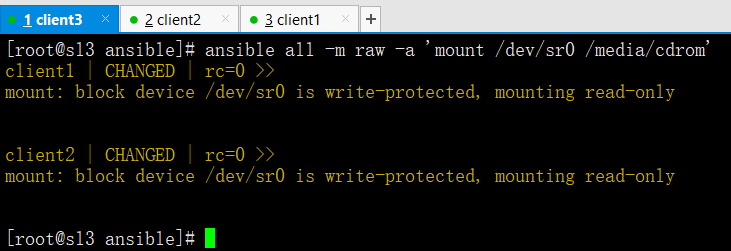
raw模块使用格式仅通过ssh实现
(不依赖python包)
copy模块注意事项
yum -y install libselinux-python(传送失败的话说明对方没有这个支持包)
copy模块拷贝文件目录使用格式
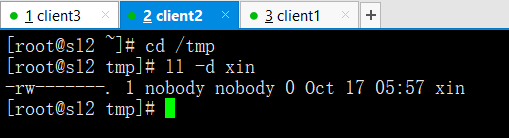
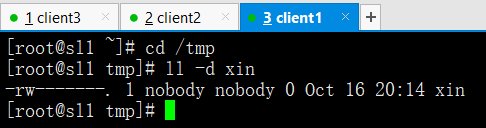
ansible all -m copy -a 'src=/root/xin dest=/tmp'
(src源文件,dest目标位置,对方没有目录模块自动创建)


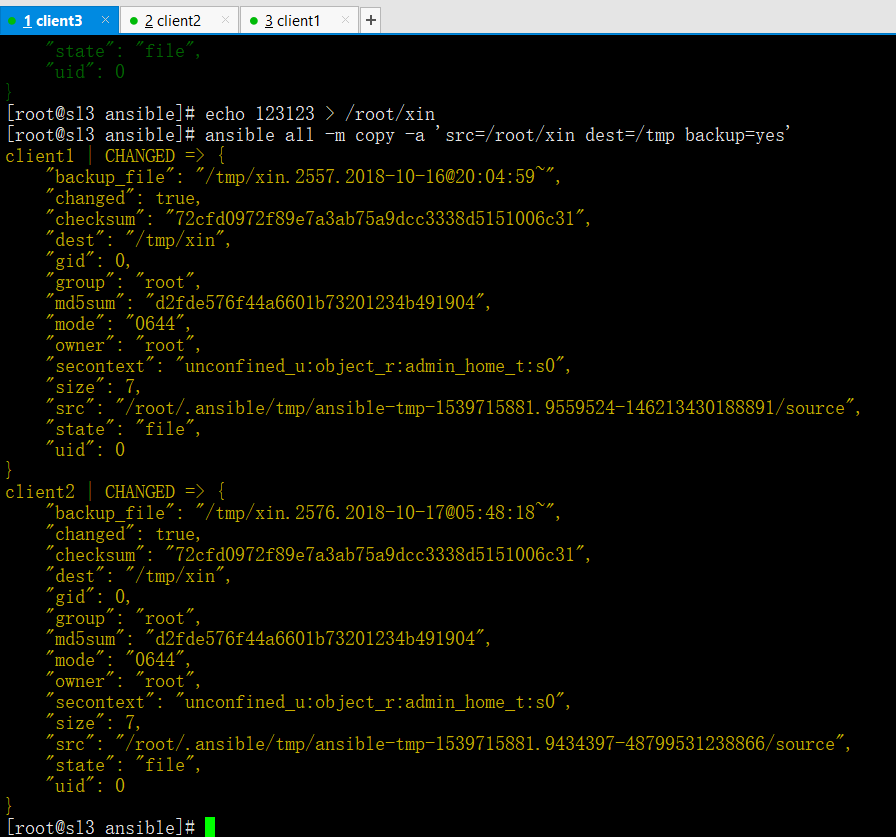
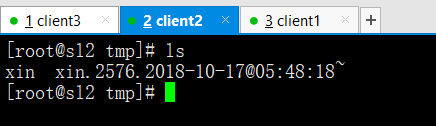
ansible all -m copy -a 'src=/root/xin dest=/tmp backup=yes'
(src源文件,dest目标位置,backup=yes覆盖同时是否备份源文件)
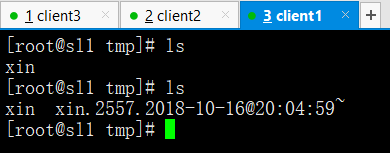
ansible all -m copy -a 'src=/root/xin dest=/tmp owner=nobody group=nobody mode=0600'
(owner=属主是谁,group=属组是谁,mode=它权限)

script模块批量运行脚本使用格式
ansible all -m script -a "/service/scripts/auto_nginx.sh"
#操作示例-->远程批量分发并自动部署nginx#所有被管理端需要挂载光盘,并创建本地yum配置文件[root@ansible scripts]# pwd/service/scripts[root@ansible scripts]# ls | xargs -n1auto_nginx.sh #自动安装nginx脚本fenfa.sh #批量分发脚本nginx-1.10.2.tar.gz #nginx源码包[root@ansible scripts]# cat auto_nginx.sh #nginx安装脚本#!/bin/sh#nginx install shell scriptstest -d /media/cdrom || mkdir -p /media/cdrommount /dev/sr0 /media/cdrom &>/dev/nullyum -y install gcc gcc-c++ make pcre pcre-devel zlib zlib-devel openssl openssl-devel &>/dev/nulltest -d /service/scripts || exit 3cd /service/scripts/tar xf nginx-1.10.2.tar.gz -C /usr/src/cd /usr/src/nginx-1.10.2/./configure --prefix=/usr/local/nginx --with-http_ssl_module --with-http_stub_status_module &>/dev/nullmake &>/dev/nullmake install &>/dev/nullexit 0[root@ansible scripts]# cat fenfa.sh #源码包和安装脚本的批量分发脚本#!/bin/sh#批量分发脚本Group=$1ansible $Group -m copy -a "src=/service/scripts/ dest=/service/scripts/"ansible $Group -m script -a "/service/scripts/auto_nginx.sh"[root@ansible scripts]# sh fenfa.sh all #激活脚本
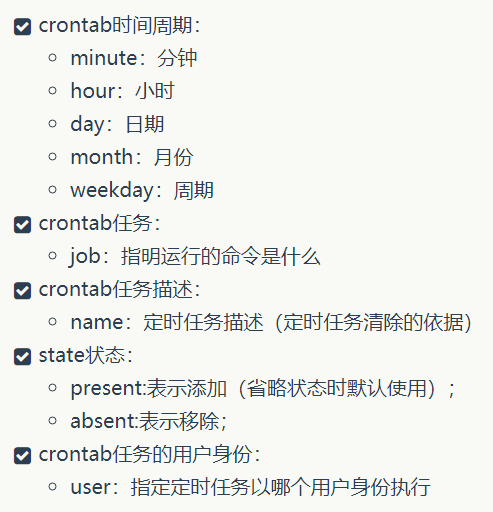
cron定时任务模块
Ansible中的cron模块用于定义任务计划。主要包括两种状态(state)
#添加定时任务计划,在所有被管理的主机里每十分钟输出hello字符串,定时任务描述为test cron job[root@ansible ~]# ansible all -m cron -a 'minute="*/10" job="/bin/echo hello" name="test cron job"'Web02 | SUCCESS => {"changed": true,"envs": [],"jobs": ["test cron job"]}Web01 | SUCCESS => {"changed": true,"envs": [],"jobs": ["test cron job"]}[root@ansible ~]# ansible all -m shell -a 'crontab -l'Web01 | SUCCESS | rc=0 >>#Ansible: test cron job*/10 * * * * /bin/echo helloWeb02 | SUCCESS | rc=0 >>#Ansible: test cron job*/10 * * * * /bin/echo hello#删除描述为test cron job的定时任务[root@ansible ~]# ansible all -m cron -a 'minute="*/10" job="/bin/echo hello" name="test cron job" state=absent'Web02 | SUCCESS => {"changed": true,"envs": [],"jobs": []}Web01 | SUCCESS => {"changed": true,"envs": [],"jobs": []}[root@ansible ~]# ansible all -m shell -a 'crontab -l'Web02 | SUCCESS | rc=0 >>Web01 | SUCCESS | rc=0 >>#给Web01服务器上的普通用户yunjisuan添加一个定时任务[root@ansible ~]# ansible Web01 -m shell -a 'id yunjisuan'Web01 | SUCCESS | rc=0 >>uid=1000(yunjisuan) gid=1000(yunjisuan) 组=1000(yunjisuan)[root@ansible ~]# ansible Web01 -m cron -a 'minute="*/10" job="/bin/echo hello" name="yunjisuan cron job" user="yunjisuan"'Web01 | SUCCESS => {"changed": true,"envs": [],"jobs": ["yunjisuan cron job"]}[root@ansible ~]# ansible Web01 -m shell -a 'crontab -u yunjisuan -l'Web01 | SUCCESS | rc=0 >>#Ansible: yunjisuan cron job*/10 * * * * /bin/echo hello[root@ansible ~]# ansible Web01 -m cron -a 'minute="*/10" job="/bin/echo hello" name="yunjisuan cron job" user="yunjisuan" state="absent"'Web01 | SUCCESS => {"changed": true,"envs": [],"jobs": []}[root@ansible ~]# ansible Web01 -m shell -a 'crontab -u yunjisuan -l'Web01 | SUCCESS | rc=0 >>
yum模块批量安装软件包
利用yum模块安装软件包,虽然能被shell模块替代,但是用yum模块更显专业一些

user模块批量创建用户
用户管理模块。管理用户账号

#在Web02上创建一个普通用户yunjisuan,并设置用户的密码为123123[root@ansible ~]# ansible Web02 -m user -a 'name=yunjisuan comment="welcom to yunjisuan" uid=1066 groups=wheel password=123123 shell=/bin/bash home=/home/yunjisuan'Web02 | SUCCESS => {"changed": true,"comment": "welcom to yunjisuan","create_home": true,"group": 1066,"groups": "wheel","home": "/home/yunjisuan","name": "yunjisuan","password": "NOT_LOGGING_PASSWORD","shell": "/bin/bash","state": "present","system": false,"uid": 1066}[root@ansible ~]# ansible Web02 -m shell -a 'tail -1 /etc/passwd'Web02 | SUCCESS | rc=0 >>yunjisuan:x:1066:1066:welcom to yunjisuan:/home/yunjisuan:/bin/bash[root@ansible ~]# ansible Web02 -m shell -a 'tail -1 /etc/shadow'Web02 | SUCCESS | rc=0 >>yunjisuan:123123:17783:0:99999:7::: #密码居然是明文!!!
利用ansible的user模块状态用户时要注意在password参数的后边添加密文,否则不能登陆用户
通过Python的pip程序安装passlib即可为密码加密
#安装Python2的pip工具,并通过pip工具安装Python的加密模块来给密码加密[root@ansible ~]# yum -y install epel-release[root@ansible ~]# yum -y install python2-pip[root@ansible ~]# pip install passlib#生成密文密码[root@ansible ~]# python -c "from passlib.hash import sha512_crypt;import getpass;print sha512_crypt.encrypt(getpass.getpass())"Password: #输入你想要加密的密码$6$rounds=656000$Tw15COd8DLh/VS94$Mcmz/8CcjBKiEl0mYHcOQQCxEA5mz66EcGH2qXVk6o.Sm7FsRS.DsDVy6ET8iI6jDa045I94slZqWFwyYnRSW1 #加密后的密码#删除之前创建的yunjisuan用户,并删除它的家目录[root@ansible ~]# ansible Web02 -m user -a 'name=yunjisuan state=absent remove=true'Web02 | SUCCESS => {"changed": true,"force": false,"name": "yunjisuan","remove": true,"state": "absent"}#继续在Web02上创建yunjisuan用户[root@ansible ~]# ansible Web02 -m user -a 'name=yunjisuan comment="welcom to yunjisuan" uid=1066 groups=wheel password=$6$rounds=656000$Tw15COd8DLh/VS94$Mcmz/8CcjBKiEl0mYHcOQQCxEA5mz66EcGH2qXVk6o.Sm7FsRS.DsDVy6ET8iI6jDa045I94slZqWFwyYnRSW1 shell=/bin/bash' home=/home/yunjisuan'[root@ansible ~]# ansible Web02 -m shell -a 'tail -1 /etc/shadow'Web02 | SUCCESS | rc=0 >>yunjisuan:$6$rounds=656000$Tw15COd8DLh/VS94$Mcmz/8CcjBKiEl0mYHcOQQCxEA5mz66EcGH2qXVk6o.Sm7FsRS.DsDVy6ET8iI6jDa045I94slZqWFwyYnRSW1:17783:0:99999:7::: #终于密文了
setup模块批量查看服务的所有属性
Ansible中使用setup模块收集,查看被管理主机的facts(facts是Ansible采集被管理主机设备信息的一个功能)。每个被管理主机在接收并运行管理命令之前,都会将自己的相关信息(操作系统版本,IP地址等)发送给控制主机
#查看远程主机的facts信息[root@ansible ~]# ansible Web01 -m setup | headWeb01 | SUCCESS => {"ansible_facts": {"ansible_all_ipv4_addresses": ["192.168.200.184"],"ansible_all_ipv6_addresses": ["fe80::20c:29ff:fe77:16ad"],"ansible_apparmor": {"status": "disabled"
ansible-playbook的初步使用
playbook可以把ansible的模块进行组合
ln -s /usr/local/python/bin/ansible-playbook /usr/local/bin (优先制作软链接)shell模块支持很多模式,copy模块分发文件或目录,register模块输出命令运行结果,nginx_conf配置下发并检测,vars自定义变量,setupvars内置变量,filevars可变配置文件vim test_shell[copy,register,nginx_conf,vars,setupvars,filevars].yaml (执行模板)ansible-playbook test_shell[copy,register,nginx_conf,vars,setupvars,filevars].yaml (执行配置文件)我们可以使用ansible all -m setup | less (查看ansible内置变量)vim if.j2 (下发配置文件模板样式)
下发配置文件里面使用判断语法
vim /tmp/if.j2{% if PORT %} #if PORT存在ip=0.0.0.0:{{ PORT }}{% else %} #否则的话ip=0.0.0.0:80{% endif %} #结尾vim test_ifvars.yaml---- hosts: allgather_facts: True #开启系统内置变量vars:- PORT: 90 #自定义变量tasks:- name: jinja2 if testtemplate: src=/tmp/if.j2 dest=/root/testansible-playbook test_ifvars.yaml (下达分发命令)如果我们将变量PORT值为空的话,就会进入else否则的80端口---- hosts: allgather_facts: Truevars:- PORT: #置空tasks:- name: jinja2 if testtemplate: src=/tmp/if.j2 dest=/root/test
Playbook下发可变配置文件
#利用template模块下发可变的配置文件---- hosts: allgather_facts: True #开启系统变量vars:- myname: "yunjisuan" #自定义变量tasks:- name: template testtemplate: src=/tmp/test dest=/root/test #使用template下发可变配置文件
配置文件如果使用copy模块去下发的话,那配置都是一样的;
如果下发的配置文件里有可变的配置,需要用到template模块。
playbook使用register输出命令运行结果
---- hosts: alltasks:- name: test registershell: echo "welcome to yunjisuan"register: print_result #将之前命令的输出结果保存在变量print_result里- debug: var=print_result #将变量的值作为debug输出出来。我们在用playbook进行ansible模块操作的时候,并没有命令的执行结果输出,默认被隐藏了我们可以通过register模块追加输出命令的执行结果
playbook的自定义变量和内置变量
我们可以使用ansible all -m setup | less查看ansible内置变量
---- hosts: allvars: #定义变量- name: "yunjisuan" #第一个name变量age: "3" #第二个age变量tasks:- name: "{{ name }}" #{{}}两对大括号引用变量,变量名两头空格shell: echo "myname {{ name }},myage {{ age }}"register: var_result- debug: var=var_result
---- hosts: allgather_facts: Truetasks:- name: setup varshell: echo "ip {{ ansible_all_ipv4_addresses[0] }} cpu {{ ansible_processor_count }}" >> /tmp/test- name: setup var2shell: echo "time {{ ansible_date_time["date"] }}" >> /tmp/testregister: var_result- debug: var=var_result特别提示:引用变量需要在双引号中引用。在使用自定义变量时,我们要特别注意不要和系统的内置保留变量同名,容易引发问题。Found variable using reserved name: name #name是一个保留的内置变量,我们在自定义时不能用,会有警告
---- hosts: allgather_facts: True #使用ansible内置变量tasks:- name: setup varshell: echo "ip {{ ansible_all_ipv4_addresses[0] }} cpu {{ ansible_processor_count }}" >> /tmp/test- name: setup var2shell: echo "time {{ ansible_date_time["date"] }}" >> /tmp/testregister: var_result- debug: var=var_result#python取变量方法a = [1,3,5] --> a[0]=1 #这样取值就不会带[]a = {"sl":123123,"sl1"123321} --> a[sl]=123123 #这样取值就不会带[]
playbook的简单shell模块的使用
--- #开头三个小-开头- hosts: webBtasks:- name: testshell: echo "welcome to yunjisaun" >> /tmp/username- name: test2shell: echo "welcome to yunjisuan" >> /tmp/username模板说明:--- #开头必须有三个小-,顶格写- hosts: #正文配置代码的第一级,必须有两个空格(-占一个空格位)- host: webB #webB是host参数的值,值和hosts:之间要有一个空格tasks: #tasks:表示接下来要执行的具体任务- name: #相对于tasks再多缩进两个格(-占一个空格位),表示属于tasks的下一级- name: test #test只是要执行的具体命令的名字可以随便写。name:后还是有一个空格要注意shell: #表示调用shell模块执行命令相对于tasks仍旧要多缩进两个空格shell: echo "xxx" >> xxx #shell:后边还是要有个空格,需要注意。
playbook的简单copy模块的使用
---- hosts: alltasks:- name: test copycopy: src=/tmp/copy_test dest=/tmp/模板说明:--- #开头必须有三个小-,顶格写- hosts: #正文配置代码的第一级,必须有两个空格(-占一个空格位)tasks: #tasks:表示接下来要执行的具体任务- name: test #test只是要执行的具体命令的名字可以随便写。name:后还是有一个空格要注意copy: src=/tmp/copy_test dest=/tmp/ #把源文件拷贝到对方的位置
Playbook的notify通知和下发nginx配置
vim nginx.j2worker_processes {{ ansible_processor_count }}; #可变的参数#实战下发可执行动作的可变的nginx配置文件---------------------------------------------------------------------------vim test_nginxvars.yaml---- hosts: allgather_facts: True #开启系统内置变量tasks:- name: nginx conftemplate: src=/tmp/nginx.j2 dest=/usr/local/nginx/conf/nginx.confnotify:- reload nginx #下发通知给handlers模块执行名字叫做reload nginx的动作handlers: #定义动作- name: reload nginx #动作的名字shell: /usr/local/nginx/sbin/nginx -s reloadansible-playbook test_nginxvars.yaml (执行分发命令)
nginx配置下发并检测
---- hosts: alltasks:- name: copy nginx.confcopy: src=/tmp/nginx.conf dest=/usr/local/nginx/conf/ backup=yes- name:shell: /usr/local/nginx/sbin/nginx -tregister: nginx_result- debug: var=nginx_result
ansible的script模块批量运行脚本
#操作示例-->远程批量分发并自动部署nginx#所有被管理端需要挂载光盘,并创建本地yum配置文件auto_nginx.sh #自动安装nginx脚本fenfa.sh #批量分发脚本nginx-1.10.2.tar.gz #nginx源码包#!/bin/sh#nginx install shell scriptstest -d /media/cdrom || mkdir -p /media/cdrommount /dev/sr0 /media/cdrom &>/dev/nullyum -y install gcc gcc-c++ make pcre pcre-devel zlib zlib-devel openssl openssl-devel &>/dev/nulltest -d /service/scripts || exit 3cd /service/scripts/tar xf nginx-1.10.2.tar.gz -C /usr/src/cd /usr/src/nginx-1.10.2/./configure --prefix=/usr/local/nginx --with-http_ssl_module --with-http_stub_status_module &>/dev/nullmake &>/dev/nullmake install &>/dev/nullexit 0#源码包和安装脚本的批量分发脚本#!/bin/sh#批量分发脚本Group=$1ansible $Group -m copy -a "src=/service/scripts/ dest=/service/scripts/"ansible $Group -m script -a "/service/scripts/auto_nginx.sh"
使用roles标准化Playbook
roles功能可以用来规范playbook的编写
创建所需要的roles原型目录结构
#创建roles基本原型的目录结构[root@ansible myroles]# tree /myroles//myroles/├── nginx.yaml #入口触发配置文件└── roles #playbook的原型配置目录└── nginx #nginx相关模组配置目录├── files #copy模块和script模块的参数src默认会从这个文件夹查找├── handlers #用来存放notify的├── tasks #用来存放ansible模块任务的├── templates #用来存放j2的└── vars #用来存放变量的7 directories, 1 file#入口触发配置文件[root@ansible myroles]# cat /myroles/nginx.yaml---- hosts: all #执行的主机范围gather_facts: True #开启系统内置变量roles: #启用roles原型配置- nginx #执行nginx原型模组
roles中tasks任务编排模组的使用
#在nginx模组添加tasks任务配置文件[root@ansible myroles]# cat roles/nginx/tasks/main.yaml---- name: check alived #任务1的名字ping: #执行ping模块- name: #任务2的名字shell: ls / #执行shell模块register: ls_result #将执行结果保存给变量- debug: var=ls_result #变量的值赋值给debug进行输出#完成后的目录结构如下所示[root@ansible myroles]# tree /myroles//myroles/├── nginx.yaml #nginx模组入口配置文件└── roles└── nginx #nginx原型模组目录├── files├── handlers├── tasks│ └── main.yaml #nginx模组的tasks任务配置文件├── templates└── vars7 directories, 2 files
执行简单的roles任务模型
#执行nginx入口配置文件[root@ansible myroles]# ansible-playbook nginx.yamlPLAY [all] ****************************************************************************************************TASK [Gathering Facts] ****************************************************************************************ok: [webA]ok: [webB]TASK [nginx : check alived] ***********************************************************************************ok: [webA]ok: [webB]TASK [nginx : shell] ******************************************************************************************changed: [webA]changed: [webB]TASK [nginx : debug] ******************************************************************************************ok: [webA] => {"ls_result": {"changed": true,"cmd": "ls /","delta": "0:00:00.002805","end": "2018-06-21 11:52:29.343592","failed": false,"rc": 0,"start": "2018-06-21 11:52:29.340787","stderr": "","stderr_lines": [],"stdout": "bin boot dev etc home lib lib64 media mnt opt proc roo root run sbin service srv sys tmp usr var","stdout_lines": ["bin","boot","dev","etc","home","lib","lib64","media","mnt","opt","proc","roo","root","run","sbin","service","srv","sys","tmp","usr","var"]}}ok: [webB] => {"ls_result": {"changed": true,"cmd": "ls /","delta": "0:00:00.002708","end": "2018-06-21 11:52:29.359754","failed": false,"rc": 0,"start": "2018-06-21 11:52:29.357046","stderr": "","stderr_lines": [],"stdout": "bin boot dev etc home lib lib64 media mnt opt proc roo root run sbin service srv sys tmp usr var","stdout_lines": ["bin","boot","dev","etc","home","lib","lib64","media","mnt","opt","proc","roo","root","run","sbin","service","srv","sys","tmp","usr","var"]}}PLAY RECAP ****************************************************************************************************webA : ok=4 changed=1 unreachable=0 failed=0webB : ok=4 changed=1 unreachable=0 failed=0
ansible-playbook执行入口配置文件nginx.yaml后,它会自动在roles目录下查找nginx目录并进入后查找tasks任务目录并执行main.yaml的任务配置文件。
其实,这个roles的操作等效于以下配置
#本配置和之前的roles配置等效[root@ansible myroles]# cat /service/scripts/test.yaml---- hosts: allgather_facts: Truetasks: #其实roles的本质就是将tasks任务单独写了。- name: check alived #并在入口文件里追加了roles去查找tasks配置文件路径ping:- name:shell: ls /register: ls_result- debug: var=ls_result
roles中vars自定义变量模组的使用
#创建自定义变量vars模组的配置文件[root@ansible myroles]# cat roles/nginx/vars/main.yaml---my_name: yunjisuanphone: 1800000000[root@ansible myroles]# cat roles/nginx/tasks/main.yaml---- name: check alivedping:- name:shell: ls /register: ls_result- debug: var=ls_result- name: #添加对变量引用的任务编排shell: echo my phone is {{ phone }}register: echo_result- debug: var=echo_result[root@ansible myroles]# ansible-playbook nginx.yaml #执行入口配置文件
使用copy,script模块的标准化
roles模型里使用copy,script模块,默认从roles/nginx/files这里面找
[root@ansible myroles]# cat roles/nginx/files/testwelcome to yunjisuan[root@ansible myroles]# cat roles/nginx/files/test.shecho "aaa" >> /tmp/test[root@ansible myroles]# chmod +x roles/nginx/files/test.sh[root@ansible myroles]# cat roles/nginx/tasks/main.yaml---- name: check alivedping:- name:shell: ls /register: ls_result- debug: var=ls_result- name:shell: echo my phone is {{ phone }}register: echo_result- debug: var=echo_result- name: #添加copy模块copy: src=test dest=/root/- name: #添加script模块(自动在目标IP机器上执行脚本)script: test.sh[root@ansible myroles]# ansible-playbook nginx.yaml
roles中template模块的使用
roles模型里使用template模块,默认从roles/nginx/template里面找
[root@ansible myroles]# cat roles/nginx/templates/test.j2myname is {{ my_name }},my phone is {{ phone }} #引用自定义变量my ipaddress is {{ansible_all_ipv4_addresses[0]}} #引用内置变量[root@ansible myroles]# cat roles/nginx/tasks/main.yaml---- name: check alivedping:- name:shell: ls /register: ls_result- debug: var=ls_result- name:shell: echo my phone is {{ phone }}register: echo_result- debug: var=echo_result- name:copy: src=test dest=/root/- name:script: test.sh- name:template: src=test.j2 dest=/root/test2 #下发可变配置文件[root@ansible myroles]# ansible-playbook nginx.yaml
roles中notify模块的使用
roles使用notify模块,默认从roles/nginx/handles里面找
[root@ansible myroles]# cat roles/nginx/handlers/main.yaml---- name: start_nginx #定义handlers的动作类型shell: /usr/local/nginx/sbin/nginx- name: stop_nginx #定义handlers的动作类型shell: /usr/local/nginx/sbin/nginx -s stop- name: reload_nginx #定义handlers的动作类型shell: /usr/local/nginx/sbin/nginx -s reload[root@ansible myroles]# cat roles/nginx/tasks/main.yaml---- name: check alivedping:- name:shell: ls /register: ls_result- debug: var=ls_result- name:shell: echo my phone is {{ phone }}register: echo_result- debug: var=echo_result- name:copy: src=test dest=/root/- name:script: test.sh- name:template: src=test.j2 dest=/root/test2notify: start_nginx #执行template任务后下发通知给handlers执行start_nginx[root@ansible myroles]# ansible-playbook nginx.yaml
特别提示:
notify下发通知只有当之前的任务造成了变化那么才会被执行,如果没有发生任何改变,则notify不会被执行。例如:
#tasks任务造成改变,触发notify[root@ansible myroles]# cat /tmp/test.yaml---- hosts: webAgather_facts: Truetasks:- name:copy: src=/tmp/test dest=/root/ #这步造成目标改变才能出发notifynotify: start_nginxhandlers:- name: start_nginxshell: /usr/local/nginx/sbin/nginx[root@ansible myroles]# ansible-playbook /tmp/test.yamlPLAY [webA] ***************************************************************************************************TASK [Gathering Facts] ****************************************************************************************ok: [webA]TASK [copy] ***************************************************************************************************changed: [webA] #发生了改变RUNNING HANDLER [start_nginx] #触发notify *********************************************************************************changed: [webA]PLAY RECAP ****************************************************************************************************webA : ok=3 changed=2 unreachable=0 failed=0#我们再次执行/tmp/test.yaml[root@ansible myroles]# ansible-playbook /tmp/test.yamlPLAY [webA] ***************************************************************************************************TASK [Gathering Facts] ****************************************************************************************ok: [webA]TASK [copy] ***************************************************************************************************ok: [webA] #没有造成任务改变,未触发notify通知PLAY RECAP ****************************************************************************************************webA : ok=2 changed=0 unreachable=0 failed=0
ansible批量管理企业案例
4.1 ansible all -m copy -a 'src=/root/xin.sh dest=/root'
4.2 ansible all -m user -a 'name=yunjisuan shell=/sbin/nologin createhome=no'
4.3 ansible all -m shell -a 'echo "123123" | pass --stdin root'
4.4 ansible all -m user -a 'name=benet password=321321 shell=/bin/bash'
4.5 ansible all -m cron -a 'job="/bin/echo xin > /tmp/sl" name="test cron job"'
4.6 ansible all -m shell -a 'vmstat'