目录
1-APACHE创建WEB服务器
课程目标:
- 了解常见的WEB服务器
- 熟悉apache服务的基本配置
- 掌握apache服务的虚拟主机配置
- 熟悉apache的访问控制
- 掌握MySQL的安装
一、WEB服务概述
web服务是我们日常使用最多的服务,所有的网站都是以web服务的形式为我们呈现
1.WEB服务的特点
-
web服务分为客户端和服务端
-
web客户端通常是我们所使用的浏览器(IE/Chrome/Firefox/Safari或者命令行浏览器等)
-
web服务端就是我们所访问的网站提供的web服务器
-
常见的web服务器程序有:
Apache/Nginx/Tengine/Lighttpd/IIS等,不同的web服务针对不同的系统平台各自有优缺点
-
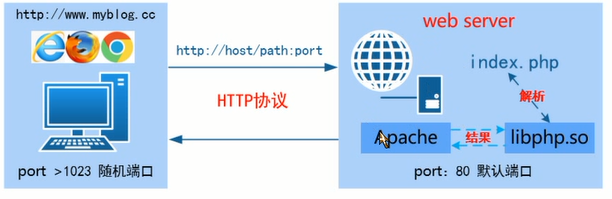
2.HTTP协议
- web服务端与客户端是通过HTTP协议(HyperText Tranfer Protocol)超文本传输协议进行交互

- Apache或Nginx都只支持静态页面的解析
3.静态页面和动态页面
-
HTML语言
-
HTML超文本标记语言(HyperText Markup Language),是绝大多数网页使用的语言,几乎所有的网页都是以HTML作为源代码,通过浏览器解释后展现出来
-
HTML有固定语法,用来存储网页数据,定义不同元素,如文字、标题、图片等,现在的网页都用CSS语言来存储网页的表现形式
-
现代主流的网页设计架构:
内容存储:HTML
网页架构:div
网页样式:css
-
HTML形式的页面我们称之为静态页面,包含一些图片,文本,表格等
-
-
动态语言
- 网站使用特定的语言编写的一些程序,在用户访问的时候基于不同的条件生成不同的HTML代码返回给用户浏览器,这样就实现网页的动态化
- 常见的动态语言:.php .jsp .cgi .asp python等
4.WEB服务的中间件
- php:PHP-FPM、HHVM(HipHop Virtual Machine)
- jsp:Tomcat、JBOSS、Resin、IBM WebSphere
5.常见的WEB组合方式
- LAMP(Linux+Apache+MySQL+PHP) //php作为Apache的模块
- LNMP(Linux+Nginx+MySQL+PHP) //php-fpm进程(服务)
- Nginx/Apache +Tomcat
二、Apache的介绍
Apache是著名的web服务器软件,开源,由apche软件基金会负责管理开发。
- Apache服务特点:
- 开放源码
- 跨平台
- 支持多种编程语言
- 采用模块化设计
- 安全稳定
- 工作原理
-
Apache的官网和手册
- www.apache.org
- 英文手册:需要安装
httpd-manual.noarch //安装后启动服务就可以本地查看 yum -y install httpd-manual.noarch service httpd restart 查看官方手册 IE:httpd:/10.1.1.2/manual -
Apache的软件包:httpd
三、开胃菜—搭建简易WEB服务
1.关闭防火墙和selinux
2.配置yum源
3.软件三步曲(查看安装|确认成功|查看软件的文件列表)
4.了解配置文件	man 5 xxx.conf
5.根据需求修改配置文件来完成服务搭建
6.重启服务,开机自启
7.测试验证
需求1:访问一个静态页面,内容:hello world 五一快乐!
环境:web-server:10.1.1.2
步骤:
1.略
2.略
3.
/etc/httpd
/etc/httpd/conf		//主配置文件的主目录
/etc/httpd/conf.d	//子配置文件的目录
/etc/httpd/conf.d/README
/etc/httpd/conf.d/welcome.conf	//欢迎页面
/etc/httpd/conf/httpd.conf	//主配置文件
/etc/httpd/conf/magic
/etc/httpd/logs		//日志	/var/log/httpd/  硬链接	同一个文件	inode号一样
/etc/httpd/modules
/etc/httpd/run		//	硬链接	//var/run/httpd/
/etc/logrotate.d/httpd		//日志轮转
/etc/rc.d/init.d/htcacheclean
/etc/rc.d/init.d/httpd		//服务启动脚本
/etc/sysconfig/htcacheclean
/etc/sysconfig/httpd

/usr/sbin/apachectl
/usr/sbin/htcacheclean
/usr/sbin/httpd

/var/log/httpd
/var/run/httpd
/var/www		//apache服务的数据目录
/var/www/html	//apache服务的静态页面存放路径
/var/www/error/HTTP_NOT_FOUND.html.var	404
/var/www/error/HTTP_FORBIDDEN.html.var	403


互为硬链接,同时改变
[root@web-server ~]# ll -id /var/log/httpd/
267919 drwx------. 2 root root 4096 Apr 23 18:52 /var/log/httpd/
[root@web-server ~]# ll -id /etc/httpd/logs/
267919 drwx------. 2 root root 4096 Apr 23 18:52 /etc/httpd/logs/

4.配置文件
serverRoot	"/etc/httpd"	//服务主目录
Listen	80					//监听端口
IncludeOptional	conf.d/*.conf	//包含conf.d下的*.conf文件
User apache					//运行Apache的用户
Group apache				//允许Apache的用户组
DirectoryIndex index.html index.php		//设置默认主页
DocumentRoot		/var/www/html/		//站点默认数据主目录

<Directory />		//系统的根目录授权
	Option FollowSymLinks		//支持软连接
	AllowOverride	None		//不支持 .htaccess访问列表 .htaccess文件提供了针对每个目录改变配置的方法
</Directory>

RHEL6:
<Directory "/var/www/html">	//授权
    Options Indexes FollowSymLinks	//支持索引	支持软连接
    AllowOverride None				//不支持	.htaccess 访问列表
    Order allow,deny				//排序	先允许再拒绝
    Allow from all					//允许all
</Directory>

RHEL7:
<Directory "/var/www/html">
    AllowOverride None
	Require all granted		//允许所有人访问
</Directory>
扩展:配置进程和线程	针对apache2.2 针对面试
# perfork MPM		//进程模式
<IfModule prefork.c>
StartServers		10		//初始建立的进程数
MinSpareServers	10			//最小空闲的进程数
MaxSpareServers	15			//最大空闲的进程数
ServerLimit		2000		//最大启动的进程数	默认256
MaxClients		2000		//最大并发连接数	 默认256
MaxRequestsPerChid	4000	//每个子进程在其生命周期内允许响应的最大请求数,0不限制
</IfModule>

# worker MPM		//线程模式
<IfModule worker.c>
StartServer			2		//初始创建的进程数
ThreadPerChild	50			//每个进程建立的线程数
MinSpareThreads	100			//最小空闲的线程数
MaxSpareThreads	200			//最大空闲的线程数
MaxClients		2000		//最大的并发访问量(线程)
MaxRequestsPerChild	0		//每个子进程在其生命周期内允许响应的最大请求数,0不限制
</IfModule>
5.修改配置文件
创建一个首页文件
echo "hello world 五一快乐" > /var/www/html/index.html
6.启动服务
7.测试验证
四、更改默认数据根目录
mkdir /webserver
vim /etc/httpd/conf/httpd.conf
DocumentRoot "/webserver"
<Directory "/webserver/">
修改这两处后重启服务

#ServerName www.example.com:80	265行
ServerName 10.1.1.2:80		//解决下面重启出现的问题

[root@web-server conf]# service httpd restart
Stopping httpd:                                            [  OK  ]
Starting httpd: httpd: apr_sockaddr_info_get() failed for web-server
httpd: Could not reliably determine the server's fully qualified domain name, using 127.0.0.1 for ServerName
                                                           [  OK  ]
[root@web-server conf]# vim /etc/hosts
10.1.1.2	web-server
[root@web-server conf]# vim httpd.conf
[root@web-server conf]# service httpd restart
Stopping httpd:                                            [  OK  ]
Starting httpd:                                            [  OK  ]

[root@web-server conf]# cp /var/www/html/index.html /webserver

五、Apache共享文件
Apache如何共享文件呢?
- 软连接方式
需求1:共享web-server服务端的/data目录里面的所有文件
1.apache服务默认的情况下下到哪个目录里找相应的文件
2.将本地的/data目录做一个快捷方式(软连接)到指定的目录里
步骤:
1.创建/data共享目录
[root@web-server ~]# mkdir /data/liu
[root@web-server ~]# ll /data
total 4
-rw-r--r-- 1 root root 0 Apr 28 14:10 file1
-rw-r--r-- 1 root root 0 Apr 28 14:10 file2
-rw-r--r-- 1 root root 0 Apr 28 14:10 file3
-rw-r--r-- 1 root root 0 Apr 28 14:10 file4
-rw-r--r-- 1 root root 0 Apr 28 14:10 file5
drwxr-xr-x 2 root root 4096 Apr 28 14:10 liu
[root@web-server ~]# ll /webserver/
total 4
-rw-r--r-- 1 root root 25 Apr 28 14:05 index.html
2.创建/data/的软连接/webserver/share
[root@web-server ~]# ln -s /data/ /webserver/share
[root@web-server ~]# ll /webserver/
total 4
-rw-r--r-- 1 root root 25 Apr 28 14:05 index.html
lrwxrwxrwx 1 root root 6 Apr 28 14:13 share -> /data/ 软链接
3.测试验证
http://10.1.1.2
出现首页
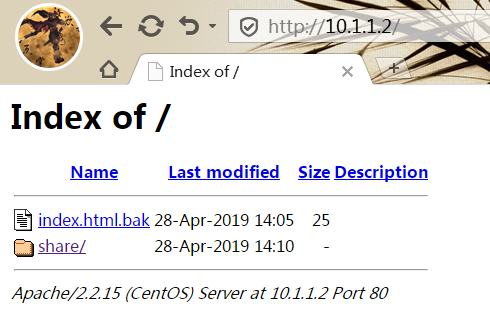
http://10.1.1.2/share
出现目录文件
结论:当默认数据目录里有index.html的首页文件时,优先找首页文件
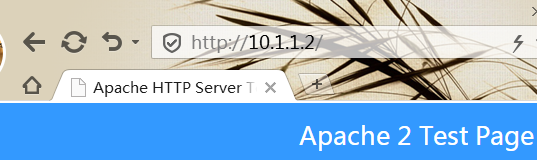
当没有首页文件时,会显示测试页
不管有没有首页文件,都不会直接找数据文件
[root@web-server ~]# mv /webserver/index.html /webserver/index.html.bak
两种解决方式:
1)加路径,如上http://10.1.1.2/share
2)删掉或重命名测试页
[root@web-server ~]# cd /etc/httpd/conf.d/
[root@web-server conf.d]# ll
total 16
-rw-r--r-- 1 root root 295 Aug 2 2013 manual.conf
-rw-r--r--. 1 root root 118 May 20 2009 mod_dnssd.conf
-rw-r--r--. 1 root root 392 Aug 14 2013 README
-rw-r--r--. 1 root root 299 Aug 2 2013 welcome.conf
[root@web-server conf.d]# mv welcome.conf welcome.conf.bak
[root@web-server conf.d]# service httpd restart
Stopping httpd: [ OK ]
Starting httpd: [ OK ]
结果依次如下面三图显示

- 别名方式
[root@web-server conf]# vim httpd.conf
[root@web-server conf]# service httpd restart
照猫画虎:
Alias /icons/ "/var/www/icons/"

<Directory "/var/www/icons">
    Options Indexes MultiViews FollowSymLinks
    AllowOverride None
    Order allow,deny
    Allow from all
</Directory>
在配置文件末尾添加后重启服务
Alias /test/ "/data/"	别名是/test/,下面两图区别

<Directory "/data">
    Options Indexes MultiViews FollowSymLinks
    AllowOverride None
    Order allow,deny
    Allow from all
</Directory>
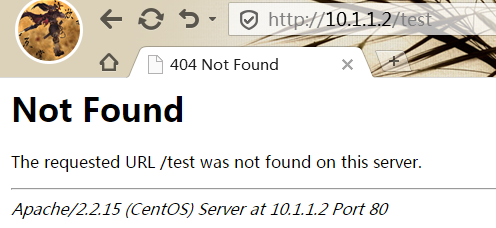
注意:test后面加一个斜杠/后可以访问,别名对访问有影响,必须和别名一致

课堂练习
1.共享/home目录(用别名方式,别名/rhome)
Alias /rhome "/home/"

<Directory "/home">
    Options Indexes MultiViews FollowSymLinks
    AllowOverride None
    Order allow,deny
    Allow from all
</Directory>
重启服务
测试验证:http://10.1.1.2/rhome没有文件显示,因为/home目录下的文件是700,其他人没有权限,新建一个test目录后显示出来。
2.共享/tmp目录(用软链接方式)
[root@web-server conf]# ln -s /tmp/ /webserver/tmp
[root@web-server conf]# ll /webserver/
total 4
-rw-r--r-- 1 root root 25 Apr 28 14:05 index.html.bak
lrwxrwxrwx 1 root root  6 Apr 28 14:13 share -> /data/
lrwxrwxrwx 1 root root  5 Apr 28 14:47 tmp -> /tmp/
测试验证
http://10.1.1.2/tmp
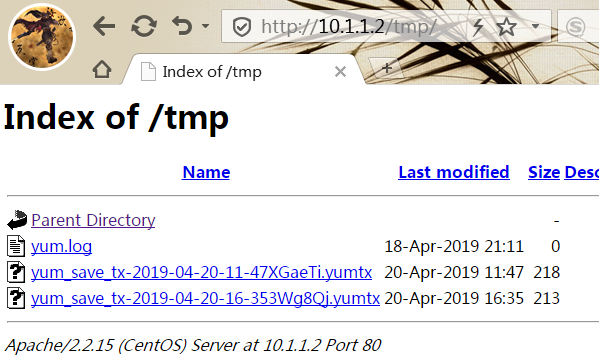
其他文件不显示的原因是权限不足