1.简介
官网的地址: https://baomidou.com/

这些都是官网中写的 mybatis-plus 有哪些好处,下面通过官方文档进行学习:
2.快速入门
2.1 使用第三方组件 首先需要进行 导入依赖
<dependency>
    <groupId>com.baomidou</groupId>
    <artifactId>mybatis-plus-boot-starter</artifactId>
    <version>3.2.0</version>
</dependency>
2.2 数据库中创建 表和插入数据 暂时都用官网中给的相应的数据

DROP TABLE IF EXISTS user;

CREATE TABLE user
(
    id BIGINT(20) NOT NULL COMMENT '主键ID',
    name VARCHAR(30) NULL DEFAULT NULL COMMENT '姓名',
    age INT(11) NULL DEFAULT NULL COMMENT '年龄',
    email VARCHAR(50) NULL DEFAULT NULL COMMENT '邮箱',
    PRIMARY KEY (id)
);

DELETE FROM user;

INSERT INTO user (id, name, age, email) VALUES
(1, 'Jone', 18, 'test1@baomidou.com'),
(2, 'Jack', 20, 'test2@baomidou.com'),
(3, 'Tom', 28, 'test3@baomidou.com'),
(4, 'Sandy', 21, 'test4@baomidou.com'),
(5, 'Billie', 24, 'test5@baomidou.com');
其中 后边需要用到 逻辑删除 插入时间 ,更新时间和乐观锁 在数据库中添加相应得字段
2.2.1 在application.properties 文件中填写 链接数据得代码
#链接数据库
spring.datasource.driver-class-name=com.mysql.cj.jdbc.Driver
spring.datasource.username=root
spring.datasource.password=8020
spring.datasource.url=jdbc:mysql://localhost:8020/mybatis?useSSL=false&useUnicode=true&characterEncoding=utf-8&serverTimezone=GMT%2B8
2.3 创建 springboot 项目 导入下面得依赖
<dependency>
            <groupId>org.springframework.boot</groupId>
            <artifactId>spring-boot-starter</artifactId>
        </dependency>
        <!--数据库驱动-->
        <dependency>
            <groupId>mysql</groupId>
            <artifactId>mysql-connector-java</artifactId>
        </dependency>

        <dependency>
            <groupId>org.projectlombok</groupId>
            <artifactId>lombok</artifactId>
            <optional>true</optional>
        </dependency>
        <dependency>
            <groupId>com.baomidou</groupId>
            <artifactId>mybatis-plus-boot-starter</artifactId>
            <version>3.4.0</version>
        </dependency>
引入mybatis-plus包就不用再mybatis 和mybatis-spring 的包 ,官网也明确的表明了

2.4 创建实体类
@Data
@AllArgsConstructor
@NoArgsConstructor
public class User {
    private Integer id;
    private String name;
    private Integer age;
    private String email;
    private Integer version;
    private Integer deleted;
    private Date gmtCreate;
    private Date gmtModified;
}
2.5 写一个mapper 接口继承BaseMapper
2.6 在主程序入口 填写 注解 @MapperScan("com.qlx.mapper")
2.7 编写测试类
@Test
  void contextLoads() {
    List<User> userList = userMapper.selectList(null);
    userList.forEach(System.out::println);
  }
结果为:
3.配置日志
#配置日志 在控制台输入即可  配置好之后再执行 会再控制台输入我们想要的sql  语句  到底是咋样的
mybatis-plus.configuration.log-impl=org.apache.ibatis.logging.stdout.StdOutImpl
4.CRUD
4.1插入操作
 @Test
  public void testInsertUser(){
    User user = new User();
    user.setName("哈哈");
    user.setEmail("哈哈@哈哈.com");
    int count = userMapper.insert(user);
    System.out.println(count);
  }
执行的结果 查看日志:

我们在测试的时候只插入了 name和email id却为我们自动生成了 (这里使用了 雪花算法),,我们可以通过在属性值上面添加注解 @TableId(type = IdType.ID_WORKER)
 /**
     * 数据库ID自增
     */
    AUTO(0),
    /**
     * 该类型为未设置主键类型
     */
    NONE(1),
    /**
     * 用户输入ID
     * 该类型可以通过自己注册自动填充插件进行填充
     */
    INPUT(2),

    /* 以下3种类型、只有当插入对象ID 为空,才自动填充。 */
    /**
     * 全局唯一ID (idWorker)
     */
    ID_WORKER(3),
    /**
     * 全局唯一ID (UUID)
     */
    UUID(4),
    /**
     * 字符串全局唯一ID (idWorker 的字符串表示)
     */
    ID_WORKER_STR(5);
4.2 更新操作
 @Test
  void testUpdateUser(){
    User user = new User();
    user.setId(1303515878754709505L);
    user.setName("呵呵");
    userMapper.updateById(user);
  }
控制台输入的sql日志:

4.3查询操作
List<User> userList = userMapper.selectList(null);
    userList.forEach(System.out::println);

4.4 删除操作
userMapper.deleteById(1303515878754709505L); //就可以删除成功
5.自动更新
在系统中,创建用户和更新用户信息 都是需要系统自动的 保存时间 这里有两种办法
第一种: 在数据库中 相应的字段中添加默认值 currenttimestamp
第二种就是使用 在属性值上添加注解:
  @TableField(fill = FieldFill.INSERT)
    private Date gmtCreate;
    @TableField(fill = FieldFill.INSERT_UPDATE)
    private Date gmtModified;
6.乐观锁
乐观锁实现方式:
①取出记录时,获取当前 version
②更新时,带上这个version
③执行更新时, set version = newVersion where version = oldVersion
④如果version不对,就更新失败
在相应的字段上添加 注解@Version
执行 更新操作
  @Test
  public void testOptimisticLocker(){
// 1、查询用户信息
    User user = userMapper.selectById(1302950133436047514L);
// 2、修改用户信息
    user.setName("呵呵");
    user.setEmail("呵呵@呵呵.com");
// 3、执行更新操作
    userMapper.updateById(user);
  }
7.分页查询
注册组件
 // 分页插件
    @Bean
    public PaginationInterceptor paginationInterceptor() {
        return new PaginationInterceptor();
    }
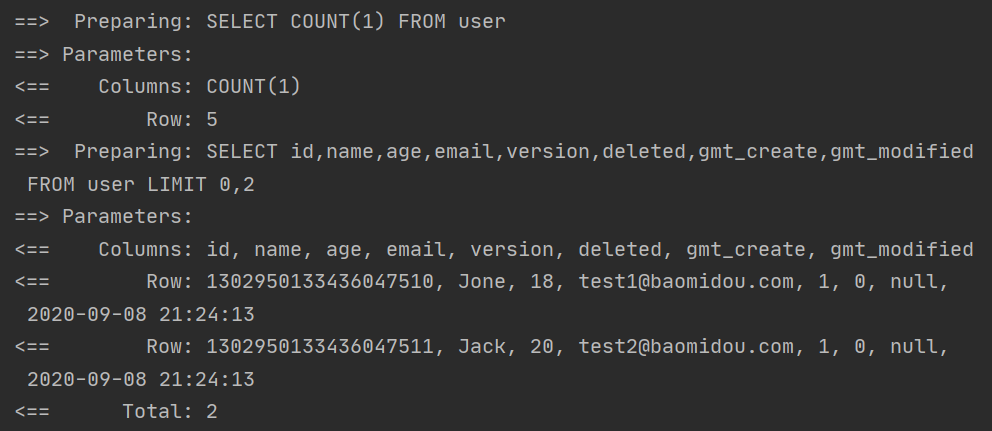
测试代码:
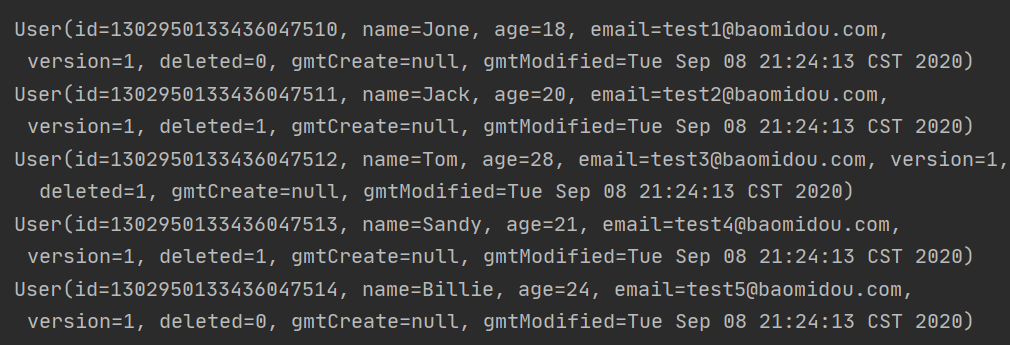
 // 测试分页查询
  @Test
  public void testPage(){
// 参数一:当前页
// 参数二:页面大小
// 使用了分页插件之后,所有的分页操作也变得简单的!
    Page<User> page = new Page<>(1,2);
    userMapper.selectPage(page,null);
    page.getRecords().forEach(System.out::println);

  }
8.逻辑删除
8.1 区别
物理删除 :从数据库中直接移除
逻辑删除 :再数据库中没有被移除,而是通过一个变量来让他失效! deleted = 0 => deleted = 1
8.2 导入组建
// 逻辑删除组件!
@Bean
public ISqlInjector sqlInjector() {
return new LogicSqlInjector();
}
8.3 配置逻辑删除
# 配置逻辑删除
mybatis-plus.global-config.db-config.logic-delete-value=1
mybatis-plus.global-config.db-config.logic-not-delete-value=0
