树莓派初始化
物理配置

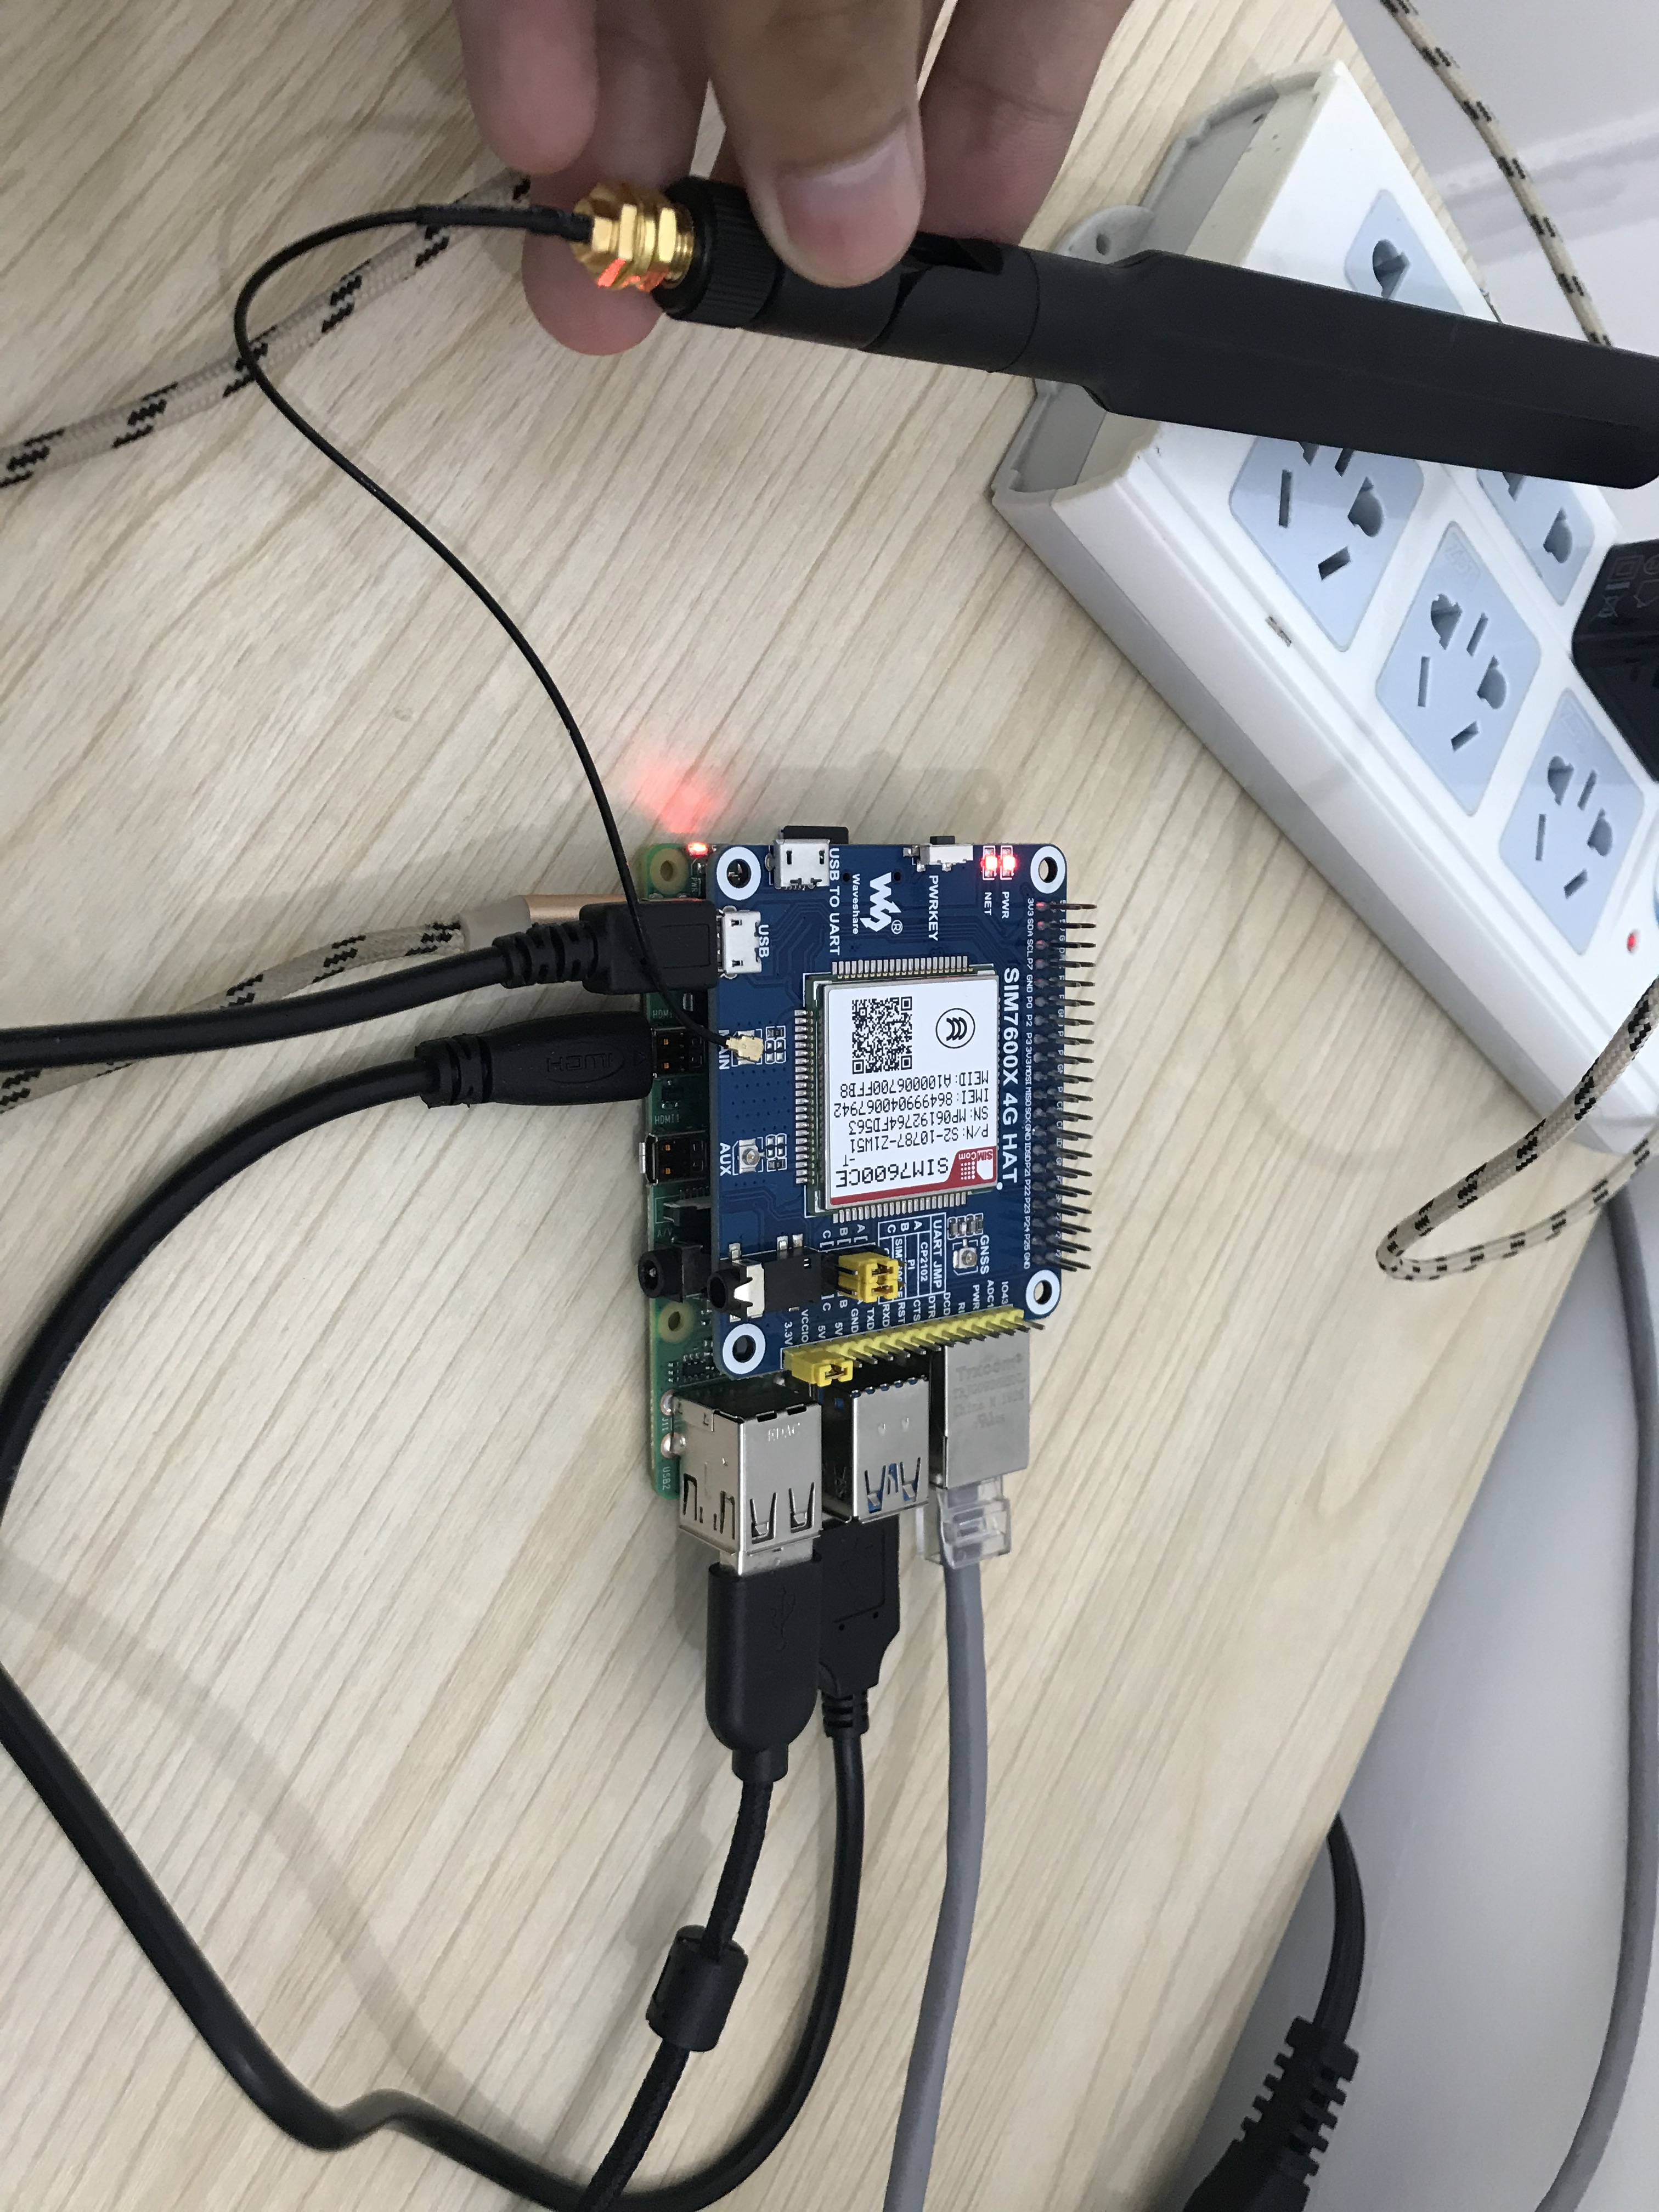
这里需要先正常插入一张能够上网的4G卡在模块内。
软件环境
- 下载示例程序,解压后,把其内部Raspberry文件夹下的c文件夹改名为SIM7600X,然后把SIM7600X整个文件夹复制到树莓派/home/pi目录下
- 进入/home/pi/SIM7600X目录下,执行指令
chmod 777 sim7600_4G_hat_init
- 设置开机初始化脚本
sudo nano /etc/rc.local
- 在exit0之前增加代码
sh /home/pi/SIM7600X/sim7600_4G_hat_init
树莓派配置
- 配置串口
在shell输入sudo raspi-config
sudo raspi-config
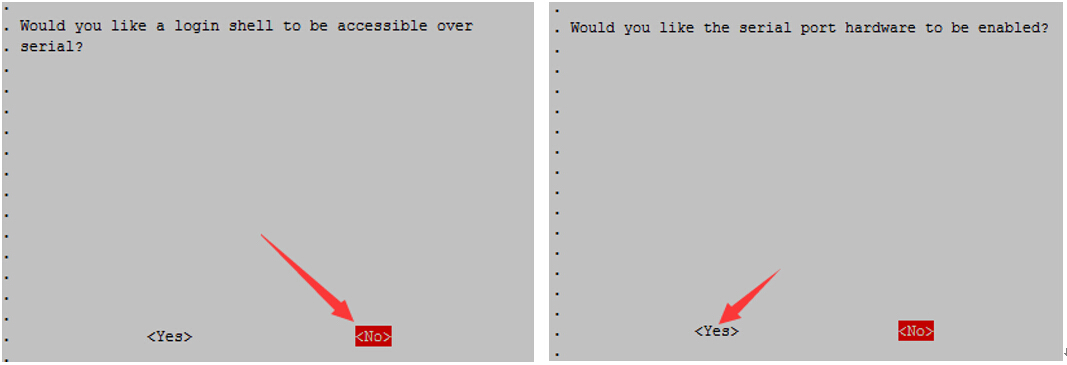
根据路径Interfacing Options ->Serial ->no -> yes按照下图进行设置

- 打开/boot/config.txt文件,找到如下配置语句使能串口,如果没有,可添加在文件最后面:
enable_uart=1
至此重启生效
串口调试
- 安装调试工具minicom
sudo apt-get install minicom
- 执行minicom -D /dev/ttyS0(ttyS0为树莓派3B/3B+/4B的串口)。
默认波特率为115200
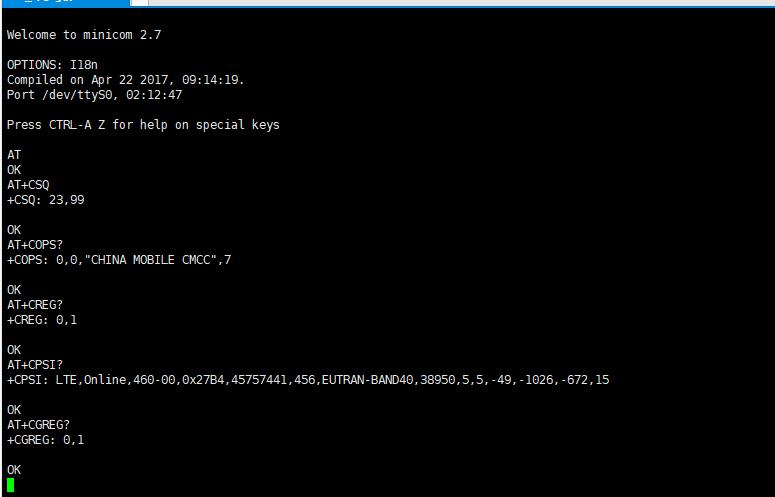
树莓派2B/zero,用户串口设备号为ttyAMA0,树莓派3B/3B+/4B串口设备号为ttyS0。 - 以AT同步测试为例,发送相关指令,如下图所示:

示例程序
- 下载示例程序至/home/pi/里面
wget https://www.waveshare.com/w/upload/2/29/SIM7600X-4G-HAT-Demo.7z
sudo apt-get install p7zip-full
7z x SIM7600X-4G-HAT-Demo.7z   -r -o/home/pi
sudo chmod 777 -R /home/pi/SIM7600X-4G-HAT-Demo
- 进入此程序的bcm2835目录内,编译安装BCM2835库
cd SIM7600X/c/bcm2835
chmod +x configure && ./configure && sudo make && sudo make install
- 分别进到对应实例目录下,编译和运行程序,相关指令说明如下
sudo make clean      //清除原来的执行文件
sudo make        //重新编译
sudo ./TCP       //运行程序(以TCP为例)
上述命令组合使用如下
sudo make clean && sudo make && sudo ./PhoneCall

ppp拨号软件安装与配置-视频
安装ppp
sudo apt-get install ppp
新建script脚本
sudo su
cd /etc/ppp/peers
cp provider gprs
修改gprs配置文件
修改内容如下
# example configuration for a dialup connection authenticated with PAP or CHAP
#
# This is the default configuration used by pon(1) and poff(1).
# See the manual page pppd(8) for information on all the options.

# MUST CHANGE: replace myusername@realm with the PPP login name given to
# your by your provider.
# There should be a matching entry with the password in /etc/ppp/pap-secrets
# and/or /etc/ppp/chap-secrets.
user "myusername@realm"

# MUST CHANGE: replace ******** with the phone number of your provider.
# The /etc/chatscripts/pap chat script may be modified to change the
# modem initialization string.
connect "/usr/sbin/chat -v -f /etc/chatscripts/gprs" #修改

# Serial device to which the modem is connected.
/dev/ttyUSB2 #由于我们使用SIM7600CE的4G模块,并且该模块的驱动已经默认添加到raspbian的内核的(高通驱动),ttyUSB2为ppp的拨号端口

# Speed of the serial line.
115200

nocrtscts  #增加
debug  #增加
nodetach #增加
ipcp-accept-local #增加
ipcp-accept-remote #增加


# Assumes that your IP address is allocated dynamically by the ISP.
noipdefault
# Try to get the name server addresses from the ISP.
usepeerdns
# Use this connection as the default route.
defaultroute

# Makes pppd "dial again" when the connection is lost.
persist


 # Do not ask the remote to authenticate.
 noauth
调试SIM7600CE串口
ls /dev/ttyUSB*
一般情况下串口都是/dev/ttyUSB2
使用minicom调试/dev/ttyUSB2
AT
OK
AT+CSQ
+CSQ: 21,99

OK
AT+CPIN?
+CPIN: READY

OK
AT+COPS?
+COPS: 1,0,"CHINA MOBILE CMCC",7

OK
AT+CREG?
+CREG: 0,1

OK
AT+CPSI?
+CPSI: LTE,Online,460-00,0x69B1,132648988,136,EUTRAN-BAND40,38950,5,5,-65,-988,8

OK
AT+CEREG?
+CEREG: 0,1

OK
开始上网
先拨号
pppd call gprs
因为初次拨号需要设置DNS,所以利用su权限输入下列命令
route add -net 0.0.0.0 ppp0
最后打开浏览器拔掉网线关闭WiFi,就可以访问互联网了。
参考如下:
https://www.cnblogs.com/little-kwy/p/11296426.html
https://www.bilibili.com/video/av75543557?zw