文档
解读
Script脚本

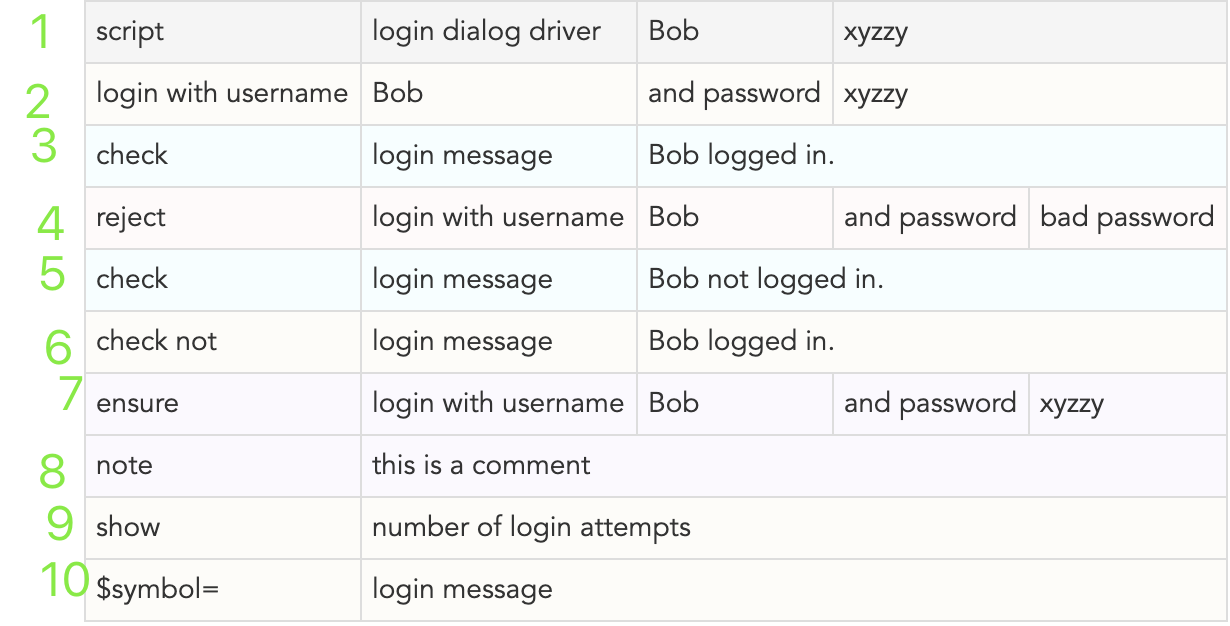
| 行 | 说明 |
|---|---|
| 1 | script:表示表格类型;login dialog driver:对应代码中的构造函数,加上后面两个参数,最终可以生成一个实例 |
| 2 | 调用实例的loginWithUsernameAndPassword方法(注意写法) |
| 3 | 调用实例的login message方法,其中Bob logged in.是预期值,check:表示让方法返回值和预期值进行比较,相同为true,不同为false |
| 4 | 再次调用实例的loginWithUsernameAndPassword方法,其中reject:表示方法返回值的预期值是false |
| 5 | 同3 |
| 6 | check not 和 check的判断逻辑相反 |
| 7 | ensure:表示方法返回值的预期值是true |
| 8 | note:表示注释,改行不被执行 |
| 9 | show:展示方法的返回值。表格执行后,会在改行的尾部添加一个单元格,用于展示返回值 |
| 10 | $symbol= :表示将方法的返回值,添加到变量symbol中。后续可以通过$symbol来提取值,这个功能非常实用 |
例子中的代码
public class LoginDialogDriver {
  private String userName;
  private String password;
  private String message;
  private int loginAttempts;

  public LoginDialogDriver(String userName, String password) {
    this.userName = userName;
    this.password = password;
  }

  public boolean loginWithUsernameAndPassword(String userName, String password) {
    loginAttempts++;
    boolean result = this.userName.equals(userName) && this.password.equals(password);
    if (result)
      message = String.format("%s logged in.", this.userName);
    else
      message = String.format("%s not logged in.", this.userName);
    return result;
  }

  public String loginMessage() {
    return message;
  }

  public int numberOfLoginAttempts() {
    return loginAttempts;
  }
}
说明
关键字主要是利用脚本表实现的。
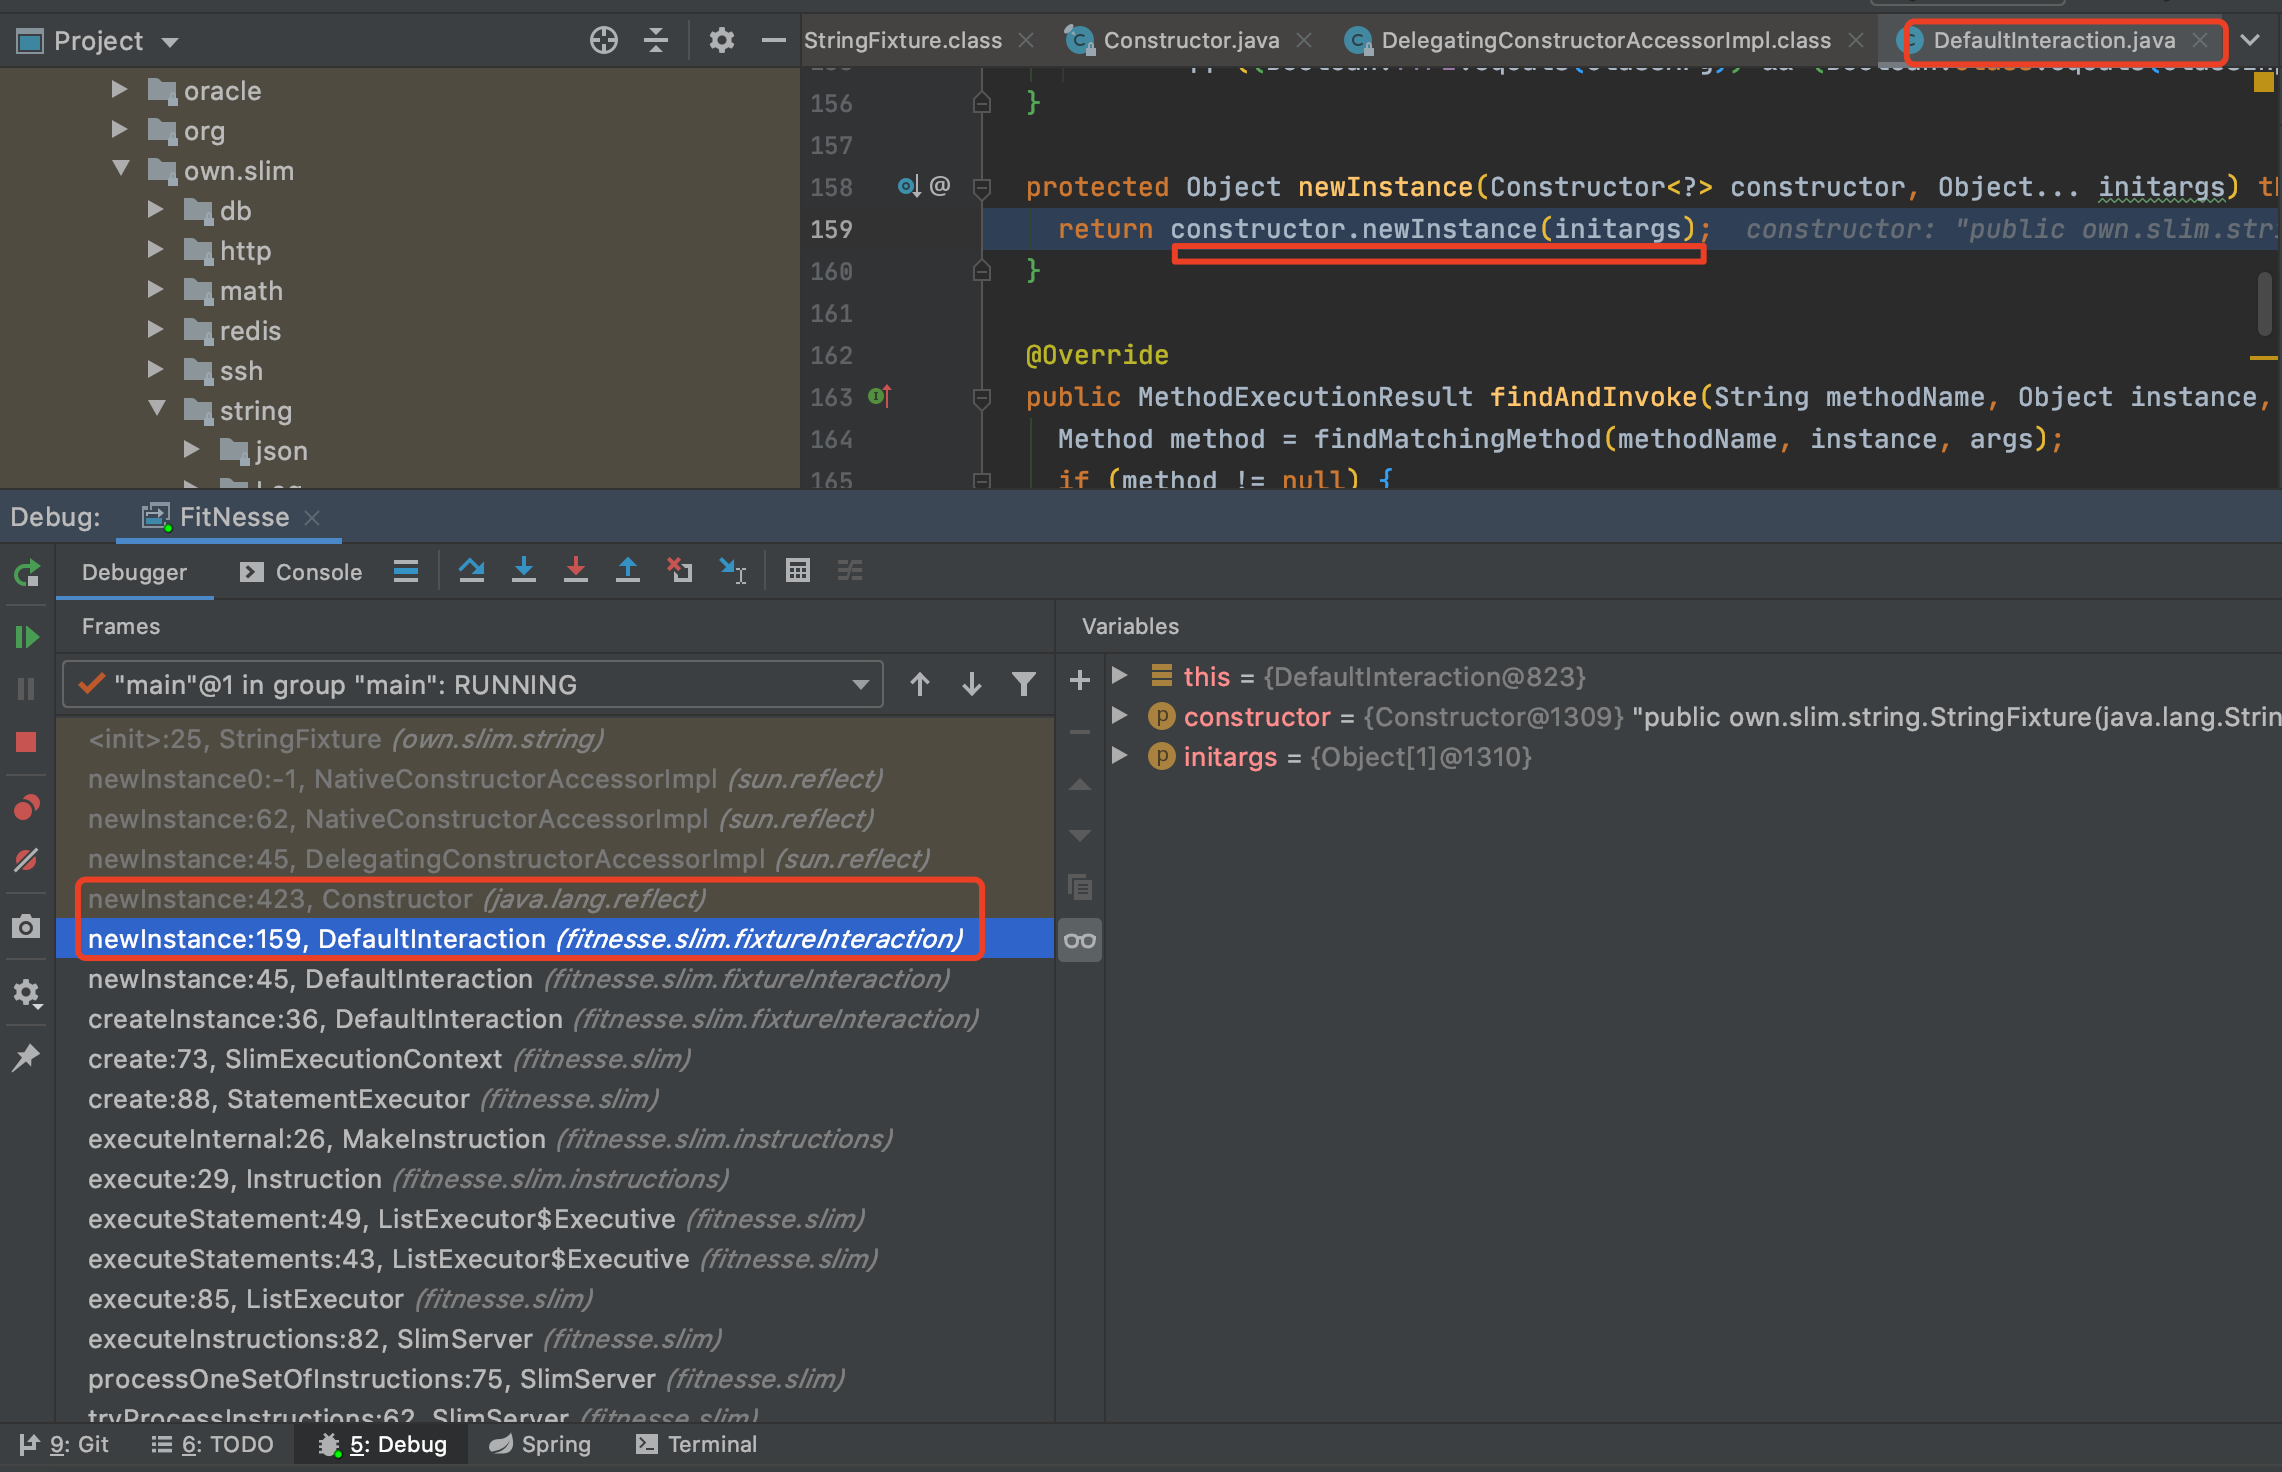
下面是FitNesse生成Fixture的实例的关键源码,是通过反射实现的。
