【本文版权归微信公众号"代码艺术"(ID:onblog)所有,若是转载请务必保留本段原创声明,违者必究。若是文章有不足之处,欢迎关注微信公众号私信与我进行交流!】
Swagger,中文“拽”的意思,它是一个功能强大的在线API在线文档,目前它的版本为2.x,所以称为Swagger2。Swagger2提供了在线文档的查阅和测试功能。利用Swagger2很容易构建RESTful风格的API,在SpringBoot中集成Swagger2,步骤如下。
1.引入依赖
<!--Swagger2-->
<dependency>
    <groupId>io.springfox</groupId>
    <artifactId>springfox-swagger2</artifactId>
    <version>2.7.0</version>
</dependency>
<dependency>
    <groupId>io.springfox</groupId>
    <artifactId>springfox-swagger-ui</artifactId>
    <version>2.7.0</version>
</dependency>
2.配置Swagger2
@Configuration
@EnableSwagger2
public class Swagger2Config {

    @Bean
    public Docket createRestApi(){
        return new Docket(DocumentationType.SWAGGER_2)
                .apiInfo(apiInfo())
                .select()
                .apis(RequestHandlerSelectors.basePackage("cn.yuehsutong.swagger2.controller"))
                .paths(PathSelectors.any())
                .build();
    }

    private ApiInfo apiInfo(){
        return new ApiInfoBuilder()
                .title("SpringBoot利用Swagger构建API文档")
                .description("描述内容")
                .termsOfServiceUrl("服务url")
                .version("版本")
                .build();
    }

}
3.写Swagger注解
【本文版权归微信公众号"代码艺术"(ID:onblog)所有,若是转载请务必保留本段原创声明,违者必究。若是文章有不足之处,欢迎关注微信公众号私信与我进行交流!】
@RestController
public class DemoController {

    @RequestMapping(value = "/users",method = RequestMethod.GET)
    @ApiOperation(value = "接口名称", notes = "接口的详细说明")
    public Object users(){
        Map<String,String> map = new HashMap<>();
        map.put("one","zhansan");
        return map;
    }
}
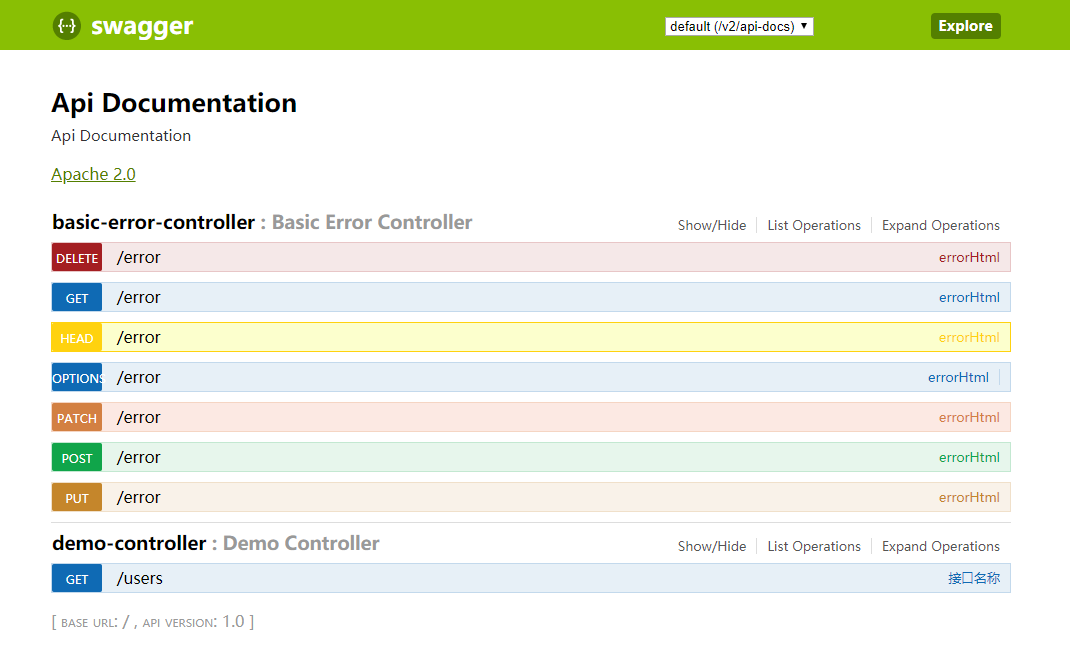
4.浏览Swagger-UI在线文档
默认访问路径:http://localhost:8080/swagger-ui.html

5.常用Swagger注解
- @Api()用于类,表示标识这个类是swagger的资源
- @ApiOperation()用于方法,表示一个http请求的操作
- @ApiParam()用于方法,参数,字段说明;表示对参数的添加元数据(说明或是否必填等)
- @ApiModel()用于类,表示对类进行说明,用于参数用实体类接收
- @ApiModelProperty()用于方法,字段,表示对model属性的说明或者数据操作更改
- @ApiIgnore()用于类,方法,方法参数,表示这个方法或者类被忽略
- @ApiImplicitParam() 用于方法,表示单独的请求参数
- @ApiImplicitParams() 用于方法,包含多个 @ApiImplicitParam
学习资源
版权声明
【本文版权归微信公众号"代码艺术"(ID:onblog)所有,若是转载请务必保留本段原创声明,违者必究。若是文章有不足之处,欢迎关注微信公众号私信与我进行交流!】
