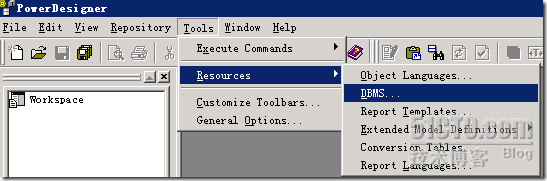
具体实现方法如下:首先新建DBMS方便起见,可以先复制Microsoft SQL Server 2000,可以这样操作(tools-Resource-DBMS可以看到如下窗口了,执行New操作命令)
新建DBMS时可以复制现有的DBMS
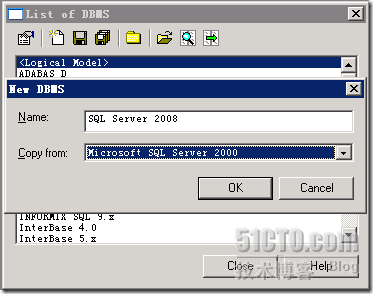
把新建的DBMS保存起来就可以进行真正的改代码操作了。
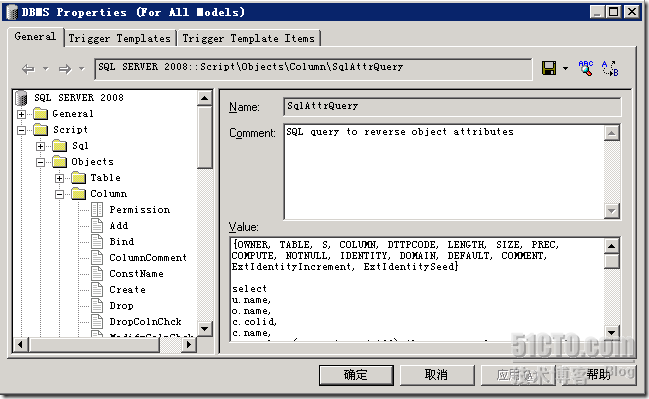
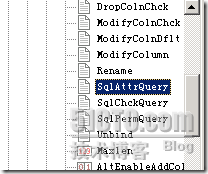
在接下来出现的DBMS Properties窗口中找到:Script-Object-Column 在Column下找到 SqlListQuery键,把下面的代码复制到DBMS Properties窗口右边的Value文本框中,确定就OK了。
脚本代码:
{OWNER, TABLE, S, COLUMN, DTTPCODE, LENGTH, SIZE, PREC, COMPUTE, NOTNULL, IDENTITY, DOMAIN, DEFAULT, COMMENT, ExtIdentityIncrement, ExtIdentitySeed}
select
u.name,
o.name,
c.colid,
c.name,
case when (s.usertype < 100) then s.name else x.name end,
c.prec,
c.length,
c.scale,
z.text ,
case (c.status & 8) when 8 then 'NULL' else 'NOTNULL' end,
case (c.status & 128) when 128 then 'identity' else '' end,
case when (s.usertype < 100) then '' else s.name end,
v.text,
CONVERT(varchar, ISNULL(p.[value], '')) AS text,
case (c.status & 128) when 128 then ident_incr(u.name + '.' + o.name) else null end,
case (c.status & 128) when 128 then ident_seed(u.name + '.' + o.name) else null end
from
dbo.sysusers u
join dbo.sysobjects o on (o.uid = u.uid and o.type in ('U', 'S', 'V'))
join dbo.syscolumns c on (c.id = o.id)
left outer join sys.extended_properties p on c.id = p.major_id and c.colid = p.minor_id
left outer join dbo.systypes s on (c.usertype = s.usertype and s.xtype = c.xtype and c.usertype >= 0)
left outer join dbo.systypes x on (s.usertype > 100 and s.xtype = x.xtype and x.usertype not in (0, 18, 80) and x.usertype < 100)
left outer join dbo.syscomments z on (z.id = o.id and z.number = c.colid)
left outer join dbo.sysobjects d on (d.id = c.cdefault and d.category <> 0)
left outer join dbo.syscomments v on (v.id = d.id)
where 1 = 1
[ and u.name = %.q:OWNER%]
[ and o.name=%.q:TABLE%]
order by 1, 2, 3
导入的注释写在了SQL数据表字段的说明里面。
使用Power Designer 9.5进行反向工程
步骤:

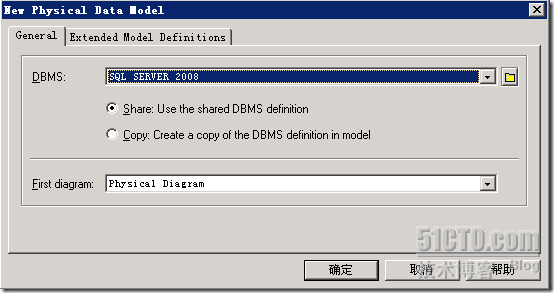


1.新建一个Physical Data Model,选择DBMS为刚才新建的SQL SERVER 2008
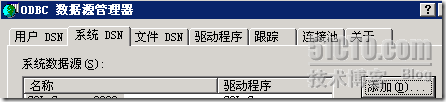
2.选择Database->configure Connections
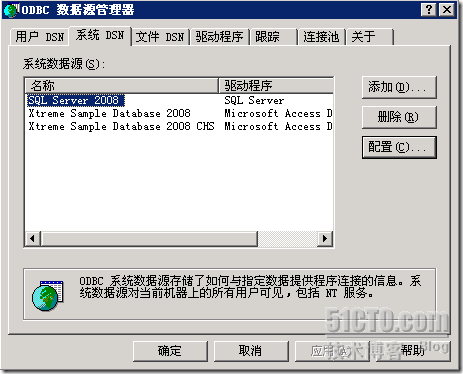
3.转到系统DNS标签,点击"添加"
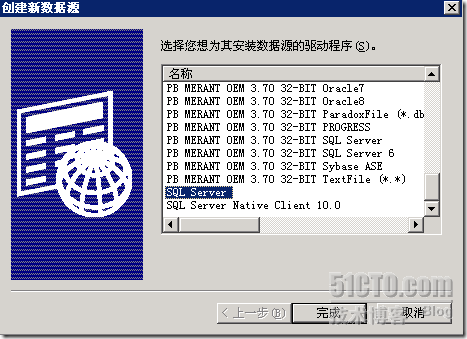
4.选择驱动程序,SQL SERVER
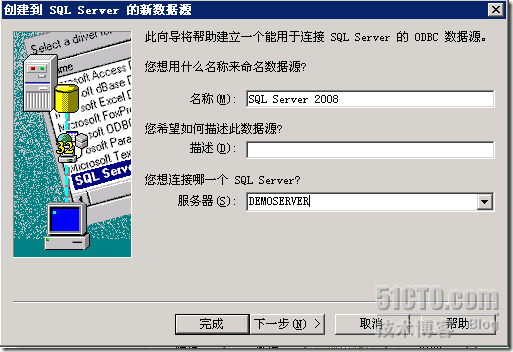
5.名称输入SQL Server 2008,描述可以不输入,选择我们的SQL Server数据库实例名,下一步。
6.选择SQL验证方法,输入SQL的用户名,密码,下一步。
7.选择要进行反向工程的数据库,下一步。
8.点击完成。
9.这样就可以看到我们新建的SQL Server 2008系统数据源了,点击确定即可。
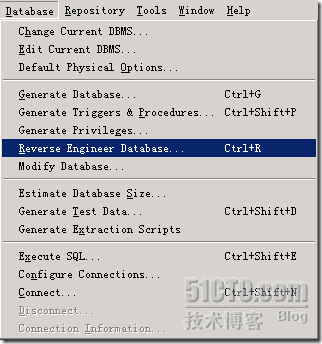
10.选择Database-Reverse Engineer Database。
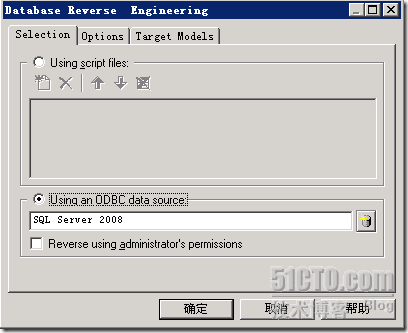
11.选择我们自己建立的系统数据源SQL Server 2008,点击确定。
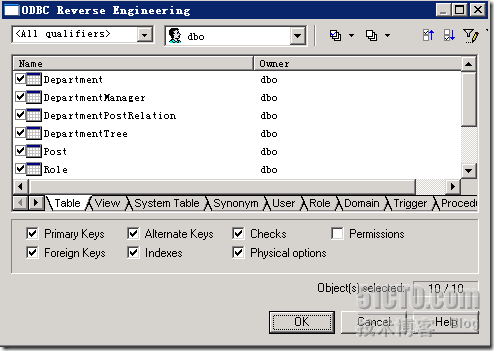
12.这时就会显示出需要导入的数据库表了,选择需要导入的表,点击OK。
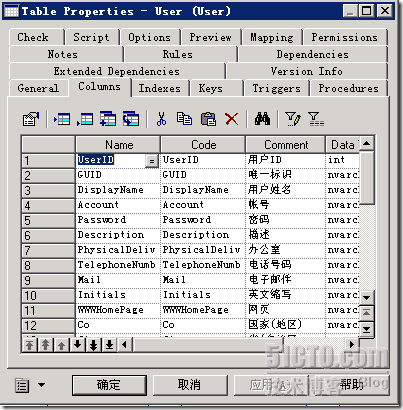
13.完成导入后,双击其中一个表,选择Columns选项卡,就可以看到我们用刚才修改的脚本导入的注释字段了。
参考文章:
怎么样将sql server数据库中的结构导入到powerdesign中
http://hi.baidu.com/yonered/blog/item/701d96ed1eb6efd3b21cb113.html
关于PowerDesigner反向工程SQL Server2000数据库时生成注释的解决方法
http://blog.csdn.net/LightJie/archive/2005/06/04/387431.aspx
SQL2005中 sysproperties 无效
http://blog.csdn.net/msnetc/archive/2008/06/18/2559215.aspx
在sql server2005中查询表的字段的备注(说明),为什么会报错误呢: 对象名 sysproperties 无效。如何解决?
http://www.phpchinaz.cn/2006c/3/3328/3328213.html
在SQL 2005升级后将原来SQL 2000中的系统表sysproperties删除掉了,替换成了extended_properties,而且引用上也发生了变化,原来直接打sysproperties即可,现在需要写成sys.extended_properties才可以。
本文出自 “努力学习的小熊” 博客,转载请与作者联系!