01-vue的起步
1.引包
    a) 直接下载,并用<script>标签引入
    b) CDN方式引入:
        <script src="https://cdn.bootcss.com/vue/2.5.18-beta.0/vue.js"></script>
    c) npm install vue

2. 创建实例化对象:
    new Vue({
            el:'#app', //目的地
            data:{
                //数据属性
                //数据驱动视图
                msg: 'hello vue',
            }

3.  {{ }}  模板语法插值
1.1 安装node
官网:https://nodejs.org/en/ 下载 安装

# 检查node版本
node -v
下载完node 自带包管理器 npm
1.2 使用npm
第一步:初始化npm项目, 生成package.json文件
npm init

第二步:下载vue,--save 指的是 把vue下载到当前的项目里
npm install vue --save
1.3 引用和双大括号插值


<!DOCTYPE html>
<html lang="en">
<head>
    <meta charset="UTF-8">
    <title>Title</title>
</head>
<body>
<div id="app">
    <!--模板语法{{}} 主要的作用是 插值-->
    <h3>{{ msg }}</h3>
    <!--支持字符拼接-->
    <h3>{{ msg+'hello' }}</h3>
    <!--支持三元运算-->
    <h3>{{ 1<1?'真的':'假的' }}</h3>
    <!--可以插入字符串-->
    <h2>{{'hyp'}}</h2>
    <!-- 不能使用if-else -->
</div>

    <!--1.引包-->
    <script type="javascript" src="./node_modules/vue/dist/vue.js"></script>
    <script type="javascript">
        //2.创建vue实例化对象
        // el: 当前实例化对象绑定的根元素
        // data: 数据,可以是个对象、也可以是个函数
        new Vue({
            el:'#app', //目的地
            data:{
                //数据属性
                //数据驱动视图
                msg: 'hello vue',
                a:20
            }

        });
        // app.a = 20;
        console.log(app);
        // 在vue实例化之后,这个对象中属性的 前面会有 $,主要跟自己定义的属性区分。
        console.log(app.$el === document.getElementById('app'));

    </script>

</body>
</html>
1.4 package.json

02-指令系统
1. v-text和v-html
v-text:在元素中插值

v-html:在元素中不仅可以插值,还可以插入标签

v-text:等价于 {{}}  实现原理:innerText

v-html:实现原理:innerHTML
<!DOCTYPE html>
<html lang="en">
<head>
    <meta charset="UTF-8">
    <title>Title</title>
</head>
<body>
    <div id="app">
        <!--<h2>{{msg}}</h2>-->

    </div>

    <!--在pycharm中,引入本地的vue.js,会报错,显示没引进来,因此以cdn的方式引入,就没问题了!-->
    <!--<script type="javascript" src="./node_modules/vue/dist/vue.js"></script>-->
    <script src="https://cdn.jsdelivr.net/npm/vue@2.5.17/dist/vue.js"></script>
    <script type="text/javascript">

        new Vue({
            el:'#app',
            //data(){}
            data: {
                msg:'hello指令系统',
                msg2:'<a href="#">这是我的数据</a>',

            },
            //template 的绑定优先级 大于 el的优先级
            template:
                `
                <div>
                    <h3>{{msg}}</h3>
                    <h2 v-text="msg"></h2>
                    <h2 v-text="msg2"></h2>
                    <h2 v-html="msg2"></h2>
                </div>
                `,

        })
    </script>
</body>
</html>
2. v-if和v-show
v-if 和 v-else:根据表达式的真价值来动态插入和移除元素

v-show:根据表达式的真假值来显示和隐藏元素
v-if VS v-show:

v-if 是“真正”的条件渲染,因为它会确保在切换过程中条件块内的事件监听器和子组件适当地被销毁和重建。

v-if 也是惰性的:如果在初始渲染时条件为假,则什么也不做——直到条件第一次变为真时,才会开始渲染条件块。

相比之下,v-show 就简单得多——不管初始条件是什么,元素总是会被渲染,并且只是简单地基于 CSS 进行切换。

一般来说,v-if 有更高的切换开销,而 v-show 有更高的初始渲染开销。因此,如果需要非常频繁地切换,则使用 v-show 较好;如果在运行时条件很少改变,则使用 v-if 较好。
<!DOCTYPE html>
<head>
    <meta charset="UTF-8">
    <title>Title</title>
    <style type="text/css">
        .box{
             200px;
            height: 200px;
            background-color: red;
        }
    </style>
</head>
<body>
    <div id="app">

        <h1>{{ msg }}</h1>
        <!-- v-if和v-on 来实现页面中DOM的创建和销毁 -->
        <!--<div class="box" v-on:click="showHanlder" v-if="isShow"></div>-->

        <div class="box" v-if="isShow"></div>
        <button v-on:click="showHanlder">{{btnText}}</button>
    </div>
    <script type="text/javascript" src="./node_modules/vue/dist/vue.js"></script>
    <script type="text/javascript">

        new Vue({
            el: "#app",
            template: ``,
            // data 在vue实例化中可以是一个对象,也可以是一个函数,
            // 但是在组件中,data 必须是一个函数,函数的内容一定是一个 return 一个对象
            // 数据驱动视图
            data: function () {
                return {
                    msg: '事件处理',
                    count: 0,
                    isShow: true,
                    btnText: '隐藏',
                }
            },
            // 在vue中所有的事件都声明在methods
            methods:{
                showHanlder(){
                    //this.isShow = false;

                    // if(this.isShow){
                    //     this.isShow = false;
                    //     this.btnText = '显示'
                    // }else {
                    //     this.isShow = true;
                    //     this.btnText = '隐藏'
                    // }

                    this.isShow = !this.isShow
                }
            }
        })


    </script>
</body>
</html>
3. v-for
v-for:根据变量的值来循环渲染元素
<!DOCTYPE html>
<html lang="en">
<head>
    <meta charset="UTF-8">
    <title>Title</title>

</head>
<body>
<div id="app">
    <ul>
        <li v-for="item in nameList"><h2>序号:{{item.id}}; 名字:{{item.name}}</h2></li>
    </ul>
</div>

<!--在pycharm中,引入本地的vue.js,会报错,显示没引进来,因此以cdn的方式引入,就没问题了!-->
<!--<script type="javascript" src="./node_modules/vue/dist/vue.js"></script>-->
<script src="https://cdn.jsdelivr.net/npm/vue@2.5.17/dist/vue.js"></script>
<script type="text/javascript">

    new Vue({
        el: '#app',
        data: {
            isShow: true,
            nameList:[
                {id:1, name:'hyp'},
                {id:2, name:'lcy'},
                {id:3, name:'nmp'}
            ]
        },

    })
</script>
</body>
</html>
4. v-bind
v-bind:绑定标签的属性并执行相应的操作,所有的属性都可以绑定,

注意:只要使用了v-bind后面的字符串一定是数据属性data里面的值,否则会报错!

v-bind:class='{}|[]|变量名|常量'
<!DOCTYPE html>
<html lang="en">
<head>
    <meta charset="UTF-8">
    <title>Title</title>
    <style type="text/css">
        .wrap{
            width: 100px;
            height: 100px;
            background-color: red;
        }
        .active{
            background-color: green;
        }
    </style>
</head>
<body>
<div id="app">
    <div class="wrap" v-bind:class="{active:isGreen}">
        <a v-bind:href="href">vue.js</a>
    </div>
</div>
<!--在pycharm中,引入本地的vue.js,会报错,显示没引进来,因此以cdn的方式引入,就没问题了!-->
<!--<script type="javascript" src="./node_modules/vue/dist/vue.js"></script>-->
<script src="https://cdn.jsdelivr.net/npm/vue@2.5.17/dist/vue.js"></script>
<script type="text/javascript">

    new Vue({
        el: '#app',
        template:'',
        data: {
            isShow: true,
            nameList:[
                {id:1, name:'hyp'},
                {id:2, name:'lcy'},
                {id:3, name:'nmp'}
            ],
            isGreen: true,
            href:"https://cn.vuejs.org/v2/guide/"
        },


    })
</script>
</body>
</html>
03-事件
1. v-on
vue中使用v-on:click 对当前的DOM绑定click事件

注意:所有的原生js事件使用 v-on 都可以绑定
2. v-model
// v-model: 它能轻松实现表单输入和应用状态之间的双向绑定。

html:
<div id="app-6">
  <p>{{ message }}</p>
  <input v-model="message">
</div>

js:
var app6 = new Vue({
  el: '#app-6',
  data: {
    message: 'Hello Vue!'
  }
})
04-组件
4.1 局部组件的使用
<!DOCTYPE html>
<html lang="en">
<head>
    <meta charset="UTF-8">
    <title></title>
    <style type="text/css">
        *{
            padding: 0;
            margin: 0;
        }
        body{
            color: #fff;
        }
        .main{
            width: 100%;
        }
        .head{
            width: 100%;
            height: 70px;
            background-color: purple;
            text-align: center;

            font-size: 20px;
            line-height: 70px;
        }
        .wrap{
            width: 100%;
            height: 1200px;

        }
        .wrap .aside{
            width: 30%;
            height: 1200px;
            background-color: green;
            float: left;
        }
        .wrap .content{
            width: 70%;
            height:1200px;
            background-color:yellow;
            float: left;
        }
    </style>
</head>
<body>
    <div id="app">

    </div>
    <!--<script type="text/javascript" src="./node_modules/vue/dist/vue.min.js"></script>-->
    <script src="https://cdn.jsdelivr.net/npm/vue@2.5.17/dist/vue.js"></script>
    <script type="text/javascript">

        // 打油诗: 先声子 挂子 用子
        // 2.先声明头部组件
        var Vheader = {
            template:`
                <header class='head'>
                    我是头部
                    <span>{{count}}</span>
                    <button @click = 'count+=1'>点击</button>
                </header>
            `,
            data(){
                return {
                    count: 0
                }
            },
            methods:{

            }
        };

        var Vaside = {
            template:`
                <div class='aside'>
                    我是侧边栏
                </div>
            `
        };
        var Vcontent = {
            template:`
                <div class='content'>
                    我是内容区域
                </div>
            `
        };

        // 1.声明入口组件

        /*
            1.头部组件
            2.侧边栏
            3.内容组件
            4.脚部组件

        */

        // 1. 声明入口组件  局部组件 我是入口组件
        var Vmain = {
            template:`
                <div class='main'>
                    <Vheader></Vheader>
                    <div class='wrap'>
                        <Vaside />
                        <Vcontent />
                    </div>
                </div>

            `,
            components:{
                // 等价于Vheader:Vheader 2.1 挂载子
                Vheader,
                Vaside,
                Vcontent,
            }
        };

        new Vue({
            el:"#app",
            // 1.3 使用子组件
            template:`<Vmain />`, //入口组件
            data:{

            },
            components:{
                // 1.2 挂载子组件  key表示组件名 value:组件对象
                Vmain:Vmain
            }
        });
    </script>

</body>
</html>
4.2 父组件通过Prop向子组件传递数据
<!DOCTYPE html>
<html lang="en">
<head>
    <meta charset="UTF-8">
    <title></title>
    <style type="text/css">
        *{
            padding: 0;
            margin: 0;
        }
        body{
            color: #fff;
        }
        .main{
            width: 100%;
        }
        .head{
            width: 100%;
            height: 70px;
            background-color: purple;
            text-align: center;

            font-size: 20px;
            line-height: 70px;
        }
        .wrap{
            width: 100%;
            height: 1200px;

        }
        .wrap .aside{
            width: 30%;
            height: 1200px;
            background-color: green;
            float: left;
        }
        .wrap .content{
            width: 70%;
            height:1200px;
            background-color:yellow;
            float: left;
        }
    </style>
</head>
<body>
    <div id="app">

    </div>
    <script type="text/javascript" src="./node_modules/vue/dist/vue.min.js"></script>

    <script type="text/javascript">

        // 打油诗: 先声子 挂子 用子
        // 1.先声明头部组件
        var Vheader = {
            template:`
                <header class='head'>
                    <span>{{title}}</span>
                    <span>{{count}}</span>
                    <button @click = 'count+=1'>点击</button>
                </header>
            `,
            data(){
                return {
                    count: 0
                }
            },
            props:['title'],
            methods:{

            }
        };

        var Vaside = {
            template:`
                <div class='aside'>
                    我是侧边栏
                </div>
            `
        };
        var Vcontent = {
            template:`
                <div class='content'>
                    <ul>
                        <li v-for = 'post in posts' :key = 'post.id'>
                            <h3>我的博客标题:{{post.title}}</h3>
                            <p>我的博客内容:{{post.content}}</p>
                        </li>
                    </ul>
                    <button @click='changeSize'>改变字体大小</button>
                </div>
            `,
            props: ['posts'],
            methods:{
                changeSize(){
                    // 通过$emit()方法来触发自定义的事件
                    // 第一个参数是自定义的事件名字 第二个参数就是传递的值
                    // this指的vue实例化对象的子类
                    this.$emit('postChangeSize',3)
                }
            }
        };

        var Vmain = {
            data(){
                return{
                    fontsize:18
                }
            },
            template:`
                <div class='main' :style  = '{fontSize:fontsize+"px"}'>

                    <Vheader v-bind:title = 'title'></Vheader>
                    <div class='wrap'>
                        <Vaside />
                        <Vcontent v-bind:posts = "appPosts"  @postChangeSize = 'clickHandler'/>
                    </div>
                </div>

            `,
            methods:{
                clickHandler(value){
                    this.fontsize  = this.fontsize+value;
                }
            },
            components:{
                // 等价于Vheader:Vheader 2.挂载子
                Vheader,
                Vaside,
                Vcontent
            },
            props:['title','appPosts']
        };

        new Vue({
            el:"#app",
            // 3.使用子组件
            template:`<Vmain  :title = "text" :appPosts = "posts"/>`,
            data:{
                text:"我是一个标题",
                posts:[
                    {id:1,title:"组件中的传值",content:"通过Prop传递数据"},
                    {id:2,title:"组件中的传值2",content:"通过Prop传递数据2"},
                    {id:3,title:"组件中的传值3",content:"通过Prop传递数据3"},
                ]

            },
            components:{
                // 2.挂载子组件  key表示组件名 value:组件对象
                Vmain:Vmain
            }
        });
    </script>

</body>
</html>
Prop 是你可以在组件上注册的一些自定义特性。当一个值传递给一个 prop 特性的时候,它就变成了那个组件实例的一个属性。
一个组件默认可以拥有任意数量的 prop,任何值都可以传递给任何 prop。在上述模板中,你会发现我们能够在组件实例中访问这个值,就像访问 data 中的值一样。
new Vue({
    el:"#app",
    // 3.使用子组件
    template:`<Vmain  :title = "text" :appPosts = "posts"/>`,
    data:{
        text:"我是一个标题",
        posts:[
            {id:1,title:"组件中的传值",content:"通过Prop传递数据"},
            {id:2,title:"组件中的传值2",content:"通过Prop传递数据2"},
            {id:3,title:"组件中的传值3",content:"通过Prop传递数据3"},
        ]

    },
    components:{
        // 2.挂载子组件  key表示组件名 value:组件对象
        Vmain:Vmain
    }
});


// 入口组件 Vmain
var Vmain = {
    data(){
        return{
            fontsize:18
        }
    },
    template:`
        <div class='main' :style  = '{fontSize:fontsize+"px"}'>

            <Vheader v-bind:title = 'title'></Vheader>
            <div class='wrap'>
                <Vaside />
                <Vcontent v-bind:posts = "appPosts"  @postChangeSize = 'clickHandler'/>
            </div>
        </div>
    `,
    methods:{
        clickHandler(value){
            this.fontsize  = this.fontsize+value;
        }
    },
    components:{
        // 等价于Vheader:Vheader 2.挂载子
        Vheader,
        Vaside,
        Vcontent
    },
    props:['title','appPosts']
};

// 子组件 Vheader
var Vheader = {
    template:`
        <header class='head'>
            <span>{{title}}</span>
        </header>
    `,
    data(){
        return {
        }
    },
    props:['title'],
    methods:{
    }
};

// 子组件 Vcontent
var Vcontent = {
    template:`
        <div class='content'>
            <ul>
                <li v-for = 'post in posts' :key = 'post.id'>
                    <h3>我的博客标题:{{post.title}}</h3>
                    <p>我的博客内容:{{post.content}}</p>
                </li>
            </ul>
        </div>
    `,
    props: ['posts'],
    methods:{
        changeSize(){
            // 通过$emit()方法来触发自定义的事件
            // 第一个参数是自定义的事件名字 第二个参数就是传递的值
            // this指的vue实例化对象的子类
            this.$emit('postChangeSize',3)
        }
    }
};
4.3 公共组件的创建
<!DOCTYPE html>
<html>

<head>
    <meta charset="utf-8">
    <title></title>
    <style>
    * {
        padding: 0;
        margin: 0;
    }

    #head {
        width: 100%;
        height: 80px;
        background-color: purple;
    }

    .defalut {
        display: inline-block;
        line-height: 1;
        white-space: nowrap;
        cursor: pointer;
        background: #fff;
        border: 1px solid #dcdfe6;
        /*border-color: #dcdfe6;*/
        color: #606266;
        text-align: center;
        box-sizing: border-box;
        outline: none;
        margin: 0;
        transition: .1s;
        font-weight: 500;
        padding: 12px 20px;
        font-size: 14px;
        border-radius: 4px;
    }

    .primary {
        color: #fff;
        background-color: #409eff;
        border-color: #409eff
    }

    .success {
        color: #fff;
        background-color: #67c23a;
        border-color: #67c23a;
    }
    </style>
</head>

<body>
    <div id="app">
    </div>
    <script type="text/javascript" src="./node_modules/vue/dist/vue.min.js"></script>
    <script type="text/javascript">
    // 创建公共组件
    // 第一个参数是公共组件的名字,第二个参数options
    Vue.component('Vbtn', {
        template: `<button class='defalut' :class='type'>
                <slot></slot>
            </button>`,
        props: ['type']
    });

    var Vheader = {
        data() {
            return {

            }
        },
        template: `<div id='head'>
                <Vbtn>登录</Vbtn>
                <Vbtn>注册</Vbtn>
                <Vbtn>提交</Vbtn>
                <Vbtn>默认的按钮</Vbtn>
                <Vbtn type='primary'>主要的按钮</Vbtn>
                <Vbtn type='success' >成功的按钮</Vbtn>
            </div>`
    };

    // 局部组件的使用
    var App = {
        template: `<div>
                <Vheader></Vheader>
            </div>`,
        components: {
            Vheader
        }
    };

    new Vue({
        el: '#app',
        data() {

        },
        template: `<App />`,
        components: {
            App
        }
    });
    </script>
</body>

</html>
4.4 内置组件—过滤slot
05-过滤器
5.1 全局过滤器和局部过滤器
<!DOCTYPE html>
<html>

<head>
    <meta charset="utf-8">
    <title></title>
    <style>

    </style>
</head>

<body>
    <div id="app">
        <input type="text" v-model = 'price'>
        <h3>{{ price | currentPrice}}</h3>
        <h4>{{msg | reverse}}</h4>
    </div>
    <script type="text/javascript" src="./node_modules/vue/dist/vue.min.js"></script>
    <script type="text/javascript">

    // 注册全局的过滤器
    Vue.filter('reverse',function(value) {

        return value.split('').reverse().join('');
    });


    new Vue({
        el: '#app',
        data() {
            return{
                price:0,
                msg:"hello luffy"
            }
        },
        // 局部过滤器  在当前 组件中声明过滤器
        filters:{
            currentPrice:function (value) {
                // 参数1就是纯涤的元数据
                console.log(value);
                return '$' + value;
            }
        }
    });
    </script>
</body>

</html>
5.2 侦听属性之watch
<!DOCTYPE html>
<html>
<head>
    <meta charset="utf-8">
    <title></title>
</head>
<body>
    <div id="app">
        <input type="text" v-model='myName'>
        <h3>{{ myName}}</h3>
        <button @click='clickHandler'>修改</button>
    </div>
    <script type="text/javascript" src="./node_modules/vue/dist/vue.min.js"></script>
    <script type="text/javascript">
        new Vue({
            el:'#app',
            template:``,
            data(){
                return {
                    myName:'',
                    firtName:'wusir'
                }
            },
            methods:{
                clickHandler(){
                    this.myName = 'alex';
                }
            },
            watch:{
                // 检测单个属性 命令式
                myName:function(value) {
                    console.log(value);
                    if (value === 'alex') {
                        console.log(value +' '+this.firtName+'是sb')
                    }
                }
            }
        });
    </script>

</body>
</html>
06-计算属性
6.1 computed
<!DOCTYPE html>
<html>
<head>
    <meta charset="utf-8">
    <title></title>
</head>
<body>
    <div id="app">
        <h4>{{alexDesc}}</h4>
        <button @click='clickHandler'>修改</button>
    </div>
    <script type="text/javascript" src="./node_modules/vue/dist/vue.min.js"></script>
    <script type="text/javascript">
        new Vue({
            el:'#app',
            template:``,
            data(){
                return {
                    myName:'alex',
                    age:18
                }
            },
            methods:{
                clickHandler(){
                    this.myName = 'WUSIR';
                    this.age = 28;
                }
            },
            computed:{
                alexDesc:function() {
                    var str = `${this.myName}它的年龄是${this.age}岁了可以去大保健`;

                    // 默认只有getter
                    return str;
                }
            }
        });
    </script>

</body>
</html>
6.2 setter
<!DOCTYPE html>
<html>
<head>
    <meta charset="utf-8">
    <title></title>
</head>
<body>
    <div id="app">
        <h4>{{alexDesc}}</h4>
        <button @click='clickHandler'>修改</button>
    </div>
    <script type="text/javascript" src="./node_modules/vue/dist/vue.min.js"></script>
    <script type="text/javascript">
        new Vue({
            el:'#app',
            template:``,
            data(){
                return {
                    myName:'alex',
                    age:18
                }
            },
            methods:{
                clickHandler(){
                    console.log(this.alexDesc);
                    this.alexDesc = 'ALEX is SB!!!';
                }
            },
            computed:{
                alexDesc:{
                    set:function(newValue) {
                        console.log(newValue);
                        this.myName = newValue;
                    },
                    get:function() {
                        var str = `${this.myName}它的年龄是${this.age}岁了可以去大保健`;

                        // 默认只有getter
                        return str;
                    }
                }
            }
        });
    </script>

</body>
</html>
<!DOCTYPE html>
<html>
<head>
    <meta charset="utf-8">
    <title></title>
</head>
<body>
    <div id="app">
        <input type="text" v-model = 'alexDesc'>
        <h4>{{alexDesc}}</h4>
        <!-- <button @click='clickHandler'>修改</button> -->
    </div>
    <script type="text/javascript" src="./node_modules/vue/dist/vue.min.js"></script>
    <script type="text/javascript">
        new Vue({
            el:'#app',
            template:``,
            data(){
                return {
                    myName:'',

                }
            },
            computed:{
                alexDesc:{
                    set:function(newValue) {

                        this.myName = newValue;
                    },
                    get:function() {
                        return this.myName;
                    }
                }
            }
        });
    </script>

</body>
</html>
07-生命周期的钩子函数
<!DOCTYPE html>
<html lang="en">
<head>
    <meta charset="UTF-8">
    <title>Document</title>
</head>
<body>
    <div id="app">
        <App></App>
    </div>
    <script type="text/javascript" src="./node_modules/vue/dist/vue.min.js"></script>
    <script type="text/javascript">
    // 钩子函数
    //  beforeCreate
    // created
    // beforeMount
    // mounted
    // beforeUpdate
    // updated
    // activated
    // deactivated
    // beforeDestroy
    // destroyed
    // 创建 销毁

    var Test = {
        data(){
            return{
                msg:"哈哈哈"
            }
        },
        template:`
            <div>
                <div>{{msg}}</div>
                <button @click = 'changeHandler'>修改</button>
            </div>
        `,
        methods:{
            changeHandler(){
                this.msg = this.msg + 'alex'
            }
        },
        beforeCreate(){
            // 组件创建之前
            console.log(this.msg);
        },
         created(){
             // 组件创建之后
             // 使用该组件,就会触发以上的钩子函数,created中可以操作数据,发送ajax,并且可以实现vue==》页面的影响  应用:发送ajax请求
             console.log(this.msg);
             // this.msg = '嘿嘿黑';
         },
         beforeMount(){
             // 装载数据到DOM之前会调用
             console.log(document.getElementById('app'));
         },
          mounted(){
              // 这个地方可以操作DOM
             // 装载数据到DOM之后会调用 可以获取到真实存在的DOM元素,vue操作以后的DOM
             console.log(document.getElementById('app'));
         },
         beforeUpdate(){
             // 在更新之前,调用此钩子,应用:获取原始的DOM
             console.log(document.getElementById('app').innerHTML);
         },
         updated(){
             // 在更新之前,调用此钩子,应用:获取最新的DOM
             console.log(document.getElementById('app').innerHTML);
        },
        beforeDestroy(){
            console.log('beforeDestroy');
        },
        destroyed(){
            console.log('destroyed');
        },
        activated(){
            console.log('组件被激活了');
        },
        deactivated(){
            console.log('组件被停用了');

        }
    };

    var App = {
        data(){
            return {
                isShow : true
            }
        },
        template:`
            <div>
                <keep-alive>
                    <Test v-if = 'isShow'></Test>
                </keep-alive>

                <button @click = 'changeHandler'>改变组件的生死</button>
            </div>
        `,
        methods:{
            changeHandler(){
                this.isShow = !this.isShow;
            }
        },
        components:{
            Test
        }
    };
    new Vue({
        el:'#app',
        template:``,
        components:{
            App
        }
    });

    </script>

</body>
</html>
08-$ref和$nextTick
<!DOCTYPE html>
<html lang="en">

<head>
    <meta charset="UTF-8">
    <title>Document</title>
</head>

<body>
    <div id="app"></div>
    <script type="text/javascript" src="./node_modules/vue/dist/vue.min.js"></script>
    <script type="text/javascript">

    Vue.component('subComp',{
        template:`<div></div>`
    });


    var App = {
        template: `<div>
                            <subComp ref = 'subc'></subComp>
                    <button ref = 'btn'>我是按钮</button>
                    <p ref = 'sb'>alex</p>
            </div>`,
        beforeCreate() {
             console.log(this.$refs.btn);//undefined
        },
        created() {
               console.log(this.$refs.btn);//undefined
        },
        beforeMount() {
            console.log(this.$refs.btn); //undefined
        },
        mounted() {
              console.log(this);
           console.log(this.$refs.btn);
           // 如果是给组件绑定的ref = 'subc'属性那么this.$refs.subc取到的是组件对象
           console.log(this.$refs.subc);

           var op = this.$refs.sb;
           this.$refs.btn.onclick = function() {
               console.log(op.innerHTML);

           }
        }
    };

    new Vue({
        el: '#app',
        data() {
            return {

            }
        },
        template: `<App />`,
        components: {
            App
        }
    });
    </script>
</body>
<!DOCTYPE html>
<html lang="en">

<head>
    <meta charset="UTF-8">
    <title>Document</title>
</head>

<body>
    <div id="app"></div>
    <script type="text/javascript" src="./node_modules/vue/dist/vue.min.js"></script>
    <script type="text/javascript">

    var App = {
        data(){
            return{
                isShow:false
            }
        },
        template: `<div>
                        <input type="text"  v-if='isShow' ref = 'fos'/>
            </div>`,
        mounted() {
            // vue实现响应式并不是数据发生变化之后DOM立刻发生变化,而是按一定的策略进行DOM的更新

            // $nextTick 是在下次Dom更新循环结束之后执行的延迟回调,在修改数据之后使用$nextTick ,则可以在回调中获取更新之后的DOM
            this.isShow = true;

            this.isShow = false;
            this.isShow = true;
            console.log(   this.$refs.fos);
           // focus()
            this.$nextTick(function() {
                // 获取更新之后的DOM
                  this.$refs.fos.focus()
            });

        }
    };

    new Vue({
        el: '#app',
        data() {
            return {

            }
        },
        template: `<App />`,
        components: {
            App
        }
    });
    </script>
</body>

</html>
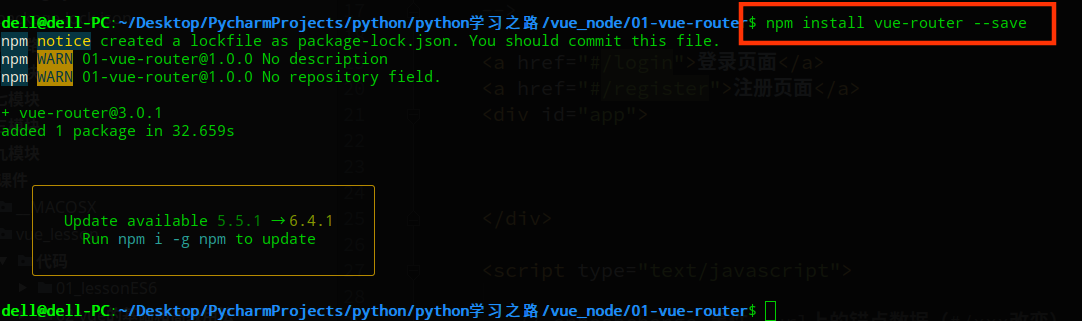
09-vue-router的使用