Canvas组件,是一个可以让你任性的组件,一个可以让你随心所欲地绘制界面的组件。Canvas是一个通用的组件,它通常用于显示和编辑图形,可以用它来绘制直线,圆形,多边形,甚至是绘制其他组件。
在Canvas组件上绘制对象,可以用creat_xxx()方法(xxxvia表示对象类型,例如直线line,矩形rectangle和文本text等)。
 1 from tkinter import *
 2
 3
 4 root = Tk()
 5 w = Canvas(root,width=200,height=100)
 6 w.pack()
 7 w.create_line(0,50,200,50,fill="yellow")
 8 w.create_line(100,0,100,100,fill="red",dash=(4,4))
 9 w.create_rectangle(50,25,150,75,fill="blue")
10 mainloop()
执行结果:

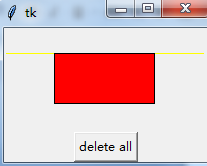
注意,添加到画布上的对象会一直保留着。如果希望修改他们,可以使用coords(),itemconfig()和move()方法来医用画布上的对象,或者用delete()方法来删除。
 1 from tkinter import *
 2
 3
 4
 5 root = Tk()
 6 w = Canvas(root,width=200,height=100)
 7 w.pack()
 8 line1 = w.create_line(0,50,200,50,fill="yellow")
 9 line2 =w.create_line(100,0,100,100,fill="red",dash=(4,4))
10 rect = w.create_rectangle(50,25,150,75,fill="blue")
11 w.coords(line1,0,25,200,25)
12 w.itemconfig(rect,fill="red")
13 w.delete(line2)
14 Button(root,text="delete all",command=(lambda x=ALL:w.delete(x))).pack()
15 mainloop()
执行结果:
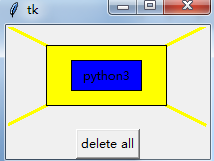
还可以在Canvas上显示文本,使用create_text()方法:
 1 from tkinter import *
 2
 3 root = Tk()
 4 w = Canvas(root,width=200,height=100)
 5 w.pack()
 6 line1 = w.create_line(0,0,200,100,fill="yellow",width=3)
 7 line2 = w.create_line(200,0,0,100,fill="yellow",width=3)
 8 rect1 = w.create_rectangle(40,20,160,80,fill="yellow")
 9 rect2 = w.create_rectangle(65,35,135,65,fill="blue")
10 text = w.create_text(100,50,text="python3")
11 Button(root,text="delete all",command=(lambda x=ALL:w.delete(x))).pack()
12 mainloop()
执行结果:
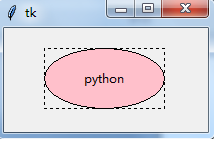
使用create_oval()方法绘制椭圆形(或圆形),参数是指定一个限定矩形(Tkinter会自动在这个矩形中绘制一个椭圆)
1 from tkinter import *
2
3 root = Tk()
4 w = Canvas(root,width=200,height=100)
5 w.pack()
6 w.create_rectangle(40,20,160,80,dash=(4,4))
7 w.create_oval(40,20,160,80,fill="pink")
8 w.create_text(100,50,text="python")
9 mainloop()
执行结果:
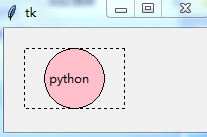
而绘制圆形就是把限定矩形设置为正方形即可。
1 from tkinter import *
2
3 root = Tk()
4 w = Canvas(root,width=200,height=100)
5 w.pack()
6 w.create_rectangle(20,20,120,80,dash=(4,4))
7 w.create_oval(40,20,100,80,fill="pink")
8 w.create_text(65,50,text="python")
9 mainloop()
执行结果:
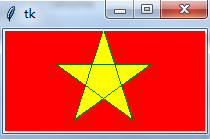
如果想绘制多边形,可以使用create_polygon()方法。来看画一个五角星,因为五角星不是三角函数,所以需要计算位图,确定角度和
 1 from tkinter import *
 2 import math as m
 3
 4 root = Tk()
 5 w = Canvas(root,width=200,height=100,background="red")
 6 w.pack()
 7 center_x = 100
 8 center_y = 50
 9 r = 50
10 points = [
11     #左上点
12     center_x - int(r*m.sin(2*m.pi/5)),
13     center_y - int(r*m.cos(2*m.pi/5)),
14     #右下点
15     center_x + int(r*m.sin(2*m.pi/5)),
16     center_y - int(r*m.cos(2*m.pi/5)),
17     #左上点
18     center_x - int(r*m.sin(m.pi/5)),
19     center_y + int(r*m.cos(m.pi/5)),
20     #顶点
21     center_x,
22     center_y-r,
23     #右下点
24     center_x + int(r*m.sin(m.pi/5)),
25     center_y + int(r*m.cos(m.pi/5))
26 ]
27 w.create_polygon(points,outline="green",fill="yellow")
28 mainloop()
执行结果:
下面来看一个,像windows画图工具那样的画板,可以随心所欲的画
先上代码
 1 from tkinter import *
 2 import math as m
 3
 4 root = Tk()
 5 w = Canvas(root,width=200,height=100)
 6 w.pack()
 7 def paint(event):
 8     x1,y1 = (event.x-1),(event.y-1)
 9     x2,y2 = (event.x+1),(event.y+1)
10     w.create_oval(x1,y1,x2,y2,fill="red")
11 w.bind("<B1 - Motion>",paint)
12 Label(root,text="按住鼠标拖动").pack(side=BOTTOM)
13 mainloop()
执行结果:

来分析下,其实这个的实现原理很简单,就是获取用户拖动鼠标的坐标,然后每个坐标对应绘制一个点上去就可以了,但是Tkinter没提供点的方法
所以我们就可以通过绘制一个超小的椭圆或者圆形来表示“点”,通过响应”鼠标拖动”事件,在鼠标拖动的同时,获取鼠标的实时位置,并绘制超小的圆形。
除了以上关于画布的知识点外,还有一些知识点,做个汇总:
1、Canvas组件支持的对象
-arc(弧形、炫或扇形)
-bitmap(内建的位图文件或XBM格式的文件)
-image(BitmapImage或PhotoImage的实例对象)
-line(线)
-oval(圆形或椭圆形)
-polygon(多边形)
-rectangle(矩形)
-text(文本)
-window(组件)
2、坐标系
由于画布可能比窗口大(带有滚动条的Canvas组件)
-窗口坐标系---以窗口的左上角为坐标原点
-窗口坐标系---以画布的左上角为坐标原点
3、画布对象显示的顺序
Canvas组件中创建的画布对象都会被列入显示列表中,越接近背景的画布对象位于显示列表的越下方
4、指定画布对象
Canvas组件提供几种发放可以指定画布对象:

-Item handles
-Tags
-ALL
-CURRENT

-Item handles:事实上是一个用于指定某个画布对象的整型数字(在画布组件上创建一个画布对象的时候,Tkinter将认为Canvas组件中独一无二的整型值,然后各种Canvas方法可以通过这个值来操纵画布对象。)
-Tags:是附件在画布对象上的标签,Tags由普通的非空白字符串组成。一个画布对象可以和多个Tags相关联,一个Tags也可用于描述多个画布对象。然而,与Text组件不同,没有指定画布对象的Tags不能实际绑定和配置样式,也就是说,Canvas组件的Tags是仅为画布对象所拥有的。
Canvas组件预定义两个Tags:ALL和CURRENT
-ALL或(all)表示Canvas组件中的所有画布对象。
-CURRENT(或current):表示鼠标指针下的画布对象。